Before I talk about this AWESOME recipe, I thought I’d give you a little update. Last night, Zac had a definite FPIES reaction. No confusion; his diapers told the story quite clearly. (I’ll refrain from details, as I’m about to talk about food!)
We’re not 100% sure it is the broccoli, but the odds are in favor of it at this point. So, broccoli is shelved for now, and we’ll move on to something else when he gets back to baseline.
It’s sad, but I’m not going to let it get me down. He does have ONE safe food, after all!
And I’m way too thrilled about today’s recipe to let myself get bummed out about anything! I’m doing a “Zac happy dance” about this one: a gluten free, gum free, vegan sandwich bread that KNEADS!!!
Sometimes in cooking, there is no need to reinvent the wheel. I mean, I love experimenting in the kitchen, but I do have two little boys that are VERY demanding, so at times (especially when it’s a particularly challenging feat in front of me) I simply search for a recipe online and give it a shot.
After my last bread-making fiasco, that’s exactly what I did. This time, I specifically searched for “gum-free” recipes, because I really would like to avoid using guar and xanthan gum if at all possible.
Xanthan gum is not what I would call real food; it’s a bacteria grown on corn, produced in a lab. That’s enough for me to want to avoid it! Guar gum is real food, however, it is harder to find in stores, and seems to reduce the absorption of glucose. That’s a problem for Jed, because glucose helps offset any fructose he might ingest. No absorbing glucose=Jed going wonky from fructose.
In any event, I don’t like gums and would rather not use them.
Only one problem with that: they’re sort of “magic ingredients” in almost ALL gluten-free recipes!
One place, however, had a recipe that looked promising: Farmhouse Seed Bread over at Nourishing Meals. I made a few tweaks (did you expect any different?) and in the end I wound up with THE PERFECT FREAKING SANDWICH BREAD.
No joke, here, folks! If you’re gluten-free, stop making whatever bread you’re making and start making this one!
It feels like bread dough. It kneads like bread dough. And it tastes like real bread, not a facsimile.
Sigh. I miss bread. Now, fortunately, Jed does not have to miss bread any more! Bring on the French Toast! The grilled cheese sandwiches! The turkey sandwiches! The toast! (Do you have ANY IDEA how much easier lunchtime is going to be for me thanks to this bread? Did I mention I’m happy dancing in my chair as I write this??!)
OK, so, go read the original post, because there are lots of good tips in there, and you may decide you want to make it exactly the way they do. Then come back here and see what I did:
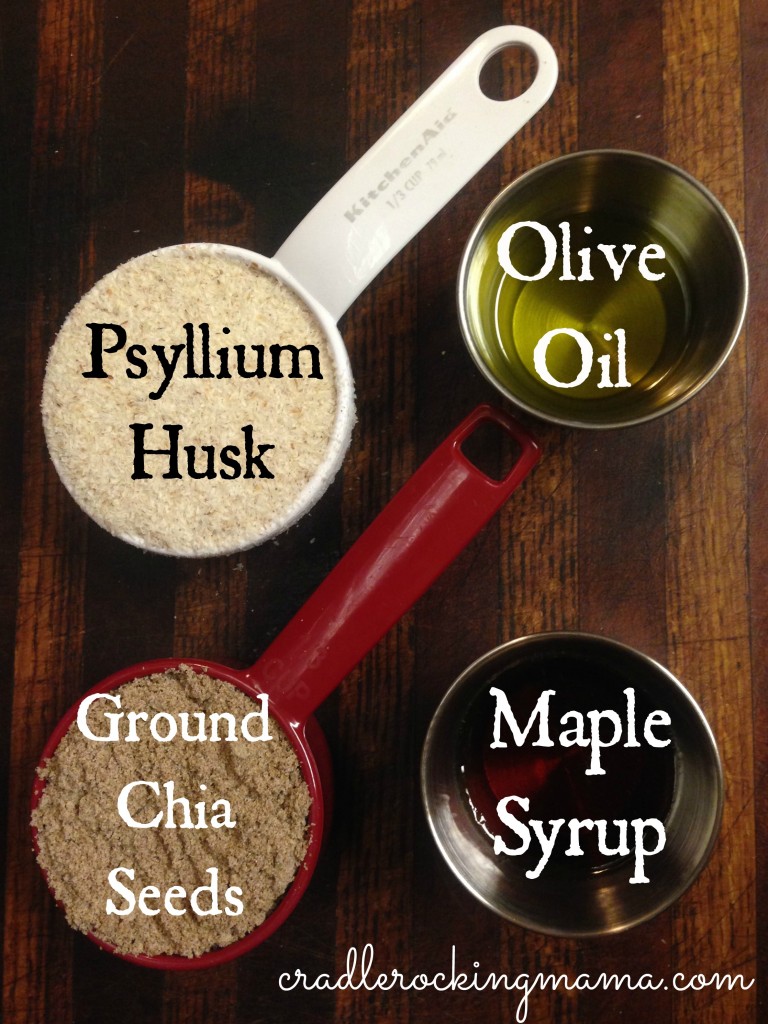
First, I gathered up all my ingredients. When I’m making a new recipe, I like to have everything ready at the beginning so I don’t get out of synch along the way…especially with something like this, where you’ll be proofing yeast and other timely steps.
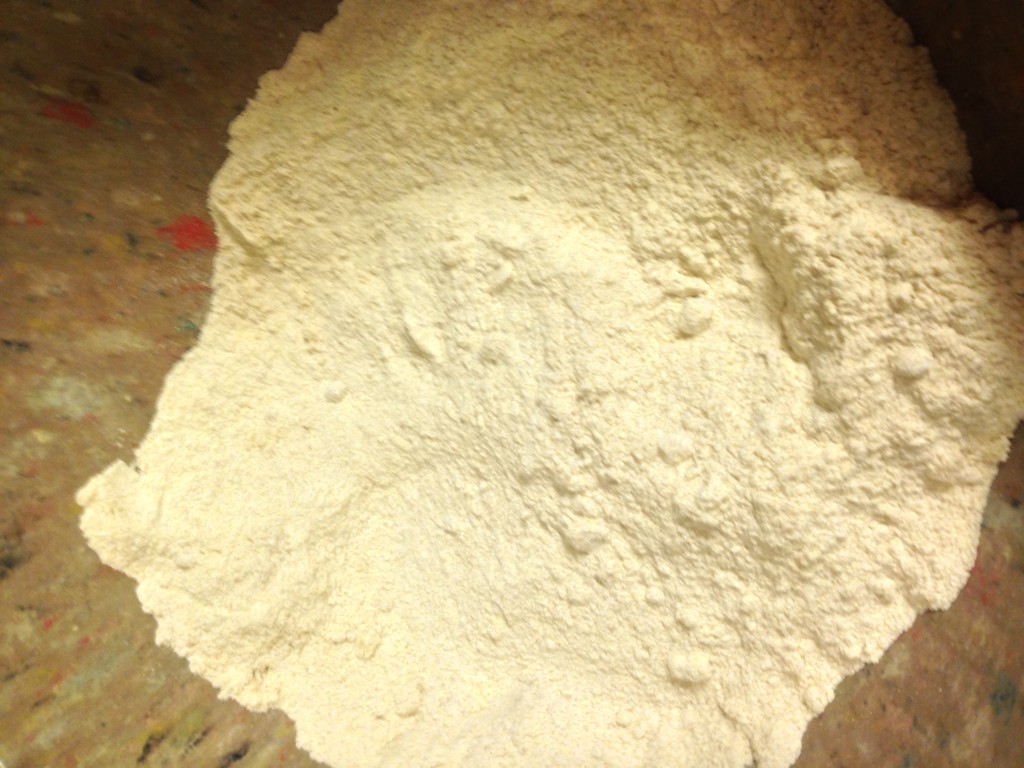
All the dry ingredients went into one bowl…
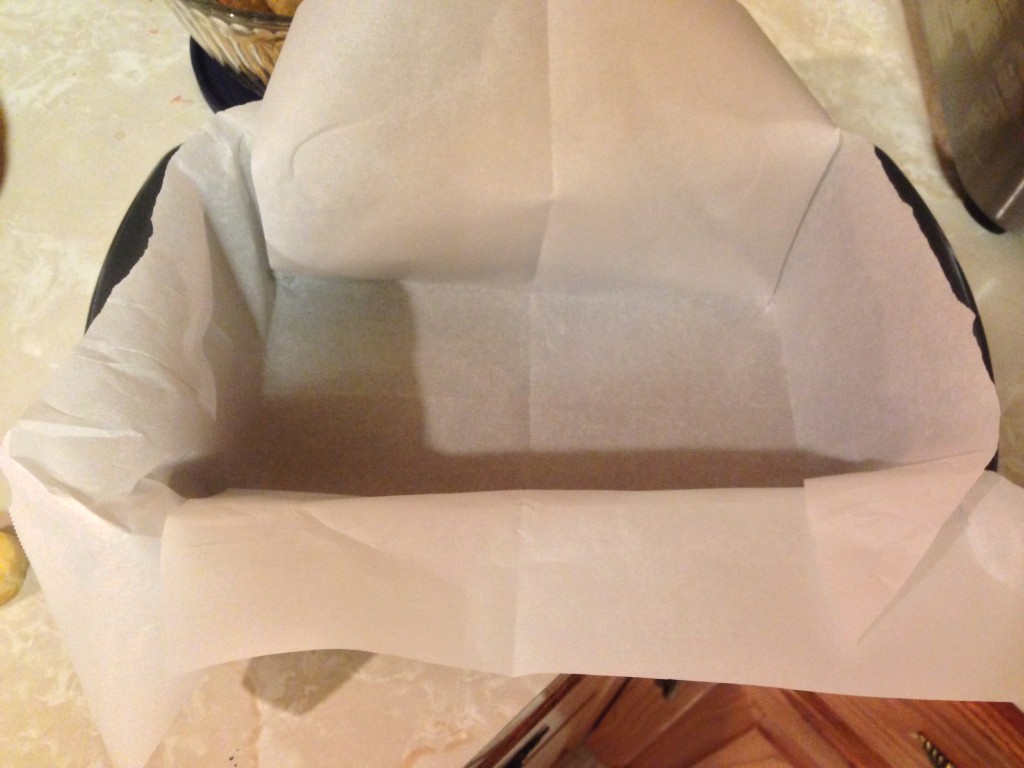
I lined my loaf pan with parchment paper…
And then I got the wet stuff ready to go.
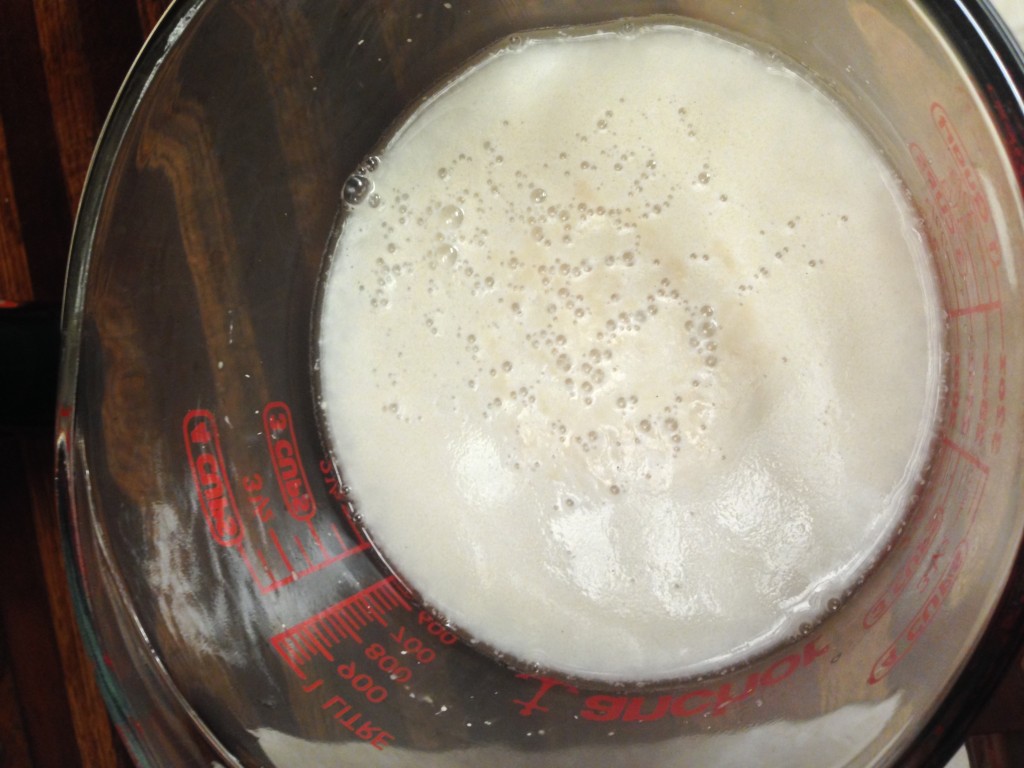
I ground the chia seeds in a coffee grinder, measured out the psyllium husks, maple syrup and olive oil, and then got some warm water in a measuring cup to start proofing some yeast!
The psyllium husks and chia seeds are the secret ingredients to this bread; they’re the reason it kneads, they’re the reason it doesn’t require any gums. I’d used chia before, but had never heard of psyllium husks. Fortunately, my health food co-op carries them, but you can find these at health food stores as a dietary supplement.
Proofing yeast is very important; I’m glad I didn’t skip this step! The first proofing I did showed me my yeast had fizzled. I grabbed a new jar, and bam! Bubbles and foam! Whew!
Make sure your water is warm but not hot; look for 105-110 degrees F.
Add the yeast and a tsp. of maple syrup to the water, whisk it together, and let it proof for 5-10 minutes. If you get bubbles and/or foam, you’re good to go! Otherwise, toss it and start over.
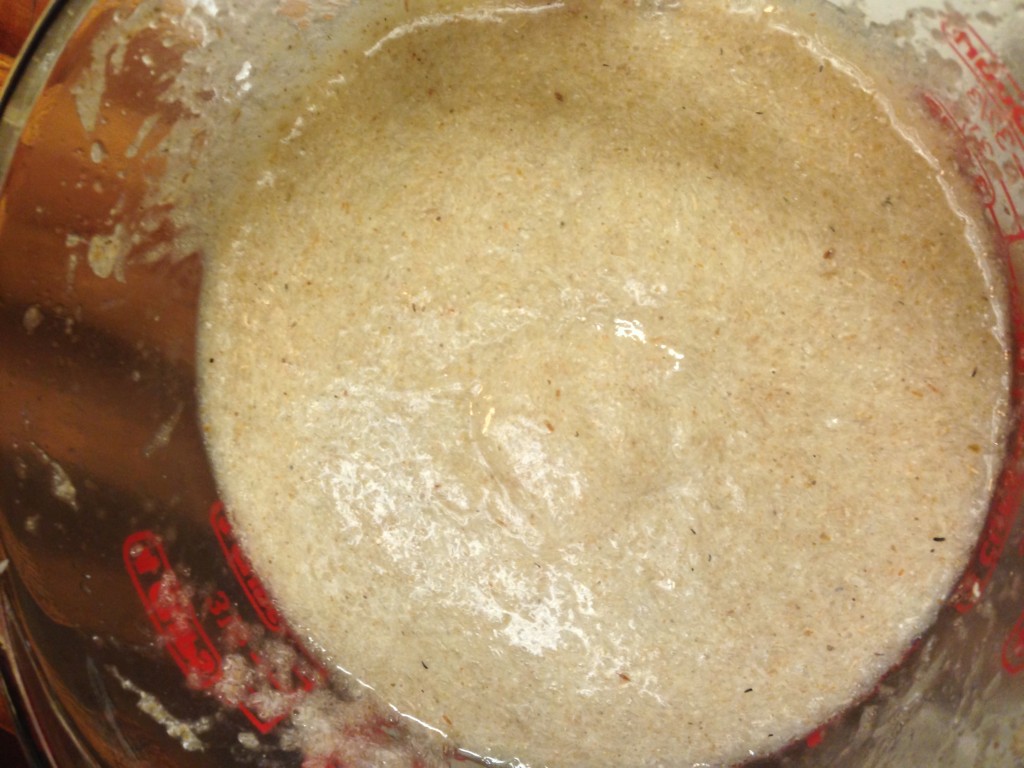
Once the yeast has proofed, add the rest of the ‘wet’ ingredients (the maple syrup, olive oil, psyllium seed, and chia seed), whisk them together and let them sit for ONE MINUTE. The chia and psyllium will gel up really quickly and become difficult to work with if you let it sit for too long. One minute is just perfect before mixing the wet into the dry.
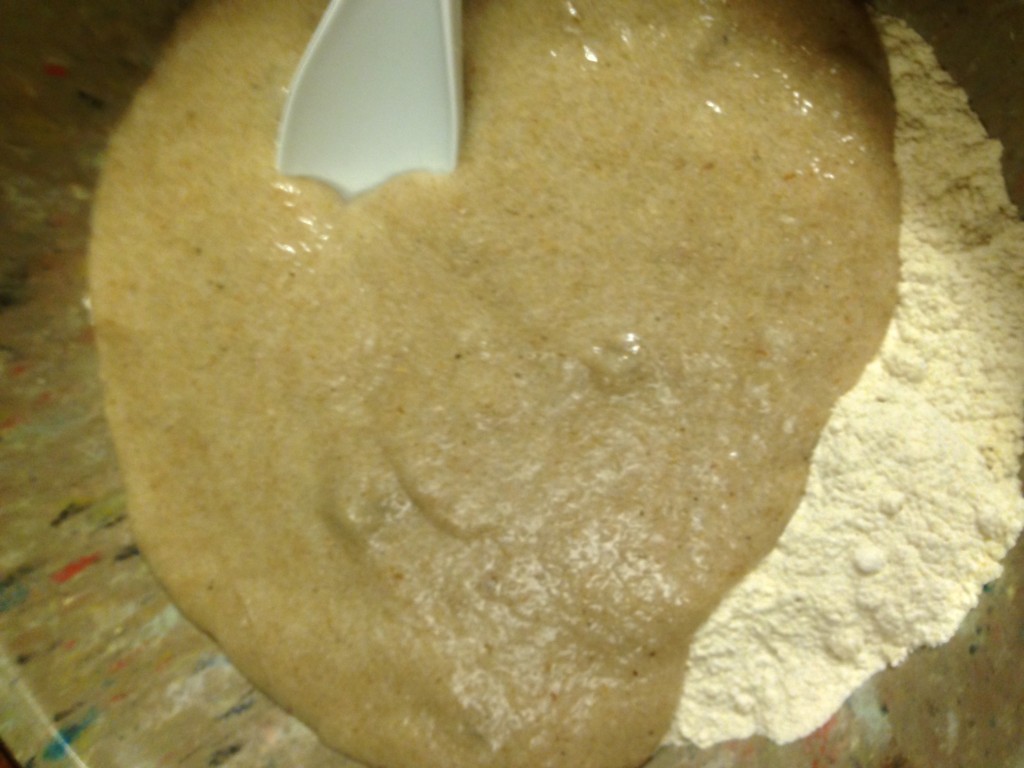
Then whisk them again and pour them on top of the dry ingredients.
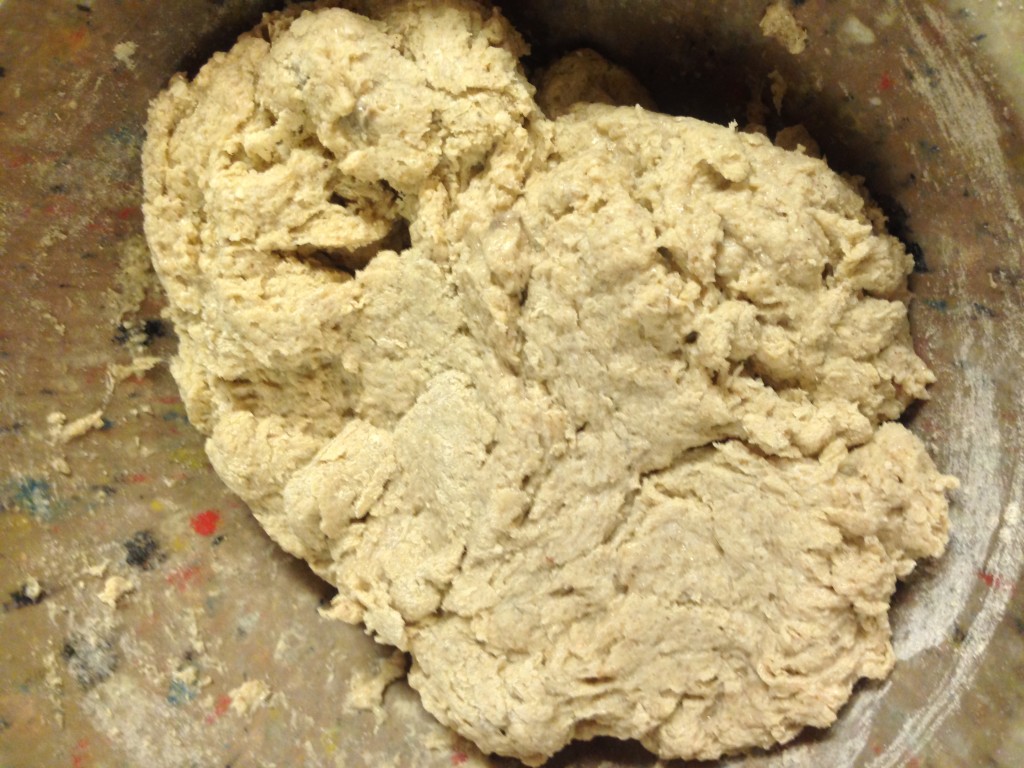
After a good arm workout stirring, the dough will suddenly come together to look like, well, DOUGH!
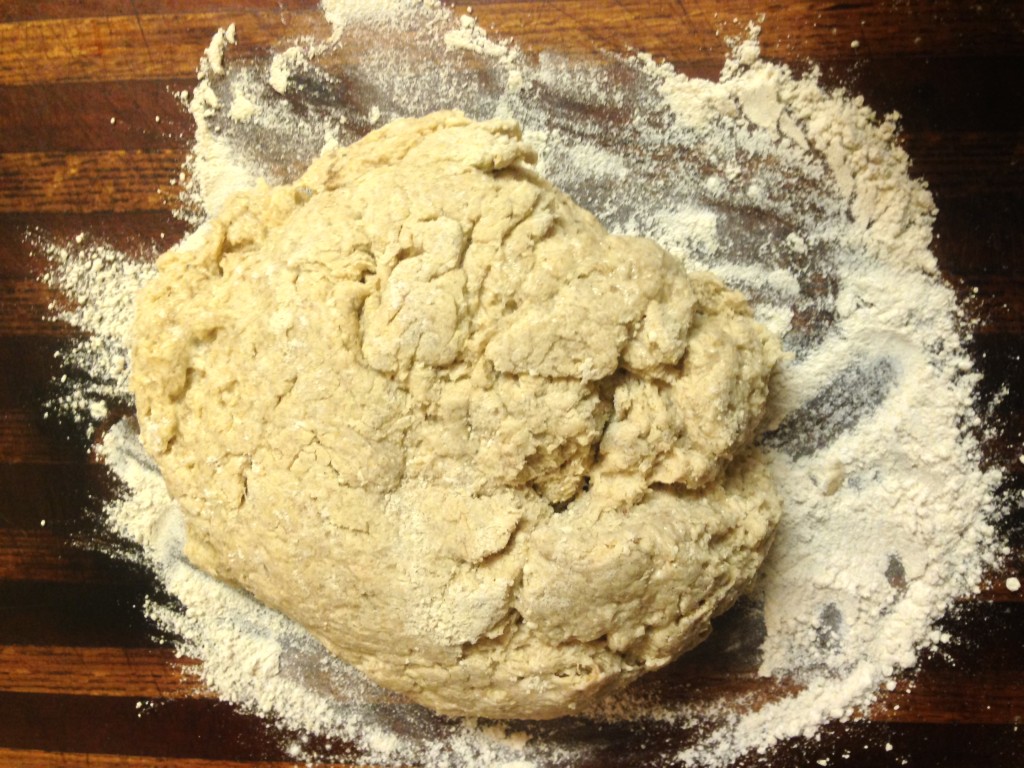
Take that lovely bread dough and turn it out on a lightly floured surface. Mine wasn’t terribly lightly floured. I got a bit heavy handed with it. Oops.
Throw some more flour on top and start kneading away!
You’ll wind up adding about 1/2 to 3/4 c. of flour to this as you knead; don’t add too much or it will make the dough too dense, but you will need to add some.
Now, I LOVE baking bread. I love kneading it, and working the dough in my hands. Pre-FPIES, I made ALL our bread from scratch, so I consider myself a fairly good baker.
This is not a wheat dough. You can’t work it like you would a gluten-filled dough. Yes, you do get the great pleasure of kneading, but not the “knead for ten minutes” kind of kneading you get with a normal loaf of bread.
After just about a minute or two of kneading, this dough felt “done” to me; if I’d kept working it, it would have kept getting sticky and I’d have had to add far too much flour to make it feel right again.
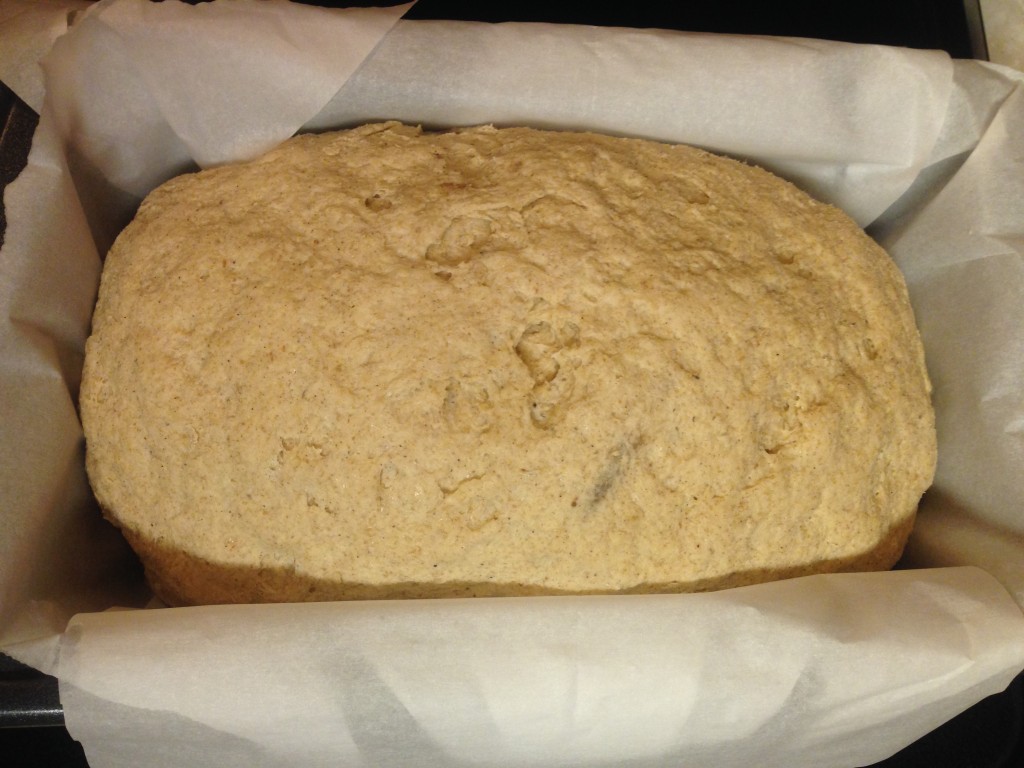
So in the interest of not making a brick of bread, I stopped, shaped it into a loaf, tucked the ends under all pretty-like, and plopped it in my parchment-lined loaf pan.
Then I covered it with a wet towel and sat it on my stove to rise. At the time, I had a roast in the oven (at 300 degrees), so the top of my stove was pleasantly warm, but not hot.
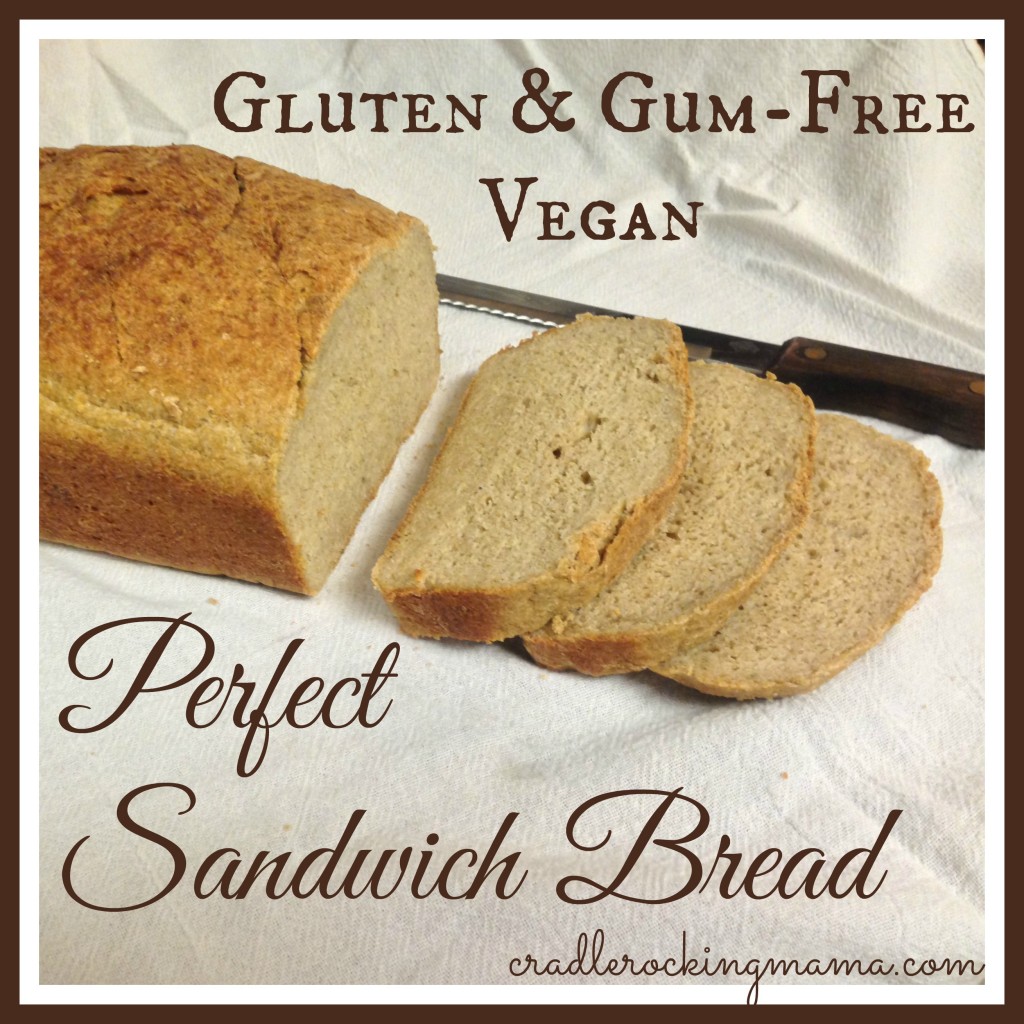
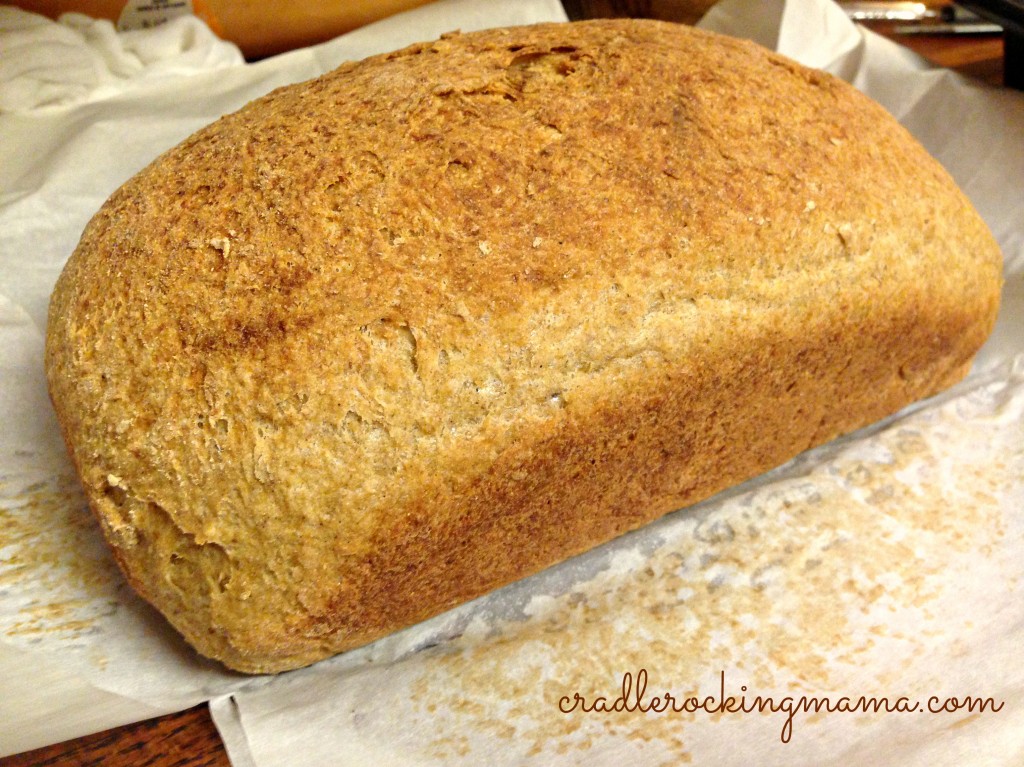
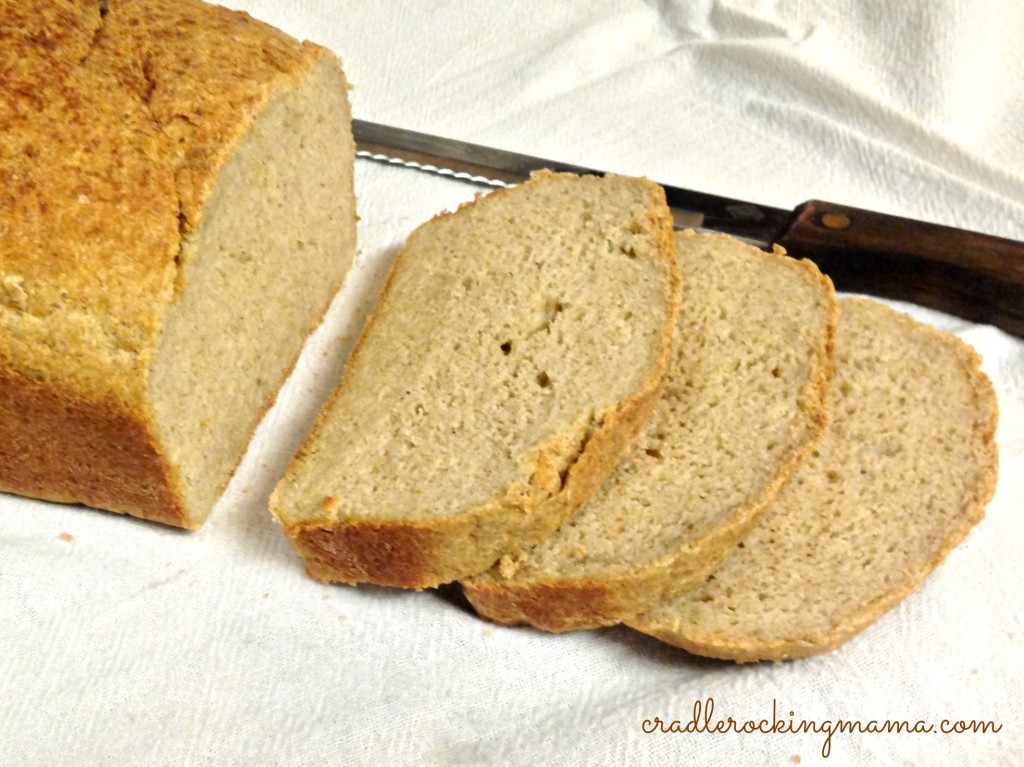
The recipe said to let it rise for an hour, but after only about 35 minutes, I noticed my loaf had risen to just over the top of the loaf pan! It was almost doubled in size already! So into the oven it went (after adjusting the temperature), where it baked for 40 minutes. It came out looking like this:
The instructions were very clear: let this bread cool and rest for 30-60 minutes before slicing in to it. Otherwise, it will be gummy and icky. If you wait, it will be perfect.
Jed didn’t want to wait. We had some words about disobedient children after he took a pizza cutter to the top of my perfectly beautiful bread loaf. After I’d ensured that he understood why I was upset with him, I went ahead and cut the loaf, even though it still felt somewhat warm to the touch.
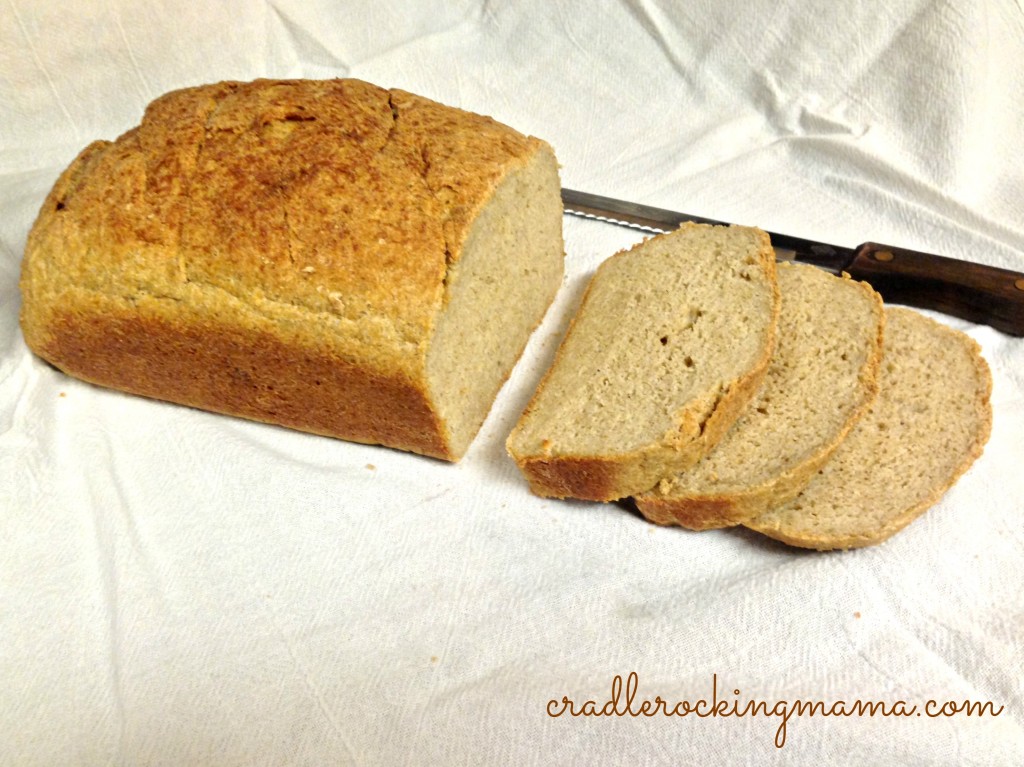
Fortunately, all was not lost! The bread was gorgeous!
Here’s a closer look at those slices….
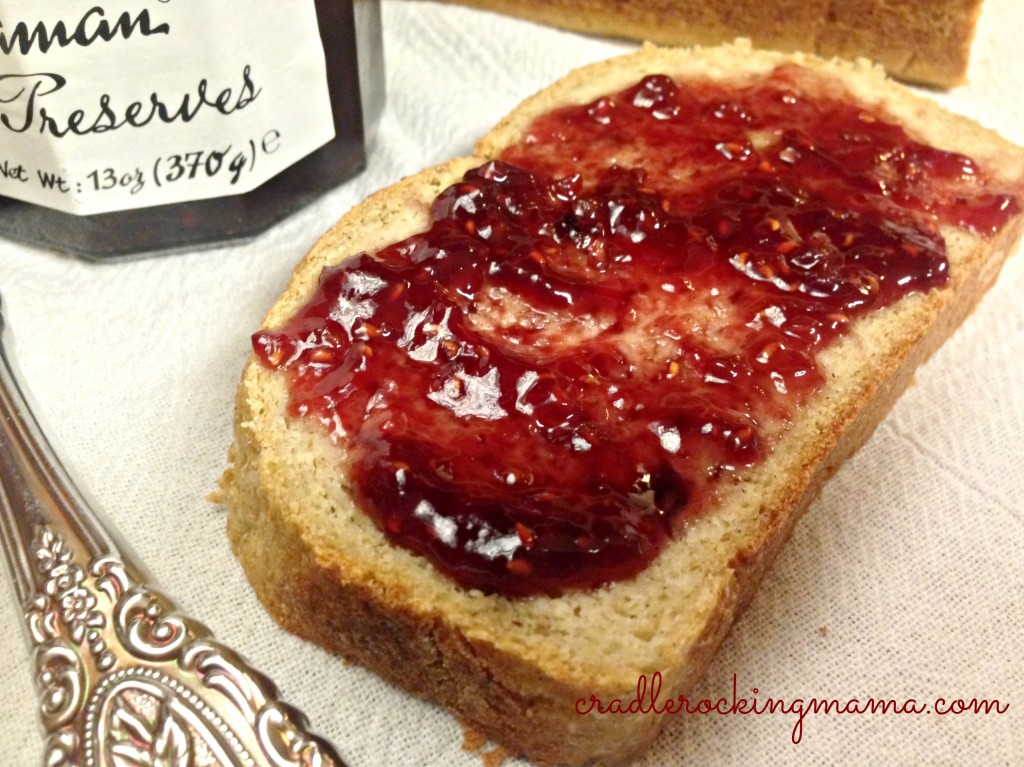
And I just couldn’t resist…
Darrel did say it was a little “thicker” than he likes his bread, so maybe I need to let it rise a little more next time. Jed certainly liked it, and both of the fellas said it tasted like bread and would certainly work for them!
I’m thinking this bread recipe is more likely to resemble a crusty, whole grain type bread, rather than a typical, fluffy white American bread. That’s okay, though! It’ll certainly fill you up!
I plan to make this bread into tiny little balls on Thanksgiving morning to turn into dinner rolls for Jed. And I know I encouraged you to “think outside the cold turkey sandwich” on Thanksgiving, but I really am so glad Jed will now be able to participate in that tradition!
One day, I’m going to eat this bread and swoon in happiness. I hope you get to swoon sooner than I will!
- DRY INGREDIENTS
- 1 c. millet flour
- 1 c. sorghum flour
- ½ c. quinoa flour
- ½ c. almond flour (to make this allergy free, sub another flour for this)
- 1½ tsp. sea salt
- WET INGREDIENTS
- 2½ c. warm water (105-100 degrees)
- 2¼ tsp. active dry yeast
- 1 tsp. maple syrup
- 2 T. olive oil
- 2 T. maple syrup
- ⅓ c. ground chia seeds
- ⅓ c. whole psyllium husks
- Put the warm water in a bowl or a large measuring glass.
- Add the yeast and tsp. of maple syrup; whisk together. Let rest for 5-10 minutes to proof.
- Mix dry ingredients together in another bowl, and line a loaf pan with parchment paper.
- Once the yeast has proofed, pour the rest of the ‘wet’ ingredients into the yeast mixture. Whisk ingredients together and let stand one minute to let gel.
- Whisk wet ingredients again after one minute, then pour into the dry ingredients.
- Using a spoon, mix the ingredients together until so thick you can’t stir any more.
- Dump the dough out onto a lightly floured surface and knead to incorporate all the flour.
- Add more flour as needed to make sure the dough holds together and isn’t too sticky.
- Shape the dough into a loaf and drop it in a loaf pan.
- Cover with a wet towel and place in a warm spot to rise; let rise to double its’ original size.
- While the dough is rising, turn the oven on to 400 degrees F.
- Once the dough is doubled in size, place the loaf pan in the oven and bake for 40 minutes.
- Remove from the oven and let cool on the counter for 30-60 minutes until completely cool.
- Slice and enjoy your delicious, gluten-free, gum-free, vegan sandwich bread!
Have you found a great gluten and gum free bread recipe? Please share it!
__________
This post shared with:







This looks good! Question – have you tried this recipe with letting it rise twice like the original post has? Wondering if that would lighten up the loaf any (my son does not like dense bread, and since I’m making it for him….!)? A good sandwich loaf is the last gluten-free recipe I need to master to keep little guy happy. Thanks!
Hey Ruth! No, I haven’t tried the double rise yet. I always want the shortest possible line between point A and B! LOL But you’re right; a double rise might make it lighter and fluffier. Next time I’ll give it a try.
It did work GREAT as dinner rolls, though! Let me know if you try a double rise and it works!
Pingback: Food, Food Everywhere, and Not A Bite To Eat - Cradle Rocking Mama
Well after trying the Farmhouse seed bread numerous times with varied results with different flours, I found your version of it and gave it a try. I like how yours was lighter and more like a sandwich bread, however I seem to keep having the same thing happen no matter which recipe or flour. The bread seems to remain sticky, almost ‘uncooked and doughy’, even after I bought an oven thermometer, sifted my flours instead of scooping, precisely measuring my liquids, making sure not to over knead and cook it for longer. Is this just the texture of gluten free breads? Am I expecting too much for it to be more like regular store bought bread? All I want is a nice sandwich where I don’t have to toast it to enjoy it.
Any suggestions? Comments? Anything would be greatly appreciated!
Cheers!
Hi Chance! I’m glad you liked my sandwich bread version.
OK, well, I can’t speak for all gluten-free breads. The only ones I’ve tried from the store have been horrible, and the recipes I’ve tried have all been nasty messes as well – until this one.
I waited to answer your question until I could make it again, and I have to say mine doesn’t feel sticky or uncooked, just very moist. I’m guessing that’s just a condition of the recipe, because I didn’t add any extra liquids any time I made it.
Thinking about it, I can remember lots of “gourmet” sandwiches I’ve had over the years (back when we ate wheat) that had a similar texture to the breads; moist and tender. So maybe some breads are like this and some aren’t, and it’s a matter of personal preference?
I’m sorry, Chance! I wish I could tell you something more helpful than this. Have you tried slicing the bread you’d like to use for your sandwiches an hour or so before you plan to make the sandwich to see if they’ll “dry out” a little in that time?
Being my wife is allergic to almonds, I tried many substitutions but didn’t have a lot of luck. They always ended up ‘doughy’. Until I tried using 1/4 cup Tapioca flour and 1/4 cup Potato Starch. And MAN did it ever make an awesome bread!!
I now make this weekly for my wife and daughter, and it is a big hit! Toasted with pumpkin seed butter or Sunflower butter is a great snack for my little one. Or just plain, she doesn’t care!! Just as long as I keep it coming!
Thx!
Cheers!
Oh, wow, Chance! That’s great! Thank you for sharing the adjustment that worked for you. I’ll have to try it some time. So happy this is a hit for your family!
Chance- Did you leave the rest of the recipe intact or did you remove something when you added the two new ingredients?
I’ve been having the same problem.
Hi!
first, I have to say this recipe is the best of the best D:
I’ve just made it and it turned out AWESOME!, I used buckwheat because I did not have quinoa flour and it’s very expensive…. and almond four is over (ok, I made a tiny mistake: I stir the psyllium with all the dry ingredients, but was not problem).
So with these little confessions, I achieved to made a big, tasty, soft bread! When I took the bread from the pan, my hands couldn’t believe what they felt: real gluten-free bread(how smoothly!).
Thank you sooo much for your recipe… and all my frustrated tries are grateful too.
🙂
Zoy, I’m so happy this worked for you! I felt the same way when I first got this out of the oven. Yay!
Pingback: French Toast – Vegan & Gluten-Free (and Delicious!) - Cradle Rocking Mama
Can I replace sorghum flour? I can t find it in my country,
Hi Maja!
Yes, you certainly can. Just try to use several different flours, and you may need to adjust how much liquid you add depending on the substitute flour you use as some gluten-free flours are “thirstier” than others. 🙂 Good luck! Let me know what you try and how it works, okay?
Do you think it’s possible to make a bread using quinoa flour only? We do have cornstarch & eggs as safe’s to use as binders as well. Might be a mess, but I’m going to try!
Hi Melanie! I’m sure it is possible to make a bread using quinoa flour only. Especially with eggs as a binder. I have no idea how you could alter this recipe to suit those ingredients, though…I would probably try googling for “quinoa bread recipes” and see what comes up. You can probably find something that is easier to alter!
Good luck, and let me know what you find out! 🙂
Wow! I am vegan and have been gluten free for over 3 years now and the only thing I miss is bread. I have made so many bad loaves of ‘bread’ in the past year but I just sliced into this one (still slightly warm as I have no patience) and it is AMAZING! I used a different flour mix (rice, buckwheat and arrowroot starch) and flax seed in place of the chia (chia is way too expensive in the uk!) I think the psyllium was the missing link for me! Thank you so much for posting this. I never comment on things but I just wanted to let you know how great this recipe is!
Hi Georgia! Wow! Thank you for sharing this – I’m so happy it worked well for you. I also appreciate the info on the substitutions you used; it’s nice to know flax works just as well. If you like the bread, you’ll probably like the Banana Muffins I made that you could also sub flax eggs for.
Glad to meet you!
I prepared this bread last night and let my thermomix do the mixing/kneading. During the kneading, the dough seemed alive as it kept growing and threatened to pop up out the hole in the lid (of the thermomix), thought i’d have to beat it down….but then it dropped down (was a big air bubble that popped). I let it rise overnight and baked it before heading to work in the AM. It didn’t seem to rise as much as I expected overnight, but the end result was a very normal looking and tasting bread…awesome! Not gooey or wet at all. Was worried i had over-floured it at the end, but not all. Had it with some crayfish and butter at lunch. Wow! Love this bread! Need to read more of your blog to see if there is a banana bread version. Thank you so much!
Laura
Perth, Australia
Awesome, Laura! I’ve heard about Thermomix’s before, but they’re not readily available in the US. One day I hope to see one up close and see if the awesome stories are true!
I’m so glad the bread worked out for you! I don’t have a banana bread, per se, but I have a banana muffin recipe that could possibly be turned into a bread. http://cradlerockingmama.com/banana-muffins-vegan-gluten-free/ Let me know if you try it as a bread and how that works out for you!
Oh, and someday we WILL visit Australia! I know it’s just “home” to you, but it sounds like an amazing place to see. 🙂
Whops, didn’t realize it but I had tried your banana muffin recipe (as a banana bread loaf)…and already posted my comments to you on it! I loved it! I still have about 1 piece left (in the freezer). Have been taking out a piece at a time, toasting in my panini press and taking to the office. So yummy.
Nice! I’m glad to hear it freezes well, too!
Hi Carrie – I’m trying to make a GF bread in my bread maker. So far I’ve got the taste right, but now the middle is uncooked dough! During the process it rose so beautifully and looked gorgeous, then folded in on itself at the end. Please help. Thanks
Oh, Jenny…I wish I could help you but I don’t know anything about bread machines! I’ll ask around and see if I can come up with an answer for you. Sorry it isn’t working out!
Thanks Carrie – any help at this stage will be great. Have a happy day
So far, Jenny, all I’ve heard back is that with a bread machine sometimes you need extra flour. I wish I knew something better to tell you – maybe just try adding 1/4 c. or so more flour and see what happens?
Pingback: My Kitchen Sees A LOT of Action - Cradle Rocking Mama
Hello I was wondering if I could replace the pysillum husks with flax meal? I have run out but would really like to try this recipe. Thanks.
Hi Michelle! Hmm…I actually don’t know. Honestly, I’ve been planning to try that for a while now, but haven’t gotten the chance to do it yet. If you try it with the flax replacement before I get a chance to do it, would you let me know how it works? I’ll be sure to share my results as soon as I’ve made it that way, too. 🙂
So I did try it the bread turned out great, but the dough is not knead able. It is like a batter. The bread texture is very moist after done baking. It needed extra baking time as well. I don’t know what the texture for your recipe is with using pysillum husks is. I will be definitely will be trying it with pysillum husks next time. I was completely out yesterday. Thanks for the fast reply and yummy recipe 🙂
Thank you for sharing your results! I’m glad to know it worked even without the psyllium husks! With the psyllium husks, it is very much a kneadable bread dough. It holds together very firmly and is NOT pourable.
I hope you like it with psyllium husks as well as without. 🙂
Wow this looks like a very non-glutenfree bread 😀 I’ll give it a try since I’m trying out perfect glutenfree bread recipes at the moment, trying to find a perfect one.
I hope you like it! If you find another recipe that you like, please share! I’m always on the lookout for new gluten-free breads. 🙂
Hi Carrie, I have been making non-gluten gum free bread for a long while now. I use psyllium and flax seed as my gluten replacement. I add my flax and psyllium to the dry ingredients along with the yeast. Do test that your yeast is good if you have any doubts before adding any to your dry ingredients and dry whisking it to mix well. I use brown rice syrup instead of maple as I don’t like any sweet taste in bread.This means that I stay away from almond and coconut flours. Because of time restraints I put the wet ingredients in my bread machine add the dry ingredients and use the dough cycle. I then form the bread and pop it in my prepared tin of choice and allow to rise above the tin before baking in the oven. I do test my bread with a thermometer just to make sure it has an internal temperature of 200*. I defy anyone to guess it is not an extra good wheat bread they are eating. I hope these comments help others, Enjoy, Monica
Thanks, Monica! Great tips!
Pingback: When Recipes Go Wrong - Cradle Rocking Mama
Hi there, I’d love to make this bread for my gluten intolerant son, but I always struggle with the US cups! I never seem to get the quantities right even though I’ve got the measuring spoons and cups. Would you be able to tell me the weight of the dry ingredients (in grams if at all possible)? Many thanks,
Maya
Hi Maya! You know, it has crossed my mind that I should start doing that since many of my readers are not in the US. Next time I make this, I’ll use weights instead and update the recipe. Thanks for the nudge! And thanks for visiting.
As I love using brown rice syrup, ( I love the taste on porridge and use it in my bread,) I am disconcerted to find that it has been found to have high levels of arsenic in it. It seems that daily new challenges are being added to this fight to eat healthily.
Love your site Carrie!
Monica
Oh dear! I didn’t know that about brown rice syrup. I’m sorry to hear that. Yes, it’s becoming harder and harder to eat healthily. Thanks, Monica! I’m so glad you’re here!
Hi I have made this bread and it’s by far the best gluten free bread I’ve made but do you know why it had a bitter after taste any idea why?
Hi Irene! I’m glad the bread worked out for you (mostly)!
Hmm…I really can’t think of anything in the recipe that could cause a bitter after taste. If you used quinoa flour, sometimes that has an after taste that some find unpleasant. Otherwise, maybe some of your ingredients weren’t as fresh as they could be? I really have no idea other than that. Hope you can figure out the cause! I’d try different flour combinations to see if you find one that doesn’t give that result. Good luck, and please let me know if you figure it out!
Irene, it could be your water as silly as that sounds. I had problems with this and bread making. I searched all over the internet for info. Then, I finally found out it could be the water. So, if you are using water out of your faucet, buy some spring water from the store and try that. I did this years ago when making bread, and for me this was the causing factor. If that’s not it, it could be one of the brands of flours or starches you used. I’ve heard this before also. If I remember correctly, I think some of the Bob’s Red Mills flours (like the rice maybe) can have almost a metallic taste to it. I can’t remember which one it was for sure, just remember that specific taste.
Thanks! This is great! I had never heard that about the water before, though it doesn’t surprise me.
Sorry to hear about the psyllium husk and sorghum flour not working for Jed. I know you are a pro at assessing every ingredient, but still it’s disheartening when you’ve worked so hard perfecting things. But, thank goodness there are plenty of other flours out there.
Thanks. I’m working on a new recipe for him. It keeps coming out very moist and dense…more so than the original recipe I shared. It’s a work in progress. 🙂
Hi, Irene – I think toasting the quinoa flour helps with the bitterness (I just made this bread, and it has a good flavor – I am new to GF baking, but I toasted my quinoa flour per some info on the internet). I also used coconut oil (naturally deodorized – flavorless). Good luck!
I know that this comment is a bit old but I would like to say that the bitterness comes from psyllium husk.I know this because I have been making many other recipes that only had psyllium husk in common with this bread recipe.
The bread is great though.
Thanks, Ann!
Hi Can you tell me if there is any substitute for the yeast? baking powder? most GF bread recipes have yeast and i am trying to avoid it. thanks Melissa
Melissa, I’m so sorry but I don’t know of any yeast substitutes for this recipe. If anyone else knows of any subs, would you help Melissa out?
Carrie, are you using the chia seeds and psyllium in your recipe BOTH to replace the xantum gum?? OR, is the chia in there just to boost the fiber, and not really to help with the rising of the bread???? If one has GI issues with Chia seeds, can they just replace that measurement in the recipe with psyllium???
Both of them are used to replicate the gluten behavior of wheat flour, but I believe one comment said they didn’t have psyllium husks so they simply doubled the chia and it worked okay. I would imagine going in the reverse would work just as well, though I haven’t tried it. She did say it didn’t knead without the psyllium, so I would imagine doubling the psyllium might be a bit much. Maybe drop the quantity of psyllium down the first time?
I’m actually having to create a new bread recipe for Jed now, as we’ve learned since I first made this one that he has issues with sorghum and psyllium husks. 🙁 As soon as it’s ready, I’ll be sharing it, of course! Unfortunately, that means I probably won’t be experimenting much more with psyllium husks, as Jed can’t eat them. So please try it and let me know so I can add that to the recipe! 🙂
There are two measurements for the maple syrup. How much do I actually need? I am going to try 1T and see how it goes!
Ooops! This is what happens when you start your day at 5 am. I see the syrup mystery now. Sorry.
Oh! I’m glad you figured it out! 🙂
Pingback: Surviving Thanksgiving with Food Allergies/Intolerances - Cradle Rocking Mama
Hi Carrie!
Thanks for sharing your lovely recipe.
Before I try this, can you please tell me what active dry yeast is?
In my area I can find ‘instant yeast’, ‘dry yeast’ and fresh yeast (very expensive though so no go for this one). Instant and dry yeast need to be added to the dry ingredients according product instruction.. Is there a way to make this work with your recipe you think?
Thanks, CT
Hi CT!
The jar of yeast I use has the words “Instant Active Dry Yeast” on the label. Active Dry Yeast must be dissolved in water before use, but the instant version is ground more finely and does not need to be dissolved. However, yeast is a living organism and it’s always a good idea to “proof” it before use; with time, it can die, and if it does, it will not rise in your recipe. So even when using instant yeast, I dissolve it in warm water with a sweetener to see if it is still good to use.
If you don’t want to do that, and just want to add some instant yeast to your dry ingredients, I would still take at least a tsp. of it and proof it before using it in your recipe. It’s infuriating and heartbreaking to ruin all those expensive, yummy ingredients because the yeast was bad!
So go with with the Instant Yeast, and proof it before adding some to your dry ingredients. Happy baking!
Thanks for the reply Carry!
I agree on your point of proofing the yeast, at least you know upfront if the bread has any chance of performing. Luckily I found some active dry yeast and after some trial and error it works out very well.
One thing I will mention, if your children have problems with sugar alcohols, many of the yeasts out there have sorbitan monostereate added to them. This is dehydrated sorbitol. The only active dry yeast I’ve been able to find without it in there is red star active dry yeast PACKETS. But only the Red colored packets of RED STAR brand. The jar of the RED STAR has the sorbitan monostereate in it, so need to go with the packets. Just an FYI.
I just made this bread and it turned out awesome, I’ve never had a “special” bread rise and bake so well but, it tasted horribly bitter. The only substitution I made wasoat flour for quinoa because I didn’t have any. How did yours taste? Any thoughts on what might have made mine bitter?
Hmm…I’m so sorry it turned out bitter. Honestly, I have no idea why it did that. Mine has always tasted just like a regular whole grain bread.
If anyone has any ideas, please share!
Hello Carrie,
Your bread looks like amazing!!! I really want to try this recipe. But at the recipe, there is 2T maple syrup and 1 tsp maple syrup. We need to add both or ??? Thank you all delicious and healthy recipes:)
Hi, Sem! Sorry for the confusion; the 1 tsp. of maple syrup is used in proofing the yeast. The 2T. is part of the actual bread recipe. Hope it turns out great! I’m glad you’re enjoying some of my recipes. Let me know if there’s anything else I can do for you! 🙂
I will try it as soon as possible. Thanks:)
Hi, Carrie… this is my first time to even try GF bread (store-bought or homemade), so it’s my first time to bake it… I think I might have to try it again, maybe stir it or knead it more – it was a little sticky when I put it in the pan to rise, and it turned out quite dense and a little moist. BUT. The slices do hold together, and it was delicious regardless! Both my husband and son approved of the taste. Since I am new to this, I don’t really know what each flour tends to do to a recipe, but I might try rice or potato instead of the almond.
Two changes that I made: I toasted my quinoa flour and I used naturally deodorized (flavorless) coconut oil.
Thanks for sharing your recipes and your journey!
Keisha
Thanks, Keisha! I really like the idea of toasted quinoa flour for this. I hope each time you make it it gets a little better. 🙂
I’ve tried this recipe about 5 times with varying results. What size pan are you using? I have been doing a lot of research on GF as I recently developed an intolerance and I would recommend America’s Test Kitchen “The How Can It Be Gluten Free” cookbook, also posts by the gluten free girl & the chef. The ATK book explains a lot of why things happen/don’t happen in GF cooking/baking, and the gluten free girl (Shauna) has done an amazing amount of experimentation, much as you have, albeit without restrictions. The ATK book recommends a smaller pan than what I was using for your recipe – also incorporating a foil collar around the pan to help with the rise. I’ve tried the double rise as someone mentioned here and it was a resounding flop. I’m currently baking a loaf of bread using an ATK recipe and Shauna’s flour recipe…can’t wait for it to come out of the oven1
Hi Cheryl! Hmm…the pan I’ve been using is a standard loaf pan from Wilton’s (I believe). I was trying to make a reasonable facsimile of a “regular” loaf of bread, so I used the same sized pan as I used to use before all our food restrictions came to light. Would you mind explaining what ATK says about why a foil collar would help with the rise? Rising has never been a problem for me before, but I always proof my yeast first to make sure it’s live.
Anything from America’s Test Kitchen is top notch – I’ll be sure to check out that book! Thanks for the share! I hope you figure out a good loaf recipe somewhere. 🙂
Hi Carrrie: The ATK chefs wrap foil all the way around the bottom of the pan and back up again, extending the foil above the pan at least an inch. They secured it with staples. I didn’t quite get the staple part so I wrapped foil around the top to make the pan taller. Alas, the bread still fell in the middle – looked fine going in the oven but then collapsed sometime during baking. So, I thought the collar wasn’t tight enough. Also I thought trying to wrap foil around the pan every time I made bread was going to use a lot of foil, hence the search for a taller pan. I did get a Pullman 9 x4 x4 pan for the next round of baking. I adjusted the ATK recipe for taste (less salt and milk powder) and gave it a go. It rose beautifully, to about 1/2 in above the pan! Popped it in the oven, and about 30 min. later it fell in the center. At this point I remembered a gluten free girl post about baking sandwich bread where her bread fell in the center too, and she said it was because of the baking soda. Hmmm. Time for more investigation and a note to exclude the baking soda next time. ATK stresses that you need to bake the bread longer too – about an hour and a half, because of the extra moisture. I didn’t bake the current loaf quite that long and it is moister in the middle than the first go. The other factor for me is we live at 6500′, so things work a little bit different here than at sea level. (if you search on gluten free girl how to make a gluten free flour mix you’ll find a great list of flours divided by type that may help you in coming up with a combo your boys can eat). I may just give your bread recipe another go in the Pullman pan with longer baking time and see how it goes. I think I really need to watch the initial rise and pop the bread in the oven sooner than most recommend to catch the “rise” wave.
Has anyone tried making this with Bob’s Red Mill GF flour blend instead of the 4 different flours?
I’m not sure if anyone will chime in, but I just have one thought about this: most GF flour blends have added xantham or guar gum to the blend. Many people try to avoid the gums, as the can cause intestinal problems. So with this recipe, the joy is that it works beautifully WITHOUT any gums added. Does that help?
I love this recipe! The first time I made it I used flax instead of chia and buckwheat instead of quinoa because I had them on hand and other commenters said it worked, and I got a delicious loaf of whole-wheat-tasting sandwich bread, exactly what I’d been looking for for a year. I’ve been making it over and over again, trying out different combinations of flours. I’ve made a sourdough version, a grain-free version, and many others, and they’ve all been delicious. What a joy to have a kneadable, tweak-able bread recipe again! Thank you.
Oh, wow, Annie! I’m so glad this worked so well for you. 🙂
I would love if you would share your sourdough and grain free versions…those sound amazing! You’re very talented. 😉
For the grain free I’ve been doing 1/2 cup almond flour, 1 1/4 cups buckwheat flour, 1 1/4 cups tapioca starch, but I end up adding a fair amount more buckwheat when I knead the dough to get it to the right consistency. I probably knead in 1/4 – 3/4 cup more flour, whatever it takes to get it to feel the same as the original dough. This bread rises really beautifully but then collapses a little when it comes out of the oven. I haven’t figured out how to stop that yet.
For the sourdough I reduce the flour and water by 1 cup each and eliminate the yeast, replacing them with 2 cups of sourdough starter. This bread needs to rise much longer than with commercial yeast. I’ve been doing a double rise of about 3 hours and 1 1/2 hours. You can do a single rise, but it doesn’t have a strong sourdough flavor. I followed these instructions to make the starter: http://wholenewmom.com/recipes/gluten-free-sourdough-starter/
I haven’t made a gluten free bread yet but I’m interested in trying and this recipe looks good. I would also like the recipe from Annie for the basic sour dough bread that she made. I’ve got the sour dough starter recipe but am unclear about the recipe for the bread. Thank you. I’m really looking forward to making these breads.
Hi Mary! I hope the bread turns out great for you. 🙂
I’m a little swamped right now so I haven’t had a chance to look at the links Annie provided. Once I get the chance, I’ll see if I can help you with it! Hugs!
Carrie, Thanks for your prompt response. I checked back for a link and I think I have found what I’m looking for. Mary
HI, tried this recipe and it turned out perfect. yes it doesn’t have the same consistency as the regular bread because this is much better (for me). Amazing taste too. Mine is on the darker side though because of some substitutions, since this is what’s available.
1. Used buckwheat flour instead of millet
2. brown rice flour instead of quinoa (1/3 cup only)
3. flax meal instead of ground chia
it worked well for me 🙂
thank you for an amazing recipe.
Hi Kristel! That sounds delicious! I bet the buckwheat adds a great flavor to the bread. Thanks for sharing, and I’m glad you like it!
I have made this over and over. I had to tweak it a little because of where I live, I guess. I only do 1/4 cup each of the chia and psyllium, and I have to add the wet mixture right away to the dry because my first batch was like trying to stir already made Jello into flour. Hahaha Anyway, I just made little rolls out of these and put them in a round cake pan to make pull-aparts! This is such a good recipe, I’m so glad we finally have bread we can work with!
Yay! I’m so glad this worked for you. I loved making dinner rolls for Thanksgiving with this! Hugs!
Pingback: The Best Food Allergy Thanksgiving Tips - Cradle Rocking Mama
Thank you!!! It took me 3 try to get it right, but it was perfect and delicious, no gums, I’m so stoked!! I used 1.5 c Millet, 1/2 c each buckwheat, almond and rice flours.
Yay! I’m glad this worked for you!!
I’m anxious to make this bread but I have a question. Could you replace either the mullet or sorghum flour with oatmeal flour?
Hi Charlotte! You can sub out any flours, however, having tried to sub out sorghum flour in this recipe I’ve learned that gluten-free flours are different. They have different weights and densities, and that can impact the end result. To date, I’ve yet to successfully sub out the sorghum flour (I haven’t tried to sub out the millet yet). If anyone has any suggestions of a good alternative for this, I’d love to hear it! If the oatmeal flour works, please let me know! Good luck! 🙂
What kind of flour do you lightly dust your surface and knead with?
I’ll use any of the flours that I used in the dough.
Not sure what i am doing wrong. I followed the recipe exactly and ended up with consistency of heavy cake batter. I added lots of flour, had a sticky mess and finally gave up, scooped it into pan, let rise (didn’t much) and popped it in the oven. Not bad, considering, but looks nothing like your photos. Thanks!
Confession – i used flax instead of psyllium and i now see from the comments that this may be the problem. Will try again!
I HAVE CONCERNS! MAJOR FOOD SAFETY WARNING!
I love your idea but upon researching Psyllium seed husks on wiki
I really am concerned and I think you should at the minimum put a warning and advise people to verify for possible major side effects and some of them even life threatening.
Since by nature the Psyllium is hygroscopic which pretty much means that it binds water and as such there is tons of people how that can be a bad news for many people.
/tgere are some quite scary mechanisms that make you basically not only allergic to it especially if ate in larger quantities over time if you are not allergic to it right away but what is of concern is that it can also cause asphyxia .. leading to death..
I think this is very serious ingredient that is NOT so mild in nature as people think and therefore it should be carefully considered and people who eat breds with it should pay very careful attention to their side effects as this can be bad news for stomac, heart and other organs and can be dangerous.
I am not an expert but I would recommend to research on our own and at the mnimum check on wiki to avoid possible dath..
YOU MAY CHOCKE ON THE DUST OF THIS EVEN WITHOUT EATING IT! AS IT WILL ABSORB ALL WATER FROM YOUR LUNGS AND YOU CAN DIE, SO EVEN MIXING IT REQUIRES SOME WATER TO BEGIN WITH!!!
https://en.wikipedia.org/wiki/Psyllium_seed_husks
“Possible adverse reactions include allergic reactions, especially among those having had regular exposure to psyllium dust. Gastrointestinal tract obstruction may occur, especially for those with prior bowel surgeries or anatomic abnormalities, or if taken with inadequate amounts of water.
Psyllium seed husk consumption has noteworthy negative and positive attributes.[5] A properly trained person can address the potential side-effects between prescription medications and psyllium seed husk, and the potential interactions between herbs or supplements and psyllium seed husk.
The U.S. FDA has published that psyllium, among other water-soluble gums, have been linked to medical reports of esophageal obstruction (Esophageal food bolus obstruction), choking, and asphyxiation. To be specific, the FDA reports.
“Esophageal obstruction and asphyxiation due to orally-administered drug products containing water-soluble gums, hydrophilic gums, and hydrophilic mucilloids as active ingredients are significant health risks when these products are taken without adequate fluid or when they are used by individuals with esophageal narrowing or dysfunction, or with difficulty in swallowing.”
and “when marketed in a dry or incompletely hydrated form” are required to have the following warning labels:
“Choking:
Taking this product without adequate fluid may cause it to swell and block your throat or esophagus and may cause choking. Do not take this product if you have difficulty in swallowing. If you experience chest pain, vomiting, or difficulty in swallowing or breathing after taking this product, seek immediate medical attention;”
and
“Directions: (Select one of the following, as appropriate: “Take” or “Mix”) this product (child or adult dose) with at least 8 ounces (a full glass) of water or other fluid. Taking this product without enough liquid may cause choking. See choking warning.”[6]”
Hi Marina! I haven’t investigated this myself, nor have I ever heard this before. I will look into it. In the meantime, I will simply allow people to see your comment and investigate for themselves. Thank you for the info!
Should I immediately remove the bread from the pan when it comes out of the oven and cool it on a rack?
I usually let it sit on the counter in the pan for about ten minutes, then lift the loaf out using the parchment paper and let it cool the rest of the way out of the pan. 🙂
What type of flour do you use on your lightly floured surface?
I use whatever flour I have the most of. LOL Seriously, any of the flours you use in the bread dough itself should work fine as the lightly floured surface.
Holy Grail bread! So beautiful! Thank you very much.
I omitted the chia and I used corn syrup in place of maple to keep the flavor more neutral. This is the best vegan gluten-free bread I’ve ever made, hand’s down.
So glad you liked it!
Hi, if I’m allergic to almonds, what flour can I use instead? Thanks
Hi Ronnie! Honestly, almond flour is tricky to sub out. We discovered our son actually has trouble with almond flour, too, and I’ve been making this recipe in multitudes of ways since then trying to get it right. I’ve had varying degrees of failure/success with these attempts. So far, I’ve been using variations of millet, quinoa, amaranth, teff, buckwheat, and rice. I keep trying in hopes I’ll find a sure-fire winner, but so far, if it comes out great one time, the next time it isn’t very good. I’ve yet to discover why I’m getting such variations in results. That’s why I haven’t shared an update with an almond flour sub yet. Until I do, I hope you’ll try some alternatives and see which works best for you. And if you find a sure-fire winner, would you please share? Thank you and good luck!
Hi Carrie, I’m from the UK but living in France so struggling on two counts – getting ingredients and cup sizes! A google search on cup size conversions has given me at least four different cups to grams measurements. When you next make a loaf can you please weigh the ingredients and give me the flour, chia etc. in grams and the water in ml’s if possible. Really keen to try your recipe but don’t want to ruin it before I’ve started with getting the wrong amount of ingredients – I have had too many GF failures already 😉
Hi Jann! Oh, dear! I’m sorry for your struggles. I don’t know when I’ll make this bread again, but I promise I will measure ingredients in weights when I do and update the post. I’ll even try to remember to send you an email when I do…but you might want to check back occasionally just in case I forget.
I completely understand not wanting to have another failure, especially with such expensive ingredients. Stay tuned! I know you’re going to love this bread when you can finally have it!
Xanthan gum is not a bacteria. It is grain that is grown like hole wheat. But its naturally a non glutton and has many health benefits you are unaware of obviously. Xanthan gum is also used in all chewing gums. It’s a binding flour.
I’m actually very well aware of what xanthan gum is; in the interest of keeping the post focused on the recipe, however, I didn’t go into detail. Allow me to do so now.
According to “A Consumer’s Dictionary of Food Additives” by Ruth Winter, M.S. (7th edition), xanthan gum is “a gum produced by a pure culture fermentation of a carbohydrate with Xanthomonas campestris. Also called corn sugar gum.” The definition goes on to explain that the U.S. Dept. of Agriculture has asked for the use of xanthan gum as a necessary ingredient in packaging meat and poultry products, and is also used to thicken, suspend, emulsify, and stabilize water-based foods. additionally, it is used as a “pseudo plasticizer” in salad dressings. In animal feeds, it is used as a stabilizer, thickener, and suspending additive. It is GRAS (generally regarded as safe).
Therefore, I was not incorrect when I stated xanthan gum is a “bacteria grown on corn, produced in a lab”. That is precisely what it is! It is Xanthomonas campestris, which is the bacteria that turns broccoli and cauliflower black, grown on a carbohydrate (which, in the U.S., typically means CORN), then, once fermented, it is dried, precipitated with isopropyl alcohol, powdered, and then placed in your food or sold as a separate ingredient.
It is considered GRAS, a term which means “generally regarded as safe”. This designation goes back to the Food Additives Amendment of 1958, when a list of ingredients was created that were exempt from the new law requiring all ingredients to be properly tested before being put on the market. Ingredients that are GRAS are not required to be vetted in any way by any neutral, third-party, or government agency. Instead, it is initially the manufacturers themselves who assure the government that they have determined their ingredient is GRAS. No conflict of interest, there, I’m sure.
Regardless, xanthan gum was not introduced until the early 1960’s, years after the GRAS designation was created and all existing ingredients were grandfathered in. That means that technically, xanthan gum had not had true, double-blind placebo testing to determine whether it was truly safe to consume or not when it came into use. Instead, some scientists somewhere said “it’s safe!” and the government said “okay!” and suddenly everyone was eating this additive.
In all fairness, there HAVE been some studies done since then (in 1973 on dogs, in 1987 on humans, and in 2009 on humans) that seem to indicate that xanthan gum is actually safe to consume and may even have some health benefits, as you say, though I do have to point out that the substance had been in use for 11 years before anyone decided to even check out the question of safety in a public manner.
In the 2009 study, there were indications that xanthan gum might even have cancer fighting properties – in mice, anyway – though xanthan gum slows down the absorption of sugar in the body, and sugar is a known cancer growing medium, so I speculate personally that this is the explanation for how xanthan gum “fights cancer”. One can easily obtain the same benefit by, you know, not consuming sugar when diagnosed with cancer.
While there is some evidence that xanthan gum lowers cholesterol, it doesn’t appear to do so any better than any other soluble fiber does.
Keep in mind that to get any of the benefits listed above (lowered cholesterol, sugar absorption reduction, cancer fighting benefits, laxative effects) one would need to consume 15g or more per day, and a typical regular diet would only contain less than 1g. Unless one supplements, xanthan gum will not do much good.
It can, however, even in such small amounts, cause problems for diabetics who take insulin lowering medication (since xanthan gum lowers sugar absorption, this can effectively increase the effectiveness of the insulin lowering medication causing diabetic coma), cause choking problems for infants under 1 year of age (which is why it is not allowed in baby formulas any longer), and cause allergic reactions in people sensitive to corn, wheat, soy and dairy.
See, xanthan gum is still grown on corn, and sometimes on wheat, soy, or dairy, and is usually processed on equipment that processes wheat, soy, and dairy. Since we are allergic to corn, soy, cow dairy, and gluten, we cannot consume xanthan gum.
So I return to the brief statement I made in the post that says “Xanthan gum is not what I would call real food; it’s a bacteria grown on corn, produced in a lab. That’s enough for me to want to avoid it!”
Real food is food that has not been processed; xanthan gum is highly processed.
It IS made by growing a bacteria on corn; we are allergic to corn.
It IS produced in a lab; ergo it is not an all-natural, real food, and ergo, I want to avoid it.
As to your statements, it is NOT grown like whole wheat, as xanthan gum is not planted in the ground, watered and allowed to grow, harvested, and ground into flour, which is the method by which whole wheat is grown.
Xanthan gum may be naturally a non-gluten food, but since it is occasionally grown on wheat and is frequently processed on equipment that also processes wheat, it cannot be stated that xanthan gum is gluten-free. One would need to contact the manufacturer of the particular brand of xanthan gum in question to determine if their version is wheat/gluten-free.
I’m sure it is also used in many chewing gums, but as those are almost all either straight sugar and chemicals or some other form of sugar alcohol, we cannot have those as we also manage fructose malabsorption and my child has ADHD. Sugar is horrible for him, and we all react to sugar alcohols. So even discounting my dislike for xanthan gum, chewing gums are not a suitable item for our home. Add to it my dislike of xanthan gum, and, well, we don’t chew gum.
It is a binding flour, but psyllium husk, flaxseed, chia seeds, gelatin, and agar agar all can serve that purpose quite well, so it is not so unique and irreplaceable that one cannot survive without it.
Clearly I am aware of the health benefits of xanthan gum, but I am also aware of the health dangers of xanthan gum. On the whole, for our family and for many others like us, the benefits of xanthan gum do not outweigh the deficits, so, once again, “that’s enough to make me want to avoid it!”
Thank you for your time, and thank you for bringing up this point! I have known for a long time many of the facts I presented in this response, but they were tidbits I picked up here and there along the way. Needing to respond in a coherent fashion forced me to actually seek out sources and evidence for these “random tidbits” in my brain and I feel I am much more learned on the subject now! I appreciate the nudge! I may even turn this into a blog post all of its own. 😉
And whether you like to use xanthan gum or not, you ought to try this bread recipe. It’s really quite good! 🙂
Good explanation on the xantum gum. Citric acid which is in most processed foods used as a preservative is similar. It’s not made from citrus fruits, it’s made in a lab goes through a fermentation processing involving black mold. Most corn derived ingredients are highly processed and involve the wet milling process where they soak the corn kernals in sulpharic acid to extract the corn starch and then many many fake ingredients are made from the corn starch involving more and more chemicals. Literally there are several hundred corn derived ingredients on the market today and all for the sake of making money. They say all of these changes happened in order to feed the world, but how can corn and it’s 200+ chemically soaked ingredients be good for anyone.
I am new to gluten free baking I do not get quinoa flour in my country can I use buckwheat instead of that can I omit the almond flour if no what will I use instead of almond flour. thanks for the recipe I will give it a try
You can try to sub buckwheat for quinoa; I don’t know how that will change the recipe, though. Same for almond flour; you can sub anything else you would like but it will change the final product. There are suggestions online for how to best sub gluten free flours. I’d suggest looking up “Best flours to substitute for almond flour” and see what comes up. Good luck!
Can I use organic cane sugar instead of maple syrup as I do not get maple syrup in my country or can I use honey
I don’t see why cane sugar wouldn’t work instead of maple syrup. Honey would work well, too!
I am excited to try this!! I have multiple food sensitivities, my husband is allergic to wheat and his son has EOE.
THANK YOU for all the tips and insights.
You’re welcome! I hope it works beautifully for you!
Hello dear Carrie,
Thank you so much for sharing your recipe.
I can’t remember how I came acrross your recipe but because I am allergic to gluten and my daughter and family are vegans I decided to try it out. I used a bread machine, basic bread medium crust setting and I was happily surprised how tasty it is. I gave half of the loaf (5 slices) to my son in law and everyone in the family loved it. The only thing is that it was dense & heavy, my son in law joked that he could kill someone if he hitted the person with the bread lol!
I noticed other comments where they used conventional oven and the bread also came out dense and heavy. It’s still the best my family have tried so I’ll be getting together with my daughter to make more tomorrow.
Any idea what is causing the bread to be dense and heavy?
Blessings and thank you!
Hi Connie! You know, I don’t actually know what makes it so dense and heavy. I suspect it has to do with the chia or psyllium husks. If you’re game to try you could see how adjusting the amounts affects the recipe, but that’s just a theory. I really don’t know for certain.
Even as heavy as it is, we all enjoyed it, but I appreciate yearning for a lighter bread to eat.
Good luck and thanks! If anyone has any input on this, please share!
Pingback: Vegan Gluten-free Bread – Food