Unveiling: A Day In the Life of FPIES – The Summers Family

Here it is – the BIG PROJECT I was talking about!

Last month, Darrel came to me with an idea about expanding his photography portfolio by offering to shoot some FPIES families.

We talked about it for a while, and his simple plan snow-balled into an entirely new concept: why not shoot different FPIES families for an entire day to showcase what “A Day in the Life of FPIES” is really like?

We both thought this could be an amazing “Awareness Raising” tool.

As excited as we were, I still has doubts that we could convince anyone else to participate. Letting someone shadow you for a whole day, taking photos and asking questions about your life…well, it’s kind of intrusive, isn’t it?

Still, I asked on the FPIES Facebook message boards for interested families, hoping we could beg 11 other families (one per month for the year) to agree.

In a matter of hours, I had 27 families in the United States alone who wanted to be a part of this project.

More wanted to participate from other countries!

I was blown away!

We immediately began making plans to fly out to Chicago to visit two of the families who expressed interest.

The first weekend we planned to travel, Jed had his bout of Mesenteric Lymphadenitis. Thankfully that turned out to be nothing serious but it scared us enough to cancel.

The next weekend Chicago (and most of the country) was hit with a blizzard.

The next weekend our family came down with cooties and were all out for the count.

Obviously we’ve had some stumbling blocks along the way, but we are still excited and raring to go!

We couldn’t ask anyone to do something we weren’t willing to do ourselves, so this first installment of “A Day in the Life of FPIES” is a simple day at home with my family.

Please take a moment to read and share these stories everywhere you can. The more people who see and understand FPIES, the more children we can help.

I hope these stories are as eye-opening as I anticipate, and that you gain from peeking in on life with a rare disease. Thank you for your support!

A Day In the Life of FPIES - The Summers Family cradlerockingmama

For the “Day in the Life” of our family, we photographed a typical Sunday at our home. The only thing that varied from a normal Sunday and the day we photographed is that normally my husband, Darrel, is not busy being the photographer and participates in household chores a bit more than we could show.

For starters, let me introduce our family.

Our oldest son is Jed. He is 3.5 years old and absolutely amazing. He also deals with MSPI (Milk/Soy Protein Intolerance), typical IgE allergies to egg and peanut, and Fructose Malabosrption.

Our youngest son is Zac. He’s 20 months old and the happiest baby boy you’ll ever meet. He is our FPIES child. As of now, he has multiple known trigger foods/items, and only one safe food. He lives primarily off my breast milk.

My husband, Darrel, is a bona fide computer geek, who happens to be very talented as a photographer. He’s been slowly building a side business in photography over the last two years, in and around our children’s health demands.

Then there’s me. I’m Carrie, and I blog about our experiences living with so many food issues and share recipes, tips, and information right here at Cradle Rocking Mama. I’m currently in the middle of many leave of absences from work to stay home and take care of Zac; as a Flight Attendant, it’s almost impossible to keep him safe and fed when I’m away at work.

On to our typical Sunday…

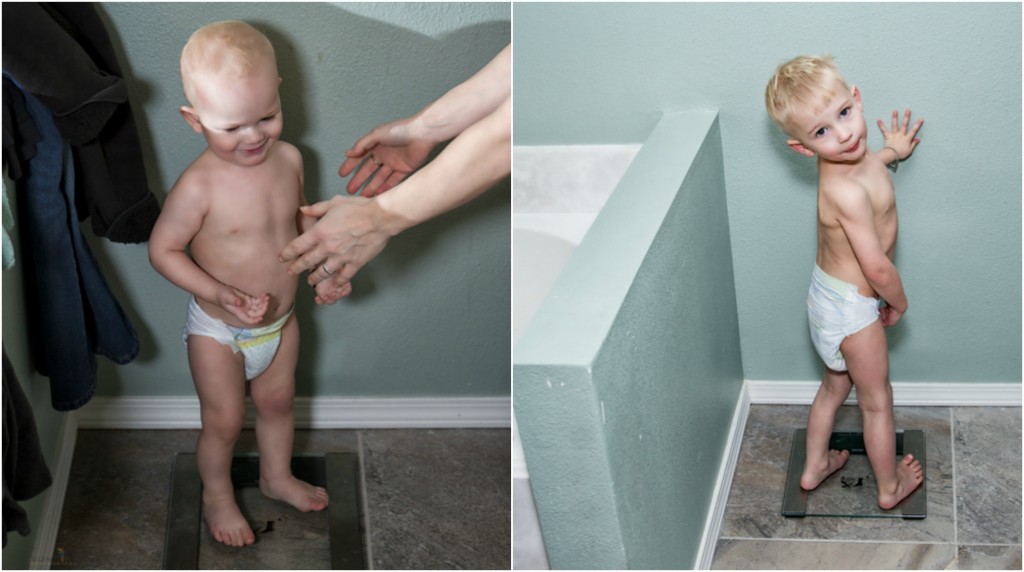
First thing every Sunday morning, the kids get their weekly weigh-in. Making sure our FPIES and Fructose Malabsorbative children are staying on track with weight gain is imperative; the weekly weigh-ins make it possible for us to keep tabs on their health.

Boys Weigh In

This week, both boys weight was good! They hadn’t gained, but they had stabilized in weight after a recent sickness.

After diaper changes and getting dressed (for the adults; the kids both refused to wear clothes this day), it was time to head to the kitchen.

As I said, Zac is 20 months old and has multiple FPIES trigger foods. At this time, the only safe things for him to eat are quinoa and my breastmilk.

To keep my breastmilk safe for him, I’m on what is known as a Total Elimination Diet (TED). We’ve learned that the only foods I can safely eat for Zac are grass-fed and finished beef, russet potatos, quinoa, olive oil, sea salt, black pepper, and stevia.

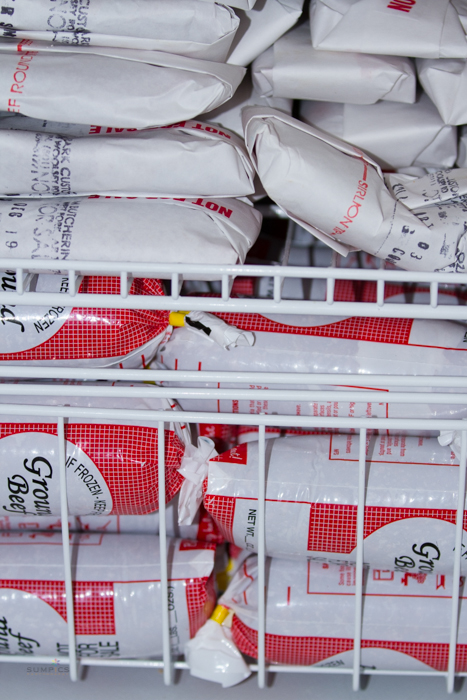
IMG_3832

This photo shows a small portion of what our freezer looks like; we buy whole cows that have been raised to specifications and have them butchered safely for us. We usually have a few hundred pounds of beef in our freezer at any point in time.

Jed has a restrictive diet of his own, as he must avoid dairy, soy, egg, peanut, and anything with fructose (which includes wheat, most fruits, many vegetables, honey, and almost all medicines).

Cooking for my family is an intensive affair.

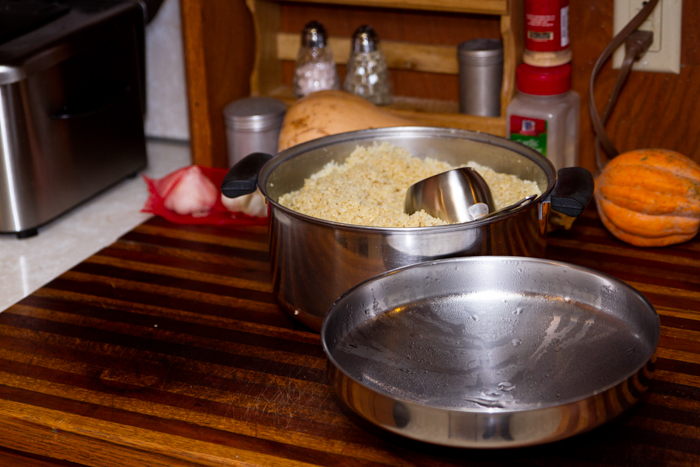
I started off on Sunday by cooking a large pot of quinoa seeds for Zac. I try to cook a big pot of quinoa to keep in the fridge; sometimes it lasts a whole week, sometimes I have to do it twice per week. On this day, I cooked 5 cups of quinoa seeds.

IMG_8503-Edit

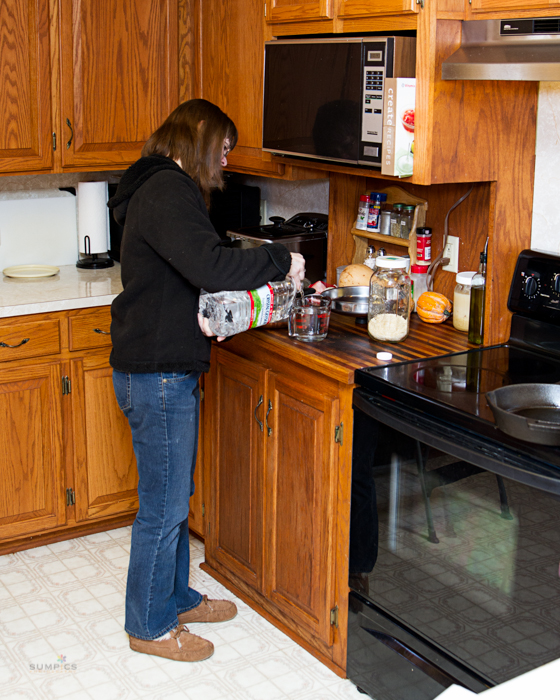
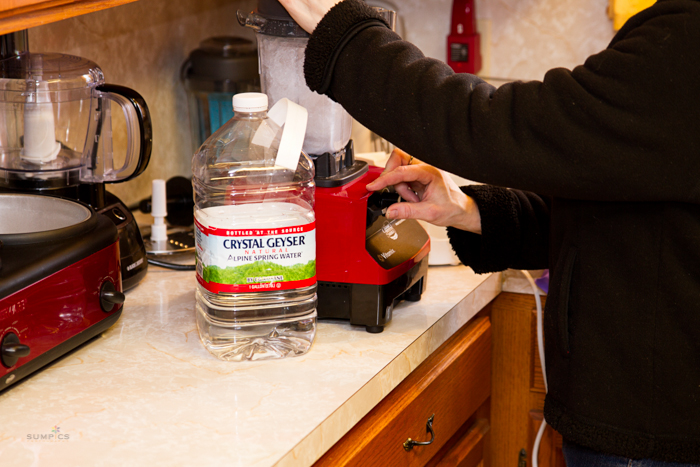
We have to be careful with water, as well. Water can have additives, and Zac is reactive to corn (which many additives are made from). We’ve noticed that he does better overall if we keep his water supply as additive-free as possible. Consequently, we cook and wash all of his and my food and dishes with one particular brand of bottled water.

IMG_8552-Edit

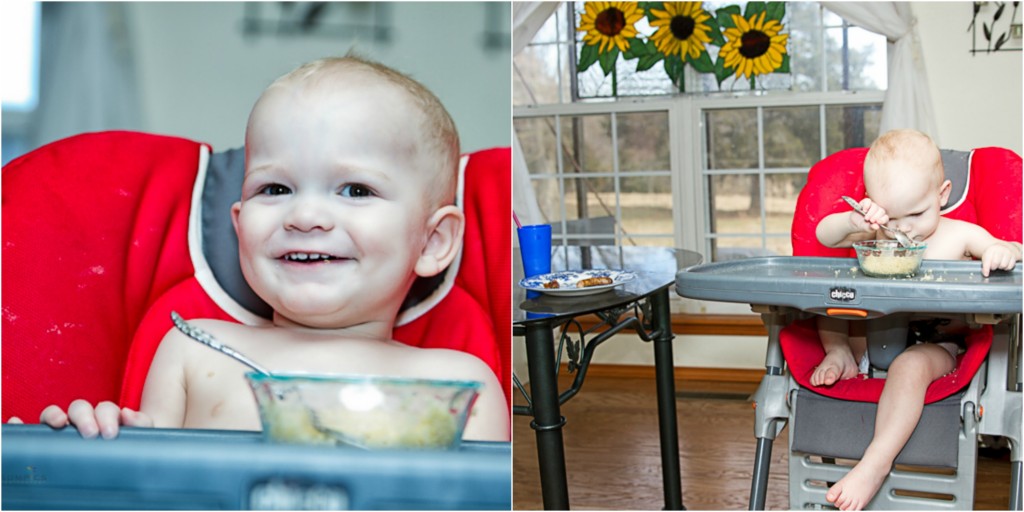
After getting the quinoa cooked, we served him a bowl of quinoa for breakfast. He loves feeding himself!

Zac Feeding Himself

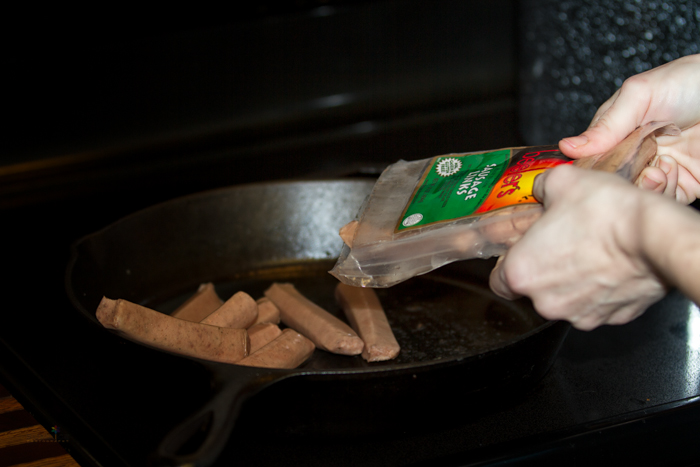
While I was cooking the quinoa, I also cooked some fructose-free sausages for Jed’s breakfast. He also asked for a bowl of cereal, which we use quinoa milk for. That left us low on quinoa milk.

IMG_3731-Edit IMG_8545-Edit

Jed loves to drink smoothies, which he calls his “special drink”. Darrel makes them safe for his fructose issues, and we often have leftover smoothies in our fridge. I also make our quinoa milk from scratch, and keep a pitcher in the fridge at all times.

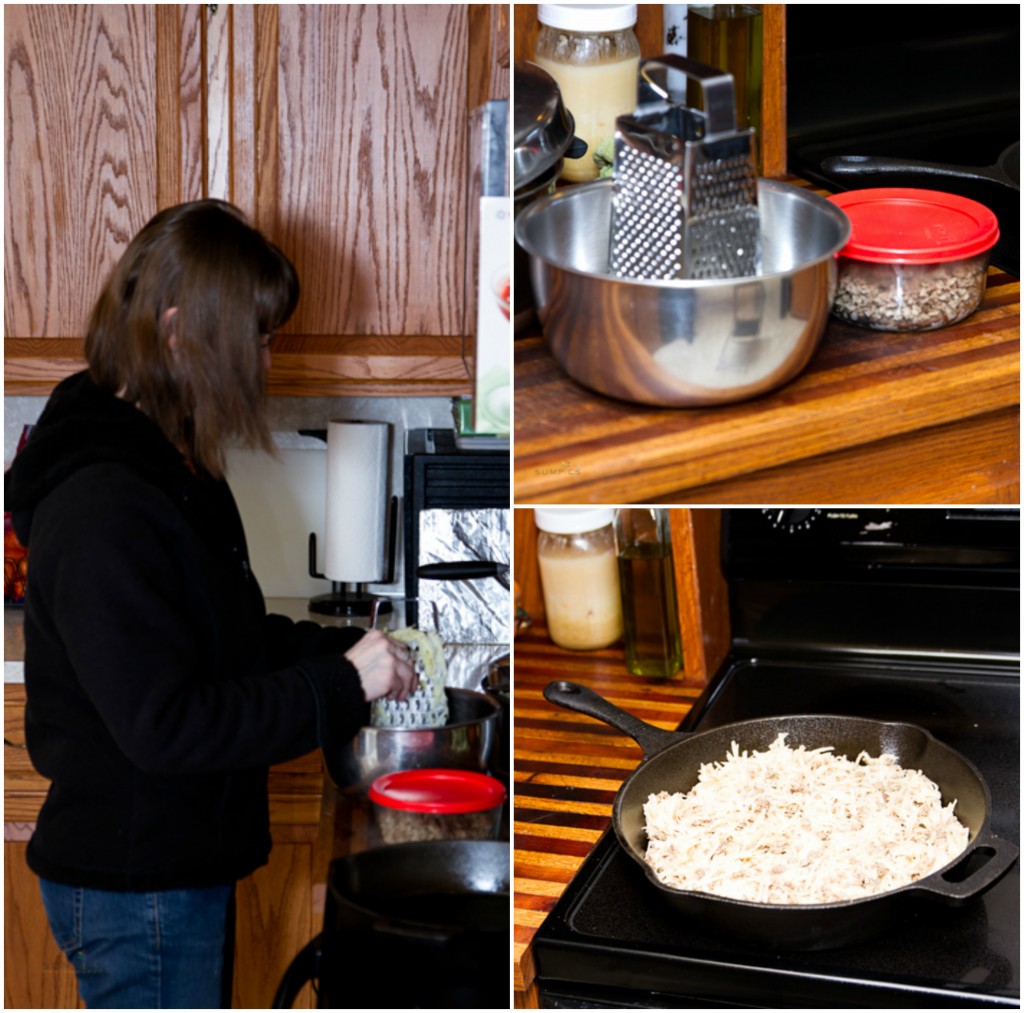
I started cooking breakfast for myself then; a recipe I created that I call Hamburger Hash. Very simple, it’s just grated potatos and ground beef with salt and pepper, pan fried in olive oil just like hash browns.

Cooking Hamburger Hash

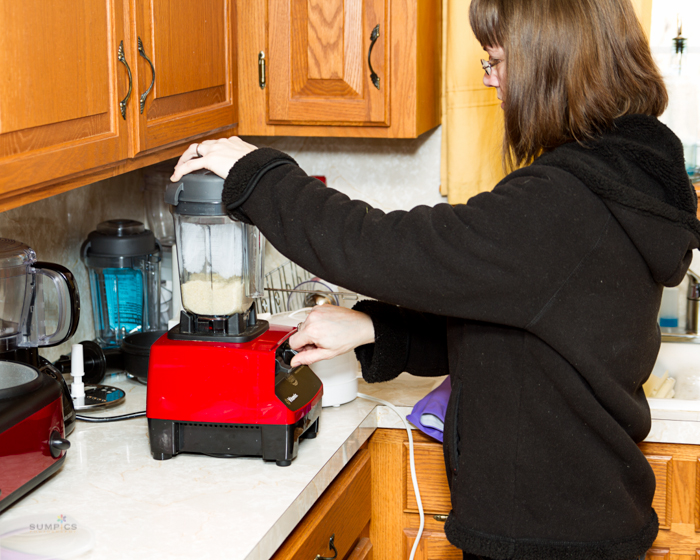
While that was cooking, I headed over to the blender to work on some more food for Jed and Zac.

IMG_8547-Edit

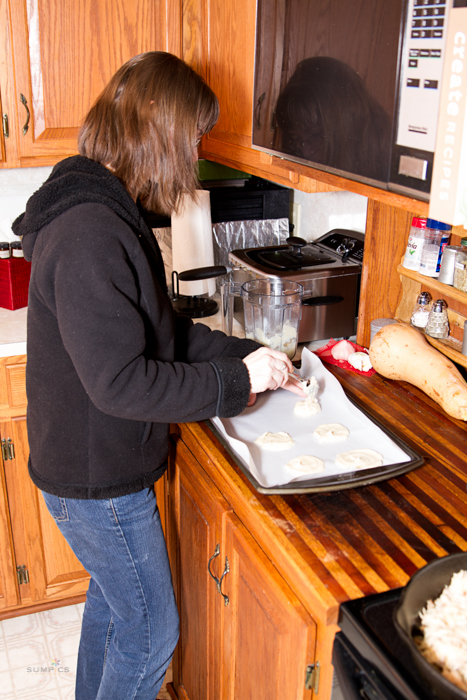
I’ve been experimenting lately with trying to create some sort of flatbread, tortilla type thing made of just quinoa and water for Zac. Today was another ratio change and experiment. This time they came out sort of puffy like a sopapilla!

IMG_8556-Edit

IMG_8622-Edit

Then I made some more quinoa milk for the boys to drink and use.

IMG_8605-Edit

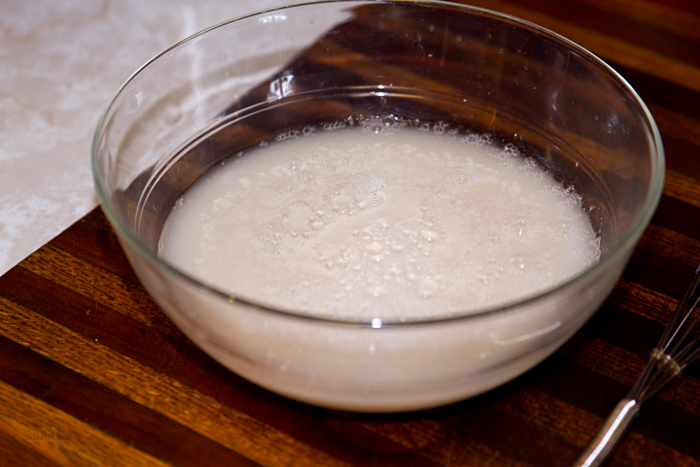
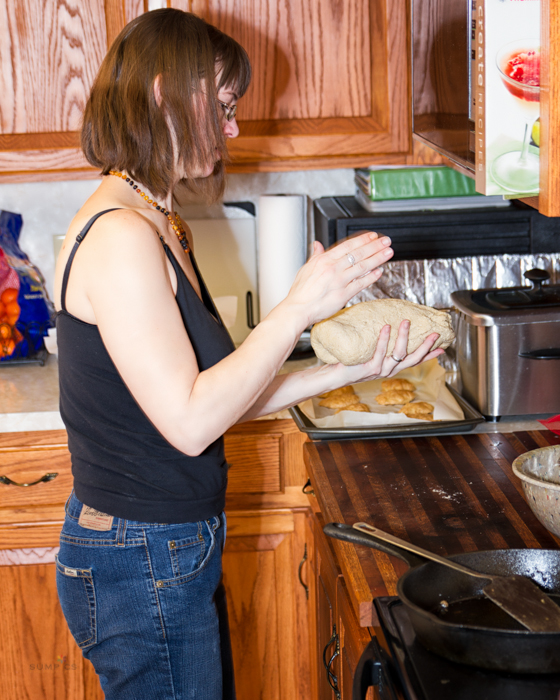
While that was going on, I started proofing the yeast for some bread. Because of Jed’s fructose issues, he reacts to wheat, so I have to make our bread from scratch. I try to make a loaf every weekend for use throughout the week.

IMG_8618-Edit

I got the bread set to rise just about the time my breakfast was ready, and as usual, ate it in the kitchen. Darrel ate his breakfast at the dining room table, but if Zac sees me while I’m eating, he yells for me the whole time. So I have to hide to eat.

IMG_8603-Edit

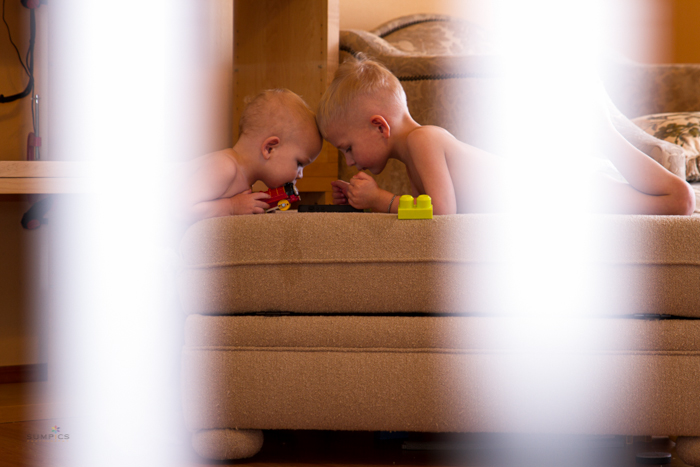
The whole time I was cooking in the kitchen, the boys were playing by themselves in the living room. We had a movie playing over the TV, but they weren’t interested in that very much once they “borrowed” my phone. Jed had a good time introducing his little brother to one of his favorite pre-school apps.

IMG_8609-Edit

Jed can come and go throughout the house as he pleases, but Zac spends his days confined to the living room. The only times he ever leaves it is for sitting in his high chair at meal times, diaper changes, showers, and bedtime. His world is seen through the baby gate that protects him from the kitchen and dining room, and the food dangers they contain.

IMG_8594-Edit

When he wasn’t following his brother around trying to play games on my phone, Zac played by himself. But wherever he went, he carried his spoon with him.

We only discovered quinoa was safe for him in November, when he was 17 months old. He is so in love with being able to eat that he insists on carrying a spoon with him everywhere, now.

IMG_3640-Edit

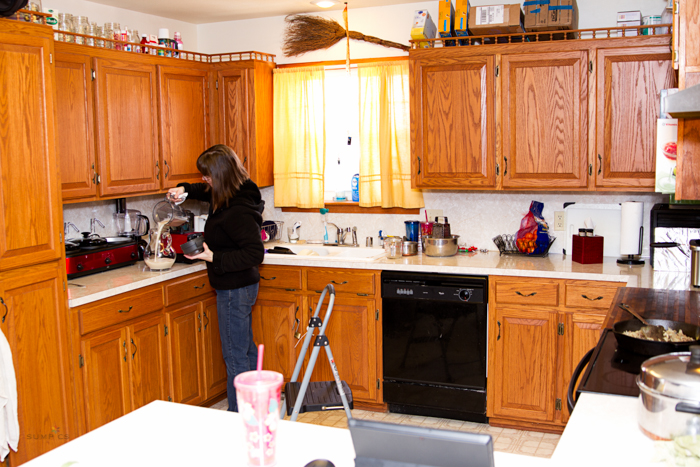
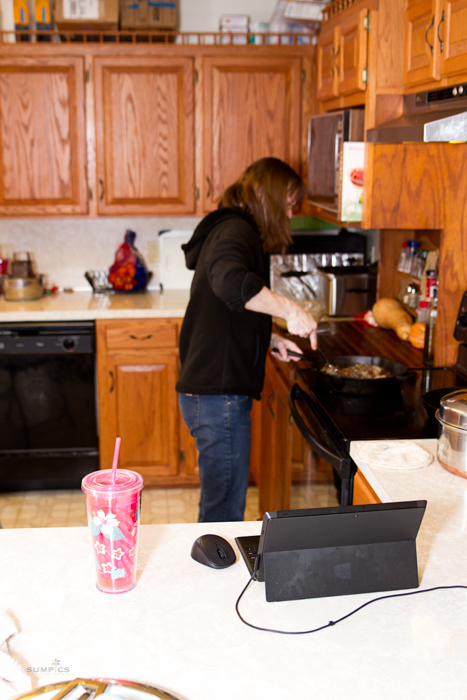
Because I spend so much time in my kitchen, I’ve set up a computer work-station on my counter. It’s where I pay bills, blog, and keep track of my recipes. I usually sit in front of the computer on Jed’s step stool to eat.

IMG_8614-Edit

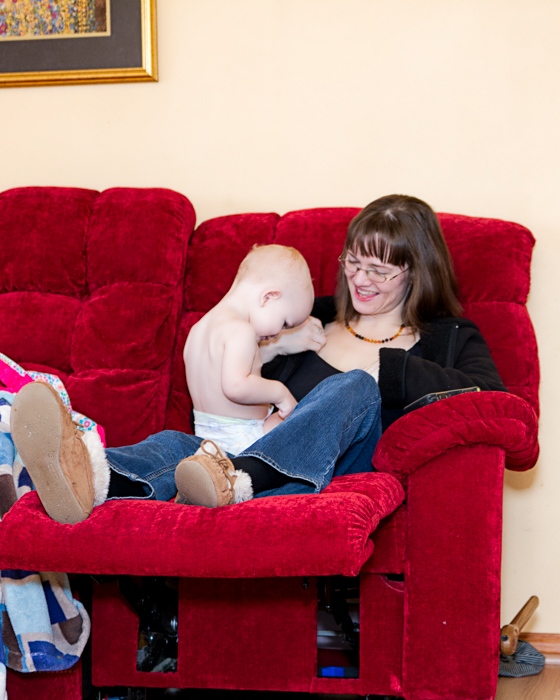
As soon as I’d finished eating, I headed into the living room to nurse Zac. Aside from the quinoa, he’s still primarily breast fed. Basically we nurse on demand, and he always demands to nurse after I finish breakfast.

This is still one of the nicest parts of my day. Zac nurses, and Jed usually lays on my legs or sits next to me on the couch and we all snuggle. On this day, Zac nursed twelve times in the 24 hour period between midnight and midnight, for a total of almost 4 hours of nursing time.

IMG_8730-EditAfter our snuggle/nursing session, I went back to the kitchen to punch down the bread and get it into the loaf pan. I unloaded the dishwasher I’d already run that day, and reloaded it.

IMG_8619-Edit

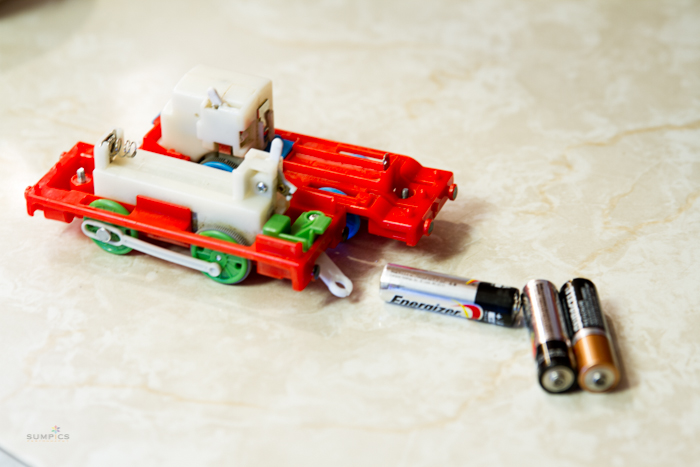
Part of the danger of FPIES for us is that Zac is super sensitive to trace contaminants. Every time his big brother brings his toy trains (or any of his toys) into the kitchen, we have to give them a good “washdown”. They have to be scrubbed with soap and water if they have touched any food at all.

IMG_8624-Edit IMG_8625-Edit

Jed’s toys get lots of wash downs. He is only 3, after all.

Because Zac is so sensitive to soy, corn, and rice, and is still teething (therefore prone to chewing and gnawing on anything he can grab) we have to strictly prohibit crayons, markers, and most arts and crafts projects. Poor Jed has only been allowed to practice coloring under strict supervision and in the rarest of circumstances.

Even with our close supervision, he has managed to sneak crayons into places where Zac got a hold of them and had reaction symptoms for days or weeks to the contaminants they contain. For our own mental health and Zac’s physical health, they are all now banned from our house.

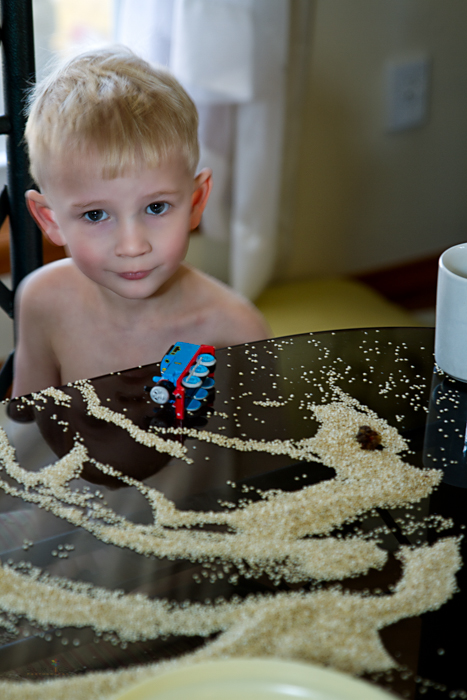
However, we recently realized that we could allow Jed to use quinoa seeds as a sensory/pouring/craft/play activity tool, similar to the way so many people use rice or beans for their pre-schooler. He loves playing with his “mess”, as he calls it.

IMG_8518-Edit

It is a mess, but he gets to practice skills he otherwise would be limited in practice on, like pouring and measuring, so it is worth it.

While I worked on bread and kitchen cleanup, and Jed played in his “mess”, Zac went back into the high chair to eat my quinoa experiment for lunch. He liked them, but since I still don’t quite know what to call them, I doubt I can use it in my blog just yet.

IMG_8790-Edit

When we were done with kitchen cleanup, the bread was ready to go into the oven. I put the bread on to bake, and took Zac to put him down for a nap. This day, he went down easily and slept for two hours, which was lovely. Sometimes, if he’s reacting, we don’t get much naptime, or he needs me to stay with him the whole time he naps. Fortunately, he’s at baseline at the moment so we were able to have a normal naptime.

While he was napping, Jed and I went back to the kitchen to get some lunch and dinner preparations.

I had eaten breakfast so late that I wasn’t hungry. Jed hadn’t finished eating his breakfast, and he was happy to eat that re-heated. Lunch isn’t always so easy for us, but I’m always grateful when it is!

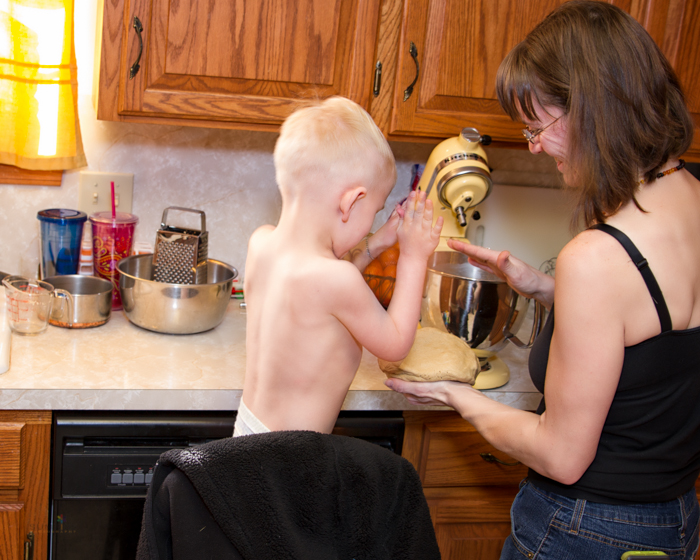
As soon as we’d finished eating, we started on dinner. I was trying out a new recipe for a gluten-free pizza crust, and Jed really liked helping me shape it into a ball for its’ rise.

IMG_8630-Edit

With so many food issues in our house, I try to encourage Jed to help in the kitchen as much as possible so he doesn’t develop any ‘fears’ of food. It’s hard, since I have so much cooking to do daily with so little time to do it, but I try. He always loves to help.

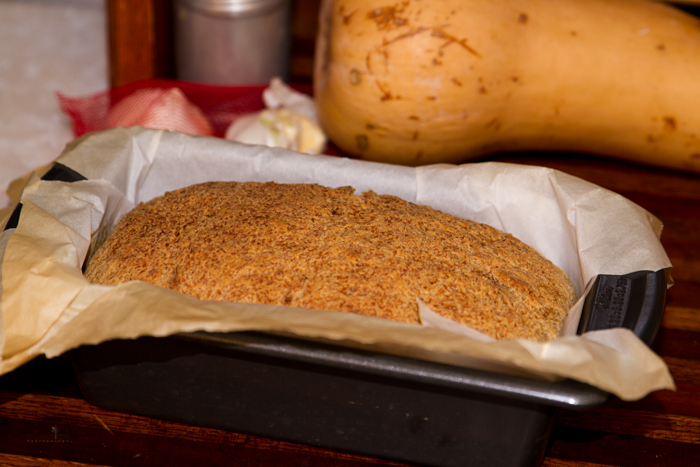
The bread came out of the oven, and I had to fight Jed constantly to keep him from digging in to it. This recipe requires it to be completely cooled before you cut into it, or it comes out sort of gummy and yucky. Jed never wants to wait until it is cool before eating it!

IMG_8637-Edit

Zac woke up, and we nursed again. Jed played with his trains this time.

IMG_8511-Edit IMG_8640-Edit

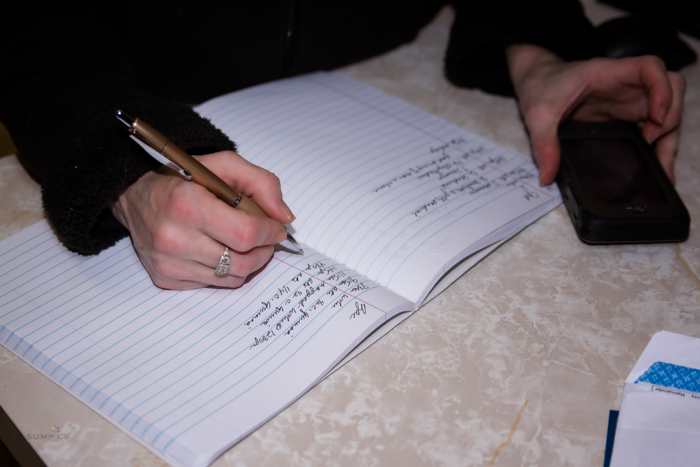
We keep detailed notes on each child. Every bite of food they eat, their moods, their diapers, their behavior, their sleep patterns are all documented.

IMG_9001-Edit

I keep it pretty simple: just a regular composition book. Each boy gets one side of the page, and each folded out page is one day. This has been a life-saver in helping us determine reactions.

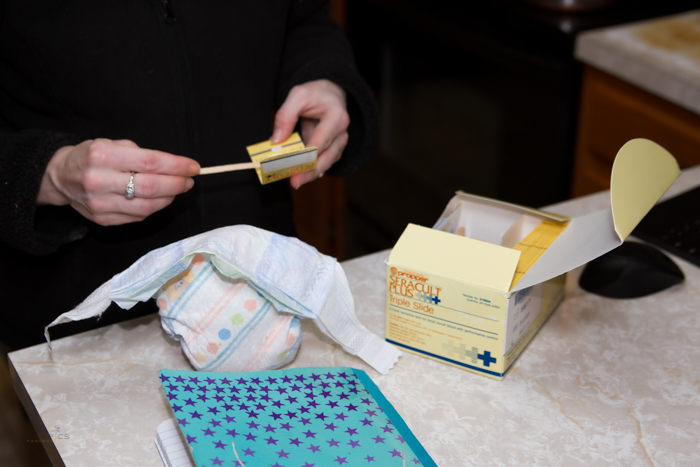
Zac had a dirty diaper, and since he was coming off antibiotics that we weren’t sure he would tolerate, we tested it for occult blood.

IMG_9003-Edit

One of the surest signs of a reaction, for us, is the presence of blood in his stool. Before we got these test kits, we would have to drive the dirty diaper to our pediatricians office to have them perform the exact same test. This is much easier – and instant results are nice. This diaper had no blood, thankfully.

After a good hand washing, I returned to kitchen duties.

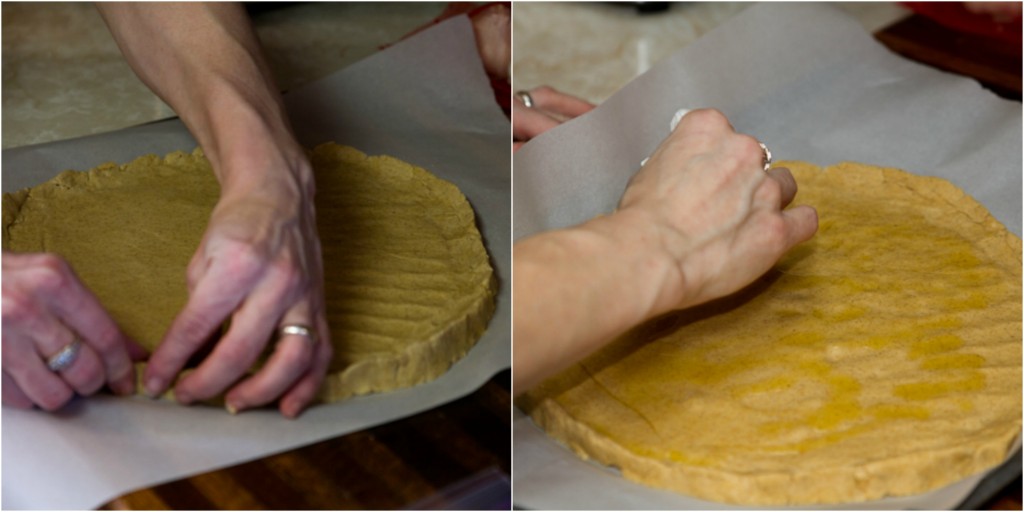
The pizza dough had risen enough that I could roll it out. It was a new recipe, and it didn’t turn out like I’d expected. In the end I had to use my hands to press it into shape.

Then it needed to be coated in olive oil. I couldn’t find my pastry brush anywhere, so I resorted to using my hands to spread the oil around.

Making pizza dough

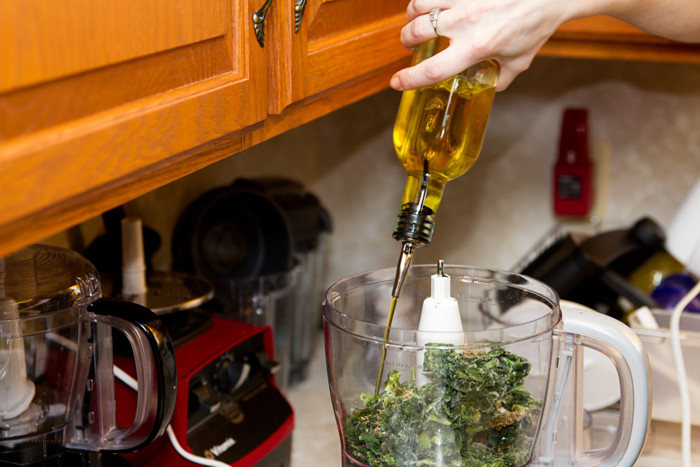
I moved on to making the ‘sauce’ for the pizza. Tomato sauces are not safe for Jed due to his fructose issues, so I created a spinach/basil/olive oil pesto-style sauce instead.

IMG_8783-Edit

You can see that we have two food processors on our counter. One is for general use; the other is used only for Zac’s safe foods to avoid cross-contamination.

That’s the same reason we have multiple blender containers. One is for general use, the other two are for Zac safe foods only. I use one to grind quinoa flour for recipes, and the other for liquid creations, like the quinoa milk.

We are also careful with our dishwashing procedures, and have three scrub brushes at our kitchen sink at all times: one for general dishes, one for my dishes, and one for Zac’s dishes. Our cooking utensils are sorted similarly, though we are slowly transitioning to all stainless steel spatulas and spoons that can be used for all foods and sterilized between uses.

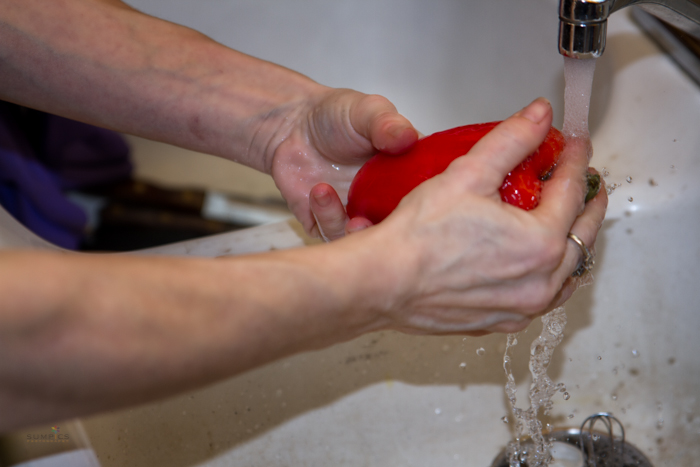
After making the sauce, I washed and chopped a bell pepper.

IMG_8797-Edit

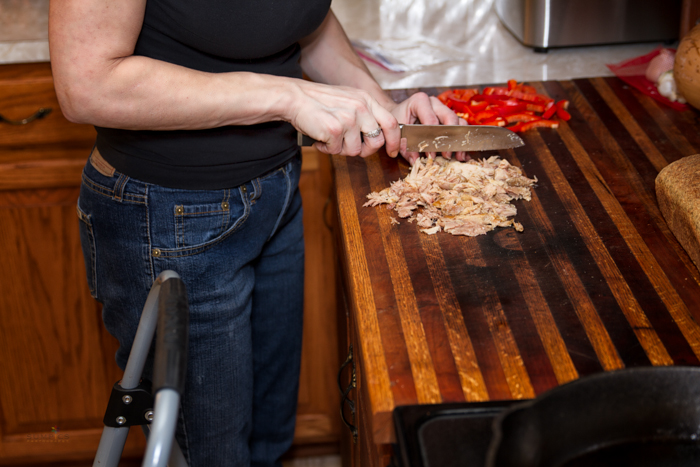
Thawed some pre-cooked, frozen chicken and chopped it into bite sized pieces.

IMG_8810-Edit

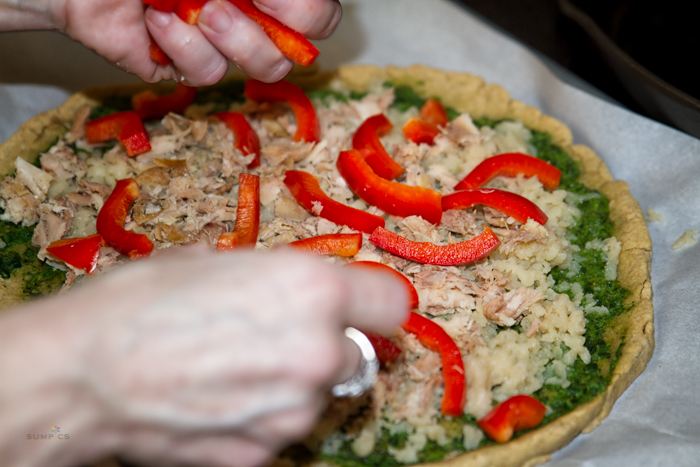
I shredded some vegan cauliflower based “cheese” that I’d made the day before, and the chicken and the bell peppers went on as toppings for the pizza. It went in the oven.

IMG_8833-Edit

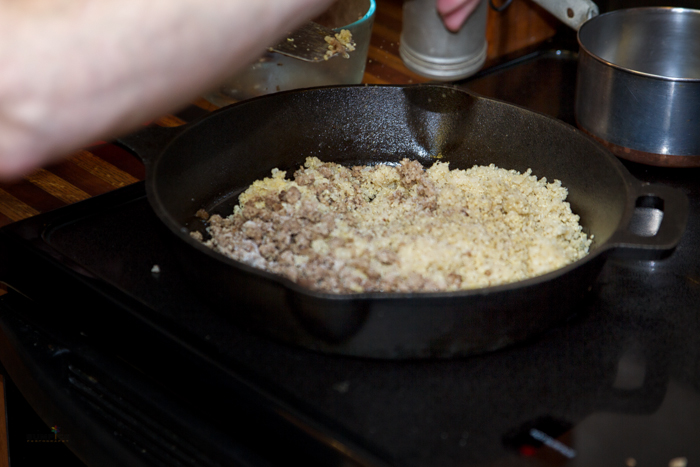
Then I started making my own dinner. Browned ground beef and quinoa heated up together on the stove with some olive oil. It’s really simple, but very tasty!

IMG_8862-Edit

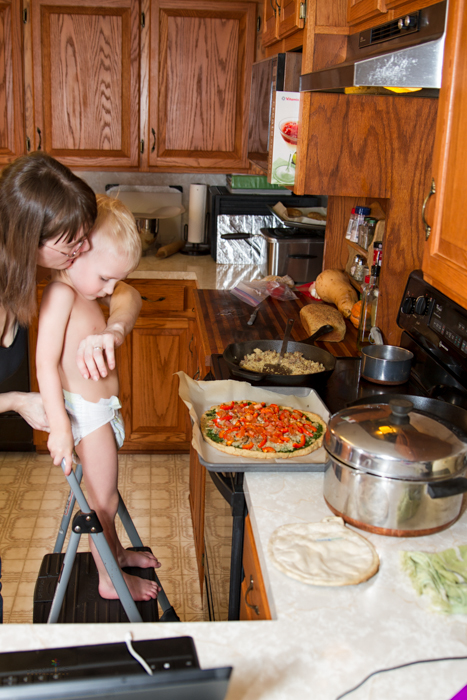
Jed likes to use his step-stool to help in the kitchen. He usually pushes it to be exactly where I need to be working. Here, I’m pulling him back to a safe distance so I can open the oven door.

IMG_8910-Edit

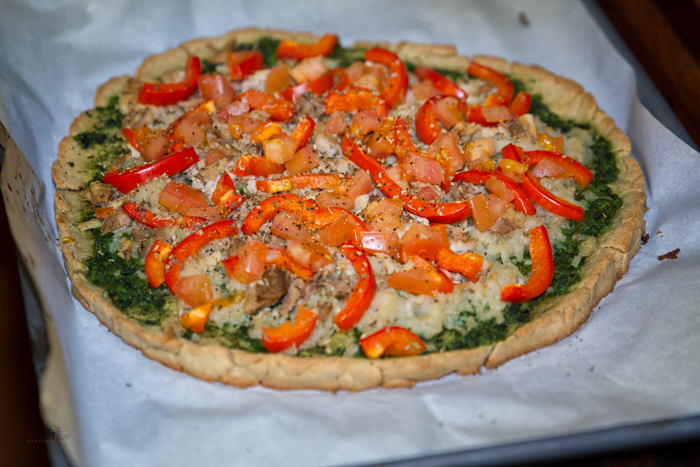
Pizza’s ready!

IMG_8925-Edit

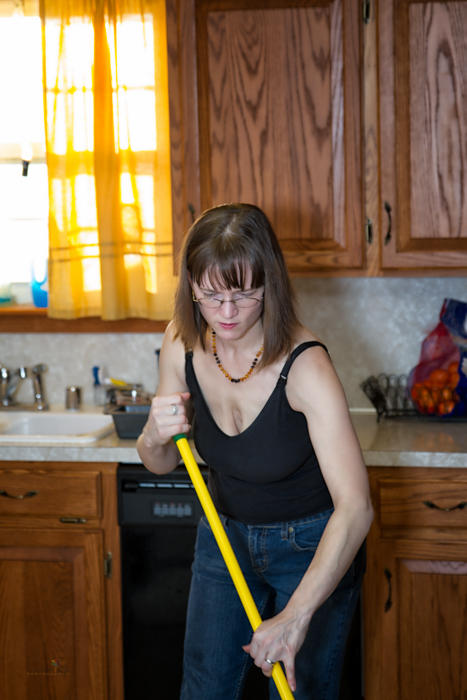
Several times per day, I sweep the floors. The living room gets swept at least once per day, sometimes twice, but the kitchen and dining room are swept no less than 3 times daily, and sometimes as many as 9 times per day.

IMG_8889-Edit

If food has been eaten in my kitchen or dining room, the floors get swept.

IMG_8948-Edit

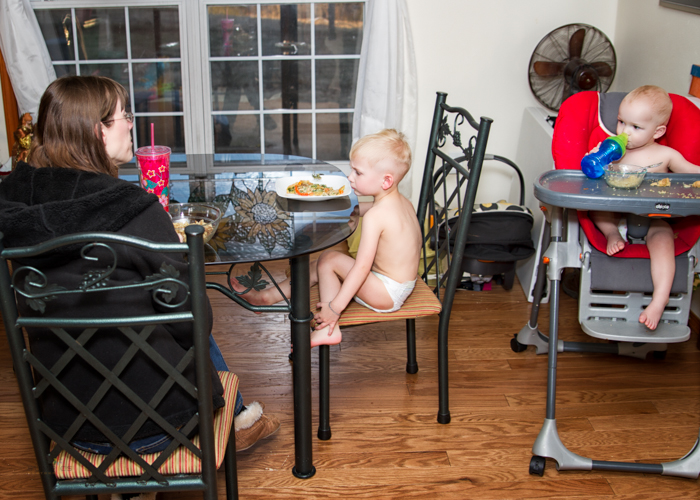
This is how we usually eat dinner. That is the closest that Zac has ever been to our dining room table. Zac sits in his high chair and eats his quinoa, whatever version of quinoa I’ve made for him. The rest of us eat at the table. Usually Darrel eats whatever I’ve made for Jed, though occasionally he will eat my version of dinner.

Whatever Darrel chooses to eat, every meal time in our house requires cooking three different meals to fit three different dietary needs.

This night was only the second time in Jed’s life he’d ever had pizza. It’s very hard to find a dairy, egg, wheat and fructose free pizza anywhere! Most people consider pizza a convenience food; something to order in on a lazy night or pop in the oven from the frozen food section. You can see how, with FPIES and other similar food intolerances, there is no such thing as a convenience food.

I wish I could say the pizza turned out delicious. It was good, Darrel said, but the crust didn’t want to hold together and in the end they had to eat it with a fork. Obviously more experimentation is needed to make a realistic pizza for my son.

After dinner we bathed the boys and went through our bedtime routine. I needed Darrel’s help with that, so we basically stopped photographing our day at dinner.

Jed sleeps in his own bed in his room, but Zac still sleeps in our bedroom due to the 2-5 times per night he wakens to nurse. After 20 months of that frequency of night wakings, I’m exhausted, but I would be incapable of functioning if I had to go to another room, get him from his crib, carry him to a chair, sit and nurse him, and reverse the process. For all our safety and mental health, having him in our room is the right decision to make.

One day he will move past breast feeding and can join his brother in “the boys room”.

After the boys were showered, we read books and said prayers and tucked them in to bed. They fell asleep quickly, and Darrel shortly followed them to bed.

Despite all the cooking I had done on Sunday, I had not eaten quite enough food to maintain my milk supply. Keeping up with the demands of a 20 month old boy is physically taxing! So I stayed awake and made myself a snack of homemade french fries.

Then I finished loading the dishwasher and ran it for the second time that day.

Finally, tummy full and kitchen clean, I went to bed. Just about the time that Zac woke up for his first middle of the night feeding.

And that is a Day in Our Lives with FPIES.

___________________________________

You may have noticed that at the beginning of our story, I said this is a typical Sunday in our home. We said prayers at bedtime, but did not go to church, which might be confusing for some. This is because we haven’t found a way to keep both boys safe at church, due to the prevalence of snacking and presence of arts and crafts supplies. We have a wonderful church family, and we miss them. FPIES has taken that away from us…at least for now. One day we will be able to go to church again, but right now our children are too sensitive and too young to expose to such an uncontrollable situation.  

___________________________________

Thank you for reading our story. If you have any questions, please don’t hesitate to ask! Darrel and I are looking forward to sharing more FPIES stories throughout the year to help raise awareness of exactly how FPIES changes the lives of the children and families who struggle with this rare disease.


Thanks for reading! Make sure you don’t miss out on any of the great recipes, tips, and stories on my blog by subscribing! There are options for blog readers or email subscription at the top of the page.

Leave a comment while you’re here, too! I love chatting with all of you!

Stay healthy and happy!

Fructose Friendly Refried Beans

Fructose Friendly Refried Beans cradlerockingmama

Well, I underestimated how much time and effort would be needed to complete my BIG SURPRISE PROJECT (kids, anyone?), and it’s not quite ready yet. Sigh.  Soon, I promise!

In the meantime, how’d you like some refried beans?

Sure, you can go to the store and buy a can (even though those are usually disgusting), and there are tons of tutorials online for how to make excellent refried beans. I could even give you an excellent recipe that I’ve used for ages that starts with simple, dried pinto beans.

One problem: if you deal with Fructose Malabsorption, pinto beans can be…problematic. 

Sad as it is for us to accept, Jed can’t tolerate pinto beans. (Of course not! They’re only $1 per pound!) So we’ve been living “refried bean-less” for many months.

Until last week, when I saw a can of Fava beans in my pantry and thought “Why not?” It made a decent hummus…why couldn’t it make a decent refried bean?

So I tried it. And it worked. Kind of.

Darrel says they were good, but they don’t taste like traditional refried beans. He went back for more, though, which I always take as a good sign!

Jed has a case of the Tremendously Terrible Three’s and has been refusing to eat ANYTHING I offer him lately. So, he might actually like this one day. If I can get him to eat it. (Very ready for this phase to be over with!)

If you can eat pinto beans, by all means, make the original. I miss pinto beans. They’re wonderful.

But if fructose or pinto beans in general are a problem for you, give this a shot: it will work perfectly on a tostada, taco, or other delicious dish!

One word about the spices: feel free to double them. Seriously. Darrel and Jed are notoriously sensitive to spicy foods, so I always try to keep the spices on the lower side in my cooking. I wouldn’t be surprised if this NEEDED to be doubled to be considered delicious by most people, but since I didn’t make it that way, I don’t want to accidentally burn your taste buds off by recommending it from the start.

Try it with the amounts I’ve listed, let it cook for a bit, and then taste it to see if you need to kick it up a notch. Leave me a note if you find the seasoning needs a bit of tweaking, please! Thanks, and enjoy!
Fructose Friendly Refried Beans
 
Prep time
Cook time
Total time
 
Refried beans made with an unconventional bean for the fructose-sensitive.
Author:
Recipe type: fructose-free, side dish, dip
Cuisine: Mexican
Serves: 2
Ingredients
  • 1 can Fava Beans
  • 1 tsp. cumin
  • ½ tsp. paprika
  • ¼ tsp. chili powder
  • ¼ tsp. salt
  • ⅛ tsp. black pepper
  • 2 c. water
Instructions
  1. Rinse and drain the beans.
  2. Add the beans and water to a saucepan.
  3. Add the seasonings, and simmer for half an hour.
  4. Get out an immersion blender or potato masher and mash those beans up as much as you like.
  5. Enjoy your non-pinto refried beans!
Have you made refried beans out of a non-traditional bean before? How did that work out for you?

Rocephin NON-Reaction?

Rocephin NON-Reaction cradlerockingmama

Last week, when we needed to give Rocephin shots to Zac thanks to a double ear infection, I was sure we were about to endure another FPIES reaction. After all, he’d reacted to his last round of shots.

Imagine my surprise as each day passed with NO signs of a reaction whatsoever.

Finally, on Saturday night, he started having some diarrhea. It had mucous, and was kind of stinky, but no blood, no bizarre colors, and no acidity or diaper rashes.

Even though it persisted through Sunday, it never got worse. Since diarrhea is typical for any person taking antibiotics, I had to step back and acknowledge that Zac appeared to be having a non-reaction to the Rocephin.

This was dreadfully confusing to me!

Then I went back over my notes from his last Rocephin experience. Looking at it in hindsight, he did begin to have diarrhea from the shots…but the green, mucousy, acidic diapers didn’t start until AFTER he chewed on a stray bit of crayon he’d found.

It seems as though I made a rash assumption last time he got the shots. I assumed the ‘reaction’ was from the shots AND the crayon, when apparently it was only from the crayon.

Boy, am I ever glad to be wrong about something!

And can I just say: I was so frustrated with the lack of safe antibiotic options available to us last week, but now am so grateful to have been “forced” back into the shots!

Now I know they still work for Zac. We still have a safe antibiotic for him. Praise God!

Now, I’m just not sure what to make of the inside of his ears.

Thanks to the Dr. Mom Otoscope, I took a peek into his ears the last two nights.

One ear still looks like it has an infection. The other looks like it is ruptured. Since I’m new to this otoscope-ear-peeking, though, I may be misreading the signs.

So today will have a call in to our pediatrician to see if this is concerning, or if we should wait a few days before heading back in for an appointment.

Does anyone know how long it should take Rocephin shots to kick out an ear infection?

__________

Meanwhile, in Jed’s world, he seems to be all better.

Physically, at least.

Behavior-wise, he’s been a pill.

He refuses to eat ANYTHING I make for him. He’ll go so far as to proclaim loudly that he doesn’t like a dish, calling it “icky”…even when we’ve never served it to him before!

He’s combative and argumentative, announcing “No” at every opportunity.

He’s regressing on some basic things he’d already mastered or almost mastered. Potty training is a no-go. Dressing himself is a battle.

He tells us he doesn’t want to grow bigger, he wants to “grow little. Forever!”

I’d say he’s acting fructosed, and at times it does seem that way, but we are being very strict on his diet and there isn’t that…frustrated desperation in his actions that comes with a fructose reaction.

No, this is all Jed.

And I have no idea how to nip this behavior in the bud.

Does he want/need something from us and is acting out to get it?

Or is he just being THREE and this will pass in time.

Either way, he’s losing trains at an alarming rate each day, and Darrel and I are at our wits ends.

When he’s being good, he is SO wonderful to be around!

When he’s being difficult, he’s so hard to deal with.

It’s frustrating.

Anyone else’s three year old ever act like this? Please say they grow out of this stage!

__________

If all goes well, I will be able to reveal the exciting project I mentioned at the beginning of the month (that bad weather and illness has delayed) tomorrow. I’m so excited! So check back to see this coolness unveiled!

Better yet, subscribe so you don’t miss anything! Enter your email address under the header “Don’t Miss A Thing”…and you won’t! Thank you!

Frugal Friday – Organize Your Debt

Organize Your Debt cradlerockingmama

Okay, back to our “clean up your finances” series of Frugal Fridays!

Today we’re going to talk about the “D” word: DEBT.

Ick, I know.

But necessary. After all, the only way to truly be in charge of your finances is to have no debt. I’d go so far as to say that the only way to truly be in charge of your own LIFE is to have no debt.

Proverbs 22:7 says “The rich rules over the poor, and the borrower is the slave of the lender.”

I don’t know about you, but that thought pretty well grates on my nerves! I hate being in debt because it automatically limits my personal autonomy. I can’t go on vacations, treat myself to anything, or give as freely as I’d like when I’m in debt, because VISA and Bank of America own my money…and the time spent earning that money.

It ticks me off, frankly. You?

There’s only one thing to do about it, though, and that is to get rid of debt. How do we do that, though?

We start by taking an honest look at what we owe and to whom we owe it.

Remember all those numbers I threw around in the first post of this series? Well, I’m still making up numbers, but I got a little more realistic on my examples.

So grab a pen and paper (or a spreadsheet) and start listing off every debt you have.

In one column list the total amount owed on that particular debt, and in the next column write down your monthly payment on said debt.

DEBT TTL Owed Monthly
Mortgage

118,000.00

1000.00

Car Loan

16,000.00

308.00

Student Loan

48,000.00

152.00

Credit Card

22,000.00

500.00

Credit Card

4,000.00

75.00

TOTAL

$208,000.00

$2,035.00

If you really want to scare yourself, total those columns up.

Somehow it doesn’t seem so bad to say you owe X amount here and X amount there; adding it all up and saying “I owe $208,000 total” makes for a much more eye-opening experience.

Okay. Now we can add that in to our monthly expenses.

Mortgage

1000.00

Car Notes

308.00

Phones

125.00

Electric

200.00

Water

40.00

Annuals

453.00

Groceries/Gas/Misc. Living

1457.00

Student Loan

152.00

Credit Cards

575.00

TOTAL

$4,310.00

Next write down all your income. Whether it is from a job, interest payments, spousal support, rental income, whatever. Write it down. For our purposes, use your NET paycheck. We’re only interested right now in the amount you can actually use.

INCOME
Job #1

2900.00

Job #2

1600.00

TOTAL

$4,500.00

If you’re lucky, your income will exceed your expenses. (My imaginary family is lucky, by a mere $190 per month.)

If, however, you’re in the same unfortunate position as we are, your expenses exceed your income.

Take a deep breath: we’ll get through this.

But not today.

Today it is enough to know exactly where we stand; to see the total financial picture of our families.

Next week, we will move on to Making A Plan.

But for inspiration, take a peek at what our imaginary family would be living like if they had NO debt:

EXPENSES
Phones

125.00

Electric

200.00

Water

40.00

Annuals

453.00

Groceries/Gas/Misc. Living

1457.00

TOTAL

$2,275.00


INCOME


Job #1

2900.00

Job #2

1600.00

TOTAL

$4,500.00

Difference

$2,225.00

Much better, right?

Read the rest of the series:
Part One: Where Are You Standing Financially?
Part Three: Make a Plan
Part Four: Focus on the Details
Part Five: Design Your Dream Life


So where did you fall? Do you have more money than bills or more bills than money?


Don’t forget to subscribe so you won’t miss the next part of the series! 

Brown Thumb Gardener: Plan Your Garden

Brown Thumb Gardener - Plan Your Garden cradlerockingmama.com

Okay, time to get back to gardening!

It is almost the end of January, and at this point there are two things that must be done soon.

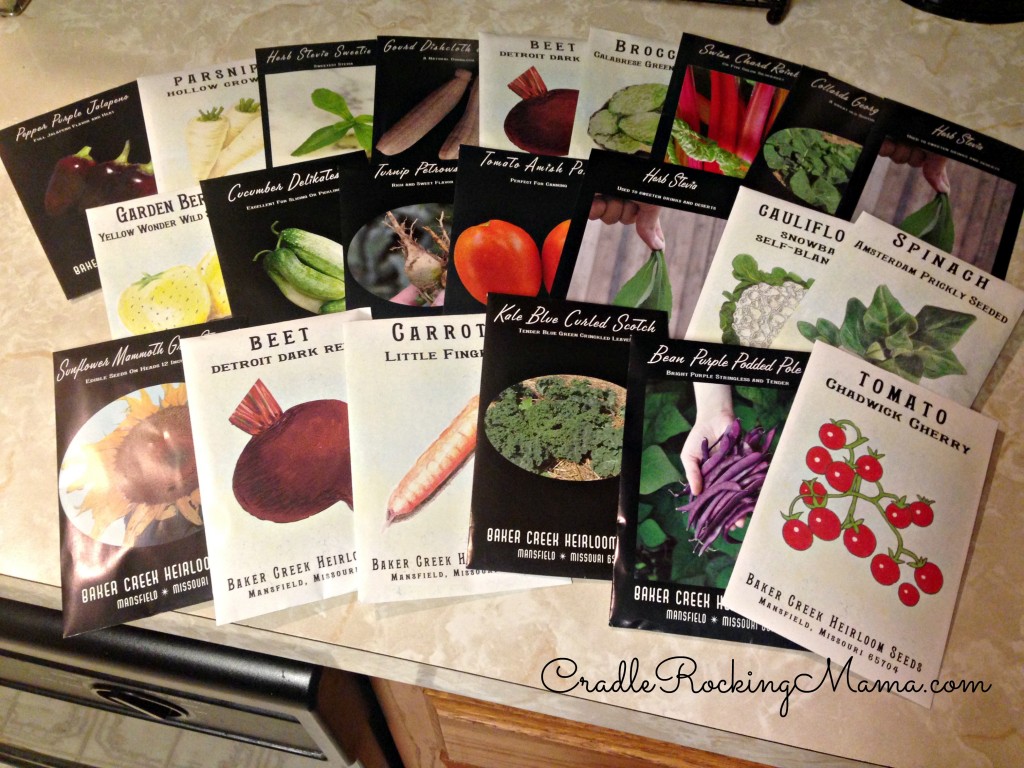
First, if you haven’t already done it, order your seeds. Organic, heirloom seeds are not infinite, and I’ve heard that if you wait too long to order, they can sometimes be sold out of the more popular seeds. So place your orders, Brown Thumbers!

Look at all my beautiful seeds! I'm SO looking forward to this!

Look at all my beautiful seeds! I’m SO looking forward to this!

Also, and yes, I’m stating the obvious, but you’ll need to have your seeds in hand so you can start them early. Most have a recommended indoor starter date of 6-8 weeks prior to your last frost, which, believe it or not, is a date quickly approaching some areas of the country!

The Farmers Almanac will calculate an estimated average last frost date for you, or you can check the National Climatic Data Center. That one is a bit tricky to read; I had to follow the instructions from Mother Earth News to be able to understand it.

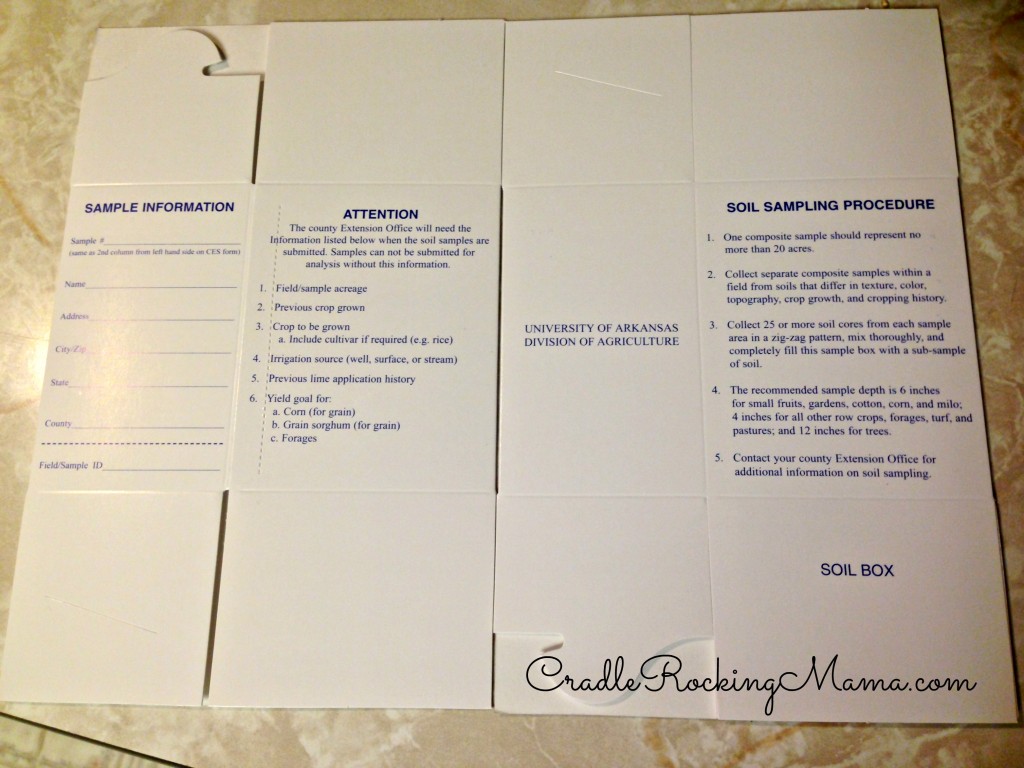
Second, it’s time to go get your soil tested. I picked up some sample boxes from my local organic gardening center, provided to them by the county extension office.

I just have to fill these little boxes with some soil and send it off for testing. Easy peasy.

I just have to fill these little boxes with some soil and send it off for testing. Easy peasy.

If you haven’t done so already, go here to find your local Department of Agriculture Cooperative Extension office. You probably have one near you, and they will have lots of pertinent information about your local growing season and conditions…not to mention, they’re the people you can take your soil samples to for testing. Call them up and ask what you need to do for soil testing – then do it!

Soil testing isn’t difficult, but it does mean you need to know where your garden will be so you can test that soil. You don’t want to test areas that you won’t be growing things, after all!

If you already have a pre-existing gardening plot, you might be ahead of the game (as long as it was placed in a good location). If you don’t, though, you’ll need to decide where you want to plant.

Ideally, your area will get lots of good sun (6-8 hours) per day. There are some plants that do better with some shade; if you’re growing some of those vegetables, you’ll want to have two garden beds: one in full sun and one in partial shade.

Wherever you decide to plant, you need to know what kind of soil you have. So go figure out the best location for your garden and take some soil samples.

I’ve just done this and am waiting to hear the results. So I don’t yet know exactly what sort of amendments I will need to make to my soil.

I do know that I have lots of clay-like soil, so I will likely need to either till the crap out of it while mixing in some “loamy” sort of dirt, or decide to do raised beds. 

I’ve honestly wanted raised beds anyway, simply because I’ve read that they’re better suited to year-round gardening. There are lots of benefits to raised bed gardening that fit my needs…however, I’m concerned about the up-front costs.

Obviously there is the cost of the frame, which could be considerable. In my circumstances, I can’t just use any old recycled materials, or the cheapest thing available; whatever we use to build the beds will, eventually, leech into the soil, which will then leech into our foods. So I have to be particular about what we build our beds with.

Then there is the cost of the soil. Again, I can’t just use any old soil; I’ll have to source organic, “non-jacked with” soil that is corn-free in every possible way. That’s probably going to hurt the pocketbook.

Truth be told, we just don’t have the money this year for raised beds, as much as I would like to have them. What little money we have would be better served in finding safe amendments to the soil, and investing in good fencing/critter protection. 

So for us, this year, we’ll probably be growing right in the ground. Raised beds will be in my future, though, especially if this years’ garden goes well.

__________

While I wait for the results of my soil testing, and start making plans for exactly how I’m going to lay out my plants, I’m thinking about trying to grow some things in my new “greenhouse”. 

Remember when I talked about closing in our front porch to reduce the amount of junk brought in the house that Zac could eat (and react to)? Well, thanks to some generous donations from friends, some deals worked out at Lowe’s on our behalf, and the sweat, blood, tears and physical labor of my amazing parents (thanks again, Mom and Dad!), it’s almost done!

All that is actually left is the outside siding, some sanding and painting on the inside, and some sealing. But we’ve been in and out of snow and ice storms for the last month, so those tasks have been held off for kinder climate conditions.

Even without being airtight with good seals, it is CONSIDERABLY warmer on the front porch than it is outside. 

As in, “rarely drops below freezing” warmer. Which isn’t terribly surprising, when you think about it: basically, we build a greenhouse!

An old picture, but you get the idea. It's a greenhouse on my front porch!

An old picture, but you get the idea. It’s a greenhouse on my front porch!

That is an older photo during construction; it looks nicer on the inside now, I promise. And the glass extends all the way around on all three sides.

It dawned on me that this would be an ideal place to start seeds, and also an ideal place to grow certain things in containers – I can get a jumpstart on some of my gardening! 

__________

By the way, I have to share an additional gardening resource I have: my parents. 

They have a huge garden area to plant, and while Mom wants to grow some things that I don’t want, and I want to grow some things that she doesn’t want, I fully plan to share seeds with her. We’re not far away from each other, but some of my things might grow better on her property than on mine.

Plus, she really wants to help feed Zac this year. (I know – awesome, right?)

So you might consider if you have someone you know, love, and trust who would be willing to grow some of your food, too…especially if you’re growing it to feed your allergy-restricted child and don’t have room to fail too much. Back-ups are always good to have.

__________

So that’s the plan this week, Brown Thumbers: order your seeds, test your soil, and start thinking about how you’re going to lay out your plants. 

Oh, and you might want to make sure to read the comments on these blog posts, and the comments on my Facebook page. I’ve already learned some really useful stuff from some of my Green Thumb readers! 

Where you are you at in your garden plans?

*****

Don’t forget to subscribe to my blog if you’d like to be a part of Brown Thumb Gardening! You might not see the posts via Facebook, now that they want bloggers to PAY to share posts. Just enter your email address under “Don’t Miss A Thing” and you’ll get one email for every post. No spam, I promise! 

Fun With Otoscopes

Fun With Otoscopes cradlerockingmama

So I had this whole post worked out in my head for today, and then Monday night happened.

Sunday, Zac really seemed to be on the upswing. He’d gotten his appetite back, was playing and his nose wasn’t running as much. So it seemed like a good time to write those “wrap up” posts about the sickness we’d been dealing with.

Monday morning he was still doing well. By the afternoon, he wasn’t eating as much. By dinner time, he was cranky.

But it was 45 minutes after I put him to bed that things REALLY got fun.

A little side bar: sometime during this last illness the kiddos decided our thermometers were actually cool toys, took them to play with, and promptly lost them somewhere in the house.

So I haven’t been able to take anyone’s temperature for over a week now. Not so great when everyone is sick!

Monday, we made a trip to town to grab some essentials, and I wanted a new thermometer to replace the ones we’d “lost” (which, true to Murphy’s Law, have already been found now that they’d been replaced).

Right there next to the thermometers was something I hadn’t seen before: Otoscopes for home use. 

Well, now.

We’ve already paid for two doctors visits where we were just sure  one of our kiddos had an ear infection, only to learn their ears were just fine. So if this little $18 tool could save us from even one unnecessary doctors appointment, then it would actually make us money.

So I bought it…you know, just to have in my handy dandy “mommy medical box”. (Hey, it’s even called “Dr. Mom Otoscope“!)

Okay. Back to the story.

45 minutes after Zac went to sleep, he woke up screaming, whimpering, and absolutely tugging, pulling, flicking, and otherwise messing with his right ear.

Unfortunately, Darrel was asleep and Zac was firm in his belief that no one  and no thing  should touch his ear.

In my quest to use my new otoscope to look in his ears, I was out-wrestled by my 20 month old. Unbelievable.

In the end, it didn’t really matter right then to see inside his ears, so I gave up and focused my attention on trying to make him feel better.

After hours of doing everything I could think of with little success, we both finally managed to pass out on the couch in the most awkward and uncomfortable position, with a movie on the TV and a boob constantly in his mouth while he whimpered. The last time I remember seeing was 2 am.

Bright and early yesterday morning, Darrel pinned Zac down for me so I could look in his ears.

Left ear looked okay to me.

Right ear…holy mother of ear infections!!

I called the pediatrician immediately and within a couple hours had a squeeze in appointment for the afternoon with our beloved nurse practitioner.

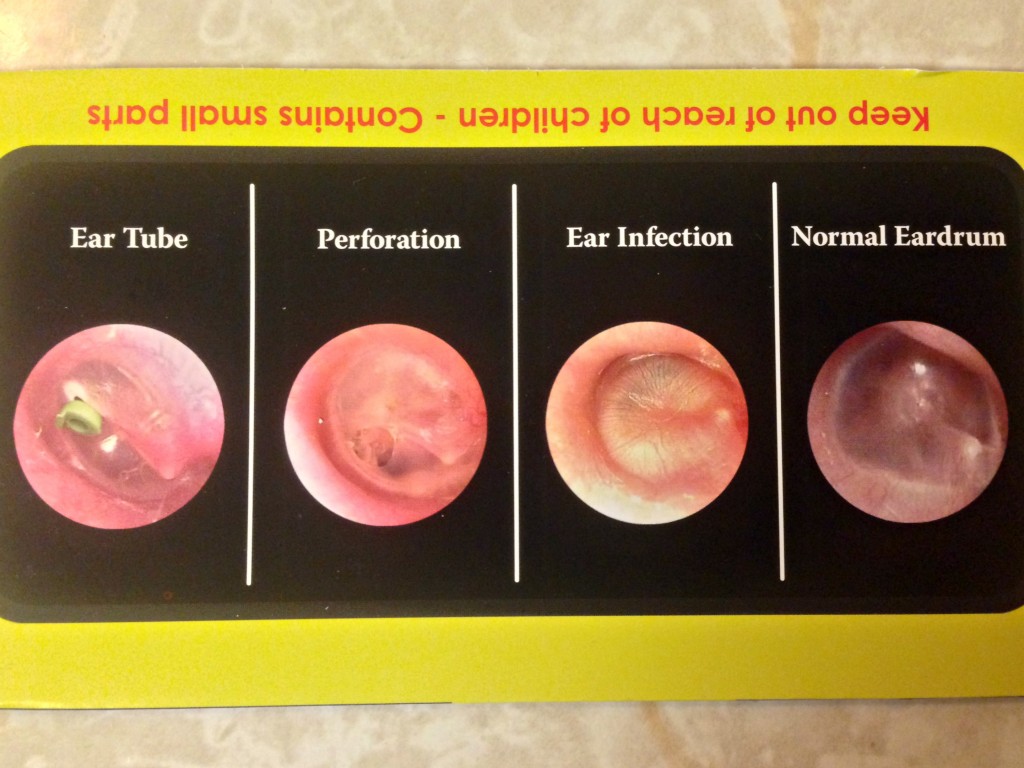
Knowing that she’d get a kick out of it, I told her about my newest medical foray into the land of “Otoscopes for Dummies”. Once she peeked into his right ear, she told me “good eye, Mom!” To which I said “Seriously. It didn’t take any talent – they have pictures for you to use!” See?

Seriously. This could not be simpler.

Seriously. This could NOT be simpler.

Not only was his right ear just a gigantic mess of an ear infection, but sometime between when I’d looked in the morning and when she checked him out in the afternoon, his left ear had suddenly developed an infection.

A double ear infection. 

Coming off a nearly two week long “virus” that the whole family suffered from.

Sigh.

Antibiotics are in our future. 

Now, I think it’s clear by now that I prefer to try and treat things naturally and holistically, if possible. And I know that ear infections are one of the most over-medicated childhood ailments.

But at this point, Zac’s little body had been fighting an infection for two weeks, and he was not winning the battle. This infection (obviously bacterial, not viral) was proving to be a stubborn jerk.

I really believed that antibiotics were warranted in this situation.

Only this time, we know that Zac reacts to the Rocephin shots. So if we are going to have a reaction regardless of what we give him, then maybe it would be wise to keep the Rocephin in reserve? After all, it is some pretty heavy duty antibiotics.

Our NP agreed, and called in a regular antibiotic to the compounding lab.

And the fun begins anew! 

Turns out, our compounding pharmacy can only get ONE form of antibiotic that would be effective against an ear infection in it’s pure, plain, un-fillered form. Azithromycin. But they have to order it. So we’d have to wait until Wednesday to get the meds.

Or we could take an antibiotic full of fillers that we KNOW he will react badly right then.

Or…we could just get the Rocephin shots.

Despite having good reasons for NOT getting the shots, we went with the shots. I hate the idea of leaving him in pain for another 24 hours before he got any medication. And if he’s going to react to his medicine (which seems likely; I’d hoped that a different antibiotic might give us a “honeymoon” period the first time through where he didn’t react…but with fillers, it’s a given that he will react) better to get it in his system and be done with it quickly.

Dosing him for ten days with something that is making his FPIES flare just seems…cruel. 

So back to the doctors office we went, Zac got his shot, and for a few hours was still just as miserable as he’d been all day.

By the evening, though, he was asking for food again, playing, and happy.

And he went to bed like a champ.

So another two days of a 50 minute one way drive to the doctors office for shots, and we can give him some gut rest, and then, finally, we can resume food trials.

And God willing, this is the last of the cooties we have to deal with for the season. (I made some Thieves Oil tonight to use in sterilizing my house; hope it helps!)

With luck, I can get back to my regular posting…fellow Brown Thumb Gardeners, have you picked out and purchased your seeds yet? Better hurry!

__________

Anyone ever used Thieves Oil? How’d it work for you? I’m planning to dilute it with water and use it to clean…anyone have any tips on that?

13 Tips to Make Life Bearable When Your Whole Family is Sick

13 Tips to Make Life Bearable When Your Whole Family is Sick cradlerockingmama

Is there anything more guaranteed to throw your household into disorder and disarray than a “traveling sickness”?

You know the one I’m talking about. It starts with one kiddo, creeps over and attacks the others, and finally, just as the kiddos are starting to feel better, the parents succumb.

From that first raspy cough, you know: you’re done for.

Being that we have young children and haven’t been sick very often, I didn’t know these little tricks before our recent bout of viral insanity. I’m nothing if not teachable, however, and I thought I’d share with you what I learned the last two weeks about how to keep your household from falling into complete disarray when cooties invade.

13 TIPS TO MAKE LIFE BEARABLE WHEN YOUR WHOLE FAMILY IS SICK

TO DO AT THE FIRST SIGN OF SICKNESS:

  • Immediately get caught up on laundry. In an ideal world, we’d all be caught up on laundry all the time, but…let’s face it. Reality is we’re all almost always a little behind. So make sure your towels, washcloths, pajamas for the family and at least one spare set of linens for the beds are clean, dried, folded and put away as soon as possible when you see a cold coming on.
  • Clean the kitchen. Again, in an ideal world, you’d never be behind on this one. As soon as your kiddo starts coughing, though, go clean out the fridge, empty the trash, run the dishwasher, hand wash whatever is in the sink, and wipe down the counters really well.
  • Make up HUGE portions of some “easily reheatable” food. Soup rocks. Taco meat works. Whatever comfort food you can think of that can be heated up without much effort is going to make life well worth living over the next week or two. (Make sure you make enough for a full week or two, by the way! As the parents, you’ll probably be that last people getting sick. It would stink to run out of food for yourself when you’re feeling your worst. Freeze some if necessary!)
  • Clean the rest of your house. Don’t go crazy here, but sweep or vacuum the floors, tidy up, whatever you have to do to make it look like human beings and not wild animals live in your house. It won’t stay this way, but if you start out looking like your house is a pig sty, well, when you finally get better and look around? You’ll cry.
  • Hit the store. Buy at least twelve boxes of super soft tissues, extra toilet paper, extra paper towels, and maybe even disposable dishes and utensils. Anything to make life easier when dealing with the crud!
  • On that note, if you cloth diaper? Unless there’s a medical need for cloth diapering, get over it. Go get some disposable diapers and move on. Trying to keep up with cleaning and folding cloth diapers when your kiddos are in misery is just…miserable.
  • Pick up whatever medicines you need. Whether you’re a straight up “give me the OTC green stuff” kind of person or a holistic “I use essential oils” kind of person, grab whatever you’re currently missing in your medicine cabinet. Trust me, running out of these essentials while your kids are sick is rotten, because then you either have to find someone to go buy them for you or haul sick kiddos to the store. Very not fun.
  • Call and cancel. Sure, your kids might bounce back pretty quickly. Sure, you might not get sick. But just save yourself the trouble and at the first sign of a cough, call up anyone and anyplace you’re scheduled to be over the next week and just cancel. You can always give them a “maybe, maybe not” answer…but taking that off your plate will be worth it. You’ll feel stressed out if you look up on Wednesday and go “Oh no! We were supposed to be at ____ right now!” Because I promise: when the kiddos are sick? Remembering your calendar is not very high on the priority list.

ONCE THE SICKNESS HAS HIT FULL FORCE:

  • Hunker down. You aren’t going anywhere for a while. (Or at least, you shouldn’t be!) Pretend you’re snowed in.
  • Turn on the TV and don’t feel guilty about it. Yes, your kids will watch WAY more TV than the experts would deem appropriate. The experts can stuff it. You’ve got miserable kids on your hands! If an endless loop of “Mary Poppins” keeps the littles distracted and happy, then get ready to sing “Chim-chim-cheree” 85 thousand times. It’s temporary.
  • Don’t worry about naptimes, mealtimes, or anything else that remotely resembles your normal routine. Sure, if you can manage it, that’s great. But don’t sweat it if your sick kiddos sleep at odd times, aren’t hungry when mealtime hits, and suddenly want to party and eat like a starving man at midnight. It happens. They’ll get back on routine pretty quickly once they’re well again.
  • Take care of yourself. Yes, you will mostly be taking care of your kids and their needs come first…but the only chance you’ve got of getting through this without getting their cooties is to take care of yourself, too. So take your vitamins, eat healthy, wash your hands, and sleep as much and as often as you can. You’re doing your kids a favor.
  • Let go. Let go of everything except the bare essentials. This is why I recommend cleaning your house and getting your laundry under control. Right now, your kiddos want Mommy or Daddy to snuggle with them. And that is exactly where you need to be. So use those disposable bowls and spoons for their chicken soup, and don’t worry about much else. Go get some snuggles in while you can.

__________

We got sick later in the year, too…this time with a stomach bug. That spawned a whole new list of tips to make life bearable when your whole family is sick. Read more here!

The Lifting Fog

The Lifting Fog cradlercokingmama

We seem to be on the upswing, finally, from the virus that wiped us all out the last week and a half. The “sick fog” is lifting, and we are slowly getting back to routine.

Darrel caught it last, and he is still suffering worse than the rest of us, poor thing. The kids and I, though, just have some residual tiredness, messed up bedtimes, strange appetites and head congestion to deal with.

It was an educational week for us.

In addition to the essential oil balms I made, and the chicken soup I tried (in vain) to get Jed to eat, I used every trick I could think of to help relive symptoms and encourage the cooties to move on quickly.

One of those tricks was taking Epsom salt baths. My whole life I’ve been told to take Epsom salt baths when feeling icky, as they would help detox the body and make you feel better.

So all four of us took frequent showers and Epsom salt baths earlier last week.

The first day the boys took a salt soak, Zac had a hard time that night. He screamed at us for no discernible reason for hours. Finally he passed out and went to sleep, where he slept fitfully.

The second day the boys had a soak, he repeated his behavior from the night before. Screaming for no reason, poor sleep with frequent wake-ups, the works. In the middle of the night, he woke me up screaming again. I discovered he had a poopy diaper. Very unusual for him overnight.

When I changed him, his heinie was bright red and tender; an acidic diaper rash took up residence on his tushie from one poopy diaper.

The next morning, he had yet another acidic poop.

And another.

And another.

I held off on the Epsom salt baths because I worried the soak would hurt him horribly. I, however, was sick and had almost nothing that I could do to get better, so I took a long, hot Epsom salt soak and felt much more human afterwards.

I also didn’t shower after the soak.

Zac nursed after I soaked, of course (he basically stopped eating this week and went back to nursing 6-7 hours a day), and a few hours later had a coughing jag that led to a big nasty vomit.

Oh, dear.

Could he have been reacting to the Epsom salts?

To be safe, we all stopped the soaks. Immediately, the no-reason-screaming stopped, and within three days Zac’s diapers were back to normal.

Yesterday he seemed to regain his appetite, and chowed down on quinoa all day long.

So…is it possible he reacted to the Epsom salts? According to a few FPIES mama friends, yes, it is.

According to them, it’s rare and weird, but it’s possible. It’s happened to a couple of their kiddos.

Most also said that if he reacted to Epsom salts, it is likely he was reacting to the sulfate part of the salts. OTC Epsom salts are magnesium sulfate.

There’s a family history on my side of being allergic to sulfa drugs, so this isn’t too far-fetched.

And sulfa sensitivity is often linked to a methylation disorder.

So now we’re at a crossroads. Do we pay for the genetic testing to see if Zac (and Jed) have a methylation disorder? Or just ostrich the possibility and keep doing what we are doing?

I don’t know much about methylation disorders. This week wasn’t my sharpest mental week ever, what with being sick.

It’s time, now, for me to add some more reading and research to my plate to see what we might be up against…and if it even looks like a possibility that methylation disorder is complicating Zac’s FPIES in some way.

After all, just because sulfa sensitivity is often linked to methylation disorders doesn’t mean it is ALWAYS connected. This could just be a fluke.

Though, if he’s sensitive to sulfa in the salts, we may need to look up which foods are high in sulfates and try to avoid trialing those.

Time for more research into yet another little known disease.

For Heaven’s sake: must everything my kids experience be rare, little known, and unique??

Sigh.

In the meantime, Jed is very slowly regaining his appetite. All he wanted to eat this week was candy bars.

I learned a few months back that Jed is just as happy with my candy bars without any chocolate poured on top, and I started adding 1/2 cup of hemp hearts to the sunbutter/maple syrup mixture, so really, it was almost like feeding him bare-bones cereal/protein bars.

I could live with that.

But it’s time for him to return to the normal “3 squares a day” sort of eating. He’s resisting.

Fortunately, he slipped back into normal bedtime fairly quickly. Two nights in a row he’s been down at our usual bedtime without a fight.

Zac is still all over the map, sleep wise, but he’s getting there slowly.

It’s funny, though, because as I re-read some old blog entries I saw that December of 2012, we were hit with a stomach bug…immediately followed by infections.

I suppose every December I have to look forward to stomach bugs, and every January to various infections that wipe out the family.

Yee-haw, y’all. 

So…what’d I miss last week? What’s new in your world?

How to Dehydrate Beef Broth

How to Dehydrate Beef Broth cradlerockingmama

It was gettin’ crazy in my freezer, y’all.

In the 18 months I’ve been on the TED, I’ve eaten 4 cows worth of beef. That’s a lot of beef!

It’s also a lot of beef BONES.

Because I’m frugal, and because I can’t have any pre-made, store-bought broths, I’ve saved all the bones from all of those steaks and roasts these last 18 months. And while I’ve made broth frequently throughout that time, I had fallen behind.

WAY behind. 

So behind, I’d started running out of room in my freezer for, you know, food, because I was storing so many bones. It was ridiculous!

Worst of all, I knew that once I made all the broth I needed to make from those lovely bones, I’d have a TON of broth to freeze…so making the broth wasn’t actually going to help out on the freezer storage solution very much.

Unless

Surely there had to be a way to dehydrate the beef broth for future use, right?

Well, not according to anything I could find on the internet! The closest I could find was a recipe for making your own bouillon cubes that used a scary amount of salt and was incredibly comprehensive. Plus, you still had to store it in the freezer.

One day, I will be returning to work. When that day comes, I’d like to be able to take my broth with me…without it leaking all over my suitcase!

So I experimented, and I found the answer. 

Read on and learn how you, too, can dehydrate beef broth!

Start out by making your broth. Most people add veggies and some vinegar to the bones to make their broth; I can’t really do that and it always comes out just fine (though probably not as nutritious). I prefer the “low and slow” approach to making broth. It’s not unusual for my broth to simmer for as long as a day or two!

Then strain all the solids out of your broth and put it in the fridge so any fats will rise to the top and solidify.

Scoop out as much of the fat as you can and set it aside to be cleaned.

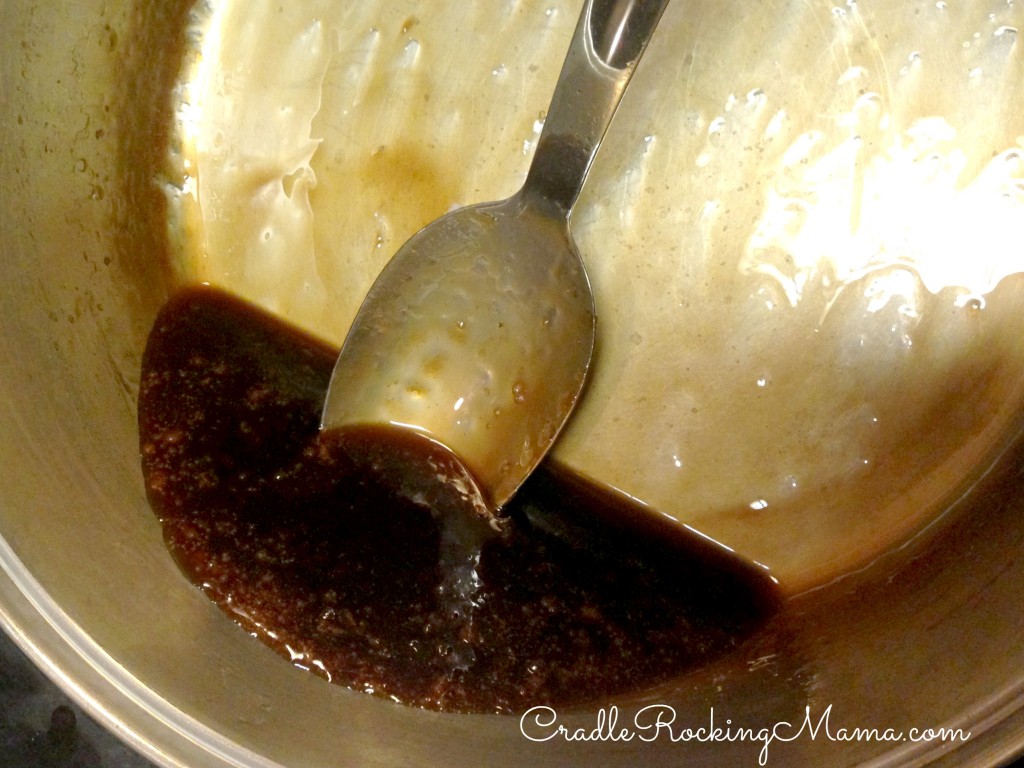
Now take that broth back to the stove and begin reducing it down. Turn the heat up until the broth is simmering, with the lid off, and let it cook until it is thickened and reduced to almost nothing.

This was 6.5 quarts of broth to start out.

This was 6.5 quarts of broth to start out.

In my experience, the broth will simmer for what feels like ages, doing nothing particularly interesting, and when I leave it alone for an hour I come back to find I’ve almost ruined it by letting it go too long. So, keep an eye on it.

It did take all day on low heat, but I finally had it reduced to almost nothing.

It did take all day on low heat, but I finally had it reduced to almost nothing.

What you’re going for is a thicker, gravy-like consistency. It should still be runny, not like a thick syrup.

Still runny, not syrupy. But thicker.

Still runny, not syrupy. But thicker.

Once you’ve reached the consistency you want, head over to your dehydrator. I’m sure you could use an oven for this, but since I haven’t done it that way I can’t give much guidance on dehydrating that way.

Drizzle the reduced broth on the non-stick sheets that come with your dehydrator. If yours doesn’t come with non-stick sheets, try using Saran Wrap wrapped around the trays. I’ve heard that works well.

Drizzled onto the trays. Use more trays with thinner drizzling if possible. I was being lazy and wanted to use just one sheet for this. It took longer.

Drizzled onto the trays. Use more trays with thinner drizzling if possible. I was being lazy and wanted to use just one sheet for this. It took longer.

Try to drizzle the broth as thinly as you can. Some of my sections got thicker than others, and they took far longer to dehydrate.

Then set your dehydrator up for the highest temperature it will go (mine is 155 degrees for meats; this is why I think this will do well in an oven) and turn it on.

After about 8 hours, I started checking mine. In the end, it took about 16 hours for me to think this had dried enough. Then I let it go an extra 2 hours, just to be sure. You really want this to be completely dried.

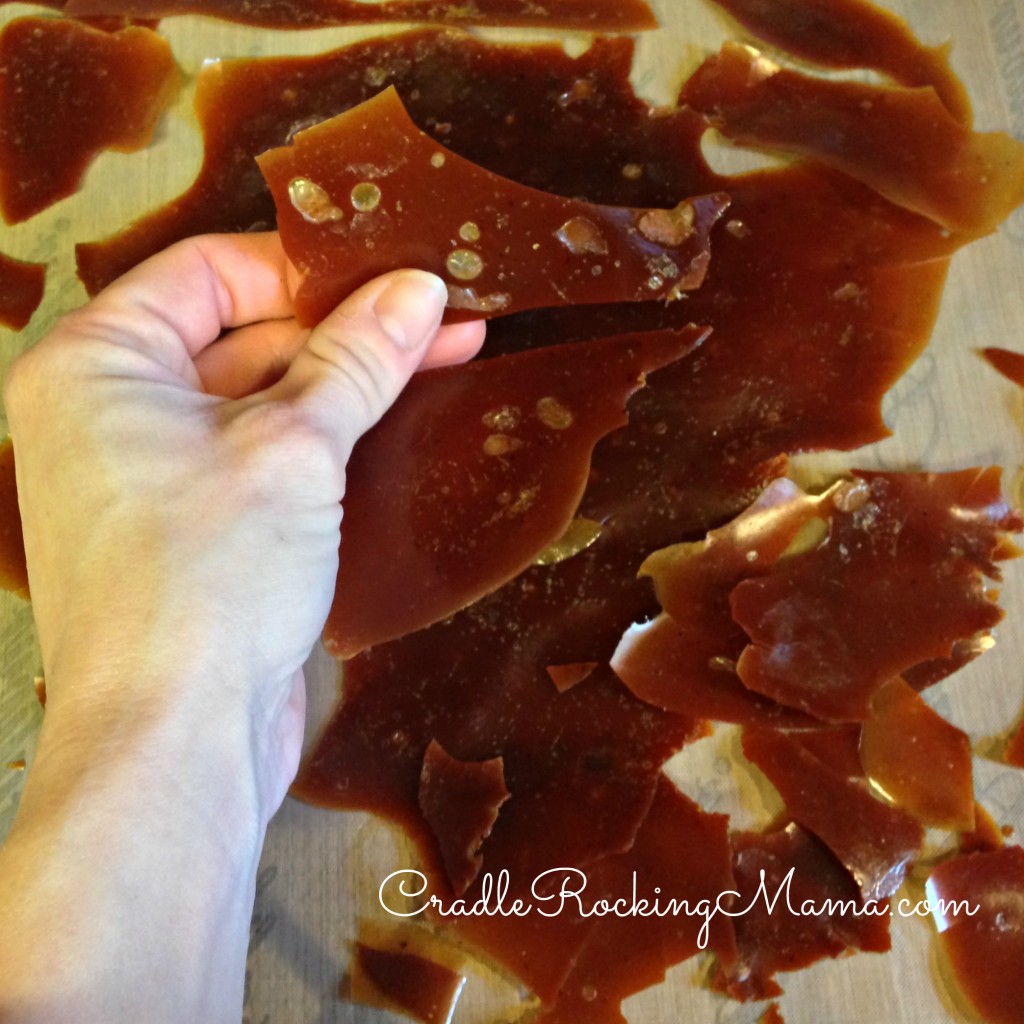
When it is dried, it will easily snap into little pieces!

Snap!

Snap!

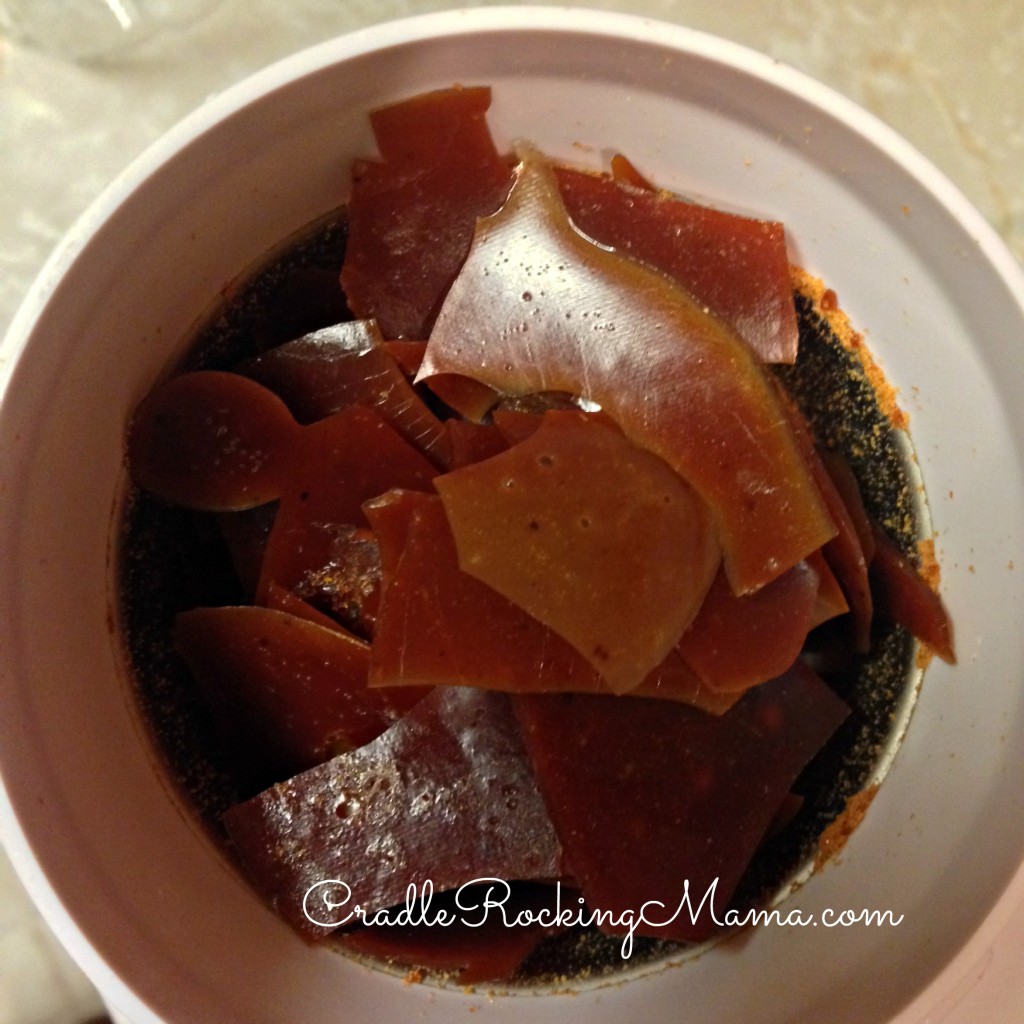
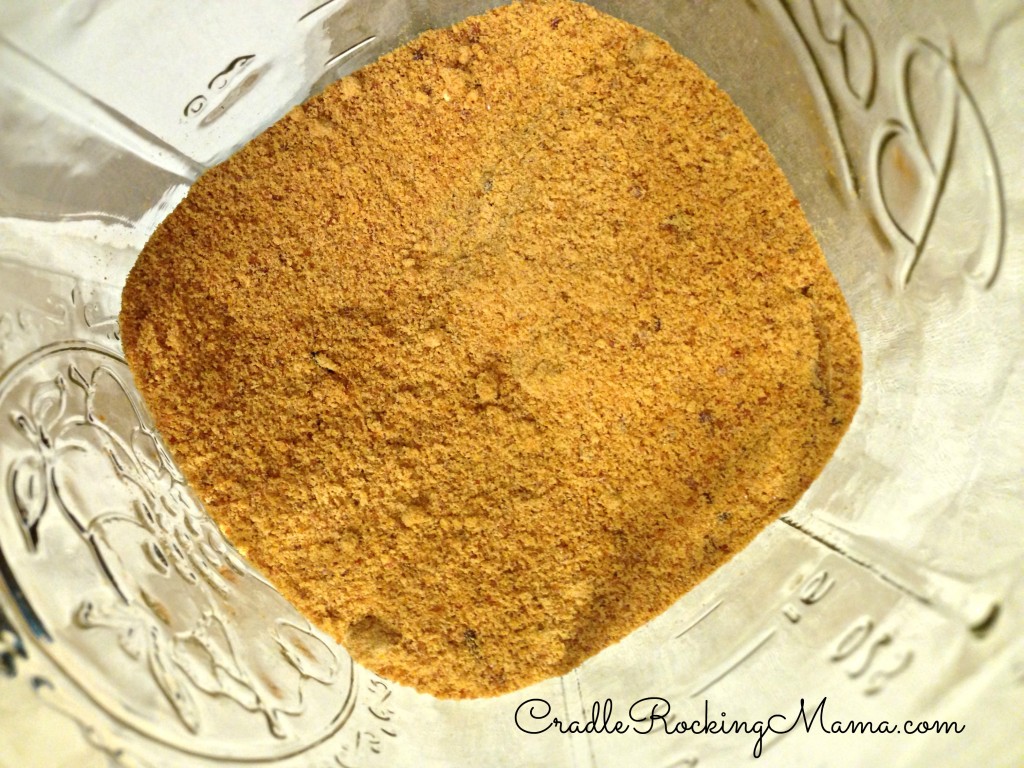
You can stop right here, if you’d like, but I wanted to be able to measure it out accurately and make it easier to store and transport. So I got out a clean coffee grinder and used it to grind the dried broth into powder.

In the cleaned coffee grinder.

In the cleaned coffee grinder.

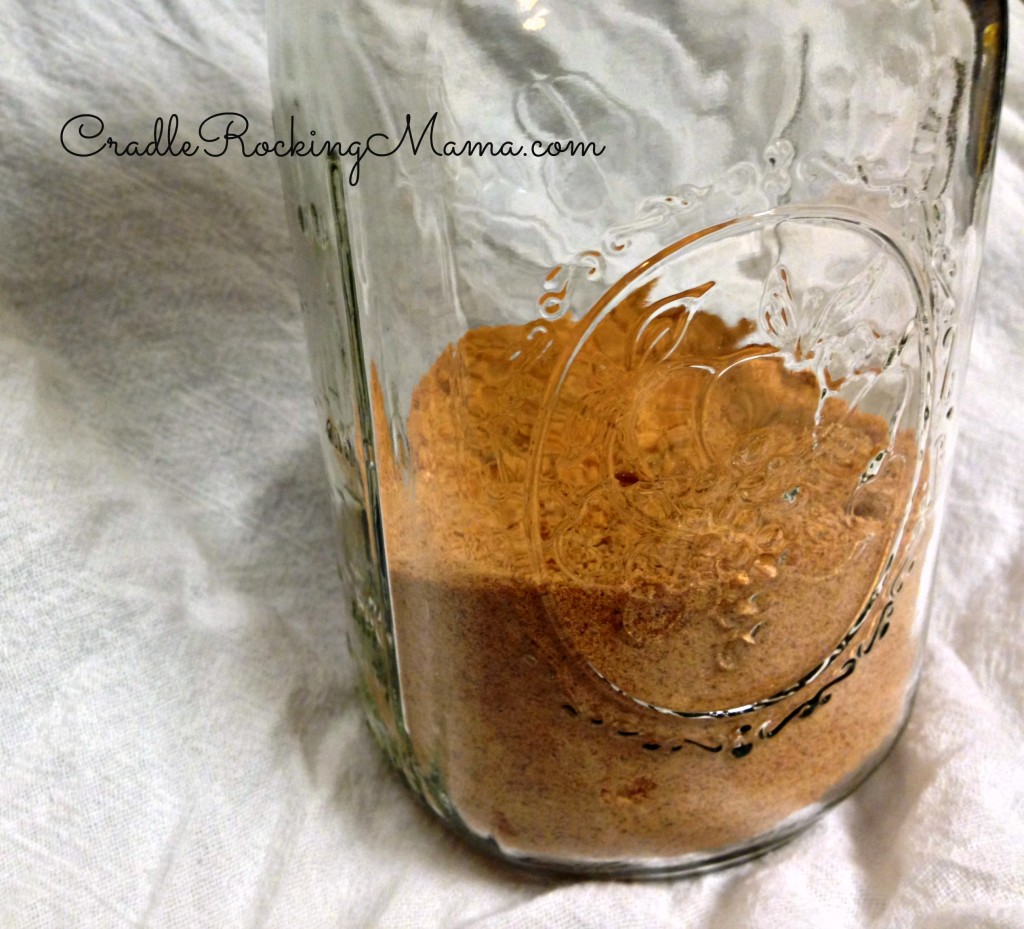
In the end, 6.5 quarts of liquid broth became 2/3 c. of powdered broth.

Dried and ground.

Dried and ground.

Much smaller amounts to store and deal with!

This was over 13 quarts of liquid broth. It doesn't even halfway fill a quart canning jar when dried and ground.

This was over 13 quarts of liquid broth. It doesn’t even halfway fill a quart canning jar when dried and ground.

Now, as for long term storage, I’ll admit that I’m not sure how this will best be kept. Traditional wisdom says, for things like this, that using moisture-removing packets and removing all the air (like with a food saver) would sufficiently protect this for safe, long term storage.

Personally, I’m making up quantities of broth to clean out my freezer of bones, and once it has been powdered I’m storing it in canning jars in my freezer and refrigerator.

I’m not aiming to build a surplus of broth to last through the end of the world as we know it; just a way to clear out some freezer space and make my broth easier to store and use!

I don’t think it will hang around my house long enough to worry about safe long-term storage methods. However, if you know anything about storing this long-term, please share in the comments!

When it comes time to use this broth, it’s incredibly simple. Figure out how many cups of broth you need. For each cup of needed broth, add 1 1/4 tsp. of powdered broth to 1 c. of water. Heat it up and stir well, and voila! Perfectly good broth, ready to use!

Reconstituted Broth. Yum! Tastes just like when I first made it.

Reconstituted Broth. Yum! Tastes just like when I first made it.

So there you have it: how to dehydrate broth. I can think of a ton of ways to use this!

Of course there are a zillion ways to use this around your home, but this would be useful for backpackers, travelers, or for taking to work to spruce up your lunch and give it extra flavor. After all, all you need is hot water and BAM! Instant homemade broth, full of nutrition and taste!

I used beef broth as the example here, but any sort of broth would work just as well. So boil up your chicken bones, or make your veggie broth and have fun dehydrating! 

I’m also going to take this opportunity to give a big shout out to my Excalibur dehydrator. I LOVE this thing! If you are serious about dehydrating, I strongly urge you to get one. It can handle anything I’ve thrown at it, and is well worth the cost. If you seriously dehydrate foods, you will easily save the cost of this dehydrator in a few short months.

*I am an affiliate seller for Excalibur. I loved them long before I ever had a blog, and recommended them before I ever made a penny off those recommendations. So I’m coming from a place of honest applause, here. If you buy an Excalibur and do so through one of the links on my blog, I will receive a small compensation for the referral…and I’d really appreciate it if you would keep me in mind if you decide to enrich your life with an Excalibur! Thank you! 

__________

HOW TO DEHYDRATE BROTH

  1. Make your broth. Refrigerate it, and scrape the solidified fat off the top once it has hardened.
  2. Take the broth back to the stove; pour it in a large soup pot.
  3. Simmer until it has reduced almost completely. Look for runny, but thicker and more like a gravy than a watery consistency.
  4. Drizzle the broth on non-stick sheets for your dehydrator.
  5. Set to the highest temperature and dehydrate until completely dry. It will easily snap into pieces once dry, and will not feel sticky or tacky at all.
  6. Break it into pieces, and drop in a clean coffee grinder. Grind until powdery.
  7. To reconstitute, take 1 cup of hot water and mix with 1 1/4 tsp. of powdered broth.

Store in an airtight container; for extreme long term storage, use moisture removing packets and vacuum seal your broth. For general long term storage, keeping it airtight and in the freezer or refrigerator will probably work fine.

__________

Have you ever dehydrated broth before? Do you have any tricks or tips about this method?

Sorta Horchata (Made with Quinoa Milk)

Sorta Horchata cradlerockingmama

After making quinoa milk a couple weeks ago, I heard from a lady who said she makes her own quinoa milk and adds some spices to it to make a drink that “tastes a lot like Horchata”.

To which I could only think, “Hor-what-a?”

So I went to Google to find out what Horchata actually was, and it sounded pretty good! One problem: people take their Horchata’s VERY seriously online.

There are tons  of posts about how to make the most authentic Horchata beverage; people have made numerous variations in the quest for the best Horchata, and everyone seems to have an opinion on what is ‘real’ and what is just a cheap knock-off.

Well.

For Jed, I could try to make some of the versions I found online, but they’re all rice based. In the hopes that one day I could actually give this drink to Zac, I’d prefer to stick with what we already know works…and we already know rice probably won’t work.

Back to quinoa milk!

I happened to have guests visiting on the day I tried this recipe, so I was able to get some varied opinions on this beverage. One person liked it best warm, another liked it best cold, and another liked it either way. They all liked it, though! So 50/50 on which was is best – try it for yourself and see which one suits your tastes!

It’s super easy to make!

Start like you’re making the quinoa milk. Then, to the blender, add the maple syrup and cinnamon.

Blend it til it’s smooth and creamy and voila! Sorta-Horchata!

Serve it over ice, or warm it on the stove before serving. Either way, it’s really good!

Sorta Horchata (Made with Quinoa Milk)
 
Prep time
Total time
 
A delicious twist on a classic drink, you'll enjoy this served either hot or cold!
Author:
Recipe type: beverage
Serves: 4 servings
Ingredients
  • 1 c. cooked quinoa
  • 2-3 c. water
  • ¼-1/3 c. maple syrup (to taste)
  • 1 T. cinnamon
Instructions
  1. Put all ingredients in a blender.
  2. Blend until smooth.
  3. Serve warmed or over ice.
  4. Enjoy your delicious beverage!

What do you think? Close enough to a Horchata or would you make some tweaks?