French Toast – Vegan & Gluten-Free (and Delicious!)

French Toast Vegan Gluten-Free and Delicious cradlerockingmama

I just love this recipe. It’s quick and easy to make, and gives me a new breakfast option for Jed. Or dinner. Either way. (You know “breakfast for dinner” is always a winner!)

French toast was always a favorite of mine, and I sorely missed it when we first had to go dairy and egg-free.

Fortunately I soon learned how to make vegan French toast, and Jed, Darrel and I all enjoyed this recipe immensely for a couple of years.

Then came fructose malabsorption, and we had to omit wheat from our collective diets. It seemed like French toast was out again.

Recently, though, I found the most delicious gluten-free sandwich bread ever, and realized Jed and Darrel could have French toast again!

So I dug out my old recipes and gave it a shot with our new sandwich bread…and it worked beautifully!

If you are dairy, egg, wheat and fructose free, take heart: French Toast is back on the menu!

Here’s how you do it:

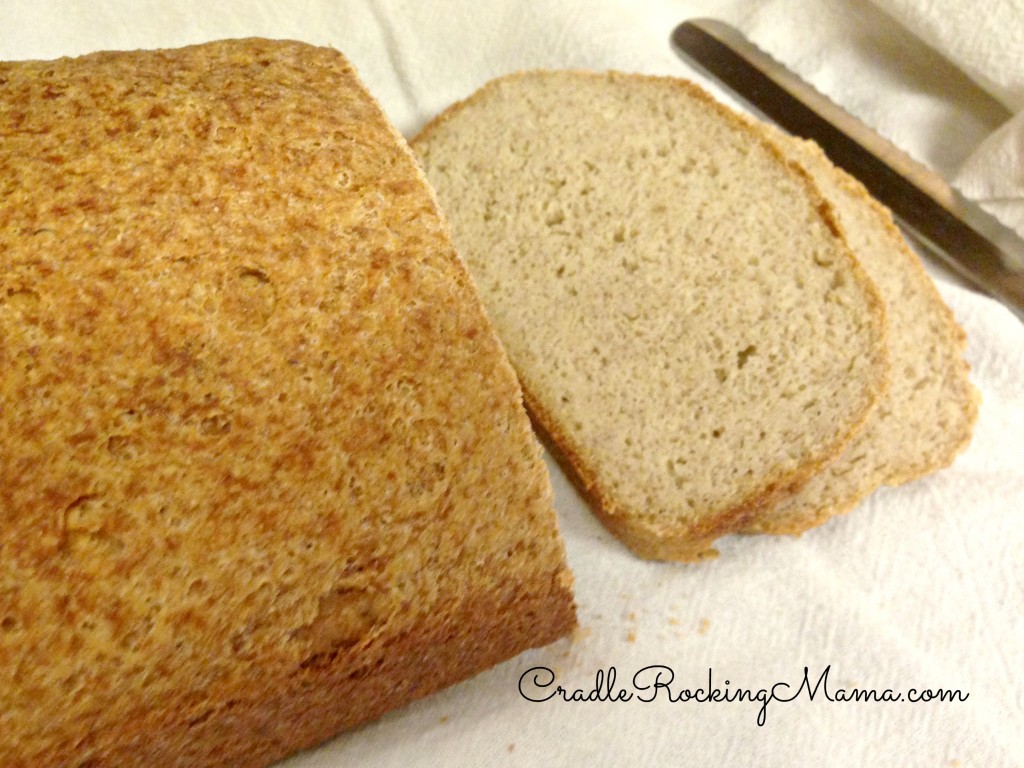
First, of course, you’ll need to make safe bread (or buy safe bread, if you’re lucky enough to have a store bought option).

Safe bread, sliced and ready to use.

Safe bread, sliced and ready to use.

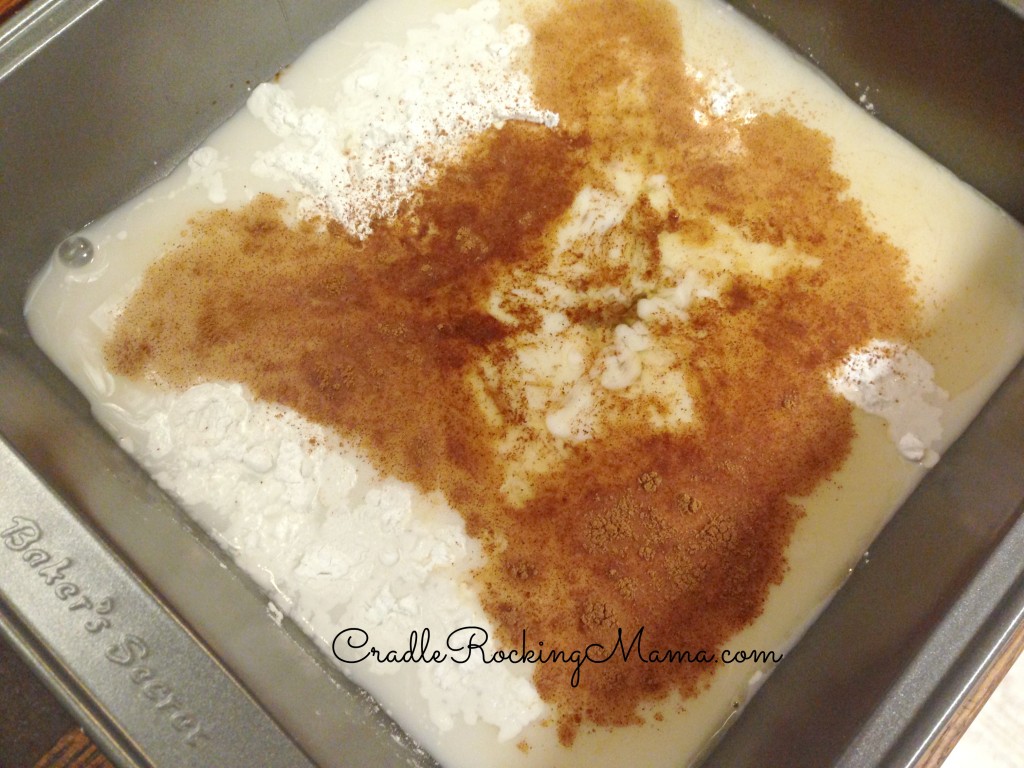
Then make up your batter. Put the milk, starch, maple syrup, vanilla, salt and cinnamon in a shallow dish. If you can have nuts, I also add a little almond extract; it really kicks it up a notch!

Ingredients in a cake dish. Sometimes I use a pie plate instead.

Ingredients in a cake dish. Sometimes I use a pie plate instead.

Whisk all the ingredients together until they’re well blended with no clumps.

Whisked and ready to dredge.

Whisked and ready to dredge.

Heat a skillet or griddle and add some oil, or spray with a non-stick spray.

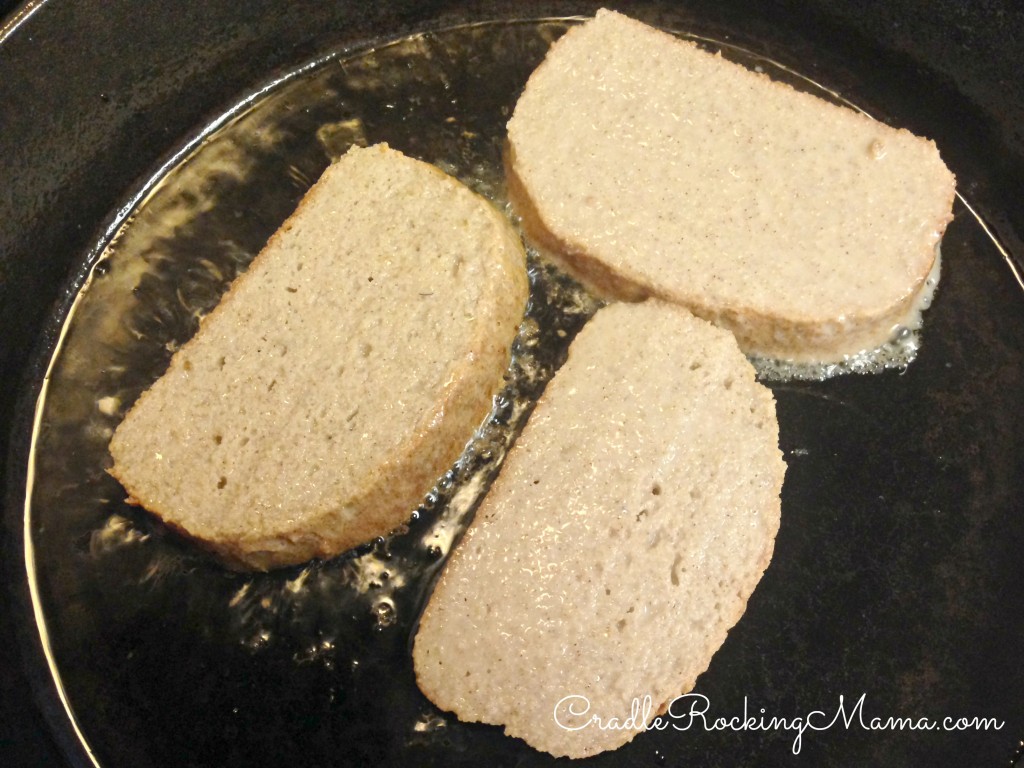
When the skillet is ready to go, cut a slice of bread, dredge it in the batter on both sides, and lay it in the skillet.

Ready to toast!

Ready to toast!

Repeat for as many slices of toast as you want to make.

I could fit three in my skillet. Perfect for Jed.

I could fit three in my skillet. Perfect for Jed.

Cook each slice for a few minutes over medium heat until lightly browned. Flip and repeat on the other side.

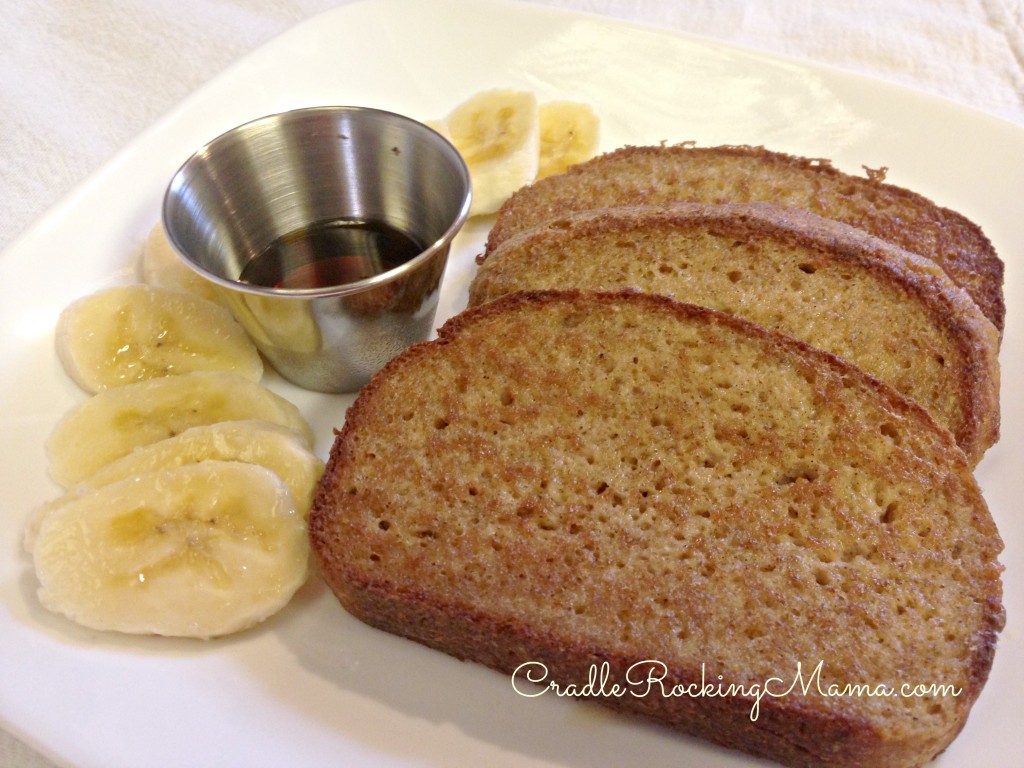
Stack up your toast on a plate, and serve with whatever accompaniments you like. We prefer a ramekin of maple syrup for dipping and some fruit.

Breakfast is ready!

Breakfast is ready!

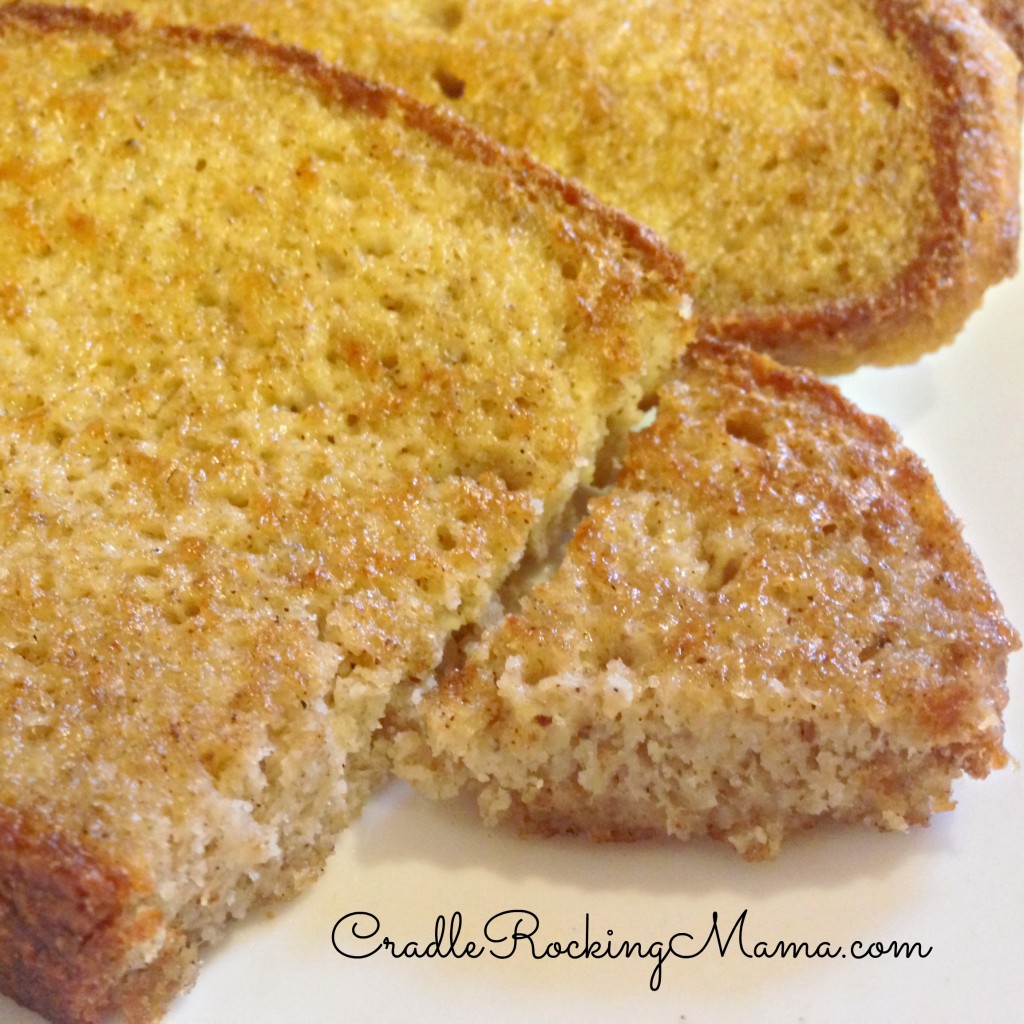
Enjoy your delicious, vegan, gluten-free, fructose-friendly breakfast!

Dipped in maple syrup...yum!

Dipped in maple syrup…yum!

Oh, and as a side note, I’ve seen vegan French toast that uses a banana purée batter. I’m sure it is delicious! But this is still a recipe worth adding to your recipe collection, just in case you ever find yourself banana-less!

SO GOOD!

SO GOOD!

French Toast - Vegan & Gluten-Free (and Delicious!)
 
Prep time
Cook time
Total time
 
This is so good, you'll never know this french toast isn't the traditional recipe!
Author:
Recipe type: Breakfast
Serves: 1 dozen slices
Ingredients
  • 1 c. milk
  • 2 T. arrowroot starch
  • 2 tsp. maple syrup
  • 1 tsp. vanilla
  • cinnamon to taste
  • 1 tsp. almond extract
  • pinch of sea salt
  • gluten-free bread
Instructions
  1. Make a loaf of gluten-free sandwich bread (or buy it if you’re really lucky).
  2. Put all ingredients (except the bread) in a shallow dish and whisk until well combined with no clumps.
  3. Heat a skillet or griddle on medium heat; add oil or spray with cooking oil.
  4. Dredge a slice of bread in the batter on both sides and lay on the griddle.
  5. Flip when the toast is lightly browned, just a few minutes. Cook the other side.
  6. Serve with syrup, fruit, or even plain!
  7. Enjoy your delicious French toast!

Hope you like it! Happy breakfasting! 

How to Treat Constipation Naturally and Fructose-Free

How to Treat Constipation Naturally and Fructose-Free cradlerockingmama

While we dealt with all the fun viral sickies this week, we realized that all day on Saturday Jed had told us “something is wrong with me”. Of course, both Darrel and I were like “Duh! You’re sick!” so we ignored him. Finally he climbed up on my lap at dinnertime, refused to eat, and told me again that “something was wrong with me”.

This time, I asked some more questions, poked him in a few places to ask if he hurt where I touched him, and we discovered: Jed was constipated. The poor kiddo WANTED to go #2, but he couldn’t and it was hurting him.

Well. That’s just great.

We don’t have any safe OTC medications for him for constipation relief. It was Saturday. No doctors, unless we drive to an urgent care center or an ER.

So, I went online and Googled for natural remedies for constipation in a toddler.

Do you know what comes up when you Google for that?

Well, you get your basic good advice: drink enough water, eat enough fiber, belly massages and hot baths, all of which are good and practical, but not necessarily going to relieve the pain of constipation fairly quickly.

The advice you’ll find that works on a quicker timeline is almost always one of the following: apple juice, prunes, prune juice, or molasses.

Can we say…Fructose??

Yeah, not gonna work for my kiddo!

So I kept scavenging the internet for anything that would be helpful, and finally, on a message board, I read someone post that psyllium husks are helpful with constipation.

New search: how to use psyllium husks for constipation!

A wealth of information came from that search!

Now, I’m not a medical doctor, and there are a lot of caveats to using psyllium husks for occasional constipation. I’m also feeling sick and fuzzy, so I’m going to “phone it in” for the rest of this post. Go click on these links and read all about psyllium husks and constipation:

I gave Jed 1/4 tsp. of psyllium husks at bedtime, made him drink a huge glass of water, and by noon the next day he had a beautiful, pain-free #2 that was staggering it its volume. Poor kiddo!

So, drink lots of water, eat lots of good fiber, but if you or your kiddo ever experience a bout of occasional constipation and you also suffer from fructose malabsorption, try taking some psyllium husks to fix the problem. 

(When my brain isn’t so fuzzy, I plan to make this post better. But I hate “sitting” on good info that could help someone, so here it is in all its’ semi-coherency. Sorry, y’all!)

Ten Reasons Why Sick Kiddos Suck

Ten Reasons Why Sick Kiddos Suck cradlerockingmama

The boys in a moment of high spirits and feeling good during an Epsom Salt bath yesterday. Five minutes later they were both crying and whining for pain relief. Fun.

It is Monday and the kiddos are still sick. Zac’s fever finally broke, but his cough has gotten worse and both kids have faucets for noses.

I’ve done everything I can think of to help my kiddos feel better, and a lot of it is helping. But with this particular virus, we really have no choice but to just let it run its course. Nothing seems to speed this vicious little bug along.

I’ve had a lot of time this weekend to think about this, and I thought I’d share with you what I think are the 10 worst things about having sick kiddos.

Or, to be a little more blunt about it…

“Ten Reasons Why Sick Kiddos Suck”.

10. They feel like crap. Which means they whine. They cry. They whimper. They moan. And you have to listen to it all. Unceasingly.

9. Bedtime is shot. They might have slept a lot that day, which means they aren’t tired at bedtime. Or maybe they didn’t nap at all, which means they pass out on the couch earlier than normal. Any way you look at it, your hard-won sleep routine? Is wrecked.

8. Your toddler/pre-schooler will start acting out in frustration…because, thanks to their stuffed up nose and head, you can’t understand a word they’re saying. Remember when they were pre-verbal? Yeah, it’s like that – only worse.

“Bomby? By dose is drilling!”
“What, honey?”
“By dose is drilling!”
“I’m sorry, I don’t understand you. Try again.”
(Getting frantic now)  “By DOSE is DRILLING!!!!”
Repeat 20 times until you figure out they’re saying “Mommy, my nose is drooling!” Toddler-speak for “my nose is running”, of course. Ah-hah!

7. Forget mealtimes or even knowing what to feed them. That delicious, nutritious chicken soup I made for them? Darrel has eaten every bowl I’ve served. Jed won’t touch it.

Over the last few days Jed has requested the following foods: bacon, sausages, sandwiches, soup, crackers and sunbutter, sliced bananas, chips and dip – and eaten none (or hardly any) of it!

Poor Darrel hasn’t eaten a real meal in days. He’s just the “meal disposal unit” for all the foods Jed won’t eat.

6. Snot. Snot everywhere. This might improve with age (please, dear God, say it does!), but for kiddos under the age of 4, if it is sitting still, it’s a Kleenex.  My shoulder, my legs, the couch…you get the idea. It’s just gross.

5. They psych you out. (Did I just date myself?) One minute they’re in the throes of agony, the next minute they’re screaming “Mommy! Watch this!” as they leap off the couch.

Are they still sick? Finally getting better? Nah…because half an hour later they can barely breathe and are clinging to you like a drowning man in the ocean.

Small kiddos don’t understand what “rest” means, and the minute they get some small relief from their symptoms they go play like normal, wear themselves out, and make you go crazy while they do it.

4. All that playing they’re still doing instead of resting? More toys to try and sterilize once the family is healthy again.

3. Mommy is the only person who can make it better. Both kids will suddenly – and simultaneously – decide they feel rotten and NEED MOMMY RIGHT THEN!!

Sometimes they pick Daddy, but whomever is their choice of “magic fixer parent” is left feeling torn and guilty that they can only attend to one child at a time, and the other parent gets to just watch helplessly. Fun times.

2. After enough days of non-stop neediness from the kiddos and enough nights of completely interrupted sleep, you will be woefully behind on laundry, dishes, and general cleaning, plus, you’ll be sick, too! Yay!

And the absolute worst reason having sick kiddos sucks:

1. It just breaks your heart to see your kids sick. Looking at their little faces all pinched in pain and discomfort, their eyes all red and watery from crying, their runny noses that make it hard to breathe, and having even your most independent toddler asking to snuggle with you just tears your heart to shreds.

__________

What do you think: are those pretty much the worst things about having sick kiddos or did I leave something out?

And no, I wasn’t joking about #2. I’m feeling pretty cruddy now, myself. I’ll probably still post this week, but it might not be what anyone expects.

Now, seriously: go wash your hands! Cooties suck.

FPIES, Fructose Malabsorption and a Virus: 3 Natural Ways to Relieve Discomfort (when you can’t take medicine)

FPIES, Fructose Malabsorption and a Virus 3 Natural Ways to Relieve Discomfort when you can't take medicine cradlerockingmama

It’s Friday. I’m not doing a Frugal Friday post today.

Why? Because we’ve been invaded by a virus and I’ve been busy tending to two sick little boys. Not only have I not had time to sit down and write, but financial planning just really isn’t on my mind right now, y’know?

So this is going to be fairly brief, but I thought I’d share a little about how to take care of sick kids when you can’t do anything that normal parents do for their sick kids.

OTC Medicines are not safe for either of my kids. So no Robitussen DM here!

All the homemade expectorant/decongestant remedies I found rely heavily on honey and ginger, both of which are high in fructose and therefore not allowed.

Other folk remedies I found were heavy on garlic and onion, again: high in fructose, so, no thank you.

What’s a Mama left to do?

Well, I grabbed some cleaned, plain tallow from my freezer, melted it gently on the stove, and made some balms with essential oils.

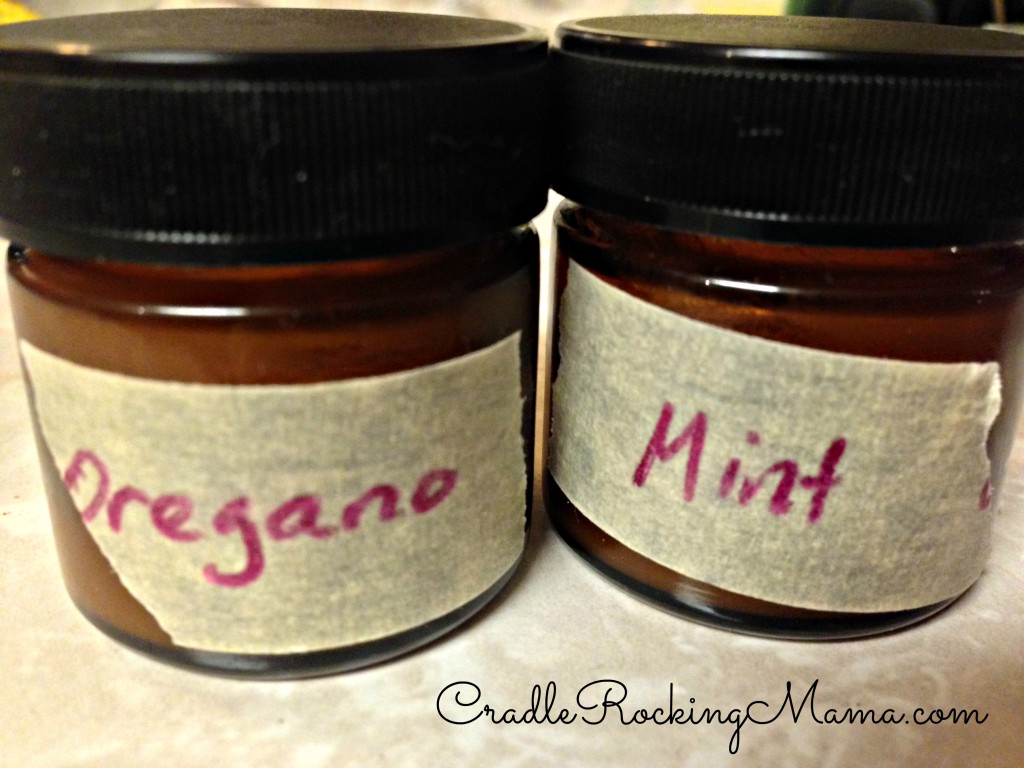
I used freezer tape to label each jar. Fancy, I know.

I used freezer tape to label each jar. Fancy, I know.

I didn’t want to go heavy on the EO, because too much, too soon can be rough on little bodies. So I kept it simple: I made one with peppermint, and one with oil of oregano.

I’m too tired right now to find the links, so you can google it yourself or take my word for it, but I read that rubbing some oil of oregano on your feet helps greatly with coughs/congestion/head pressure.

Peppermint was the second best thing for rubbing on your chest for the same issues, the best being eucalyptus. However, eucalyptus has a tendency to work either really, really well for people, or cause their airways to actually become inflamed. Since my mom is incredibly sensitive to eucalyptus and gets headaches and other nasty reactions around it, I figured better safe than sorry for my little ones and went with peppermint.

Besides, peppermint just smells nicer to me.

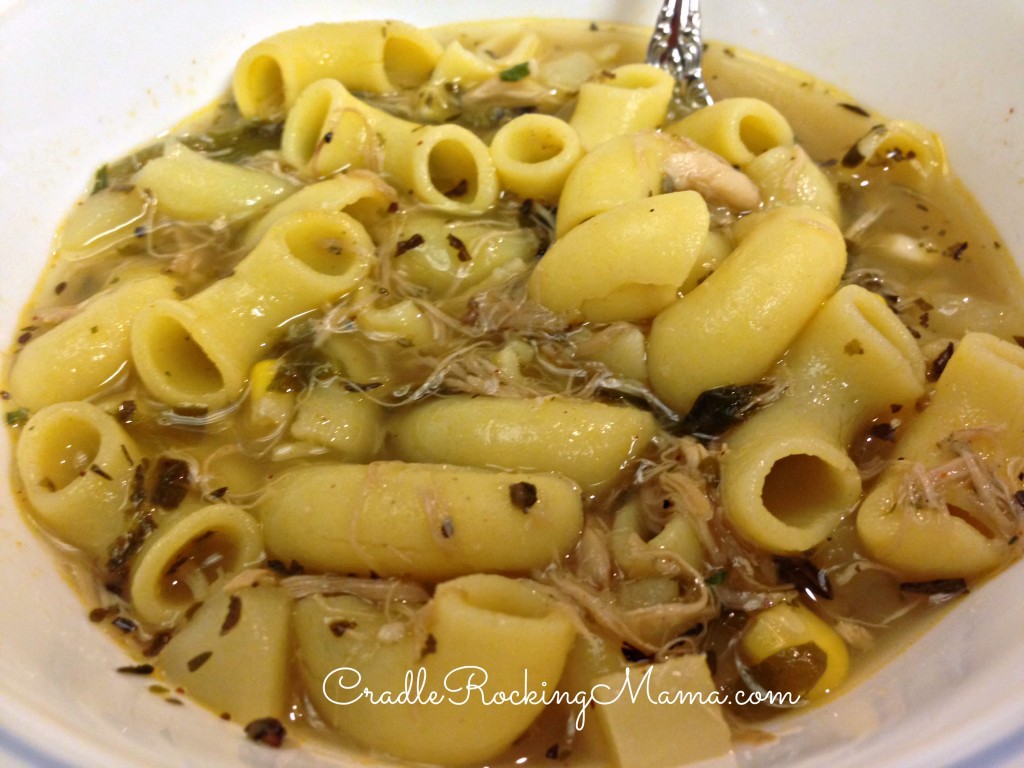
Then I made homemade chicken noodle soup.

Smelled good and I wish I could eat some.

Smelled good and I wish I could eat some.

For the record, this is why making things yourself is so wonderful; I had chicken broth, shredded cooked chicken, and tallow all sitting in my freezer. So whipping up ALL of these health aids took nearly no work on my part yesterday, and that was nice.

Did I mention TWO sick kiddos?

Anyway, back to the soup. Once again, my traditional, “great-grandma made it” chicken soup recipe is no longer safe for my kiddos, and all the “beat sickness with this chicken soup” recipes I found used ingredients we just can’t have: onion, garlic, tomatos, etc.

So I winged it, using my limited knowledge of herbs.

There are no step by step photos this time, folks. Sorry, but yesterday was survival mode.

It’s easy, though: into a soup pot throw the broth, the chicken, diced potatos, whatever veggies are safe for you (I used corn, green beans, and shredded spinach), and spices.

For that, I went with thyme, oregano, basil, some chili powder and paprika, and salt and pepper.

Thyme, basil and oregano are delicious and also very healthy for you, and the paprika and chili powder were added in hopes they’d help with the coughing/breathing issues. Really, you couldn’t taste them at all.

About half an hour before serving, add some safe noodles. I threw in elbow macaroni from Ancient Harvest. They’re quinoa and corn, so, extra nutrition for Jed.

Ta-da! Soup is served.

Peppermint is rubbed on Jed’s chest.

Oregano oil is on both boys feet.

(I didn’t want to put peppermint and tallow on Zac’s chest; too great a chance he could ingest some that way, plus I don’t know what it would do to him. But oregano oil on feet, covered in socks? It’s about all I can do for him.)

Oh, and the humidifier is going in the bedroom. And we’re taking a few showers a day for the hydrotherapy and steam.

Jed is lucky enough that we were able to get him a compounded cough medicine ($30 for what normal parents could buy OTC for $8, but, oh well) and it works fairly well. He can only take it every 6-8 hours, and it seems to lose its effectiveness after about 4 hours, so that part stinks.

And that’s what I’m doing to try and relieve the boys’ discomfort while they fight these virus’.

If you also have kiddos with FPIES and Fructmal, hope this helps you if -Heaven forbid – the crud hits your house, too.

Now, go wash your hands. There are cooties out there!

__________

Instructions:

For the balms, follow the instructions for the tallow hand cream, but don’t add olive oil. You could also use coconut oil, if that’s all you have.

MEDICAL ESSENTIAL OIL BALMS

– 1 T. tallow or coconut oil
– 6 drops of essential oil

Melt the tallow/oil and add the oils, pour into a container and store. You’ll use it up too fast to worry about how long you can store it for, I promise. Make as often as you need.

FRUCTOSE FRIENDLY CHICKEN SOUP

– 8 c. chicken broth
– 2 c. shredded, cooked chicken
– 3-4 potatos, peeled and diced
– 1 c. frozen corn
– 1 c. frozen chopped spinach
– 1 lb. safe noodles
– thyme
– basil
– oregano
– paprika
– chili powder
– sea salt
– pepper

  1. Add everything except the noodles to a soup pot and heat. Cook until potatos are tender. (The spices are strictly to taste. I’d recommend using at least 2 tsp. of everything; I went as high as 2 T. on a couple of them.)
  2. 15-30 minutes before serving, add the noodles and cook until ready to eat.
  3. Serve up a healthy, virus/cold busting soup.

__________

Anyone have any other holistic, healthy tips that might work for a kiddo that will react to everything?

Hot Cocoa – Rock the Universe Version

Hot Cocoa Rock the Universe Version cradlerockingmama

One month ago today I shared the first of my hot cocoa concoctions: Instant, Dairy and Fructose Free Hot Cocoa! In that post, I mentioned a “rock the universe” hot cocoa that we’d used, but had to shelve because coconut was the main component. Since Jed has Fructose Malabsorption, coconut is ‘out’ of our family diet.

However, I received several requests for that recipe because, come on – who wouldn’t want to know how to make a universe rockin’ hot cocoa?

Honestly, y’all, Darrel and I personally have no issues with dairy whatsoever, and have drunk various hot cocoa’s our entire lives…and even WE both think what I’m about to share with you is THE BEST hot cocoa we’ve ever had. Hands down.

And it’s dairy free! And refined sugar free! And soy free!

Does it get better than an allergy friendly recipe that tastes better than the original versions? 

I think not. 

So here it is, by demand: Hot Cocoa – Rock the Universe Version.

When I originally found this recipe, we had not been dairy-free for long. I was still a total noob in the kitchen, so I made NO modifications to the recipe. Thankfully, this recipe needed no additional modifications, thanks to the tweaks already performed by Katy She Cooks.

As a side note, I can’t begin to express my joy about this recipe. This was one of the first recipes I found that so expertly replaced dairy in our lives that it made me have HOPE that one day, we would not struggle with being dairy “deprived”. 

Dairy intolerance was the first step of our journey into the land of “you can’t eat that”, and it shook us to our foundations. We had NO IDEA how to survive without dairy! Both Darrel and I were big cheese and butter fans, and milk rarely went bad in our house.

Quite honestly, we had no idea how to cook anything that didn’t have dairy added at some point in the process. 

Finding this recipe was like breathing new life into my kitchen and my soul. It encouraged me; if someone out there could make something THIS good to replace something I’d always considered a dairy ‘dish’, then maybe, just maybe,  I could make delicious foods that didn’t rely on cow milk to satisfy our tastes.

Within a short time, I was experimenting on my own in the kitchen and finding all sorts of neat tricks and treatments to create delicious foods…and recipes like this one were the impetus of that creativity.

I think, in some ways, I’m hoping to be that catalyst for others with my blog. Our food journey has taken us FAR beyond just being dairy-free! Others in our position might not have been ‘eased’ into it the way we were, and might need some inspiration to get their own kitchen legs underneath them.

Oh, I hope I’ve done that for someone.

Anyway, back to the recipe! Again, this isn’t my creation, so I urge you to visit Katy’s site for the full recipe. But I will show you what I did to make it!

You start by making a tonic of coconut milk.

Add your whole can of coconut milk, water, maple syrup and vanilla to a pan…

Coconut Milk in the sauce pan

Coconut Milk in the sauce pan

and whisk it until it is well blended. If it’s not blending together well, you may have to heat it some, but that’s not necessary at this point.

Coconut milk tonic

Coconut milk tonic

Leaving one cup of the tonic in the sauce pan, add the cocoa powder, salt, and maple syrup. (She uses sugar at this point. You can do so, but I always used maple syrup. I just liked the flavor better.)

Starting to be delicious!

Starting to be delicious!

Stir until everything is dissolved, then add some more of the original coconut tonic back in. Stir and heat until it’s the temperature you like, add the vanilla, and ta-da!

Adding some more coconut milk tonic - almost done!

Adding some more coconut milk tonic – almost done!

Hot cocoa that will knock your socks off, rock your universe, and make you wonder why anyone would ever make hot cocoa with cow milk again! 


What do you think – am I exaggerating how good it is or do you agree this is the best thing you’ve ever tasted?

Hot Cocoa: Syrup Version (Dairy/Soy/Sugar Free)

Hot Cocoa Syrup Version - Dairy, Soy, Sugar-Free cradlerockingmama.com

In honor of the frigid temperatures across the U.S. this week (except in California, to whom I think we all want to say pthhtt!), I thought I’d share a couple more hot cocoa recipes!

I already shared a fantastic dairy and fructose-free instant hot cocoa mix, so here’s a hot cocoa version that uses my homemade chocolate syrup!

It’s so easy:

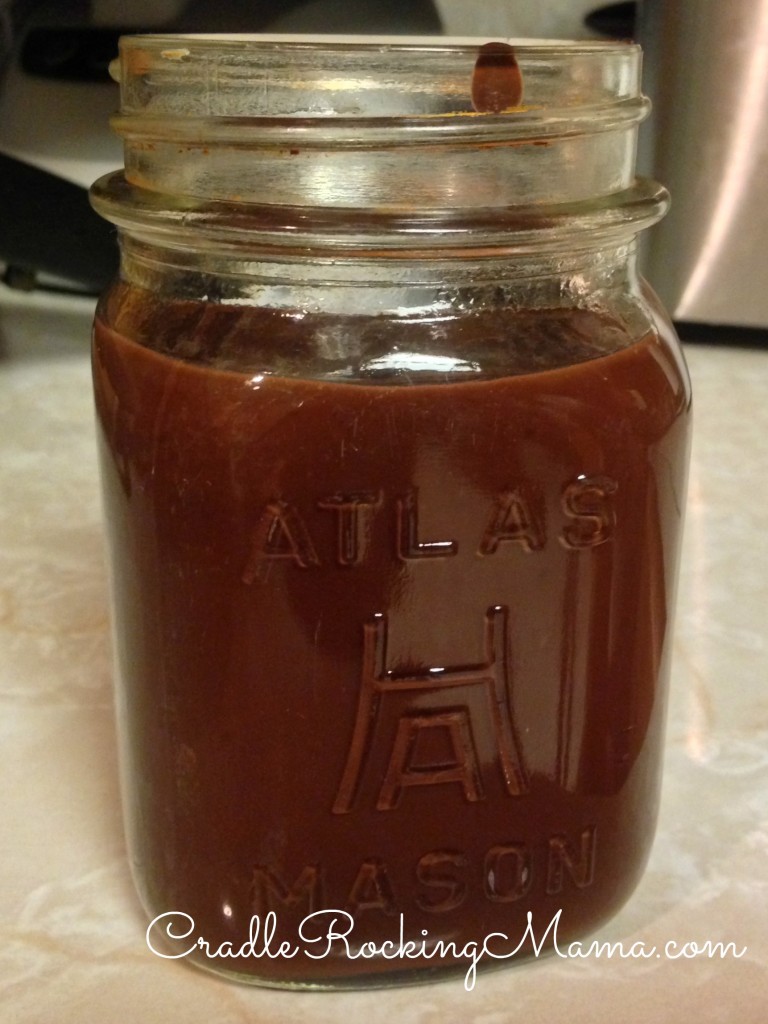
Make a batch of chocolate syrup.  (Recipe for that is at the very bottom of the linked post.)

Chocolate Syrup - good for chocolate milk, ice cream, banana oatmeal, and now, hot cocoa!

Chocolate Syrup – good for chocolate milk, ice cream, banana oatmeal, and now, hot cocoa!

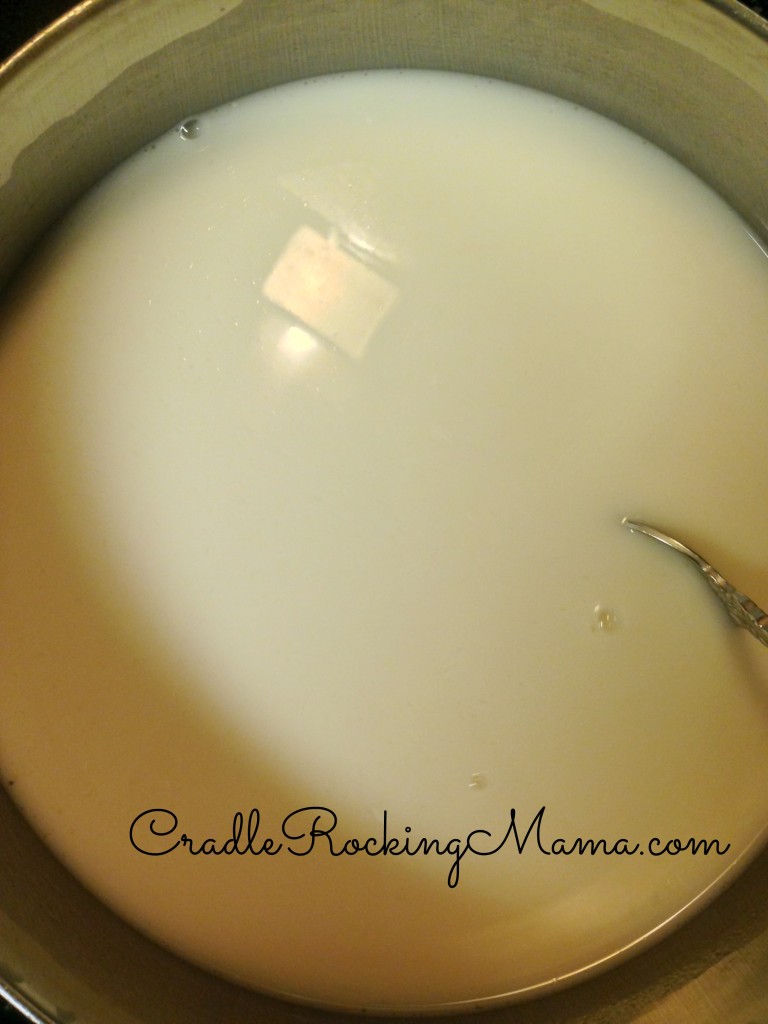
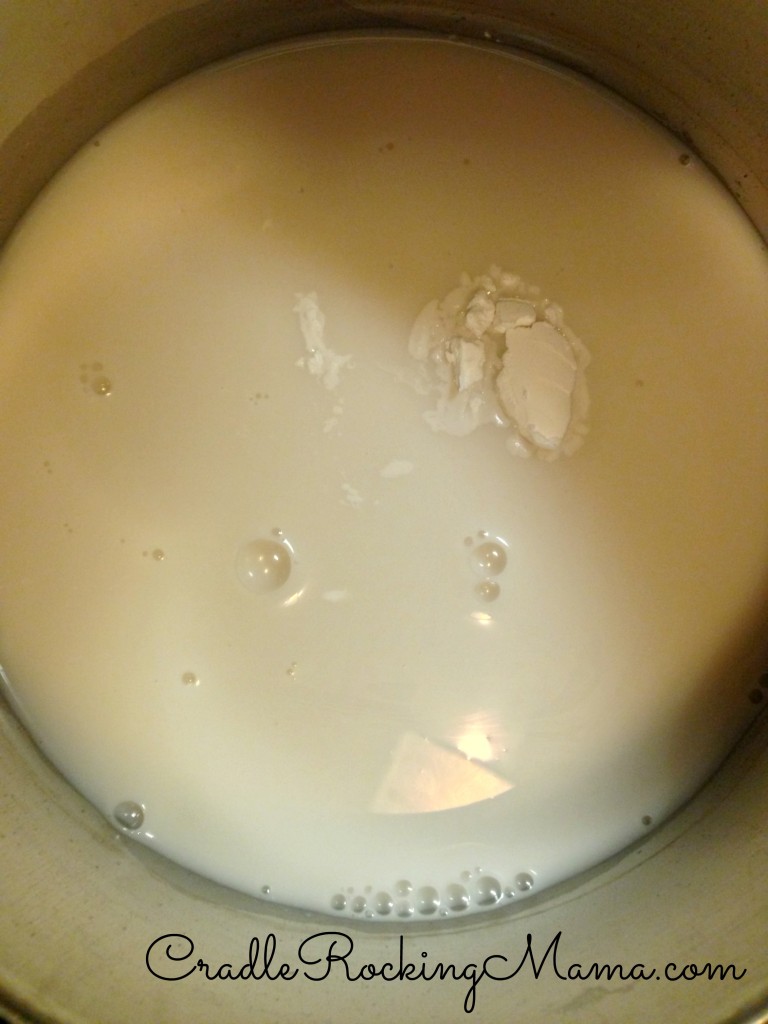
Then get some safe milk, pour it in a pan and add arrowroot starch to help thicken it.

Milk and starch warming on the stove - no, I haven't stirred the starch in yet.

Milk and starch warming on the stove – no, I haven’t stirred the starch in yet.

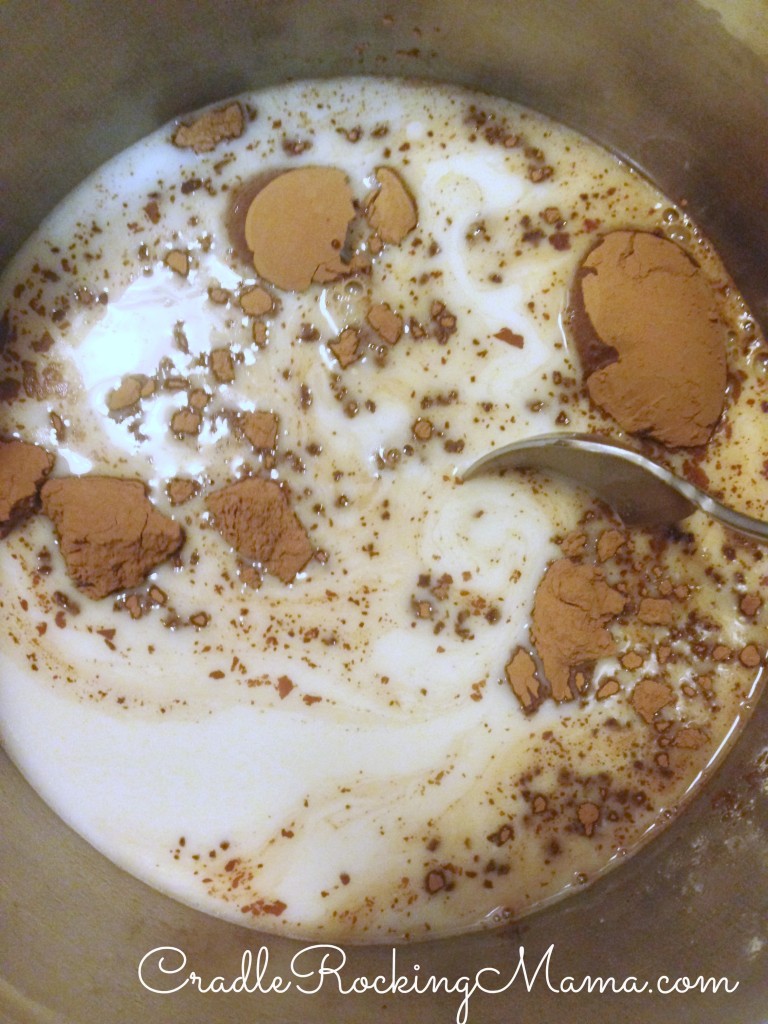
Once it is warm but not boiling, add some maple syrup and chocolate syrup, stir, and return to a simmer. Then serve and enjoy!

I’ve yet to find a hot cocoa that Jed doesn’t thrill at, so this will be an easy winner in your house if you find yourself out of the instant version some day!

Chocolate face, happy toddler! Yummy!

Chocolate face, happy toddler! Yummy!

Hot Cocoa: Syrup Version (Dairy/Soy/Sugar Free)
 
Cook time
Total time
 
This is a delicious and simple hot cocoa sure to make your kids (and yourself) very happy this winter!
Author:
Recipe type: beverage
Serves: 1 cup
Ingredients
  • 1 c. safe milk
  • ¼ tsp. arrowroot starch
  • 2 tsp. maple syrup
  • 3-4 T. chocolate syrup
Instructions
  1. Put the milk and starch in a sauce pan and heat to a simmer.
  2. Add maple syrup and chocolate syrup, return to simmer.
  3. Serve and enjoy!

Go here for the chocolate syrup recipe!

Tomorrow: the awesome coconut milk hot cocoa I talked about before!

Stay warm, y’all!

Brown Thumb Gardening: New Series!

Brown Thumb Gardener cradlerockingmama.com

My Nana was amazing. She could take a cut flower, stick it in some dirt, and in two days she’d have a full, blooming bush of flowers.

Okay, I’m exaggerating. But not by much. She really did have a knack for growing things, and almost every plant she touched bloomed and thrived.

I did not inherit her green thumb. 

My 6th grade science fair project almost netted me a solid “F” because I chose to do the simplest of all science fair concepts: growing beans in cups with different conditions to prove a theory. (You know you did it, too!)

Not only did the beans watered with motor oil fail to grow, but I pretty much killed all of my control group, too. 

My gardening skills didn’t improve much over the years.

Yes, folks, I have what I affectionately call a Brown Thumb. (When I’m feeling particularly frustrated by this knack, I call it a Black Thumb.)

Having a brown thumb hasn’t really been that big of a problem in my life, though. I mean, most anything you would want that once was a living plant you can just head off to a grocery store or flower shop and buy, right?

Ah…those were the good ol’ days.

Now, with Zac’s FPIES to corn, I’ve been having a helluva time finding fresh, frozen or canned produce that is NOT corntaminated in some way. It’s a lot harder than it looks to find a vegetable that hasn’t been sprayed or fed a corn-derived product at some point in its life!

It’s so hard, in fact, that I’ve decided the ONLY way I’m going to be able to safely feed my son this year is to grow all of his food from scratch.

This “Brown Thumb Gardener” is going to HAVE to develop a Green Thumb in order to keep my son alive and thriving. 

Failure isn’t an option for me now.

I’m confident I can do it! There has to be some latent farming talent in me from my Nana somewhere, right? (Right?)

Welcome to Brown Thumb Gardener, a new series where I share the trials, tribulations and successes of growing all the food my son will eat this year.

I’d love it if you’d take this journey with me; after all, if I can grow a garden, anyone can!

Are you game?

Then let’s get started gardening, folks!

“Wait a sec,” I can hear you asking. “It’s JANUARY. What on earth does she mean ‘let’s get started gardening’? It’s too cold to grow anything!”

A-ha! Just what I always thought. And you are correct. And you’re wrong. Turns out, there’s TONS to do in January if you plan to garden!

We may not be at optimal planting time, but it IS perfect planning time!

I visited the organic gardening center in my area and asked a ton of completely ignorant questions, thinking they could possibly steer me in the right direction for my upcoming garden.

The lady there was nice enough to give me their copy of the Baker Creek Heirloom Seeds catalog (the fact that Zac was screaming bloody murder because I wouldn’t let him down surely had something to do with her desire to give us the catalog and get us out of there! Oh, well. It was nice of her, anyway.).

First of all, I need to pick out my seeds. For me this isn’t a simple exercise of “okay, what looks like I’d enjoy eating”. Instead, it’s me picking out all the food trials we plan to do for Zac this year.

After checking the FPIES reference chart for food trials and considering my options, I flipped through the seed catalog and picked out all the things I want to grow.

23 different foods isn’t too much to start with, right? (Yes, that’s sarcasm.)

Unfortunately, I can’t think of anything I’m willing to cut out, due to the fact that it is so hard to find safe versions of most of these foods for Zac.

Well, my Mama always says “Go big or go home!”, so my garden is gonna be BIG this year, y’all!

Here’s what I’ve picked out:

  1. Detroit Dark Red Beet
  2. Calabrese Green Sprouting Broccoli (retrial for Zac, and Jed eats a lot of it)
  3. Snowball Self-Blanching Cauliflower
  4. Kuroda Long 8 Carrot
  5. Delikatesse Cucumber
  6. Yellow Wonder Wild Strawberry
  7. Luffa Gourd (that’s not a food, that’s just for fun)
  8. Georgia Southern Creole Collard
  9. Hollow Crown Parsnip
  10. Purple Jalapeno
  11. Amsterdam Prickly Seeded Spinach
  12. Five Color Silverbeet Swiss Chard (retrial and hopefully Jed will like it)
  13. Amish Paste Tomato
  14. Chadwick Cherry Tomato
  15. Petrowski Turnip
  16. Stevia (this is for me)
  17. Sweetie Star Stevia (so is this)
  18. Mammoth Grey Striped Sunflower (I hope to make ALL our sunbutter from scratch)
  19. Purple Podded Pole Bean
  20. Blue Curled Scotch Kale

And from Seed Saver Exchange I’m ordering:

  1. Genovese Basil
  2. Cilantro

And somewhere along the way I’m going to get some potatos to plant. (According to my co-op, I ate 600 pounds of potatos in 2013!! I need to plant a lot of those!)

So there is my garden for the year!

Now I’ll move on to the next steps, but I thought I’d share this first step to see if anyone else wanted to share gardening stories, tips, and experiences and take this journey with me.

Any other Brown Thumb Gardeners out there that want to become Green Thumb Gardeners? Leave a comment and we’ll share stories!

__________

What veggies do you want to grow this year?

The Best Way to Approach Food Trials – Recap

The Best Way to Approach Food Trials - A Recap cradlerockingmama.com

The post last week generated some awesome conversation about food trials! Unfortunately, it was all on the FPIES Facebook groups!

There are hundreds of families on those groups, but I know there are lots of people who either don’t use Facebook, or haven’t found the FPIES groups yet. I knew there were probably people searching for answers at the start of their journey who could benefit from this awesome conversation. 

So I asked the Mama’s there if I could share some of the wisdom they imparted here in a re-cap post, and they gave me the go-ahead.

Here is some of what I learned from my “Brain Trust” after asking my food trial question last week, and I believe these ladies have managed to find The Answer to the Question of “What is the best way to approach food trials?”

From one mom:

The reason you are supposed to go slow with sauerkraut juice or cabbage tonic is because it is a VERY strong probiotic. I recently read that 1 ml of properly fermented kraut juice has over 100 billion LAB. As a measure of comparison, an entire Culturelle pill has only 15 billion.

My personal opinion (and this may differ from child to child and so what I’ve observed for us may be completely different than what another parents observe) is that provided the child is at baseline (and not still recovering from a fail, a virus, etc) a safe food should be safe. When we first started, we started slowly because I know my son’s reactions are dose dependent. He’ll still react to a minuscule amount of his worst triggers, but the intensity of the fail, the length of his reaction, and the length of his recovery are significantly less the less he’s ingested.

My worry about giving small doses for weeks and weeks is that you run the risk of a chronic fail. I think it makes sense to ramp up slowly, but I wouldn’t go so slowly that you are giving the same tiny dose for weeks before being able to increase and I’d increase as soon as there are no symptoms.

There’s been some interesting research showing that the IgE ANA kids who were giving drops of their triggers to “desensitize” them developed EoE to their IgE triggers. This was big in the allergist world, as IgE and EGIDs were not previously thought to be linked. I would worry about the effect that small doses of an yet unknown FPIES trigger being given in small doses for a time would have on that child’s immune response to said trigger

To clarify, cabbage tonic is weaker, the counts above are for kraut juice. Usually ppl go slow on tonic because those kids struggle with probiotics. You can start with kraut juice (and skip tonic) if your LO is not really sensitive according to everything I’ve read on the GAPS board.

See? Brilliant input!

And another Mama:

I agree with your logic that going too slow is not the right answer either. We went too slow on beef broth increasing by the tsp and took almost a month to react. I’m still trying to figure out how to do trials as the increasing by tsp with regular foods doesn’t work with my fussy toddler, maybe good for an infant. But I think too slow will mask a possible reaction. I am trying now to start small then get to a full dose in a few days as he seems to react to larger quantities so why not find out sooner. No idea if going too quick could make them more prone to react or not be able to handle the food. Wish the docs knew too.

Yet another Mama encouraging us to not go TOO slow:

I agree, there is such a thing as too slow. I know you are a fan of the “bucketful” theory. As hard as it is, I think you have to fill the bucket to know if it is safe or not. We start small and build for three days, then serve moderate quantities for the remainder of the trial period. If you want to do a long trial, I wouldn’t try to dissuade you but I would suggest stepping up quantities so you can fill that bucket sooner rather then later. You also mention confusing issues like fussiness, hiccups, etc. I totally agree that our kids may not be reacting to a food protein – but adjusting to eating! That is why I’m willing to push thru some of the non-GI symptoms. Good luck to you as you start your new approach. I hope carrots are a definitive success!

And another:

I think it makes sense to start slow for a few days… Maybe a week. Then give full servings if that went well. The thing is- if it’s a fail that’s a long time coming, there’s probably been inflammation for weeks before it hits the fan if you’re doing reeeeeeally slow trials. That hasn’t necessarily been easier for us to recover from than faster fails. I think in the beginning, we had more slight adjustment symptoms, and as she ate more and more foods, that seemed to taper off for trials.
Maybe until you get a good sense of his particular typical signs of pass and fail, you could do longer trials… But I’d be wary of giving super small doses for a long time.

Here’s another Mama’s thoughtful input:

We too, have found that very small amounts (particularly with trace) make it harder to identify if the food is triggering a response. My son’s safest foods have been safe since day 1- and, for the most part, he has eaten them in larger quantities by day 3 of the trials. We let him guide, to a degree (within a certain serving size and depending on what we are doing). For instance, we know we can’t give large quantities of starches/sugar foods because his dissacharide deficiency will muddy the waters with those intolerance symptoms.

I also can’t help but wonder, as with our experience and other places I have read as such in gut health and such, how much the gut microbes play a role — even here at the introduction stages; and if there is something with the specific make up of the gut flora in the symbiotic vs. toxic picture that decides if the food will be perceived as a threat or not by the immune system. So, the small ‘doses’ maybe doesn’t dramatically change the gut flora enough to see, only until it has been a longer time or a larger serving does that ‘spill over’. But then the larger doses change it too quickly for the body to keep up? Hard to make it make sense but the microbes do a lot of the ‘talking’ in the gut and certainly must have some influence….when you hear of all the variances everyone has, makes me wonder more about it. It’s such a hard balance to find though….and so individualized.

Side note: the Dissacharide deficiency she mentions is basically what Jed has – Fructose Malabsorption. Since we’re concerned Zac will also prove to have FructMal, this was a good point for us to note. 

Here’s another Mama’s story:

we do small amounts …a few bites of the food one a day for 2 days …if no vomit/ lethargy/ severe rashing occurs and they still willingly eat what we are serving, then the third day they can consume as much as their little bodies can handle. We don’t typically make it this far though (or at least haven’t passed anything but ROSEHIP TEA in over 4 years). My boys will scream when I only let them have a bite of the “tested food” …they want more and are seriously ticked that I won’t give them more. Usually by day 2, they full out refuse to eat the tested food. Something in their body is hurting and they know to not eat it. They refuse. I agree with what “N” said about the slow trials sometimes leading to much longer recoveries … just because we don’t always see the immediate vomit/ shock/ lethargy reaction doesn’t mean other things are not going wrong on the inside. Typically 2-3 days after initial test we have mucous stools, funky sleep and behavior patterns, pale skin, allergy shiners, blood in stools, etc … takes up to 2 weeks to clear out and get back to normal.

Even more Mama’s chimed in with how they approach food trials, and the general consensus amongst those was to start small, yes, but almost all were at a full serving of the food within 5-7 days of the trial beginning.

In the end? All I can say is two things:

1. If your child has (or you suspect your child has) FPIES, you simply MUST get on the Facebook FPIES Message Boards! The information within is vital and invaluable! These Mama’s are brilliant, creative, strategic thinkers who can help you through this medical mystery better than anyone else on the planet.

2. If you’re doing a food trial, there seem to be some consistent truths to what these Mama’s have experienced:

  • If a food is going to be a safe food, it will likely be an “easy pass” – no symptoms whatsoever from the beginning.
  • However, that’s not always  true. So push through any minor symptoms that could easily be something “normal baby”, such as hiccups, minor sleep distruptions, a little clinginess, etc.
  • Start with just a little bit of the food on the first couple of days; many babies reactions vary in severity based on how much of the offending food they ingested. A small amount at first makes sense, in case of an acute, vomit-to-shock type reaction.
  • But don’t stay small for too long. The miniscule data that exists indicates this could cause other potential intolerance problems, and experiential evidence indicates this could hide a slow-burn, chronic reaction for too long and cause a much longer gut rest time to recuperate.
  • Most Mama’s eventually learn how their children react to foods and food trials and customize the length based on their own needs, but all of them generally follow a pattern:
  1. Start small
  2. Increase steadily to a full serving size between 5-7 days
  3. Maintain trial for a period of 1-7 days
  4. Take a 3 day break from the trial food
  5. Resume the trial for at least 3-5 more days
  6. Make the call: safe or unsafe

There it is, folks! The collective wisdom has answered the question of the Best Way to Approach Food Trials. 

I’m no idiot; I’ve taken the advice to heart and put it into action with Zac.

Thursday he ate 1 tsp. of carrots. Friday he ate 2 tsp. of carrots. Saturday he ate 4 tsp. of carrots. Sunday he got a whopping 8 tsp. of carrots.

Tonight, we’re basically going to give him half a serving of carrots (a serving size being 3-4 ounces, that means he will be getting approximately 1/4 cup).

Tomorrow night, a full serving.

We’ll probably hold there for a few more days, then pull the carrots for 3 days and reintroduce.

With any luck, at or before January 25th, we’ll be calling carrots a safe food for Zac! 

After all, so far, so good!

__________

A BIG SHOUT OUT to my fellow FPIES Mama’s for their willingness to let me share their wisdom here today! These ladies have earned my undying affection and respect, and we are all willing to help you if you are new to the FPIES struggle. 

__________

A little Jed story before I go…

Darrel and I have gotten pretty confident in our ability to keep him un-fructosed. In fact, we’re so pleased with how well we keep his bucket emptied that we’ve decided to be brave on occasion and let him try things that are on the ‘avoid’ list.

Last Friday at the health food co-op, we got him a muffin. Everything about the muffin was safe for him (vegan, GF, etc.) except it had cherries. We figured the small number of cherries in a muffin would be small enough to stay safely within his fructose ‘bucket’ and not cause a reaction.

Were we ever wrong!

Friday night he was a pill to put to bed. Saturday he was actually still a sweet, charming child – but he complained of mystery ailments all day long and had HORRIBLE diapers! (Potty training, still, and on Saturday he flat refused to wear underwear. I think he knew his body was out of whack and was scared he wouldn’t get to the potty in time.) Sunday was another bad diaper, but he’d stopped complaining of mystery ailments. (Seriously – he complained his earlobes hurt at one point!)

Hopefully today he’ll be back to normal, and we can give him some time to rest. Poor little guy.

__________

Thanks for indulging me in this very long post, but I really felt like this was information too good to NOT put together for you! Hope it helps!

Don’t forget to subscribe via email! Just look for “Don’t Miss A Thing” at the top of the page!

Frugal Friday – Where Are You Standing Financially?

Where Are You Standing Financially cradlerockingmama

Browsing on Pinterest this week (a great activity to do while nursing, in case you didn’t know) I saw a “savings goal for 2014” thing that looked intriguing.  Instantly I thought “now this is a great Frugal Friday tip!”

For some reason, though, when I sat down to write about it, my heart just wasn’t in it.

I couldn’t figure out why I suddenly had writer’s block, and then it came to me: we can talk about ways to not spend our money uselessly, we can talk about saving money via clever savings plans, we can discuss reusing things so we don’t have to buy new stuff, but all of that is really the icing on the frugality cake.

The actual frugal “cake” is a sound financial plan. Upon it rests all the other little tips and tricks that you might ever read – even from me.

Now, I’m not a trained financial planner. I’m not an accountant.

What I AM is a Mama that has, at 5 different points in my adult life, managed to achieve the goal of being 100% debt free, and have managed to keep my family financially afloat through some very harrowing financial times. So I’m not completely useless on the subject of money!

Full disclosure: after becoming debt free 5 times, one would imagine it would have STUCK and I could have stayed that way. Even savvy planners get sidelined by the unexpected, though…car wrecks that kept me out of work for 7 months, unexpected moving/marriage debt accrual, sick children and medical expenses too big to anticipate, etc. So, yeah…I’m still working on STAYING debt free. But getting there is something I’m VERY good at!

There are all sorts of fantastic resources out there for personal financial planning. Some have become so renowned that even those of us who haven’t utilized them know a few of their techniques (envelope method, anyone?)! With so many resources available, though, it can get a little overwhelming. Where do you start?

And if you pick a starting point and read the whole book, you can be terrified of the steps that are coming at the end of the journey; you can get overwhelmed before you even start.

So I thought I’d take the beginning of the year to refocus Frugal Friday for a very quick ‘clean up your financial house’ guide. A “Busy Mama’s Guide to Straightening Out the Checkbook”, if you will. Nothing overwhelming – just simple steps that you can take to make 2014 a little better for your family financially.

With hope, this will get you confident enough in your abilities that you can delve into more thorough research and think “I got this!” instead of “OM goodness I’ll NEVER be able to do that!”

So, let’s start!

The first thing to do when you want to get serious about your personal money is to find out where your money is at this exact moment in time. If you don’t know where you are, you can’t make a plan for where you want to go, and you can’t see which frugal tips will most help you!

So here’s the task:

Start with your set in stone bills. Get a pencil and paper (or a spreadsheet if you’re so inclined) and make a list of every place that requires you pay monthly. Think electric bill, water bill, phone bill, mortgage, etc.

In one column, write the name of the company, in the next column, write down how much you pay per month. If that amount is variable, put your best estimate in there (if it ranges from $150-250 per month, write down $200 for now).

Here’s an example:

BILL AMOUNT PER MONTH
Electric $200
Water $45
Cell Phone $180

Now move on to your set in stone bills that come on a non-monthly schedule: car insurance, homeowners insurance, heating oil, car registration, etc. These are things you WILL have to pay, but since you don’t pay them monthly they can sneak up on you.

Skip a line, and start with your “annual expenses”, putting them in a third column – like this:

BILL AMOUNT PER MONTH AMOUNT PER YEAR
Electric $200
Water $45
Cell Phone $180
Car registration $65
Car insurance $565
Homeowners Insurance $1250
Heating Oil $350

Now go back and tally things up! Start with your monthly expenses and just add those together. Add a line to that list that is titled “Annual Expenses” and leave the amount blank for now.

Then, go to your annual costs. Add those together, divide the total by 12, and now you have an amount to save monthly so you’ll never be caught scrambling to find the money to pay car insurance again! Add it to your monthly expenses like so:

BILL AMOUNT PER MONTH AMOUNT PER YEAR
Electric $200
Water $45
Cell Phone $180
Annual Expenses $186
TOTAL $611
Car registration $65
Car insurance $565
Homeowners Insurance $1250
Heating Oil $350
TOTAL $2230

So now, with our made-up numbers, it says we need $611 just to stay afloat.

Now we move on to variable things. This would be groceries, gas, entertainment, and general living expenses.

If you keep receipts,  grab all your receipts for the last three months. Why three months? Because spending is a little out of whack for Christmas so November and December might not be the best examples of normal spending to extrapolate data from. Add October in, and you’ll start to get a better picture of your actual spending.

(Bonus: add up all the costs for gifts you gave at Christmas, divide by 12, and add that to your annual expenses amount. Now Christmas won’t ever break your budget again!)

If you don’t have receipts, grab your credit card statements and bank statements and you’ll at least be able to get a rough picture of where your money goes.

Using a format that makes sense to you, start writing down where your money goes. I’d suggest thinking in categories – but don’t stress too much over this! Personally, I get a little bogged down if I start breaking up our spending into too many categories.

Over the years, I’ve realized that I do best with a single category for “household spending”; it includes groceries, eating out (as if!), clothes, shoes, toiletries, and any other misc. ‘inside the house’ expenses. This gives me the flexibility in my budget to say “OK, I’m pretty stocked up on groceries this month; I can go blow $300 on books!” without feeling guilty or ‘running out of money’ in that category.

You, on the other hand, might be unmotivated by such an approach and actually need the structure of a “groceries”, “eating out”, “kids clothing”, “parents clothing”, “dry cleaning”, etc. categorical approach.

At this point, it’s all about what works for YOU and what makes sense to YOU. Just get the info down somehow, someway, so you can use it as we progress.

So make your columns (example below) and add up the last three months of expenses, divide by 3, and use that as your monthly amount.

CATEGORY AMOUNT PER MONTH THREE MONTHS
Groceries $958 $850+$925+$1100
Eating Out $50 $55+$60+$35
Clothing $85 $89+$125+$40
Gas in Cars $308 $260+$315+$350
Dry Cleaning $56 $45+$58+$65
TOTAL $1457

Obviously I’m TOTALLY making things up here. FPIES families will look at an “eating out” category and laugh, normal families will look at that “groceries” budget and cringe. I’m just throwing out examples here.

So now, put it all together!

BILL AMOUNT PER MONTH AMOUNT PER YEAR
Electric $200
Water $45
Cell Phone $180
Annual Expenses $186
Living Expenses $1457
TOTAL $2068
Car registration $65
Car insurance $565
Homeowners Insurance $1250
Heating Oil $350
TOTAL $2230

CATEGORY AMOUNT PER MONTH THREE MONTHS
Groceries $958 $850+$925+$1100
Eating Out $50 $55+$60+$35
Clothing $85 $89+$125+$40
Gas in Cars $308 $260+$315+$350
Dry Cleaning $56 $45+$58+$65
TOTAL $1457

Using this example (that is totally made up – hey, I didn’t even include rent/mortgage in it, after all!) our fantasy family knows they need $2,068 per month just to break even on monthly expenses.

That’s enough for this week! Just sit down and take the half hour it will take you to put to paper exactly what your family costs to maintain per month. When you’re done, you’ll see much more clearly where money is being well-used and where it’s being sucked dry uselessly. 

It might inspire you to make some big changes to your budget! Just SEEING the data so clearly often makes me feel motivated to change things!

If you feel you can make some changes without being overwhelmed, go for it!

If the thought of where to go next is disheartening, however, just put this to the side for now, and pat yourself on the back for taking the first step towards financial control.

Read the rest of the series:
Part Two: Organize Your Debt
Part Three: Make a Plan
Part Four: Focus on the Details
Part Five: Design Your Dream Life

Hope that helps!


How about you and your family? Do you have a financial plan or budget? Or is bill paying a total surprise to you each month? I’d love to hear your biggest financial challenge!

The Best Way to Approach Food Trials

The Best Way to Approach Food Trials cradlerockingmama.com

Food allergy families are always looking for the safest and best ways to approach food trials, so I’m here today to tell you the simple truth:

I don’t have a clue, either.

But – Hah! Gotcha with that title, right? (Sorry, felt like having a little fun today!)

Seriously, though, Darrel and I have been talking about this for a while and I’ve paid attention to what I read on message boards. In the end, I’ve come up with some observations and made some new decisions about how we are going to proceed with Zac in the future. I thought I’d share those thoughts with you today.

To begin, a quick recap of food trials with Zac thus far.

  • Quinoa: started pretty slow and easy, seemed fine, pulled it for the 3 day break and he got an ear infection that threw us off course due to antibiotics. Finally were ready to trial it again, and decided to try and heal his gut first with some…
  • Lamb broth: started slow and easy, seemed to be fine so we gradually increased the amount. Continued to be fine, so we jumped right in to…
  • Lamb meat: feeling confident because of the lamb broth success, we gave him as much as he wanted! He did well on it! We pulled it for the 3 day break, and reintroduced it at the same time as we reintroduced quinoa (because we’d been told the proteins were identical to the broth so assumed the meat was already a safe food. Never. Assume.) The next day he had visible blood in his diapers. Pulled all 3: quinoa, lamb broth, and lamb meat.
  • Quinoa (again): finally got him as close to baseline as we’d ever get and gave quinoa another shot. He had absolutely no symptoms whatsoever – in fact, it seemed to help him get over the mild reaction to some strange thing he’d eaten earlier!
  • Broccoli: gave him as much as he wanted from the start, and he loved it! He’d eat a stalk per meal all by himself! Three days in…bloody poop. Pulled it.
  • Swiss chard: never really loved it, but we tried to get him to eat as much as he would take. Finally figured out he would eat it better if it was baked in to his quinoa nuggets. Took about a week before there were enough strange symptoms to make us stop and pull it. (Hiccups, sleep disturbances, crankiness, clinginess, increased nursing, etc.)
  • Carrots: sigh. The next time we start carrots, it will be the 3rd time we’ve tried to have a trial. It keeps getting interrupted! He does seem to get a diaper rash from the carrots, and has had hiccups, sleep disturbances and general “miserable baby” syndrome, but that could be explained by either his excessive teething, or the stomach bug that visited our house.

Okay, so thinking back over that list, I considered what a friend of mine is going through. She started her son on cabbage tonic (think sauerkraut that has only fermented for a week or two instead of a full two months) as a natural probiotic, healing food.

She was giving him a very small amount (something like a few mL per day) and her son was reacting to it in an extreme way!

The other moms said that they’d had to start their kiddos with ONE DROP of cabbage tonic at first. Sometimes even half a drop per day! They said that for some of them, it took months of very slow, steady increases to get to the point where their child could handle a “regular dose” of the tonic.

Granted, she’s trialing a probiotic food and those are rougher on the digestive tract, but still…maybe, with a sensitive gut like Zac’s, we could learn something here?

Maybe we’ve just been moving too fast.

Maybe lamb, broccoli and Swiss chard aren’t actually unsafe for him at all…maybe we just bombarded his little system with too much, too soon, and his body rejected it because of that – rather than it being a case of the actual proteins being a problem.

Maybe his digestive tract just doesn’t know how to handle foods.

After all, it took us three tries to prove quinoa was safe for him – and there were some disturbing signs at intervals along the way.

As a very wise FPIES mama friend of mine often says, “FPIES is a marathon, not a sprint”.

Maybe we’ve been sprinting a tad too much and we need to pace ourselves better.

So Darrel and I decided to hang back a bit and go slow. Like, “make me crazy” slow.

So we will reintroduce carrots, but he will only get a teaspoon of carrots at a time for the first few days. We will slowly increase that, watching for reaction signs along the way.

It may take us two months to work up to a full serving of carrots; but at the end of two months we will KNOW if carrots are safe for him.

And that’s still faster than the five months it took us to discern quinoa as his first safe food (even though it’s not nearly as fast as we would like).

I just can’t stand the thought that I’m blowing through foods that he might be able to tolerate IF we gave his system time to adjust.

So…fingers crossed that slow and steady wins the race!

And when we are finished with carrots (either through success or reaction), we will repeat the process with our next food. Heck, maybe we’ll re-trial lamb, just to completely prove our FPIES insanity!

What do you think? Do you think slow and steady is the smarter way to trial foods for sensitive guts? Or are we being overly cautious and need to speed up?

__________

Don’t forget to subscribe! Just enter your email address under “Don’t Miss A Thing” and you’ll always get an update when new content is published. Thank you for reading!