Frugal Fridays – Clean Your Face With Oil

Frugal Fridays Clean Your Face With Oil cradlerockingmama

Earlier this year I did a few posts with the theme “What’s in your _______?”

I could – and may – easily write one of those about what is in our skin cleaning products. The laundry list of chemicals and sometimes potentially dangerous ingredients in a basic facial cleanser is long and daunting.

The price tag isn’t always pleasant to read, either.

Sure, there are cheap facial cleansers on the market, and sure, it’s easy to find specials and coupons for such things, but when you combine the health factor with the money factor, it seems clear that there must be a better way.

There is! It’s the Oil Cleansing Method, and I’ve been using it for about two years now.

It’s a very simple concept: water and oil don’t mix. You need soap or a surfactant to break down oils to remove them.

But soaps and surfactants remove ALL the oils, leaving your face dry, exposed, and out of balance. So then you have to moisturize. But man-made moisturizers are not natural skin oils, so your skin starts producing MORE oil to try to compensate for the lack of oils – a small amount of which are necessary for healthy skin – and you wind up with super duper oily skin as a result.

However, oils will  link up with other oils and play nicely together. So if you put a cleansing oil on your skin, rub it in really good, and use heat to open up your pores, the clean oils will bind together with the oils that have been hanging out on your face all day and will carry them away, effectively cleaning your skin.

Your skin will feel smooth, clean, and soft once you’ve wiped the oils away.

Sounds sort of ridiculous, even though the logic is there, right? At least, that’s what I thought when I first heard of it. I’ve fought against super oily skin my whole life, and these crazy people are suggesting I USE oils to clean my face?

For whatever reason, though, I decided to give it a try.

Did I mention I’ve been doing this for two years?

Yeah. It works!

Interestingly, after using this face cleansing method for a short time, I discovered something: I don’t have oily skin! In fact, my skin actually borders on dry. I just have very efficient oil production, and with all the severe oil removal products I was using I sent my face into oil production overdrive!

Okay, so how do you do this? That can be a little complicated. There are many oil combinations you can use, depending on what your skin type actually is.

Considering that many people learn they’ve been incorrect about their skin type for a large number of years once they begin using the OCM, I’d suggest starting with a basic recipe in small quantities and making adjustments as you go.

You’ll want to use a small bottle for this; I’ve been using a glass apothecary bottle, but I’ve used small plastic bottles with little pop-up lids before.

Basic OCM recipe:

  • 1 part castor oil
  • 5 parts jojoba oil

Lately, of course, I’ve been falling in love with tallow. So when my current bottle runs out I plan to experiment with substituting tallow for jojoba.

The castor oil helps draw the skin impurities out, but it does have a tendency to dry out your skin if you use too much.

I’ve had to adjust my proportions as time has gone on to use much less castor oil for my (ha!) normal-to-dry skin.

This is a good place to start, though.

As for how to clean your face, I’ll tell you what I do. First, I grab a clean washcloth and get in the shower. I pour out a little oil into my hand, rub it all over my face, and then take a minute or so to rub it in really well.

Then I get the water as hot as I can handle, wet the washcloth, squeeze out most of the excess water, and drape the cloth over my face. I leave it there until it starts to cool, and repeat the process at least once, and sometimes two or three more times.

Finally, I get the cloth wet again, squeeze out the excess water, and use it to wipe the oils off my face. When I’m done, I can’t feel ‘oil’ on my skin at all. My skin just feels moist and clean!

Now, how is this economical? After all, these fancy oils aren’t exactly cheap, right?

Well, for starters, it takes VERY little of the oil to clean your face. My bottle of jojoba oil is 8 oz., costs about $20, and lasts for at least two months.

Secondly, you’ll find that by using the OCM at night to help remove the impurities and dirt of the day, you won’t have to “wash” your face in the morning at all. Simply using a warm washcloth and water will freshen you up and leave your skin dewy, moist, and perfect for makeup application – or going bare-faced, something I never would have dared to do before using OCM.

Will the OCM completely clear up your skin so you have perfect, never-get-a-pimple skin? No. Of course not. Nothing can promise that! 

From my experience, though, I no longer get those nasty, cyst-type zits that cause pain, and the rest of my skin feels soft, youthful and better than it has in years.

I still get whiteheads and blackheads, but that’s because I’m lazy and don’t always wash my face every day. (You Mama’s know; sometimes at the end of the day all you want to do is fall into bed. Personal care can wait in lieu of sleep, right?)*

Unfortunately, any skin cleaning method is only as good as your habit of using it, and, in fact, the few times I have used it daily I have noticed that I have exceptional results.

So there you have it: defy all your experience and clean your face with oils. It’s cheap, it’s healthy, and it’s simple!

Hope that helps!

__________

For more reading on this, including some troubleshooting, here are two useful websites:

The Oil Cleansing Method
Crunchy Betty’s Trying and Troubleshooting the Oil Cleansing Method (LOVE her blog!)

__________

Have you used the OCM? How do you like it?

*By the way, my jojoba oil usage estimation is based off times when I was cleaning my face every day. If you’re lazy like me, it will actually last longer and be cheaper!

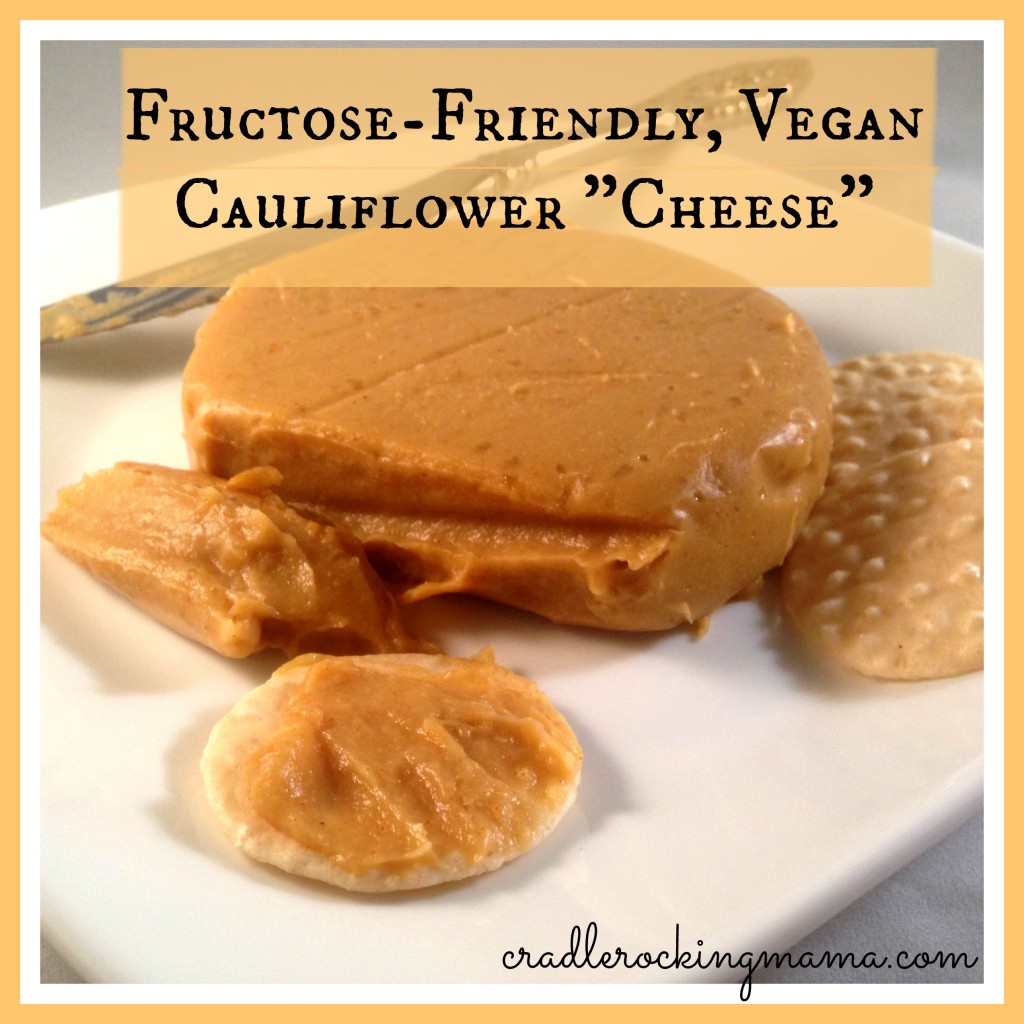
Vegan Cauliflower Cheddar “Cheese” – Fructose-Friendly!

Fructose-Friendly Vegan Cauliflower Cheese cradlerockingmama

Oh. My. Word. Y’all.

I’m happy dancing in my kitchen right now.

Ok, so you know how I shared that awesome recipe for vegan cheese that I’d found? The one made from coconut milk?

I love that recipe.

Sadly, we had to retire it, thanks to Jed’s Fructose Malabsorption. He can’t ‘do’ coconut without having a total meltdown and tummy cramping, so…no more vegan cheese for him!

Until two days ago, when, just as a mental exercise, I tried to think how I could make a bacon cheeseburger for Jed.

  • Grass-fed beef patties? Check!
  • Safe bacon? Check!
  • Lettuce and tomato? Check!
  • Bread? Not yet, but one day I’ll get it.
  • Cheese? Well, maybe if I…

And the tweak hit my brain, and it was like a ray of light enveloped me and a choir started singing “ahhhh!”

Cauliflower.

I knew that if this tweak worked, cauliflower would officially take its place as the Royal Ingredient of my kitchen.

Cauliflower has been crowned, y’all.

In fact, the cauliflower worked so well, I think it works even BETTER than the coconut milk did in the original recipe!

You’re gonna love this one: dairy free, fructose friendly, and melts beautifully.

Here goes:

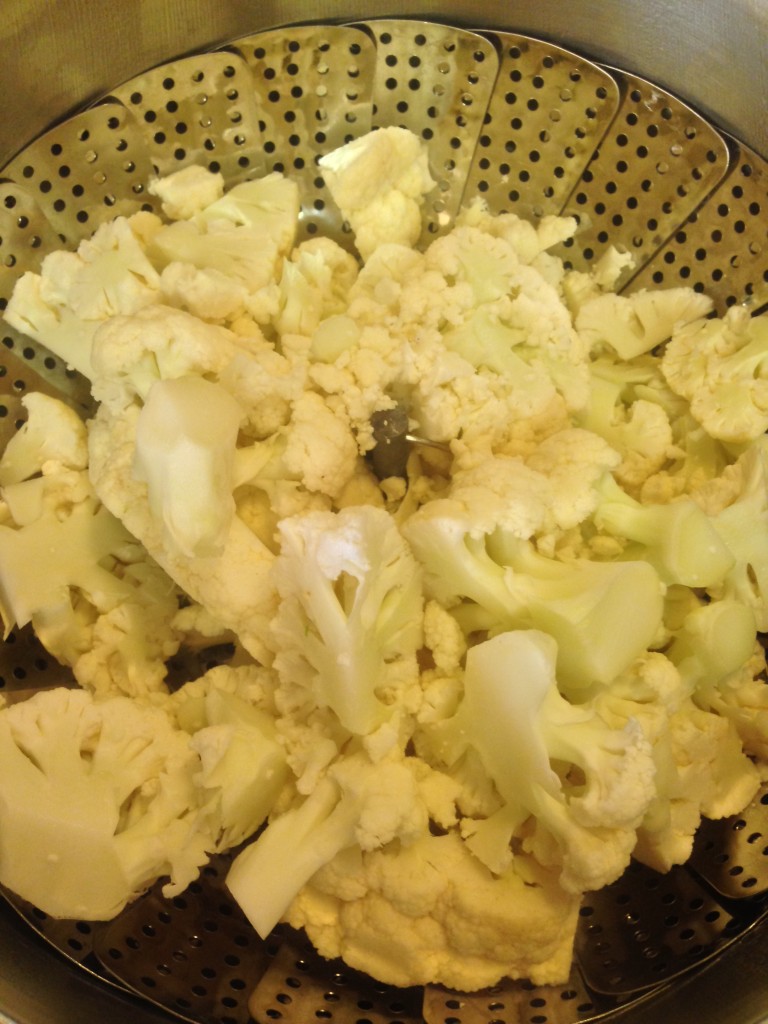
I wanted to make a small batch of this at first, because it was a total experiment. If it went wonky, I didn’t want to have wasted too much. But I didn’t know how much cauliflower I would need to net the required amount of puree, so I just went ahead and steamed a whole head of cauliflower.

Cauliflower Steaming

Cauliflower Steaming

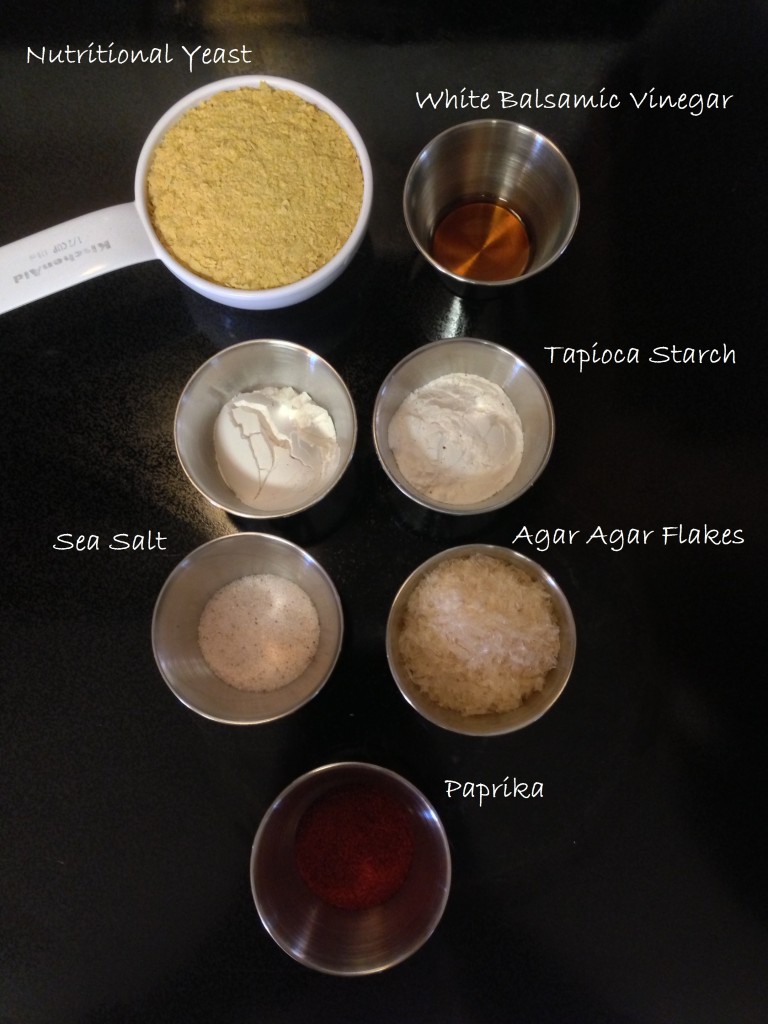
While that was going on, I gathered the rest of my ingredients.

The original recipe calls for two cans of coconut milk; each can is probably about 15 ounces (standard), which I noticed was almost exactly 2 cups of liquid. Since I wanted to make a half-batch, I just halved everything else and planned to use 2 cups of the cauliflower puree.

Once again, I cannot stress enough: with this recipe, mise en place is essential!

Mise en place ingredients

Mise en place ingredients

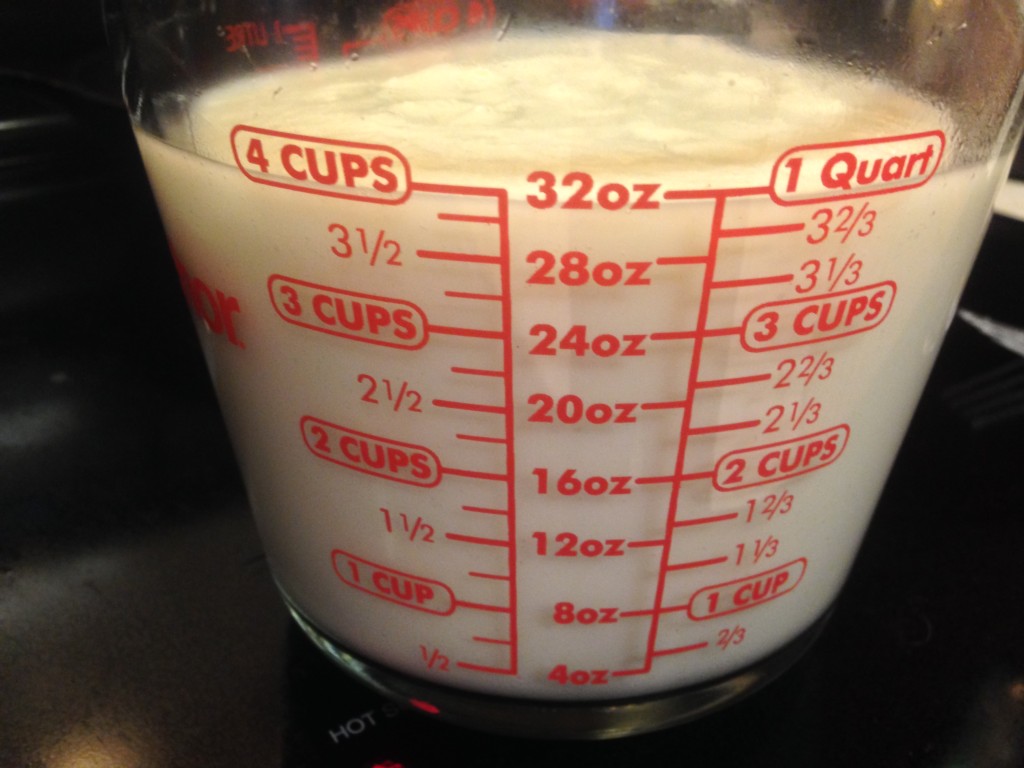
When the cauliflower had fully steamed, I pulled out the steamer basket and poured the water from the pan into a measuring cup. Wouldn’t you just know it? Exactly 2 cups of liquid!

In the end, I needed that full 2 cups to create the right consistency in the cauliflower puree.

Once it was pureed as smooth as I could get it, I added some bacon fat to the mixture. I wasn’t sure if the “full fat coconut” requirement was a clue that this recipe needs some fat to make it work, so I thought I’d give that a shot. Since I don’t use liquid smoke, I figured the nice flavor of bacon fat would add a little extra boost to the end result. (To make this Vegan, of course, simply omit the bacon fat and use a Vegan fat in its place!)

Then I poured it into a measuring cup and – another small miracle – it was exactly 4 cups of puree!

Perfect! Four cups of cauliflower puree!

Perfect! Four cups of cauliflower puree!

So then I poured 2 cups of the puree back into the pan and followed the rest of the instructions.

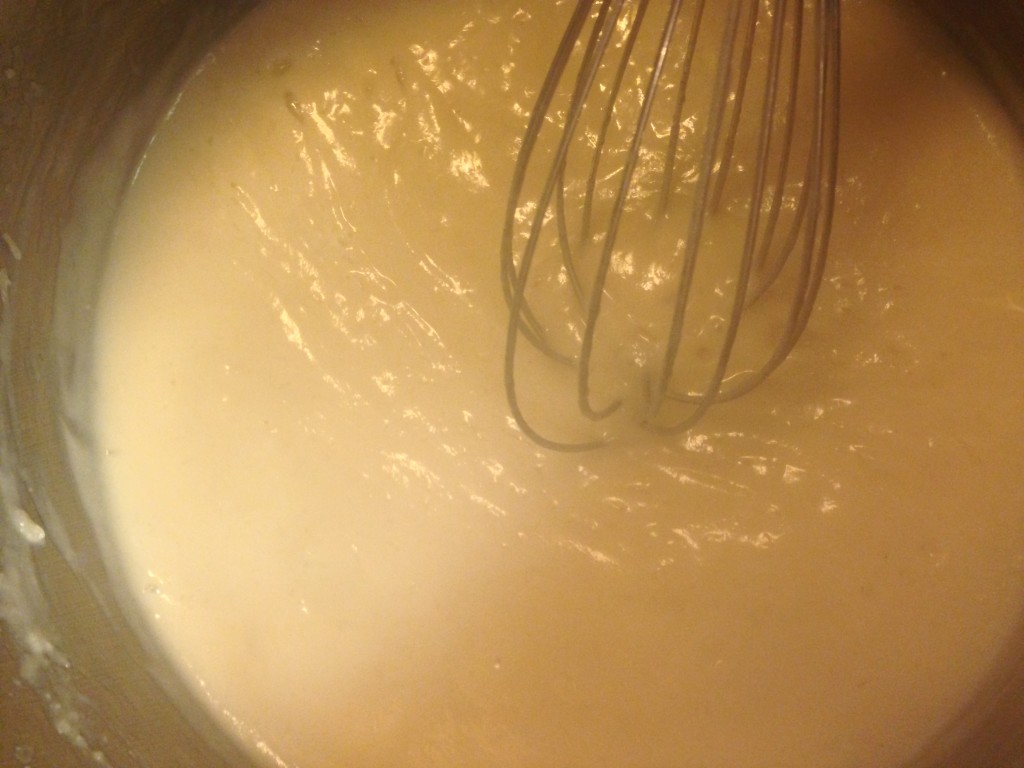
I poured in the vinegar, salt and agar flakes and whisked constantly as the mixture boiled gently.

Cauliflower, agar, salt and vinegar starting its' magic...

Cauliflower, agar, salt and vinegar starting its’ magic…

*Please note: the cauliflower puree likes to splatter and pop as it boils! Move anything off your stove top you don’t want to have cauliflower splatters, and maybe keep your little kids away from the stove while you do this. 

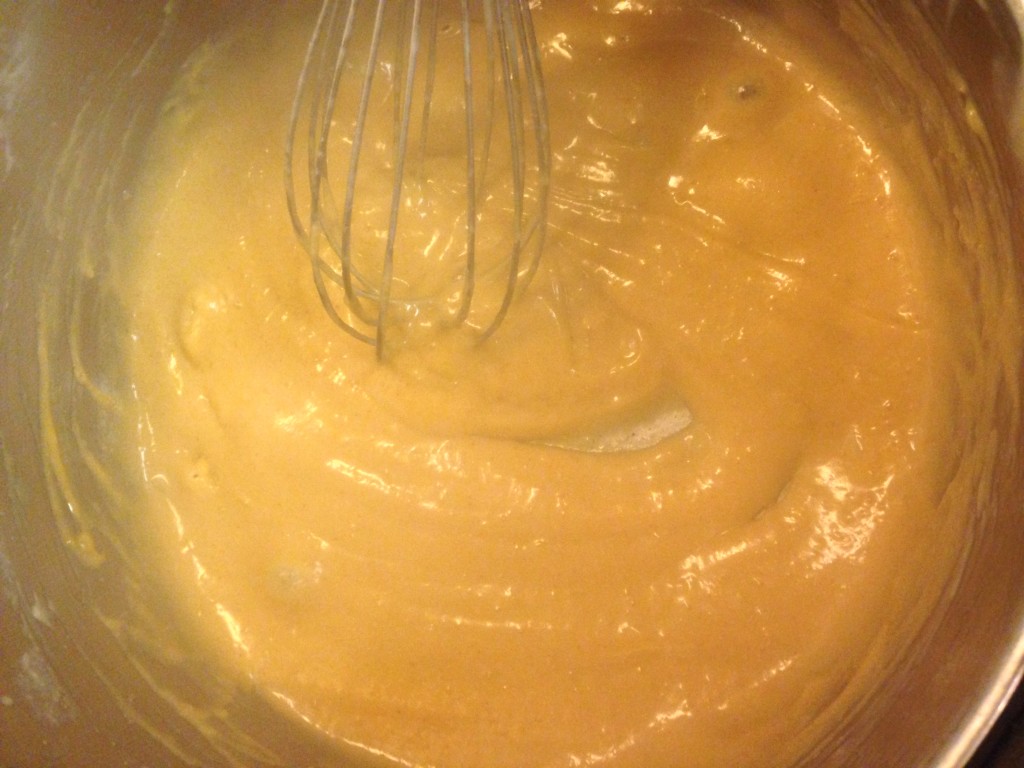
After 15 minutes, it had thickened beautifully.

See the thickening? It's really starting to gel!

See the thickening? It’s really starting to gel!

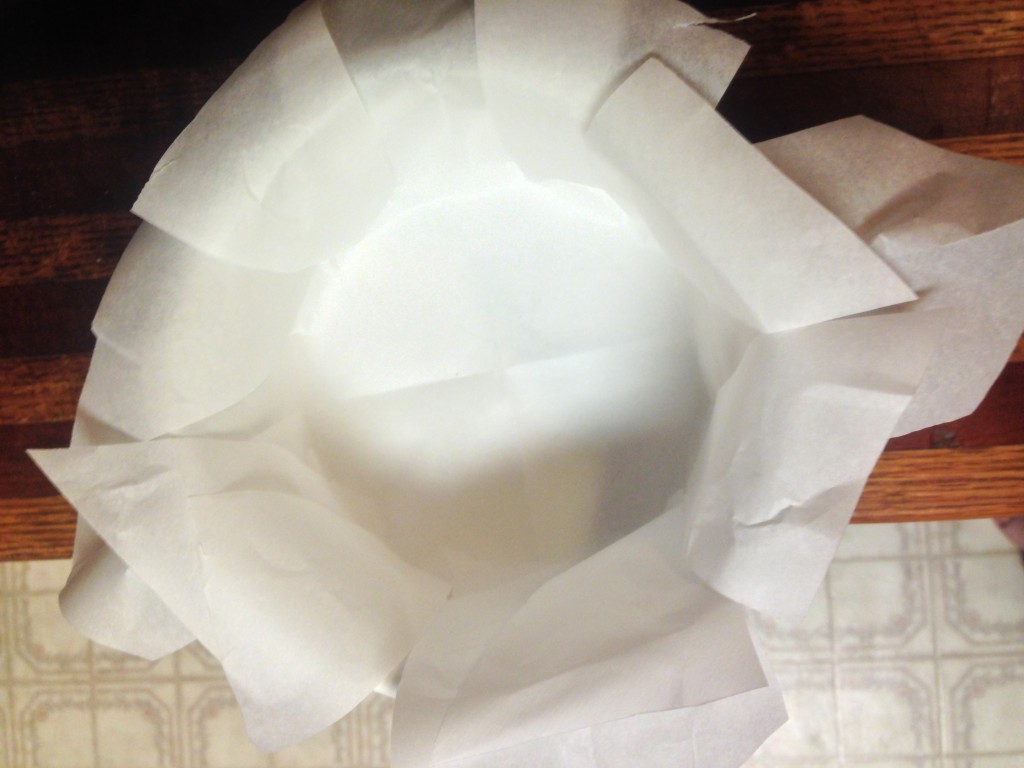
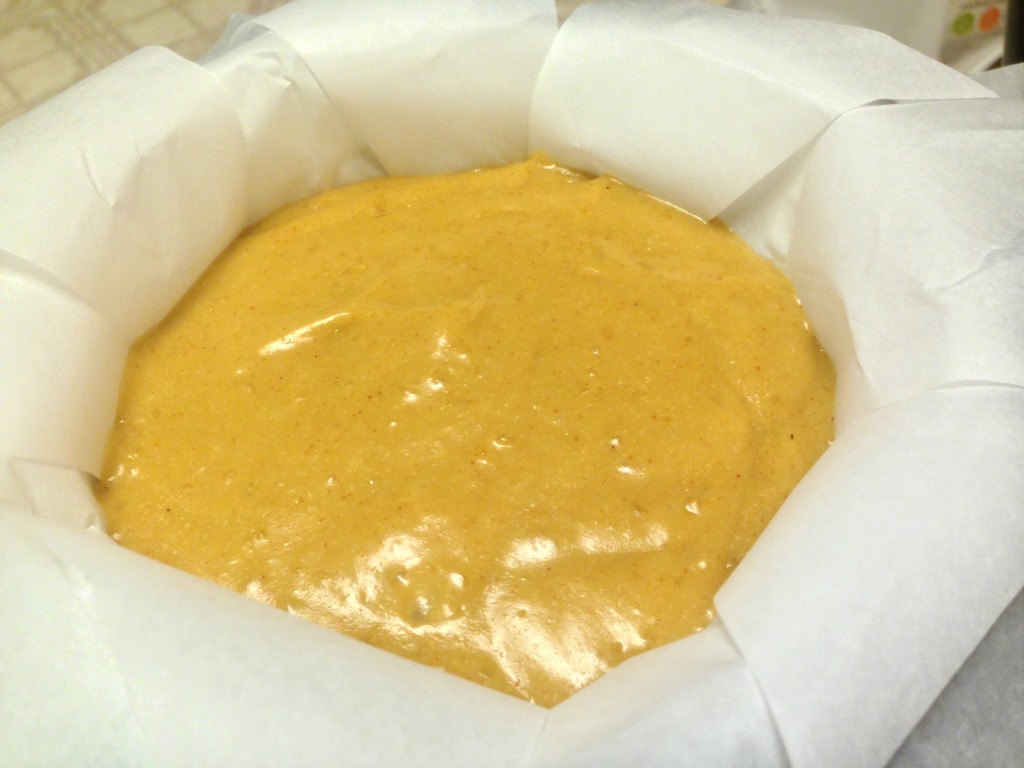
I quickly took it off the stove and did something I should have done before I’d even started: lined a small bowl with parchment paper.

I folded the paper in half twice, then cut small strips from the outside edge to approximately the edge of the inside of the bowl. When unfolded, it lined the bowl perfectly!

I folded the paper in half twice, then cut small strips from the outside to approximately the edge of the inside of the bowl. When unfolded, it lined the bowl perfectly!

Then the pot went back on the stove, and I added the paprika, nutritional yeast, and tapioca starch one at a time, incorporating each ingredient thoroughly.

Then I whisked until I thought my arms would fall off for another 5 minutes until it had thickened even more, and finally poured the concoction into the parchment paper-lined bowl.

Poured and ready to set!

Poured and ready to set!

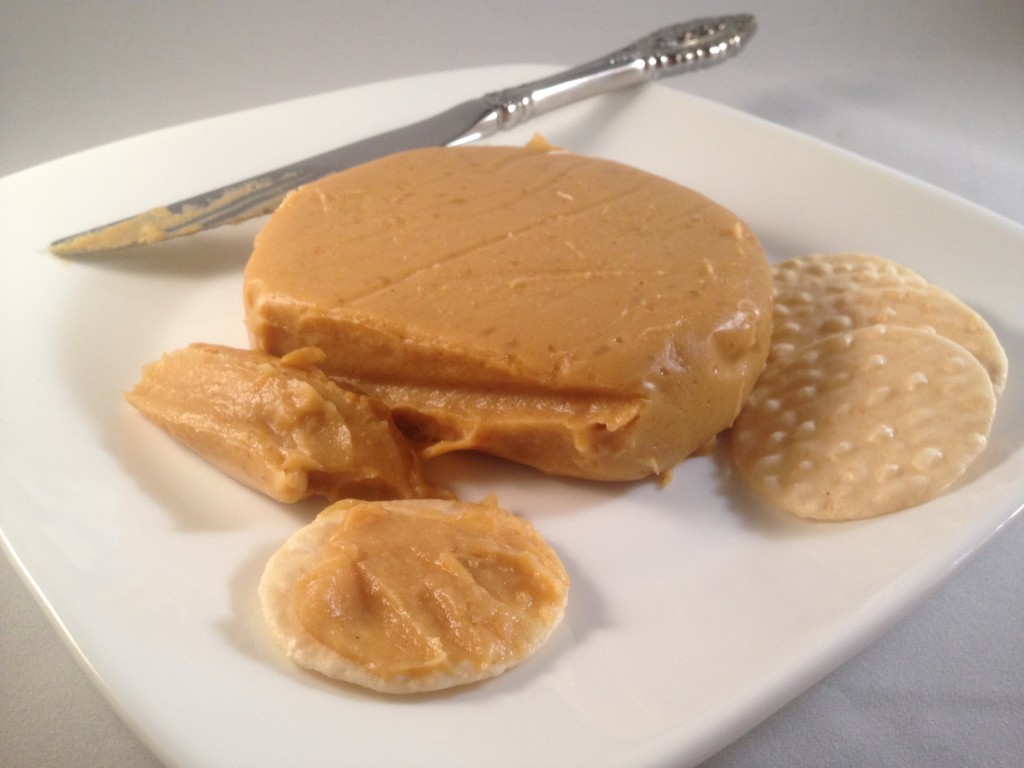
After about two hours, I carefully pulled it out of the bowl using the parchment paper, set it on a plate and voila! A lovely soft, spreadable “cheddar cheese”!

A Gorgeous Snack!

A Gorgeous Snack!

Darrel and Jed both tried it and liked it. Darrel said it tasted just like the original recipe, but it was nice that it wasn’t as oily. 

After the taste test, I put it in the fridge to harden a bit and sure enough, a few short hours later it hardened into a block that – while tricky – could be grated.

I think we’ll be having quesadillas tonight!

I love cauliflower, and I love finding ways to make things that are dairy free and fructose safe for my son. I hope you like this!

(Oh, and with the other half of the cauliflower sauce, I made another delicious batch of Vegan Mac ‘n Cheese for dinner!)

Vegan Cauliflower Cheddar "Cheese" - Fructose-Friendly!
 
Prep time
Cook time
Total time
 
Vegan? Dairy-intolerant? Then you will LOVE this recipe. Make yourself an excellent cheese substitute that will satisfy the biggest cheese-eater!
Author:
Recipe type: side dish
Serves: 2 cups
Ingredients
  • ½ head of cauliflower
  • 1 c. reserved water from steaming cauliflower
  • ½ T. bacon fat or safe Vegan fat
  • 1.5 T. agar flakes
  • ½ tsp. white balsamic vinegar
  • 2 T. tapioca starch
  • ½ tsp. paprika
  • 1 tsp. sea salt
  • 2 T. nutritional yeast
Instructions
  1. Cut the cauliflower into chunks and place in a steamer basket.
  2. Add 1.5 cups of water to a pan and place the steamer basket in the pan.
  3. Steam the cauliflower until tender.
  4. While the cauliflower is steaming, gather the rest of the ingredients and line a glass bowl with parchment paper (or oil it well).
  5. Once the cauliflower has steamed, reserve 1 c. of the steamer water and use it to purée the cauliflower.
  6. Add the fat to the cauliflower purée and incorporate fully.
  7. Measure 2 c. of cauliflower purée and put in a pan. Bring to a gentle boil.
  8. Add the vinegar, sea salt and agar flakes and begin whisking.
  9. Whisk and gently boil the mixture for 15 minutes until thickened.
  10. Add the paprika, tapioca starch, and nutritional yeast one at a time, incorporating each ingredient fully.
  11. Whisk constantly for 5-10 more minutes, until the mixture thickens even more.
  12. Pour the mixture into the lined (or oiled) glass bowl.
  13. Let sit for two hours to cool and firm.
  14. At that point, it is a spreadable, soft cheese that may be used. If you prefer a harder cheese, it can be placed in the fridge for easier slicing and grating.
  15. Enjoy your fructose and dairy safe cheese!
What’s the Royal Ingredient in your kitchen?

__________

This post shared with:

AllergyFreeWednesdays

and Real Food Wednesdays.

I Know What Real Love Is

I Know What Real Love Is cradlerockingmama

After Jed showed us so clearly that he loves us by trying to feed us, I started thinking about love.

“Faith, Hope and Love, but the greatest of these is Love.”

Love makes the world go ’round, so says musicians, poets, and the Bible. Love makes all things possible…or at least bearable.

As FPIES/food allergy/fructose malabsorbative families, we are bombarded daily with stresses and challenges ‘normal’ families can’t even imagine.

I’ve written before about coping strategies to deal with parenting a special needs child, but this thought of love combined with Thanksgiving right around the corner made me feel like revisiting one particular coping skill: Love.

There’s all sorts of love out there; the love of friends, the love for our parents, the love for our children, but today I’m sort of marinating on the love of your spouse.

As parents, we can easily let that love take a backseat to the demands of our adorable little hell-raisers; that is especially true when your children have special needs.

I recently had that truth shoved in my face (in the nicest way possible).

Now, before I begin, let me state that Darrel is not perfect.

He has annnoying habits. He can walk in to a disaster of a room and not see what needs doing. He procrastinates at times.

But that man loves me in a way I never thought possible, and I don’t take nearly enough time to focus on that.

It’s easy to do; we’ve grown accustomed to thinking love shows up as flowers, candlelight, and soft music.

But I know what REAL love is.

Real love is Darrel being there for every minute of both labor and deliveries for our children.

It’s him sticking to Jed like glue in the first hours after he was born; never letting him out of his sight while he was examined, poked, and prodded, and whisked off to the NICU.

Real love is Darrel going head-to-head with our inept and incompetent doctors and nurses after Jed’s delivery, fighting to get me and our son the right answers and the right care when I was too sick and drugged to take care of myself.

It’s routinely letting me sleep in on the weekends and taking over breakfast duties for me, so I can have at least a slight break from the routine.

Real love is Darrel’s no-holds-barred willingness to do whatever it takes to keep our boys healthy: strange diets, flying out of state for medical care, joining online groups of mostly other moms to read and learn about the conditions we deal with.

It’s the way he has loved, accepted, and wanted me no matter what the circumstances; he thinks I’m perfect and gorgeous regardless of whether I’m tipping the scales at 190 or 127.

Real love is the way he puts himself on the front lines of anything that comes our way.

Recently, thanks to forgetfulness, disorganization, and being overwhelmed, I made a mistake. A mistake which could have been very bad for Darrel.

Without going into details, I will say it resolved fairly painlessly and things are fine…but my angst over what could have happened due to my screw up was tremendous.

While this was going on, I realized Darrel hadn’t mentioned it to anyone – not even family. When I commented on that, he said “Well, there’s no point in it. It just makes you look bad for no good reason.”

And THAT, right there, is Real Love.

Even when I messed up – and messed up in a way that could directly hurt him – he thought first of defending me against any negative fallout.

We don’t have actual Knights in Shining Armor these days, but he is most definitely my Champion.

And he has been since the day I met him.

Now, nearly five years into our marriage, I was reminded of the way he loves me. The way he honors and defends me.

While telling all of this to him, I commented about how it’s easy to forget the marital bond when you’re in the thick of parenting. Especially when parenting sick kids.

He said “Yeah, it’s been hell. But there’s no one I’d rather go through hell with than you.”

Who needs roses and candlelight, right?

I’m telling these Darrel stories only partially  to shout out about how amazingly good my husband is, and how lucky that makes me.

The rest of the purpose comes from my realization that while many parents are single, or in truly destructive and unhappy marriages, lots of us are, in fact, married to amazing people…and have gotten out of the habit of noticing.

As we stumble through the parenting jungle, the FPIES puzzle, or just the drudgery of daily life, one source of tremendous strength and encouragement is the love of our spouse.

It seemed so sad to me, that moment in my marriage, when I realized how many opportunities to tell or show Darrel how much I love and appreciate him I have let pass by due to general busy-ness and complacency.

And since we’re all dealing with something  in this life, I felt a gigantic urge to share this with you in hopes that it would encourage those of you with great spouses to take a little time to look past the dirty laundry (or whatever your particular issue) and recognize your spouse for the amazing, loving person they are.

Take the time to tell them – or, better yet, show them that you see them. Really see them.

You see the ways they make your life better. The way they love you. The way they make you feel safe and cared for. The way they’d walk through fire for you and your children.

The way their heart beats.

It’s never a mistake to notice your blessings and give thanks for them.

Especially when that blessing is your spouse.

__________

Do you ever notice that you’ve started to take your spouse for granted? How do you remind yourself to not do that? How do you show your spouse you love them as much as they love you?

I Love You, Therefore I Feed You

I Love You Therefore I Feed You cradlerockingmama

Yesterday was a busy day, so we didn’t get crackers made until evening. For dinner, Zac got 1/4 c. of cooked quinoa flakes and after that, he got to nibble on crackers before bedtime.

I don’t think I can convey the sheer joy and amazement at watching Zac eat last night! The child has hardly eaten anything in his whole life, and he grabbed the spoon and started feeding himself right away.

And he was GOOD at it! Very little mess, considering this is the first time he’s handled a spoon for self-feeding.

I know he’s older and has better motor skills than most babies do when they’re first introduced to foods, but I still thought some degree of practice was required before they got to be that good at eating.

Of course, maybe all that ‘eating crap off the floor’ counts as practice.

Zac was overjoyed about being given food, and he was very intent in his focus on that bowl of quinoa.

When he finished eating and I picked him up from the high chair, he gifted me with one of the biggest smiles I’ve ever seen on his adorable face and clapped his hands.

It’s enough to make your heart explode, and break your heart at the same time.

Feeding your child shouldn’t be the thrill equivalent of a trip to DisneyWorld.

Ah, well…

So far, so good. He had a poopy diaper first thing this morning, but it looked pretty good. It had some undigested quinoa in it, but no mucous or blood. With any luck, that’s how it will stay.

I took the opportunity last night to finally sample a single quinoa cracker. It’s the first thing I’ve eaten in over a year that wasn’t on my TED!

I only ate one; in case we do have to pull quinoa again, I need my milk to stay safe.

However, this is a great time to taste one, and I’ve never tasted my own creation.

They’re really quite good! I would love to get basil and oregano into Zac’s diet; I’d imagine these would be delicious with a little Italian/savory flavoring added in.

At this point, though, I’ll just be thrilled if Zac can handle the quinoa by itself. Hopefully his bucket has been emptied enough that he can.

And if he can, I’m going to enjoy eating these crackers as a snack! Yum!

Aside from the sheer joy of feeding Zac, one of the most precious things about dinner last night was seeing Jed in action.

Jed was also thrilled to be able to feed Zac! He cheered and clapped at the dinner table, and when the crackers were baking kept running to the oven to check on them.

When they were ready, he would run to the kitchen, grab four crackers, and gleefully present them to the family. “One for Mommy, one for Daddy, one for me, and one for Zac!” he would say as he placed a single cracker in each of Darrel and my hands.

Then he would run up to Zac and shout “Here you go!” as he gave him his cracker.

He kept doing it so much, Zac wound up with a stash of crackers. He couldn’t eat them fast enough to keep up with Jed’s largess!

Darrel and I were amazed at this, until it dawned on me: Jed’s whole life, he’s heard people (Darrel, my parents, friends) comment to him “You’re very lucky to have a Mommy that loves you so much she makes such special foods for you!”

So in Jed’s world, you show how much you love someone by feeding them.

Last night made it crystal clear: our sweet Jed loves us all very, very much.

I have the two sweetest, most loving little boys in the whole wide world.

And for at least a little while, I can finally feed them both.

Today is a good day.

__________

Do your toddlers love to feed their siblings, too? Does it just melt your heart?

To Quinoa, or Not to Quinoa…(of Buckets & Baseline)

Buckets & Baseline cradlerockingmama

Well, I think we might just be losing our minds. Or maybe it’s just a case of “desperate times calls for desperate measures”.

In either case, Darrel and I had some intense discussions this weekend and have basically decided…”to hell with baseline” and “screw gut rest”.

Baseline has been, thus far, my seemingly unattainable goal for Zac for almost as long as he’s had his diagnosis.

Baseline is what all FPIES families shoot for.

Baseline is the Golden Goose.

And we’ve basically decided to let go of that dream.

Not because we don’t want it! Oh, no! We WANT baseline for Zac with every fiber of our being.

We just finally faced reality: as long as he is teething and eating everything he can find off the floor, we will NOT find baseline.

Ever since we decided to shoot for baseline and gut rest, we have been sorely disappointed with the results. Every week since then, Zac has had at least a mild reaction to something he’s eaten off the floor.

Crickets. We find parts of crickets regularly – and on two occasions – mostly whole crickets in his diapers.

Leaves. Grass. Bits of plastic from toys we deemed “safe” (this child has AMAZING jaw strength!).

All of these things give him unpleasant symptoms: diarrhea, stomach cramps, mucousy stool, bloody stool.

Which leads me back my original statement: we have thrown in the towel.

Until such time as we can replace the carpet and close in the front porch to be shoe free, we will continue to track ‘stuff’ into the house and it will continue to blend into the carpet so well that, even though I clean the floors daily, whatever I don’t see will be “Roomba-d” up by Mr. Zac.

So, logic says, if we can’t get him to baseline and he will have constant reactions to something, wouldn’t it be better for him to be getting at least some nutrition from a food while he reacts?

So today I’m making him quinoa crackers. We’re going to feed them to him as long as we can. He stopped eating every-damn-thing off the floor when we were giving him the crackers before, so maybe this will cut down on that again.

And even if quinoa is not safe for him, maybe he will have a slow enough reaction to it that it will buy us time until we can get the carpet and porch done, and maybe break him of the habit of eating things off the floor.

And even if quinoa is not safe for him, at least he would be reacting to something that is depositing some nutritional benefit into his body as it simultaneously hurts him, as opposed to plastic, which only hurts him.

And maybe we will get lucky (finally) and quinoa will be safe for him and he will stop eating crap off the floor, ooch his way slowly to baseline, and we can do a happy dance of celebration that we managed to survive 17 months with no safe foods for him.

Hey, I may have given up on the baseline/gut rest dream, but at heart, I’m still an optimist! It could happen!

(Probably won’t, but I’m gonna hang on to the hope…)

We’ll see how it goes. But we’ve got to do something. Sitting here spinning our wheels and not even getting baseline is frustrating in the extreme.

In other news, my parents came over to play cards with us on Saturday night. When it came time for dinner, I decided to throw caution to the wind and serve spaghetti…even though the last few times we had spaghetti – even my fructose-friendly spaghetti – it made Jed insane.

I had some of that last batch still frozen, and figured this would be a quick way to feed the herd and get rid of an “unsafe” food for Jed at the same time.

Lo and behold, Jed…was fine!

No attitude. No bad poops. No nothing.

Darrel pointed out that the last time we tried spaghetti on Jed, we’d been putting onion in nearly everything we cooked.

Now, we don’t. So maybe his little bucket is kept empty enough that he can now handle the occasional fructose serving without ill effects.

Maybe the onions were just enough to make it impossible for him to handle any extra fructose.

I think that sounds rational and true; or maybe I’m just clinging to whatever hope I can find, wherever I can find it.

Nah. I think Jed’s bucket is finally empty enough that we can occasionally fructose him and not make him sick.

Here’s hoping we can find some good news like this about Zac, soon.

__________

So, how was your weekend?

Frugal Fridays – Homemade Laundry Soap

Frugal Fridays Homemade Laundry Soap cradlerockingmama

Back when I talked about cleaning your washing machine, I mentioned that we use homemade laundry soap. While this is something you can easily find on nearly every blog out there, there is a reason it’s so common: it’s a brilliantly simple way to save TONS of money!

So here’s my recipe for homemade laundry soap for this weeks Frugal Friday post.

If, somehow, you’ve been on Pinterest, read blogs, and still not read about “homemade laundry soap love” elsewhere, I’ll take just a moment to fill you in.

It’s cheap.

All you need is some borax, washing soda, salt and soap. All are easy to find, all are inexpensive. For the price of one box of Tide (to use the detergent I previously used as an example), you can have enough supplies to make at least three batches of the homemade stuff.

It works.

We’ve used it for three years now, and our clothes are fresh and clean…just as good as if we were using commercially made stuff.

It’s healthier.

There are none of the nasty additives and chemicals in homemade stuff (depending on the soap you use) that there are in commercially made stuff. This is important if you are sensitive to chemicals.

It’s easy.

Some folks make this into a liquid, others make it into a powder. I’ve personally used the powder type for all this time. All I’ve done is dump one to two scoops in while the water is running into the washing machine, before I add the clothes.

Now, some things to consider:

We are in the process of going detergent-free in our household. After writing about Zac’s bucket being kept full, a wise friend of ours contacted me and shared some things she’s doing to keep her sons bucket empty. One of those was to go detergent-free.

I had never heard of this before, but apparently, many people with all sorts of maladies see dramatic improvements when they remove detergents from their lives.

My friend is an actual, real-life degreed scientist, and she explains these types of things much better than I ever could, but my understanding of it boils down to this: it’s the basic premise of how detergents work that may be causing the problem.

Detergents work by breaking down the surface area of things so they can be easily scrubbed away. That’s why they’re called “surfectants”.   So, if you’re ingesting – either topically or internally – a surfectant, then wouldn’t it make sense to expect the surfectant to continue working in your body exactly the way it is made to?

So, for example, it might work at breaking down, oh, I don’t know, say, the lining in your gut, thereby making you more sensitive to intolerances, allergies, or just about anything that might wig your gut out?

Sound familiar?

Yeah, me, too. So we’re in the process of finding replacements for the detergents in our lives. (This detergent-free thing is going to be a whole post eventually, but it needs mentioning here because, well, we’re talking about detergents!)

It’s more complicated than it seems. Detergents, to me, are the corn and soy of the non-edible world. They’re in everything and not necessarily labeled.

And if you get rid of detergents, you have to use soap instead…and soap won’t work if you have hard water. So you need a water softener if you, like us, have hard water.

If it isn’t one thing, it’s another, right?

Well, getting back to the laundry soap, the recipe I’m sharing is what we’ve used for three years to great success. As we go detergent-free, I’ll be replacing the current Fels Naptha we use with plain soap flakes, and at that time, I’ll need to start dissolving the powdered soap in hot water before adding it to the wash.

But that’s really not too big a hardship, right?

So. On to the how-to!

It’s so easy, really. Just gather your supplies and get out a food processor.

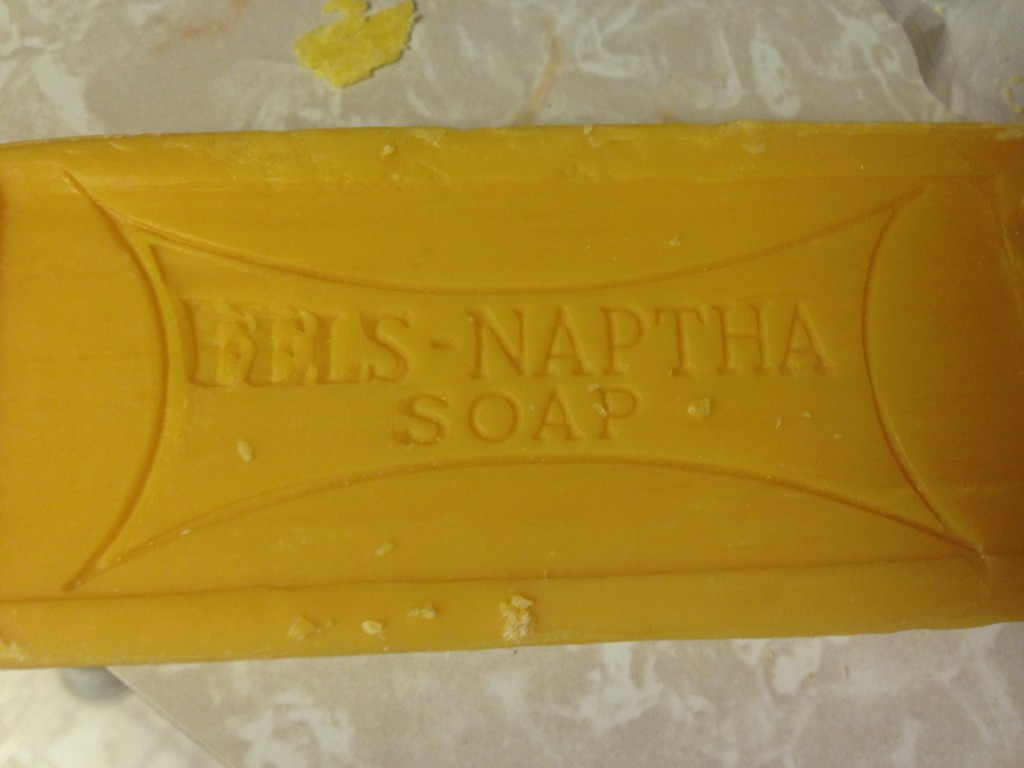
A bar of Fels Naptha

A bar of Fels Naptha

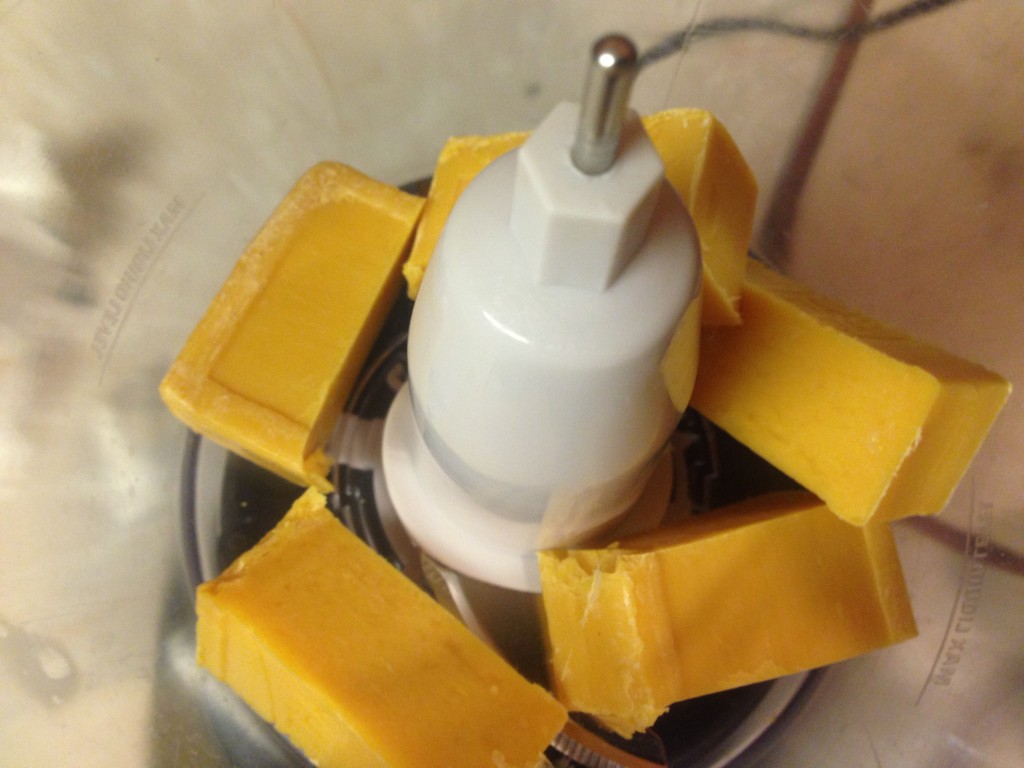
Grab a bar of Fels Naptha. Then cut it into big chunks.

Cut and ready to chop.

Cut and ready to chop.

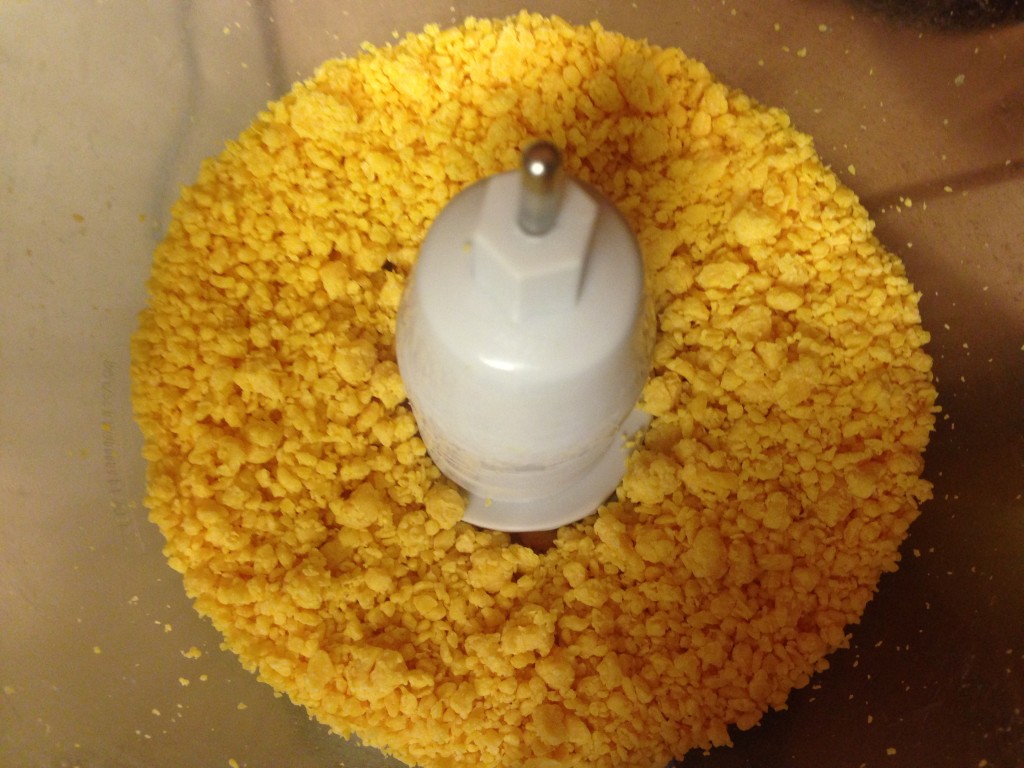
Drop the chunks into the food processor and turn it on. When it looks like this:

Chopped up soap.

Chopped up soap.

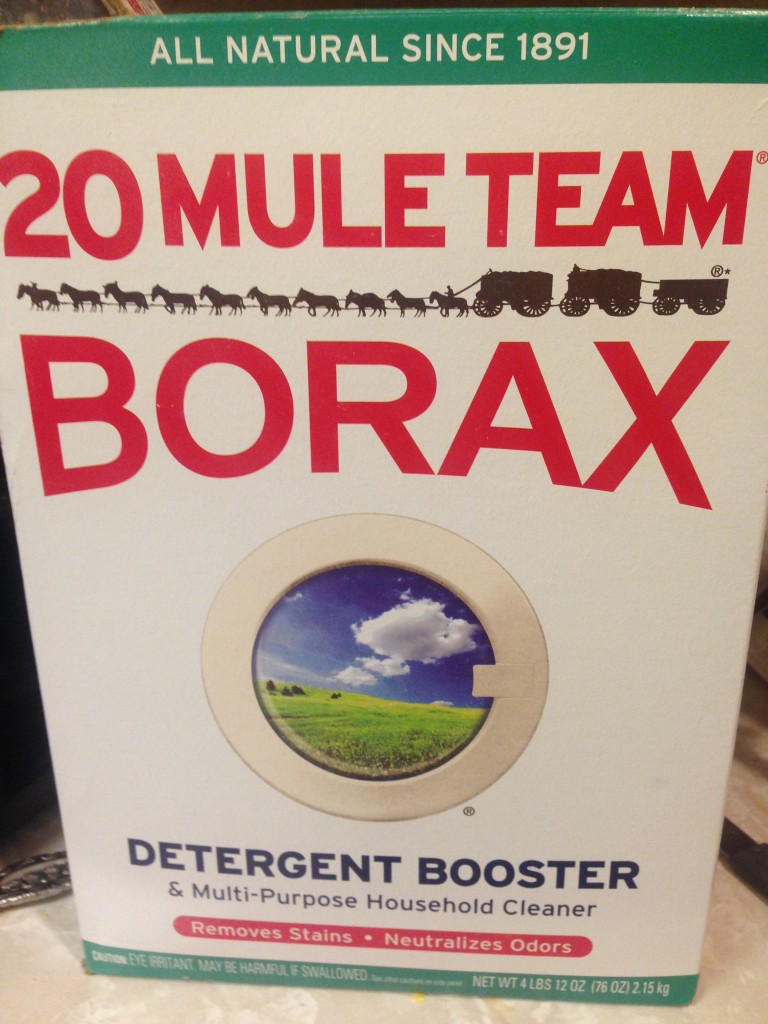
Stop processing and get the rest of your stuff. Grab some borax…

IMG_9594

some washing soda…

IMG_9596

and some salt…

IMG_9597

This is regular, corny salt. I need to switch salts, but other than the need for corn-free, any salt will work.

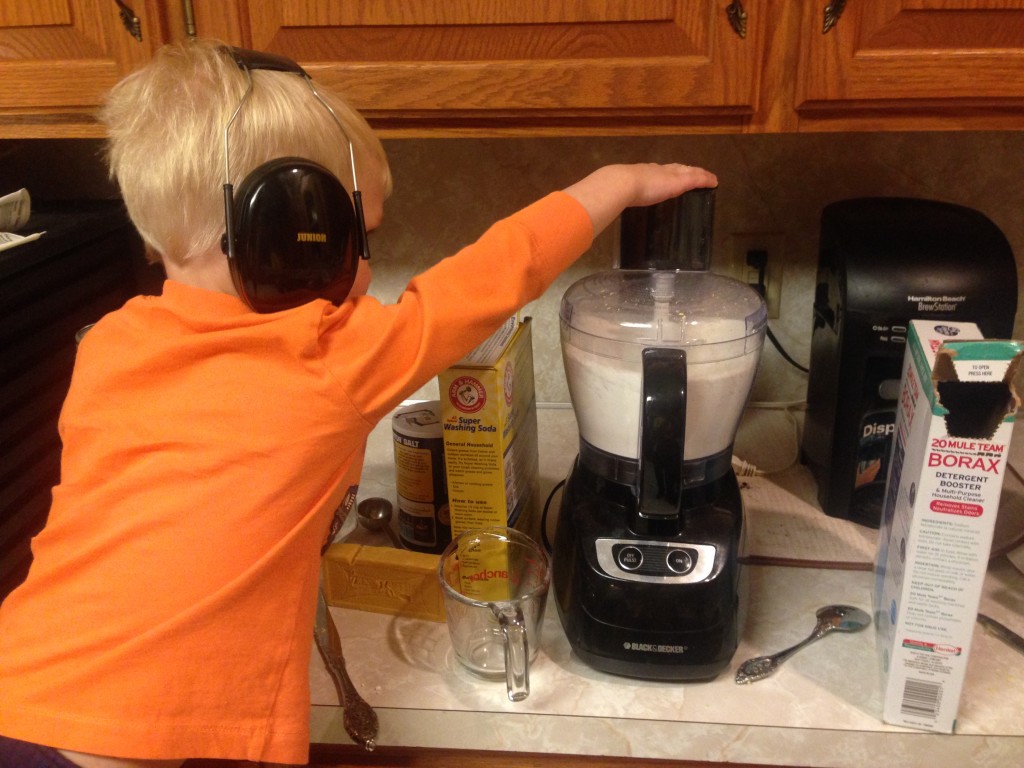
And dump it all in with the soap. Then process it again.  Make sure to get your toddler his ear protection before letting him help. (No, not a helicopter mom. He WANTS to wear the ear muffs whenever I use the food processor. In fact, he insists on it!)

My helper.

My helper.

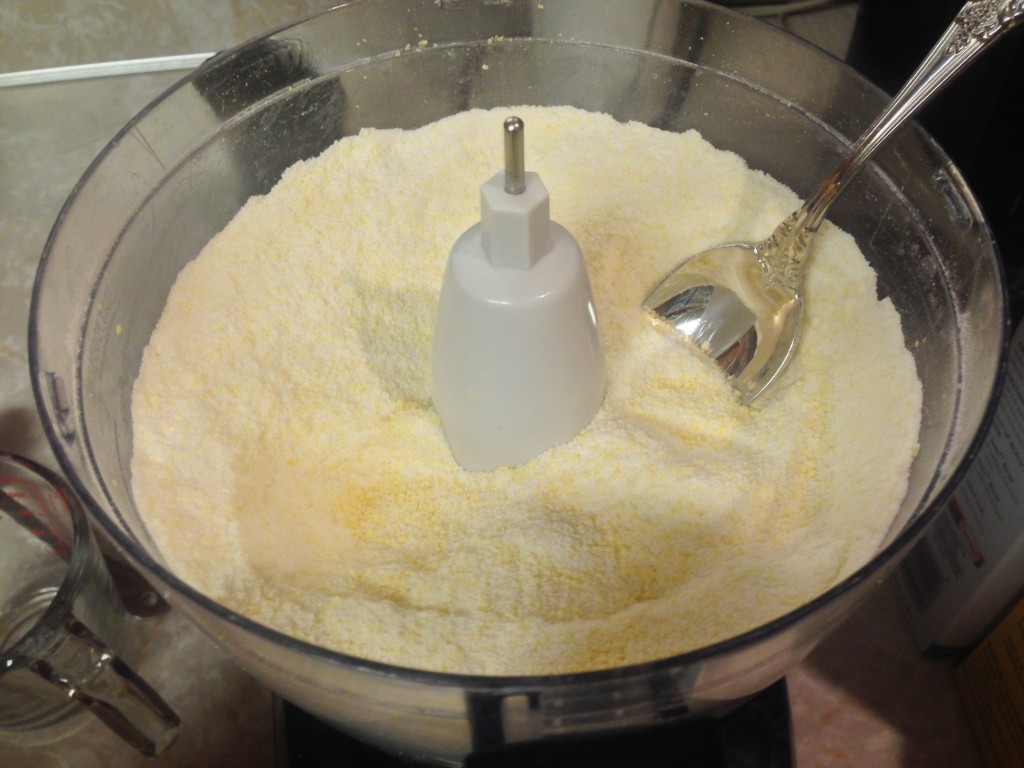
When you’re done, it will look like this:

Perfectly ground up, well blended homemade laundry soap!

Perfectly ground up, well blended homemade laundry soap!

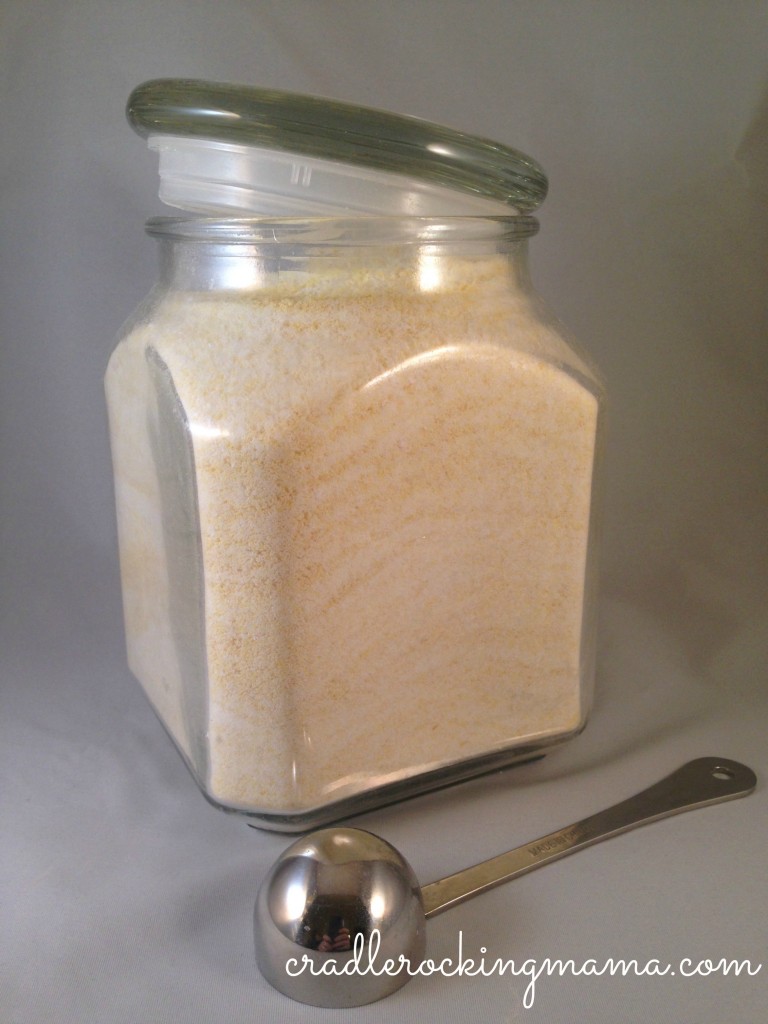
I pour it into a glass jar to store in my laundry room.

Who knew laundry soap could be so pretty?

Who knew laundry soap could be so pretty?

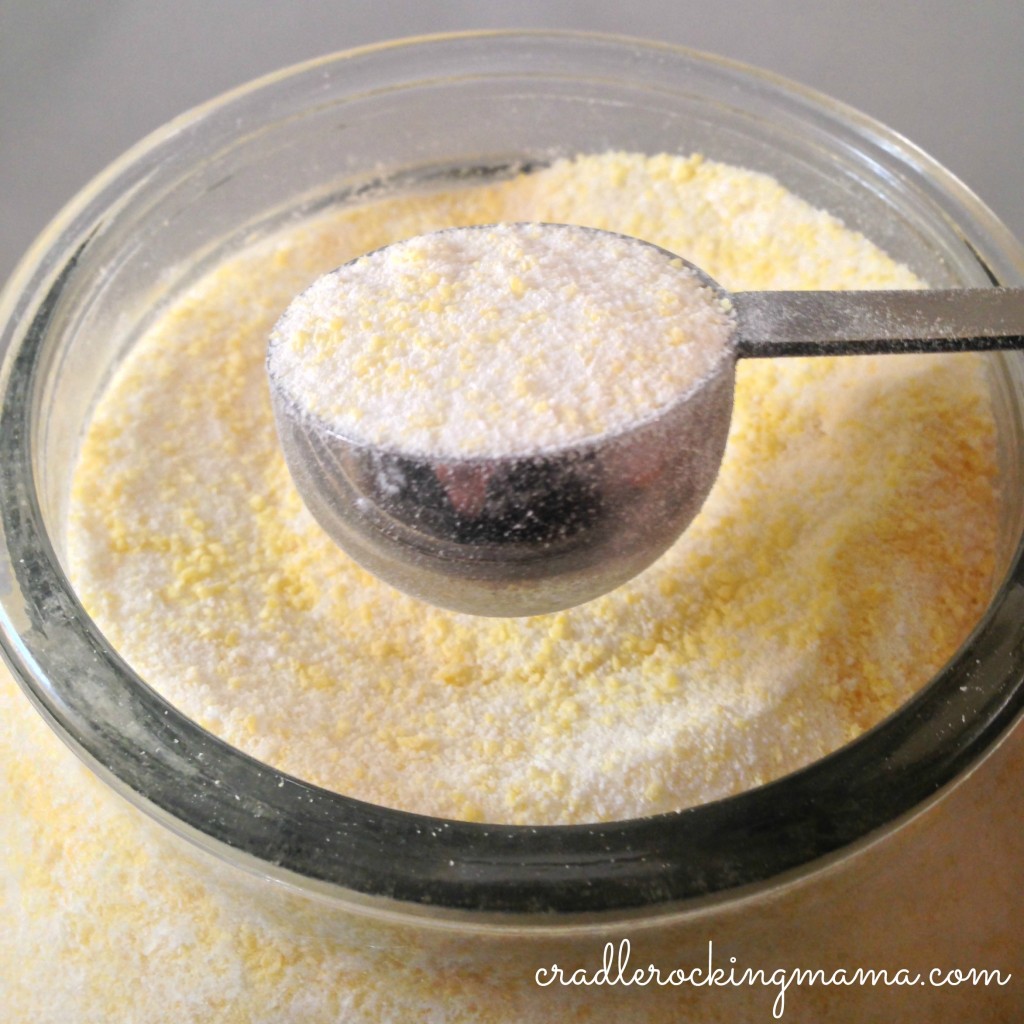
And use a coffee scoop to portion it out when I need some.

One scoop or two?

One scoop or two?

Most of the time, one scoop is enough. For particularly nasty loads of laundry, I’ll dump in two. Either way, it works like a charm and has saved us a TON of money over the years!

Hope that helps!

Frugal Fridays - Homemade Laundry Soap
 
Prep time
Cook time
Total time
 
This laundry soap works as well as store-bought stuff, at a fraction of the price. Try it!
Author:
Recipe type: personal care
Serves: 2-3 cups
Ingredients
  • 1 bar of soap (after grating, approx. 1¼ c. worth)
  • 1 c. borax
  • 1 c. washing soda
  • ½ c. salt
Instructions
  1. Chop your bar of soap into big chunks and toss in a food processor. Process until fairly small chunks.
  2. Add the rest of the ingredients and process until no chunks remain and the powder is uniform in consistency.
  3. Store in an airtight jar in your laundry area, and use 1-2 scoops per load.
  4. Enjoy saving money with clean laundry!

Do you prefer powdered or liquid laundry soap?

Adventures in Potty Training

Adventures in Potty Training cradlerockingmama

When we pulled out the cloth diapers again, Jed decided he did not like them.

At all.

Which seemed a perfect reason to begin potty training, something I’ve been putting off doing. With so much going on in our lives, that just seemed like one thing too much, you know? I knew it would happen; I just wasn’t stressing out about it.

So after I dug out the cloth diapers, I also dug out the itty-bitty 2T underwear we’d bought for Jed last year and got started with Potty Training.

Also known as “Parent Training”.

Much like dog training, at first, potty training is more about training the parents. I have to remember to remind Jed to go potty on the toilet. I have to remember to remind him to wash his hands.

I’m having to train myself  to not depend on the convenience and hands-off ease of diapers.

At first? It kind of sucked.

Everything I’ve read about potty training says you should reward the child with a treat for going potty on the toilet…M&M’s or Hershey’s Kisses are commonly cited as appropriate rewards. Or, for the health-conscious, small stickers.

All of which are not allowed in our house for health reasons.

Then I hit on something – Jed LOVES to put money in his piggy banks. How about we reward him with money?

So I got two rolls of nickels at the bank, and told Jed he could earn a nickel every time he went potty on the toilet.

The kid’s gonna be a rich man soon, let me tell ya. He WANTS his nickels. He LIKES his nickels.

I should have offered pennies. 

Hoarding his nickels.

Hoarding his nickels.

Overall, he’s doing great!

But what would my stories be without a little Truth and Reality thrown in? I keep it real, here, folks.

About three days after we started, we had a rough day. It was like he forgot he was supposed to be using the toilet; like he forgot all about those coveted nickels.

One time, he was watching You Tube on my phone at the dinner table. The chair was pushed out from the table and he was sort of planking between the two, when suddenly, he let loose with a stream of pee that I would have admired – had it been in the toilet. Instead, I had a gigantic puddle of piss on my dining room floor.

Ugh.

Another time, I was nursing Zac to sleep for his nap in our bedroom. Jed was happily playing in the living room, until I saw him waddling toward us down the hall.

It was his “I pooped” waddle.

Oh. No.

I scream/whispered for him to go into the bathroom, which he did. For all of 45 seconds. Then he came back out – this time holding his poopy underwear in his hands.

Yeah, you guessed it. In the short time it took for me to unlatch Zac and get in there to help Jed, he’d slung poop all over the floors and walls of my hallway.

That was a moment when I really, REALLY missed diapers!

Another time he pooped in his underwear and smeared it all over the loveseat cushion. This was while we were at the craft show, and my Mom was taking care of the boys.

While she was hosing off Jed’s heinie, Zac went over and ‘feasted’ on his poop.

EW. EW. EW. EW.

For some reason, this bothers me more than Zac eating cat poop! EW EW EW EW EW.

He had a mild reaction for a couple days, then was fine. Less of a reaction than eating cat poop, in fact. Huh.

Speaking of poop, I’m a little worried. Ever since we started with the underwear, Jed really doesn’t want to poop. I think he’s “self-constipating”, if you know what I mean. I think pooping in the potty is scary for him, and he doesn’t like pooping in his underwear either. So he just holds it in. Those two poop stories are the only times he’s pooped in the last 9 days.

I keep expecting to find a poopy diaper in the morning, but so far, 6 out of 7 nights he was bone-dry when we first wake up.

Not sure what to do about a kiddo who usually poops at least once a day suddenly going many (3 and 4) days between poops just because he’s scared to go in the toilet.

It’s also contributing to a little crankiness in his mood. Well, I’d be cranky, too, if I couldn’t poop. So I hope we can figure out something to do about this soon. I’ve offered him TWO nickels if he’ll poop on the potty, but no dice.

Hmm. Is a puzzlement.

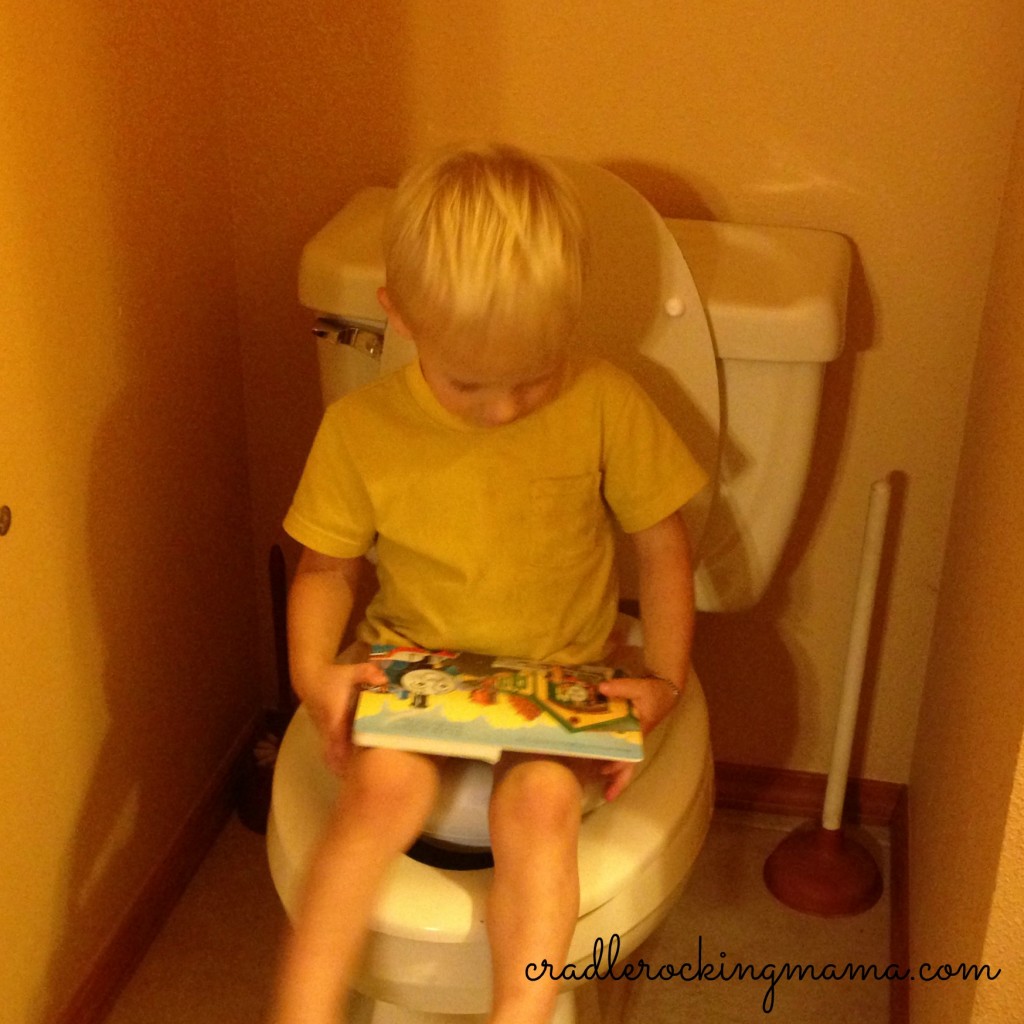
Oh, one of the cutest potty training stories came when he decided he wanted to try  to go poop on the toilet. He climbed up, informed me that I needed to go “back to the live room”, but then immediately yelled for me to come turn on the lights in his bedroom because “Thomas is in the dark”. (The half bath and his bedroom are directly across the hall from each other.)

So I turned on the lights in his bedroom, and asked if that was good. He looked hesitant for a minute, then decided “I want a book!”

But not just any book, oh no. He had a particular book in mind, and would not get back on the toilet until I procured “A Crack in the Track” for him!

Book in hand, he climbed up on the toilet, where he could see his Thomas bed in the light in his bedroom, and ‘read’ “A Crack in the Track” to himself. I’ve never seen him ‘read’ like that before! It was so precious! He would tell the story to himself as he turned the pages (can you tell we’ve read that book about a million times? I have it memorized.).

It's not like either Darrel or I have had the chance to read in the bathroom for the last three years - I don't know WHERE he got the idea to do this!

It’s not like either Darrel or I have had the chance to read in the bathroom for the last three years – I don’t know WHERE he got the idea to do this!

He didn’t actually go poop in the toilet, but he hung out there for quite a long time. And I gave him two nickels for trying so hard.

Aside from some mis-steps, all in all this is turning out to be a lovely gift for Mama. We went to town two times this last week and both times he peed in public toilets with no problems. He even made it all the way through speech therapy without any accidents!

Not having to change his diaper when we’re out in public is lovely. The fact that anyone could take him to the toilet now is just icing.

We’re still doing diapers at night, even though he wakes up dry as a bone in the morning. We probably will for a while, until we’re confident he won’t have any accidents.

After all, he likes to come to our bed in the middle of the night and I really don’t want to wake up in a puddle of pee.

__________

Speaking of waking up, I thought I’d share with you WHY Darrel and I are so tired every single day of our lives.

Daylight savings time is kicking our butts. Ever since the time change, I’ve wound up going to bed with the kids at 8 p.m.

Tuesday night, I was asleep at 8 p.m. Zac woke up at 10 p.m. to eat. Then he woke up at midnight to eat. Then he woke up at 12:50 a.m. to eat.

Then at 2 a.m. Jed woke up and – shocker here – wanted me to take him back to his bed to sleep (guess he was getting tired of Zac waking him up).

I slept on his toddler bed until about 3:30 a.m., when Zac woke up in our bedroom to eat.

I nursed him, then I realized I was starving! I’d been “sleeping” for 7.5 hours at that point, so it makes sense that I was awake. So I made myself some french fries, and at 5 a.m., Zac woke up again to eat. So I laid down to feed him, and was just about to doze off when Darrel’s alarm clock went off for work.

That also prompted Zac to wake up to eat again. So at 6 a.m., I nursed him again.

I was just about to fall asleep again, when Jed came running in to our bedroom and crawled into bed with us. At 6:30 a.m., just as Darrel left the house.

I managed to hold Jed still for a whopping half an hour, before he decided Zac and I needed to be UP FOR THE DAY and literally jumped on us until we both got out of bed.

Despite 7.5 hours straight of sleep, and two little cat naps between waking up and getting up, I felt like I’d been run over all day on Wednesday.

And Wednesday night wasn’t much different. In fact, it might have been worse; Zac decided we needed to all BE AWAKE at 6 a.m. and climbed on both Jed and me until we woke up.

I am NOT a morning person by nature.

I’ve been so tired that I’ve fallen asleep with my jeans on three nights in a row.

Daylight Savings Time can kiss my lily white heinie. 

And we have GOT to find something to feed Zac. Being woken up every hour to hour and a half all night long every night is slowly snuffing out the grey matter in my brain. Seventeen months of that, folks. He’s still nursing like a newborn.

So, if you’ll excuse me, I’m going to go sit in the corner and drool as I stare into space.

Or maybe I’ll take Jed to the toilet again. Yeah. That’s probably better.

__________

What are your best stories of potty training and sleep deprivation with young kids? Please share!

Guaca-what? (Fructose-Free Guacamole)

Fructose Free Guacamole cradlerockingmama

Last night was Taco Tuesday at the Summers house, and out of nowhere, I got the idea to make guacamole.

Why I thought Darrel and Jed might like guacamole, I don’t know. So far, the only way avocado has been remotely palatable to either of them is when it is combined with liberal amounts of cocoa or fruits. Both of them have made it quite clear that avocado is “Blech”.

And Darrel, being the older and more experienced of the two, has always been on my side of things at Mexican restaurants – keep that green stuff in the kitchen! (Yes, I’m not a fan of guacamole/avocado, either.)

But Jed is such a skinny little guy; I spend my life trying to figure out how to boost up the fat, calories, and nutritional value of what he WILL eat to ensure he’s getting enough of everything he needs to grow.

And avocados kind of rock, nutritionally. I guess it just seemed logical to at least try.

I’ve never made a guacamole from scratch before. Unlike salsa, which, once upon a time, I ate like crazy, I don’t eat guacamole at all, so I didn’t even have any taste reference for what a guacamole is supposed to be. (Not that I can taste it at this point, but, knowing what it’s supposed to taste like helps in the kitchen, actually.)

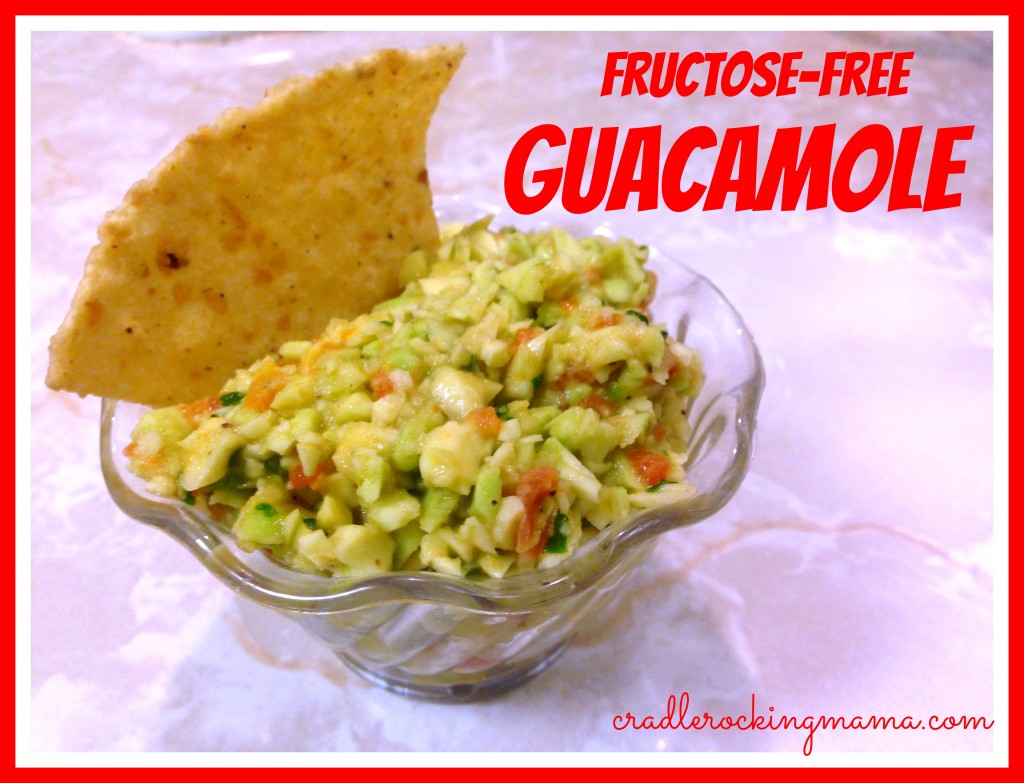
I did a quick Google search for guacamole recipes, and in the end sort of winged it. After a very short search, I realized they all had onion and/or garlic in them…which is not allowed in our house! So I created my own version of guacamole – top 8 AND Fructose Free!

Winging it WORKED! Jed and Darrel scarfed down almost an entire small bowl of it at dinner, and Darrel pointed out several times that I should make this again.

We even started trying to teach Jed to say “guacamole”, which had us both in stitches. I had to take video of his attempts at that 4 syllable trick:

So here’s what I did:

To start, I only used one avocado. In case this stunk, I didn’t want to have wasted several of our popsicle/pudding avocados! So my proportions might seem a little small. This is just enough for two people to eat at dinner, though, so keep that in mind.

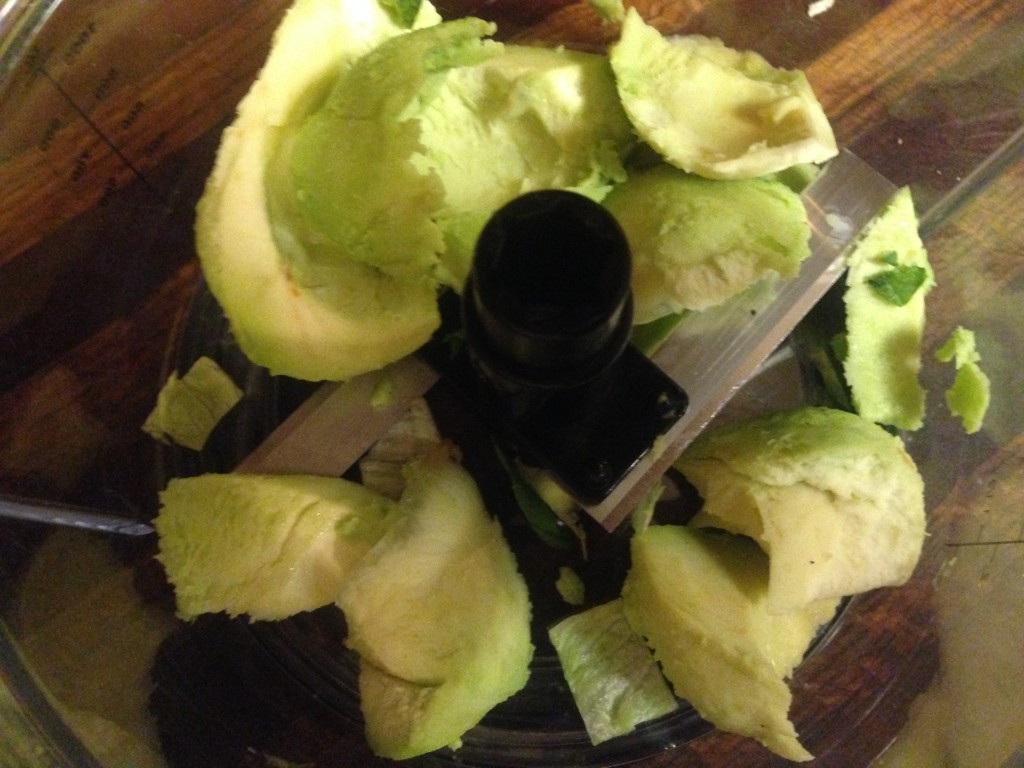
I removed the seed of the avocado and the flesh, putting it in my StarFrit food processor.

Avocado in the food processor

Avocado in the food processor

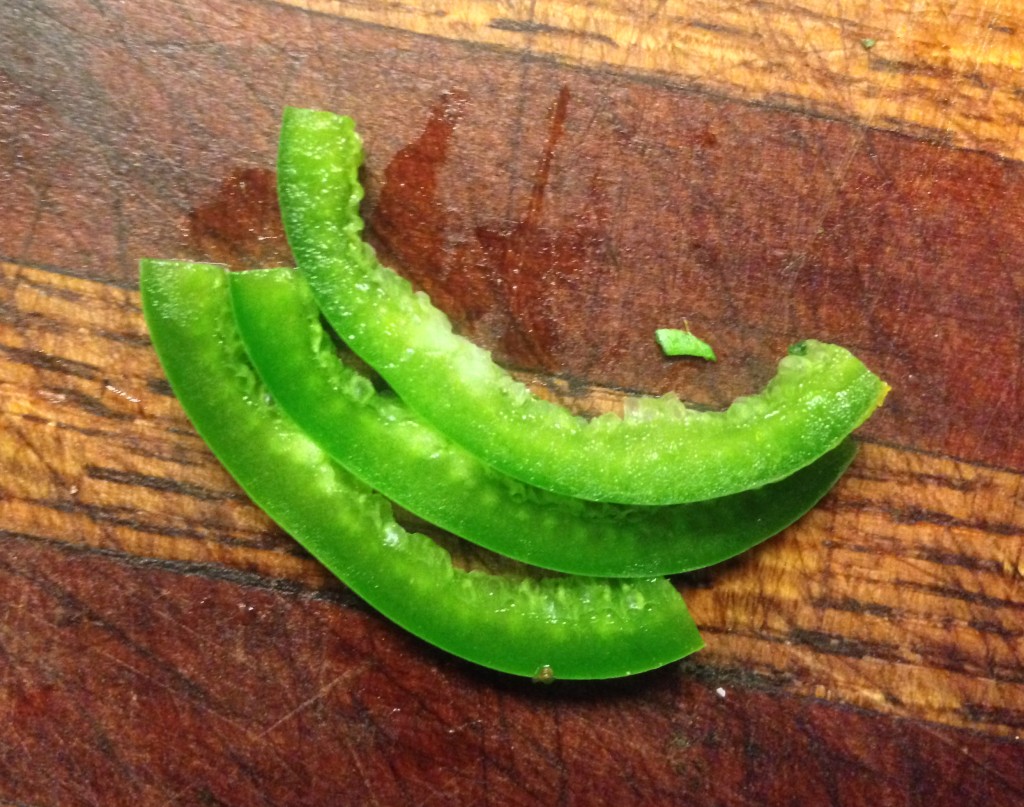
To that, I added some jalapeno, which I pre-diced (neither of my boys likes big bites of spicy foods)…

Three strips of 1/2 of a jalapeno. That's all my fellas can handle.

Three strips of 1/2 of a jalapeno. That’s all my fellas can handle.

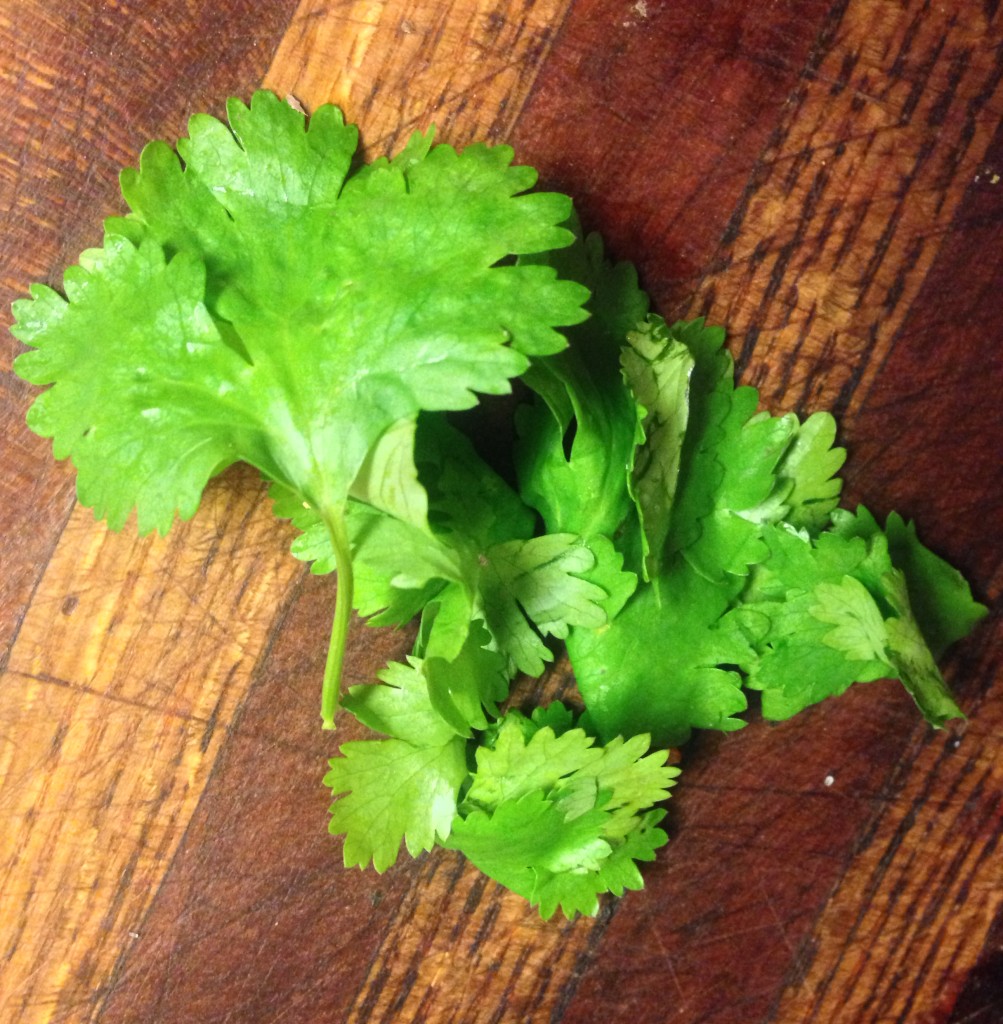
…and some cilantro, also slightly pre-chopped.

Cilantro ready to chop up

Cilantro ready to chop up

Then I tossed in some lime juice, sea salt, and pepper and spun it around. (And sorry there are no more step-by-steps; Jed was insisting on taking some almond milk into the living room and I had to stop photographing to fight with him through the rest of the process.)

It wasn’t looking like what I wanted it to look like. What I expected was a smooth, creamy guacamole like you find in restaurants. What I got was a very “chopped” looking guacamole. I blamed it on the fact that my avocado’s aren’t completely ripe yet, and decided I needed something a little more liquid-y in there to make it smoother.

So I tossed in a little olive oil and some diced tomatos and spun it around again.

It was a little better, but I still took the blade out and used a spoon to mash it up a bit.

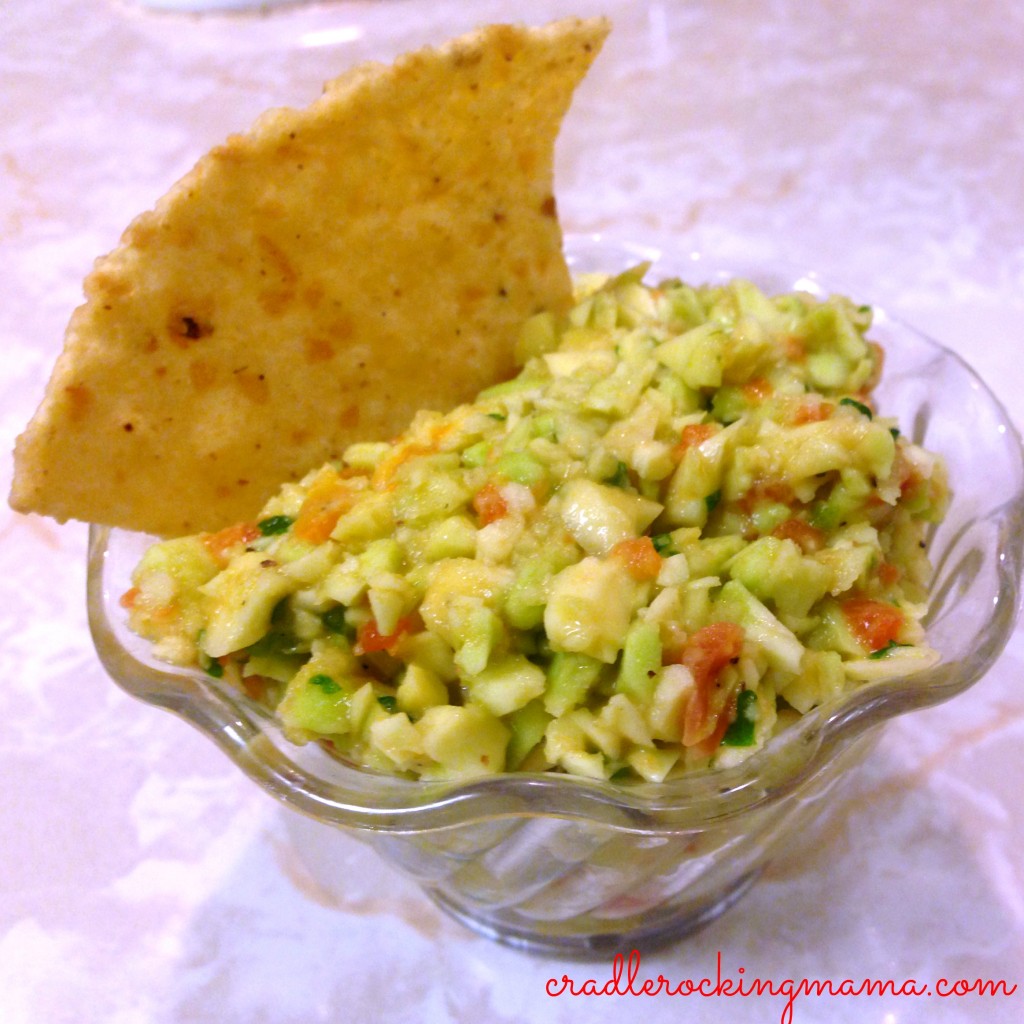
Yummy!

Yummy!

It never got to the consistency *I* wanted, but Darrel and Jed liked it just like it was, so…whatever. They’re happy, I’m happy.

So there you have it: VERY simple, WAY faster than my Salsa, and a major WIN in my household! Fructose-free guacamole!

Buen apetito!

Guaca-what? (Fructose-Free Guacamole)
 
Prep time
Cook time
Total time
 
This fructose-free guacamole is delicious! Anyone will love it!
Author:
Recipe type: appetizer
Cuisine: Mexican
Serves: 2 servings
Ingredients
  • 1 avocado
  • 2 T. cilantro
  • ¼ tsp. chopped jalapeno (feel free to add; my fellas just don't like spicy!)
  • 2-3 tsp. lime juice
  • sea salt and pepper to taste
  • 1 T. olive oil
  • 2 T. diced tomatos
Instructions
  1. Peel and de-seed the avocado and place in a food processor or bowl. You can either process or mash this guacamole.
  2. Add all ingredients and process or mash.
  3. Enjoy!

What do you like to put in your guacamole?

__________

This post shared with:

Real Food Wednesdays.

Blessings and Kindnesses

 Blessings and Kindnesses cradlerockingmama

Last weekend was jammed full. Darrel and I, once again, took part in an Arts & Crafts show to try and make some money. Then Darrel had a photo shoot on Sunday for two high school seniors. And through it all, we’re potty training Jed.

The biggest thing that filled this weekend, though, was Blessings and Kindnesses.

Darrel and I were initially discouraged at the Crafts show. Two days of selling, and I only sold one necklace. Darrel sold 4 prints, which might have been the biggest sales of the whole show. We had foot traffic; people simply weren’t buying anything from anyone!

Before we left, though, we had ample opportunity to chat with the other vendors. We received several Blessings and Kindnesses from all that chatting.

One vendor was a Native American lady who helps rescue wolves and rehabilitate them (very cool). After looking at his photographs, she booked Darrel for a photo shoot; a four hour photo shoot he will be paid well for. That was a Blessing!

She also, upon hearing of our childrens’ medical issues, gave me a Native American Medicine Pouch that she’d made.

These pouches are made to be filled with items to give you strength and healing, and this lady’s sweetness and generosity touched my heart. This was a Kindness.

Another lady at the show also exchanged “mama stories” with me. She shared that she raised two boys with Cystic Fibrosis. Her “boys” are now 43 and 46 years old, and have far outlived the life expectancy given to them as children.

I was in awe; this lady raised two boys with a life-threatening condition in a part of the country with, shall we say, not the primo best in medical care, and she raised them to full adulthood and beyond their expected lifespans.

THAT is one awesome Mama, folks!

I told her as much; I hugged her and told her how amazing she was, and that I could only hope to do such great things with my boys.

Later, I passed her booth and had to laugh. The whole show, I’d thought that booth belonged to a different lady! Somehow I switched the booths in my head. So I told her “Wow! I complimented the other lady about those hats – they’re really cute! You are so talented!”

She laughed, too, and when I passed by again, do you know what this sweet lady did?

She said to me “You like the hats? Go pick one out. A gift from one amazing Mama to another.”

I tried to refuse, but she insisted. Initially I looked for a hat for Zac, as he doesn’t have a winter hat right now (I just need to make one for him, but I haven’t done so, yet), but she didn’t have any that would fit him. It was a “Goldilocks” thing – they were either too big for him or too small.

So I picked one out for myself.

And we both had tears in our eyes as I hugged and thanked her.

Another Kindness.

A cute little cloche. With a flower, of course! My new favorite hat.

A cute little cloche. With a flower, of course! My new favorite hat.

The BIGGEST Blessing and Kindness we received this weekend came on Friday. A friend of mine from my Mommy Group here in Arkansas put together a fund-raiser to help our family.

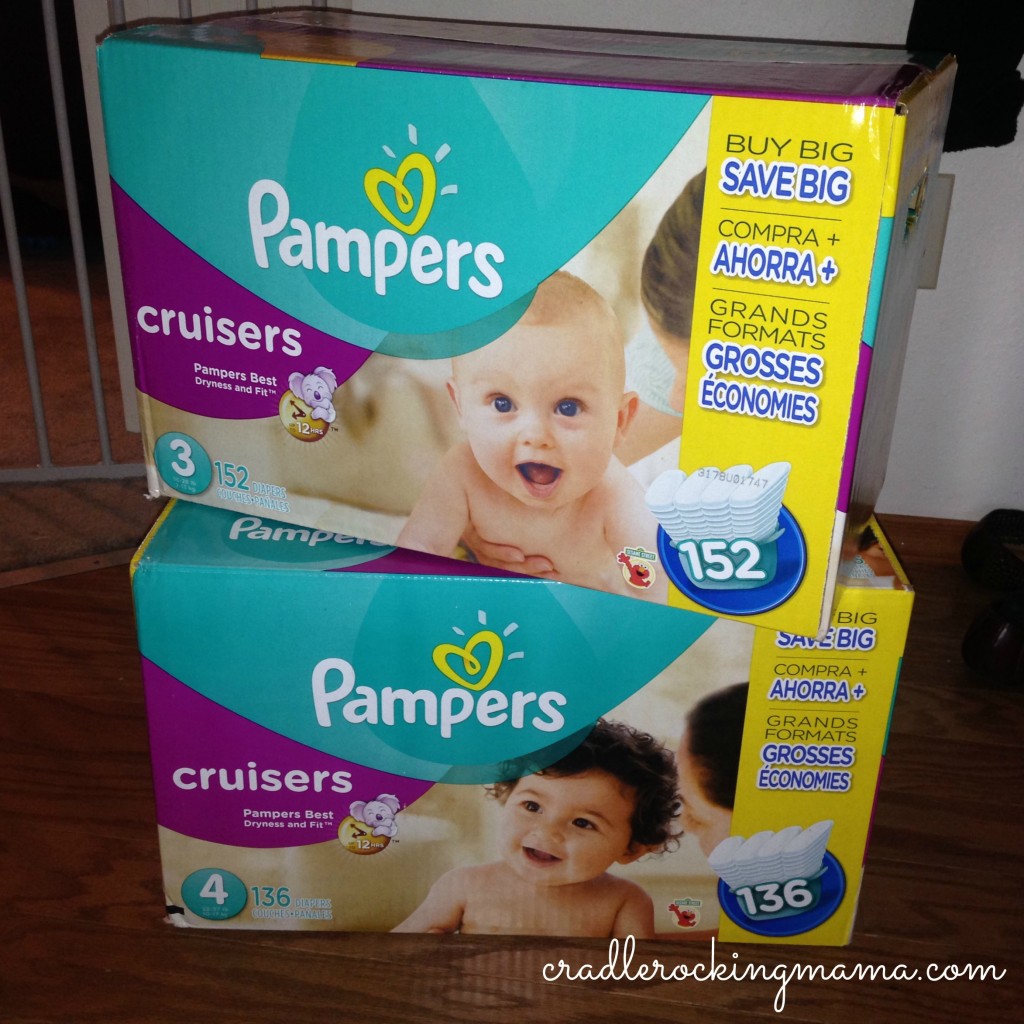
Friday afternoon, a passel of Mama’s and their kiddos went to play at the gymnastics place where we have our Halloween Party each year. Each family brought $5 to donate to our family, and a few even brought diapers as well.

Two big ol' boxes of blessings!

Two big ol’ boxes of blessings!

My heart feels like it is going to explode from the Blessings and Kindnesses these local Mama’s gave to us! It’s not just the money and the diapers. Those are wonderful, but…the fact that these women care, that they were willing to expend themselves for us just blows me away.

Especially considering that we’ve basically dropped off the planet the last year and a half and have not been participating in anything except the Halloween Party; even being inactive, even being so distant, these women still rallied for us.

Blessings. Kindnesses.

To be honest, I’m not always comfortable with receiving gifts. Oh, not Birthday or Christmas gifts – those I expect from my loved ones! But gifts from friends or acquaintances – and strangers – sometimes make me feel like I now have a debt in the “I owe ____” column of balance in my head.

Not because of anything the gift-giver does, mind you; this is strictly my own issue! Funnily enough, I love to give to people in this way! It makes my day to pass on some little gift that perks someone up or helps someone out. (Yet another thing that stinks about being so broke…I can’t do that very often any more.) But when I’m on the other end of it? I’m often slightly uncomfortable.

This weekend, though, I remembered two things that helped keep me from feeling too awkward. First, I once had someone say to me “Why would you deprive someone else of the pleasure of gift-giving? Being grateful and happy makes them feel good – so accept gifts graciously!” in response to my saying that I felt uncomfortable with receiving gifts.

That resonated with me; if I enjoy giving things to people, surely other people feel the same, right? Since I know I never expect anything in return when I give, why should I feel like I’m now indebted when I receive?

So keeping that in mind helps with my own neurosis.

The second thing I remembered, though, was the big one: these weren’t really gifts for me. Not even the hat and the medicine pouch. These were gifts for Jed and Zac’s Mama. *I* was incidental; it was because of my boys that I was being showered with Blessings and Kindnesses. It was in honor of THEM. 

These Blessings and Kindnesses served to boost my spirits in a huge way…a way that makes me feel this was all Divinely Inspired in some way. I’ve been struggling, lately, and have felt off kilter for a while. After this weekend, though, I feel myself coming back to even keel: confident, hopeful, faithful, and self-assured. 

My boys need me to be that way for them. So these Blessings and Kindnesses were, to me, a way for God and His Angels on Earth to tell me “Keep going. You’re doing a good job. Don’t lose faith. Your boys need you to be strong and resilient. Don’t forget – you’re not alone.

And I needed that SO MUCH, I can’t even begin to tell you how much I needed to know that.

I would LOVE to name names in here, to give proper public accolades to the sweet Angels who Blessed my family this weekend and showered us with such Kindness, but I didn’t ask permission to share names so I won’t.

But you know who you are.

THANK YOU. From the bottom of my heart, THANK YOU. 

__________

What Blessings and Kindnesses have YOU received that blow you away?

Frugal Fridays – Cloth Diapers

Frugal Fridays - Cloth Diapers cradlerockingmama.com

Today, I’m all about cloth diapers.

When Jed was born, I knew I would be taking a year of maternity leave. It seemed stupid to spend so much of our limited funds on diapers, so I decided we were going cloth all the way!

And we did. For two years. We were still even doing cloth after Zac was born…until FPIES kicked me in the teeth and I started struggling to keep up with the demands of FPIES research, 6 meal a day cooking, cleaning, and diaper washing and folding.

We started using disposables as a means to give me a break, and I’m grateful we did.

HOWEVER! Things are really bad in the Summers house right now, financially speaking, and it seems REALLY  stupid for us to spend our incredibly limited funds on disposable diapers.

So I’m dusting off our cloth diapers, getting out the diaper covers, and adding more work to my daily routine.

That makes it sound bad, right? Like cloth diapers are a ton of work?

No. They’re really not. They’re actually pretty easy to deal with. I was just terribly overwhelmed last year when we were first diagnosed. Now? Pshaw! I got this, baby!

Let’s back up a minute, though, before we start into what cloth diapering entails work-wise.

First you have to decide what kind of cloth diapers you want to use.

It used to be easy. Our Mama’s or Grandmothers had one choice: flat fold diapers. Fold ’em, wrap ’em around the baby, pin ’em…done!

Nowadays, not so easy to decide.

There are a ton of options out there! Pre-folds, liners, combo cloth with disposable liners, blah blah blah. And the prices on some of them are daunting!

I remember being quite overwhelmed at the options available when I was researching for Jed…until Darrel cut through the noise and chatter and got right to the heart of the matter. “Honey,” he said, “it’s a piece of material that collects poop. How hard does it need to be?”

Well, there ya go. Kinda makes it easier to not stress about it when you look at it that way, right?

In the end, I went old-school: flat fold diapers with covers.

For one thing, I already had some to start. My mom had kept a good sized stack of the diapers she’d used on my little tushie when I was a baby, and ceremoniously passed them on to me.

For another, it was cheaper. WAY cheaper to start with flat folds.

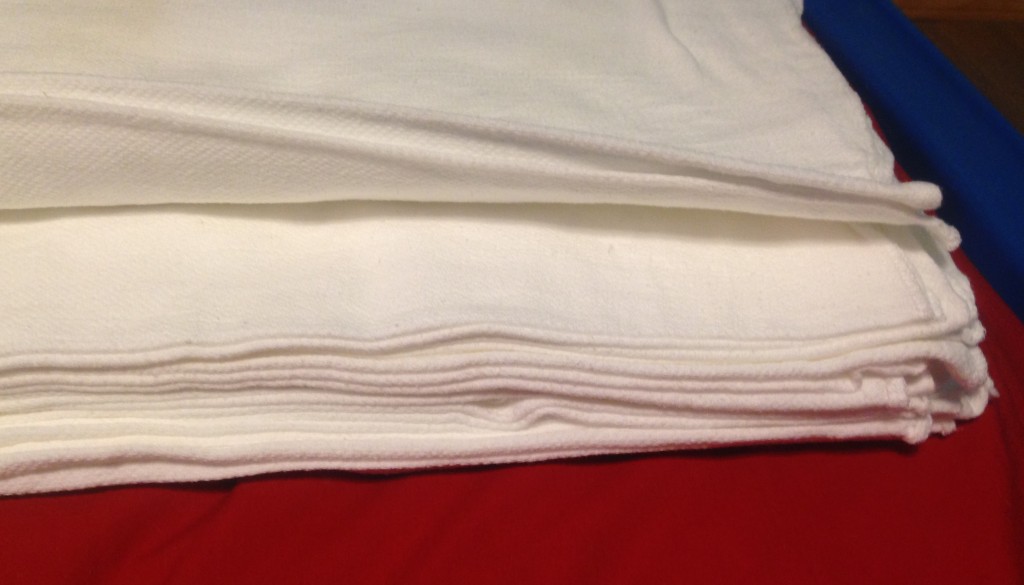
One other reason was the laundering ins and outs. Flat folds dry quicker and seemed like they’d be easier to handle regarding stain removal and heavy duty laundering.

Then I looked for covers, and while I am a genius with a crochet hook, I didn’t have time to crochet up a nice supply of woolen diaper covers. So I bought several Flip diaper covers and have been very happy with that decision ever since.

One word about flat folds: run – don’t walk – away from the Gerber flat folds in the store. They’re downright gauzy and won’t really hold anything.

GraniteSmith on ebay became my go-to place for durable, thick, soft flat fold diapers. These things rock! Unfortunately, I just checked on their shop site and didn’t see any for sale. I don’t know if that means they no longer sell them or are just out of stock. If you get a chance, try there first, but otherwise, I’d recommend searching online for other sources of flat folds. The Gerber’s are just pitiful.

If you really want to be cheap, you can make your own. No joke, but you can use t-shirts as diapers very well and without any sewing! (I’ve kept this in my mind as an emergency diaper possibility for occasions at work. Flight delays sometimes mean parents run out of diapers. The t-shirt diaper would be an awesome solution in that situation.)

Whatever way you go, now you have to use them. It’s really easy.

First, the folding.

You won’t really have to worry about this if you go with some of the newer, fancier options out there. But if you go flat-fold, well, folding is part of the deal. Since I’m a flat-fold kinda girl, that is what I’m going to talk about today.

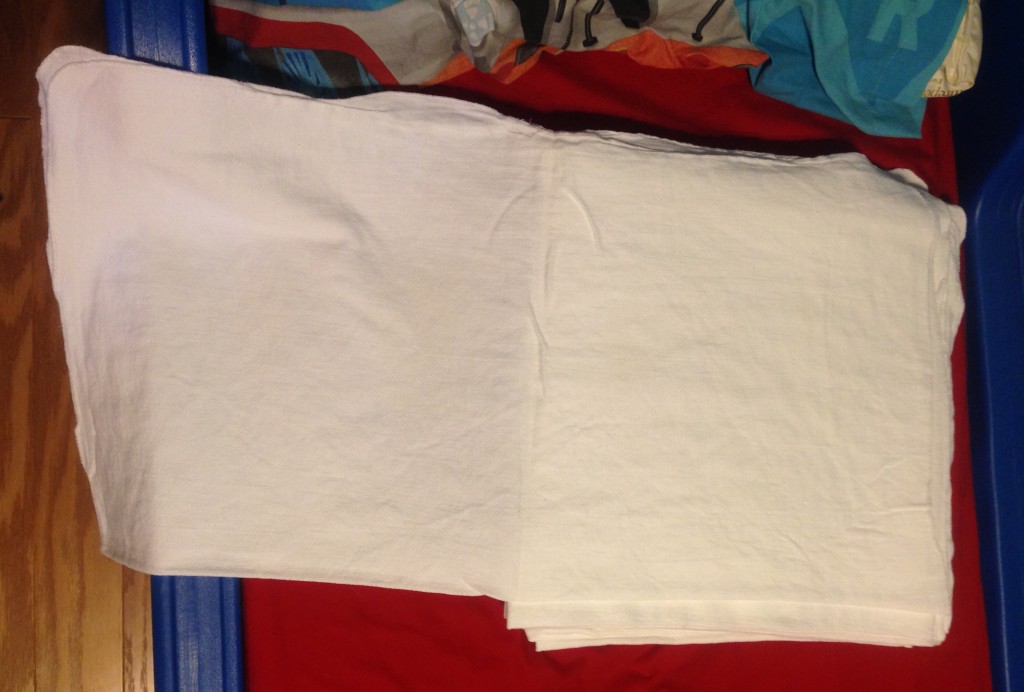
There are lots of ways to fold a cloth diaper. There are two that Darrel and I like the best, depending on how big our kiddos are and what size flat fold we’re working with (we have two sizes of flat folds).

For the most part, right now, I’m using the Origami fold. Here’s how it works:

Fold your diaper in half.

Folded in half once

Folded in half once

Fold it in half again to make a square.

A square.

A square.

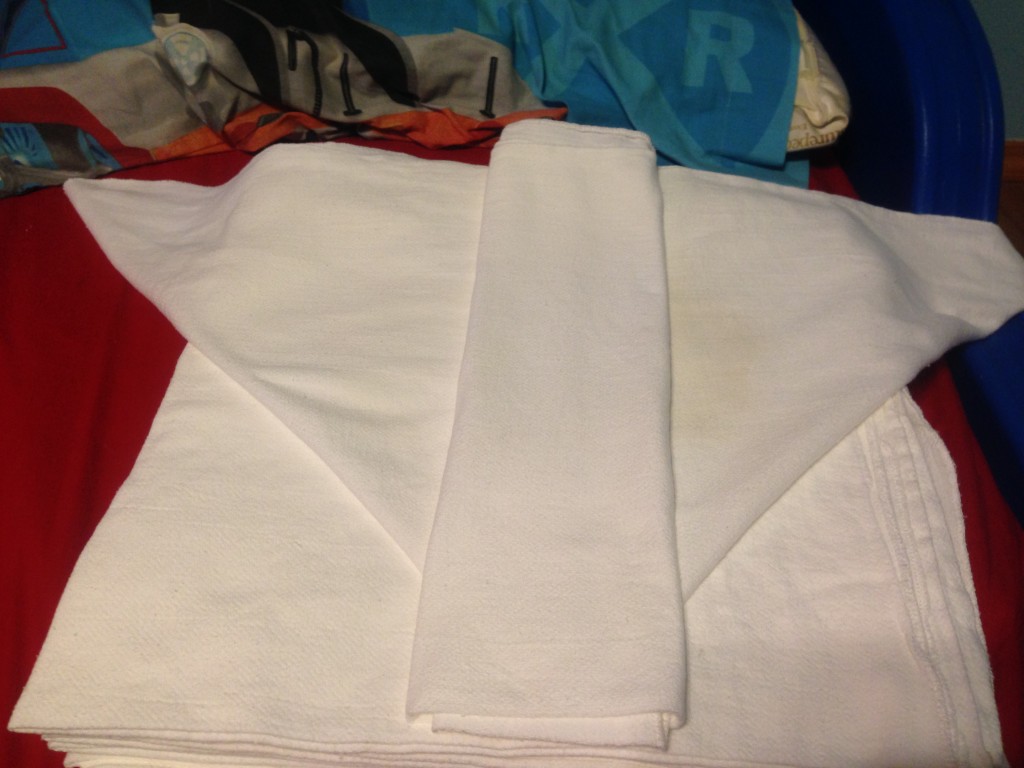
With the doubled over first fold facing you (does that make sense? Look at the picture to see what I mean)…

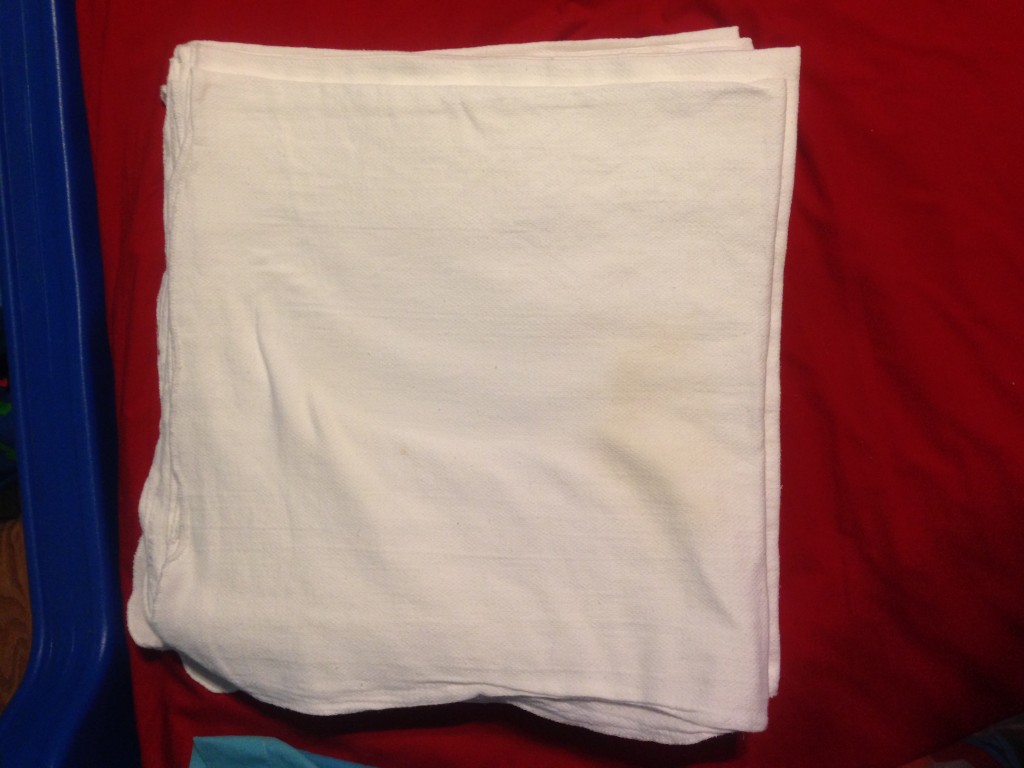
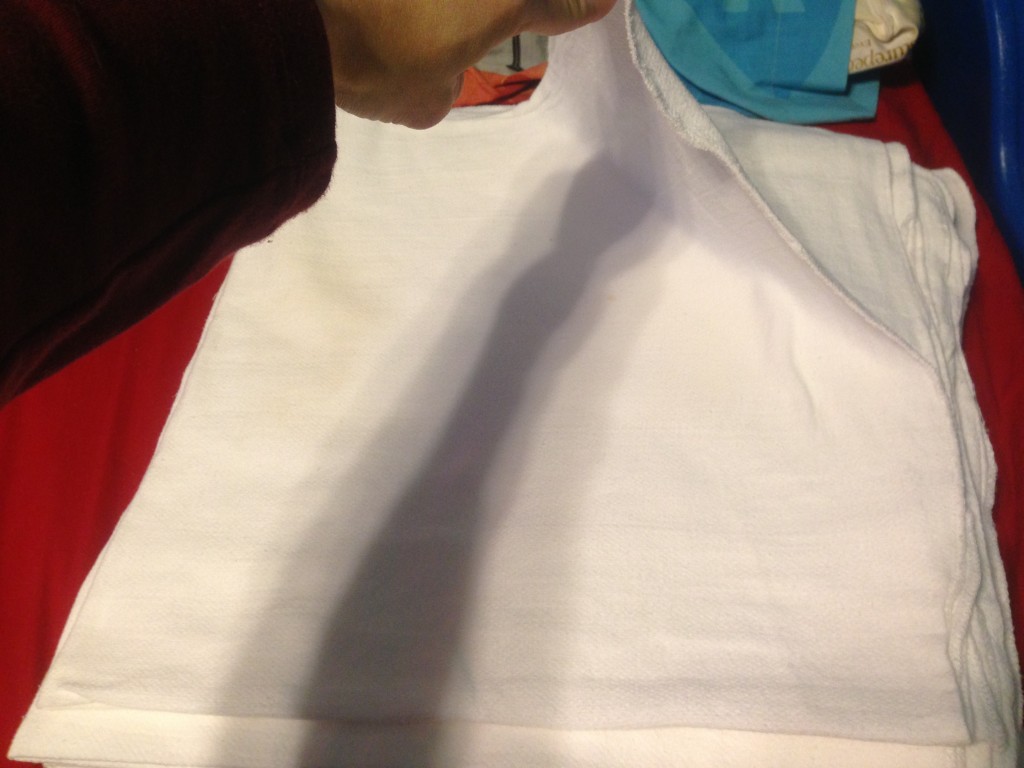
Sorry, this is a stack of diapers ready to fold. You can see where the solid edge is at the left, the two folded edges are at the bottom, and the top and right are single edges of the diaper, right? I promise - this is WAY easier than it sounds.

Sorry, this is a stack of diapers ready to fold. You can see where the solid edge is at the left, the two folded edges are at the bottom, and the top and right are single edges of the diaper, right? I promise – this is WAY easier than it sounds.

pick up the top layer out of the four layers at the upper right hand corner…

Grabbing the top right hand corner of the top layer of the diaper

Grabbing the top right hand corner of the top layer of the diaper

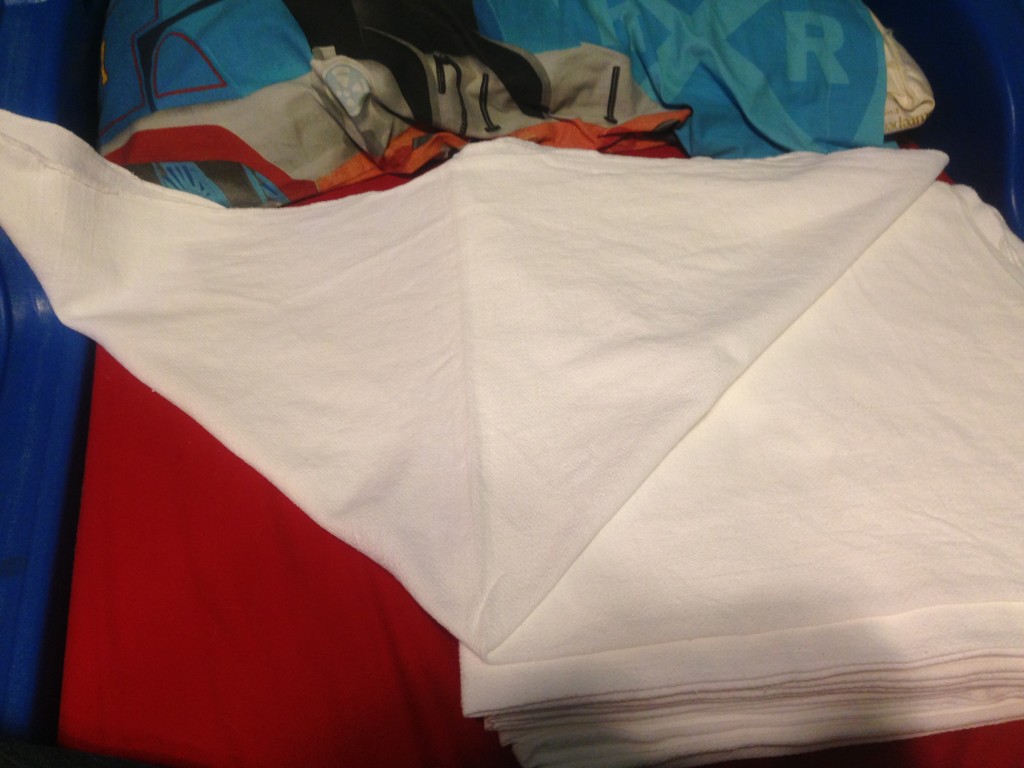
and pull it across until you’ve made a nice big ‘V’ shape.

A 'V' laying on a square. Got it?

A ‘V’ laying on a square. Got it?

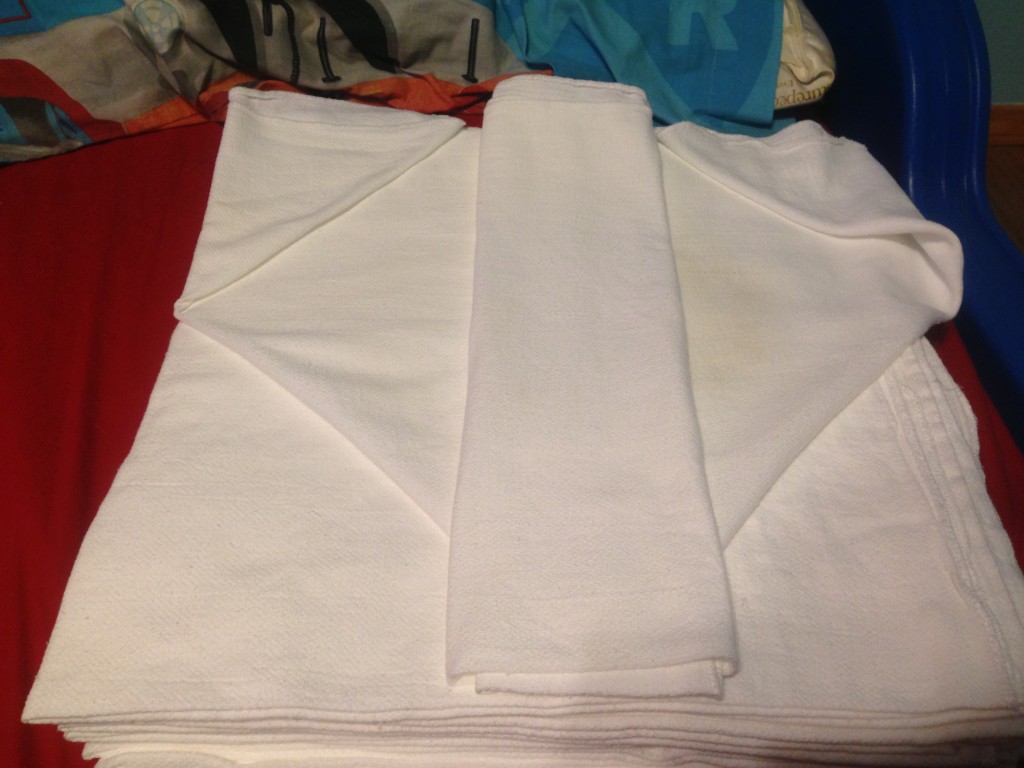
Then grab the entire diaper and flip it over, without altering that ‘V’ shape and the underlying square. See?

Now the square is on top and on the left, and the 'V' is on the bottom and pointing right.

Now the square is on top and on the left, and the ‘V’ is on the bottom and pointing right.

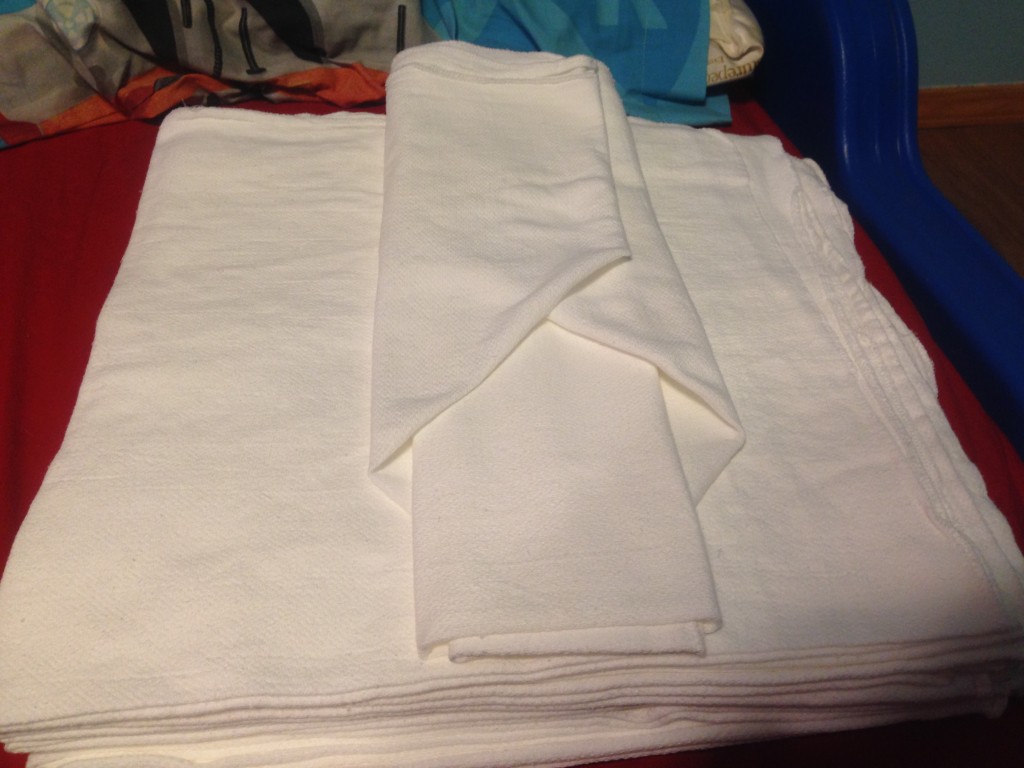
Then grab the double layer of the square and begin folding it in…

Folding in from the left.

Folding in from the left.

I shoot for thirds, until the newly formed rectangle is centered in the diaper.

Nice little diaper, ready to go.

Nice little diaper, ready to go.

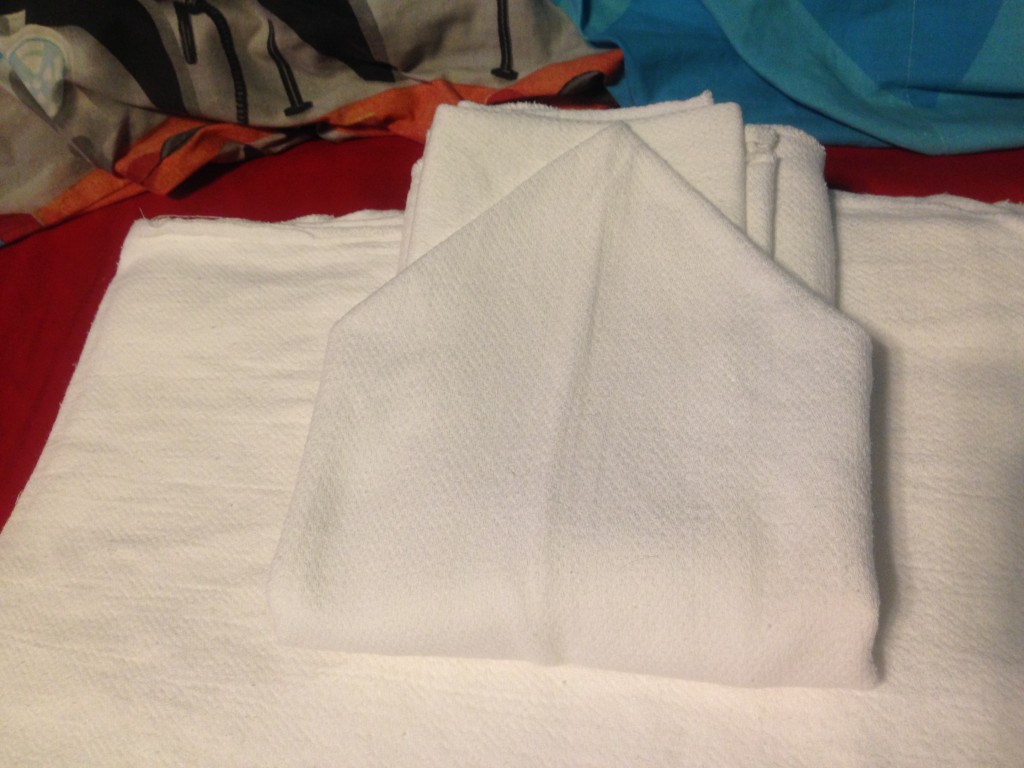
At this point, it’s ready to use…but who among us is going to fold one diaper for use while their little one is squirming naked on the changing table? No one, that’s who. We’re going to fold them all ahead of time, right? So to make them nice for storage, I go a little further.

First I fold the pointy ends over towards the center – not all the way to the center, just in a bit.


Fold the ends over towards the center

Fold the ends over towards the center

Then I fold the sides over the center of the diaper like so…


Sides folded over each other

Sides folded over each other

Then fold the whole narrow rectangle in half. Ta-da!

Fold the bottom up in half and you're done!

Fold the bottom up in half and you’re done!

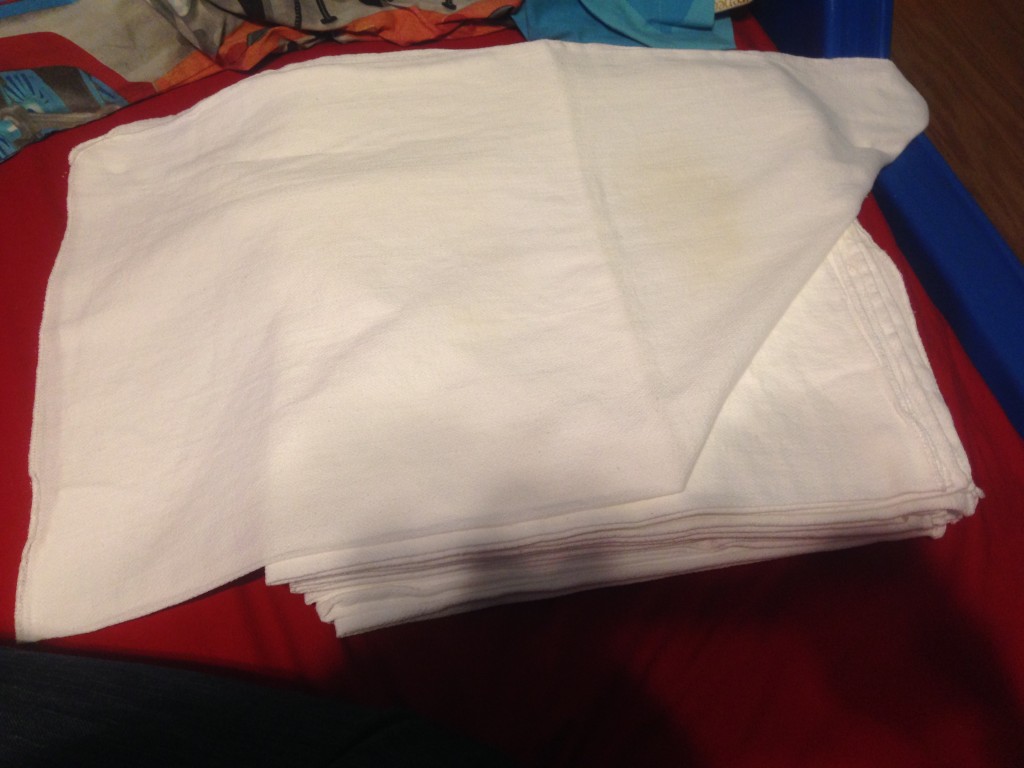
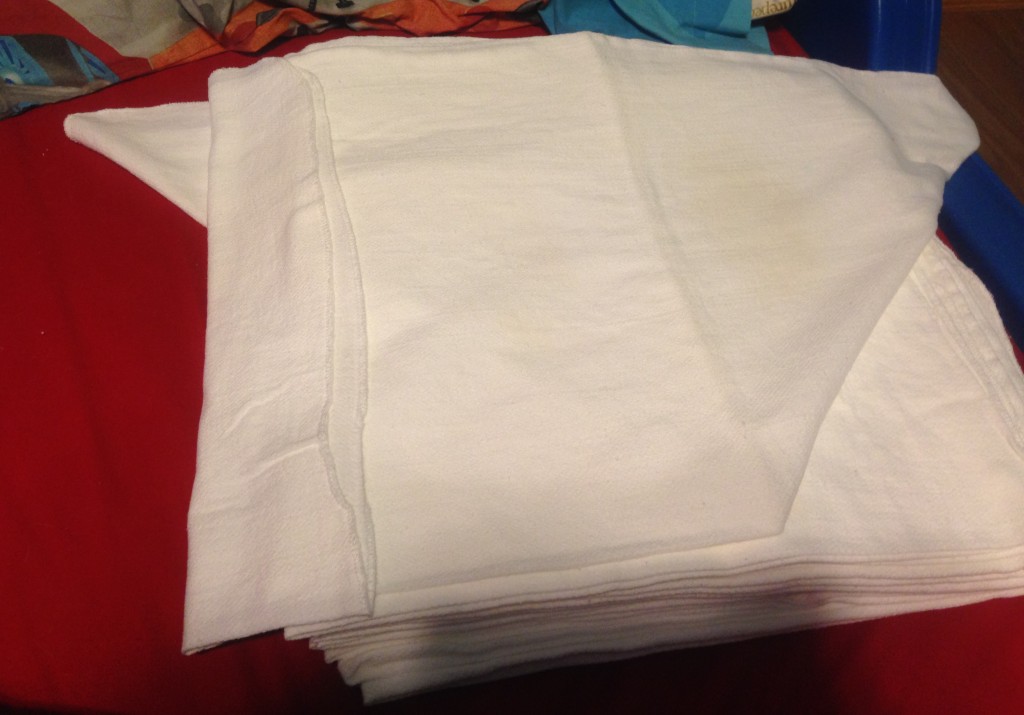
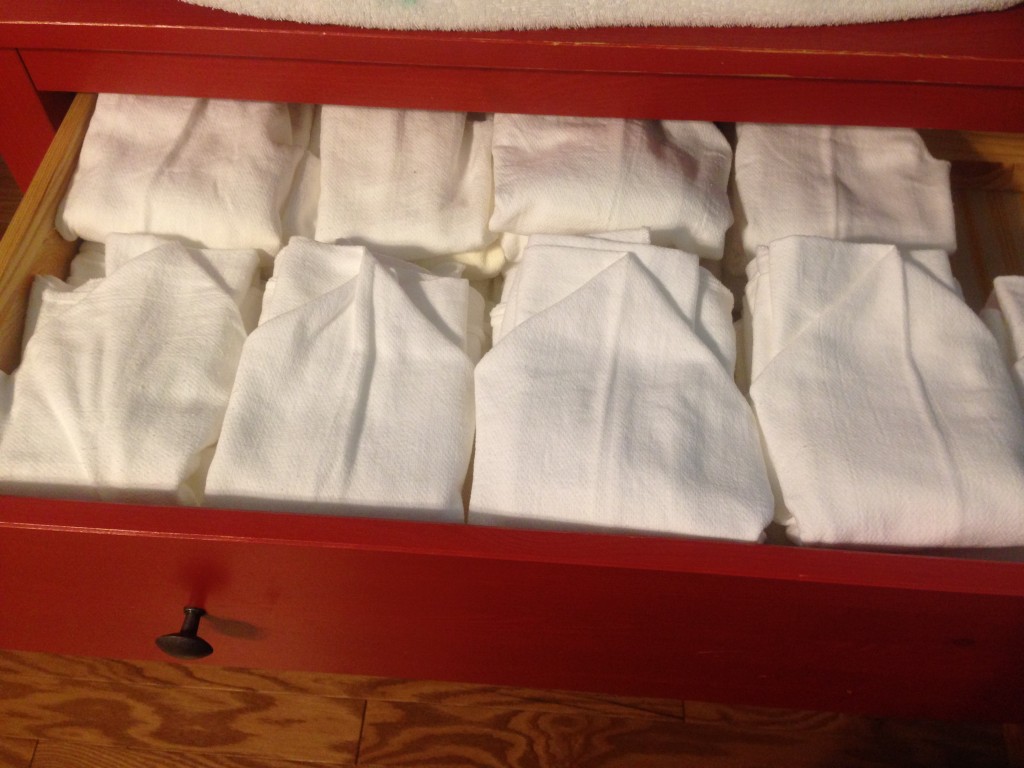
A diaper ready to stack and store in the changing table drawer.

A drawer full of diapers ready to use.

A drawer full of diapers ready to use.

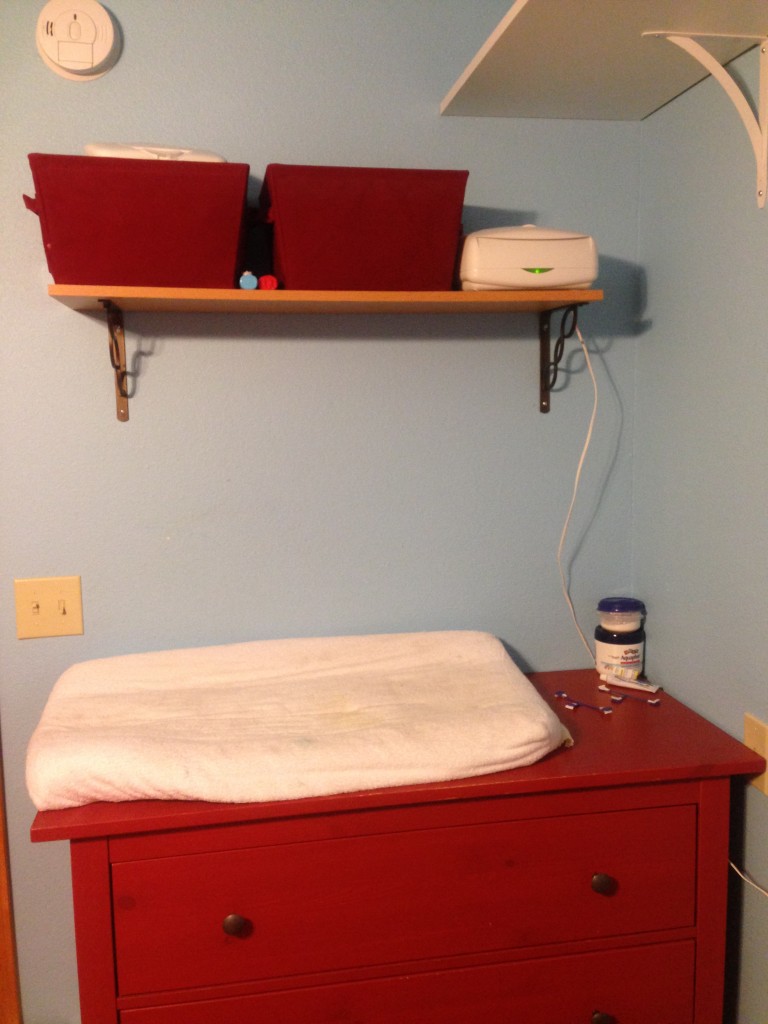
I keep the diaper covers in a basket on a shelf over the changing table, right next to a wipes container filled with cloth diaper wipes.

Two baskets on a shelf: one with diaper covers, the other with medical stuff; a wipes container, and the changing station. Nifty.

Two baskets on a shelf: one with diaper covers, the other with medical stuff; a wipes container, and the changing station. Nifty.

Directly next to the changing station is the hamper. We have a dual hamper; one side is regular clothes and the other is diapers. I just pour a little vinegar in the bottom, and when I need to, I dump the whole thing in the washing machine.

Usually I try to wash every day; it never gets out of control that way. But every other day is no big deal.

As for washing these diapers, it’s easy. Pour them in the washing machine, set the machine to rinse.

After it has rinsed and spun out, add your soap and wash normally.

Lots of people say you shouldn’t use bleach on your cloth diapers. There are whole websites devoted to the care and maintenance of cloth diapers, so I’m not going to reinvent the wheel. For washing instructions, folding methods, and everything else “nitty-gritty” about diapers, Google is your friend. (Seriously not trying to pass the buck -there’s just FAR too much to put into one post! There are BOOKS written about this!)

I will say that for poopy diapers, I dunk them in the toilet before tossing them in the diaper pail. That gets the bigger stuff off and loosens up the poo so it cleans easier. You can get one of those sprayer things if you like, but I never did. I just dunk, flush, and squeeze out the water. Then I wash my hands really well!

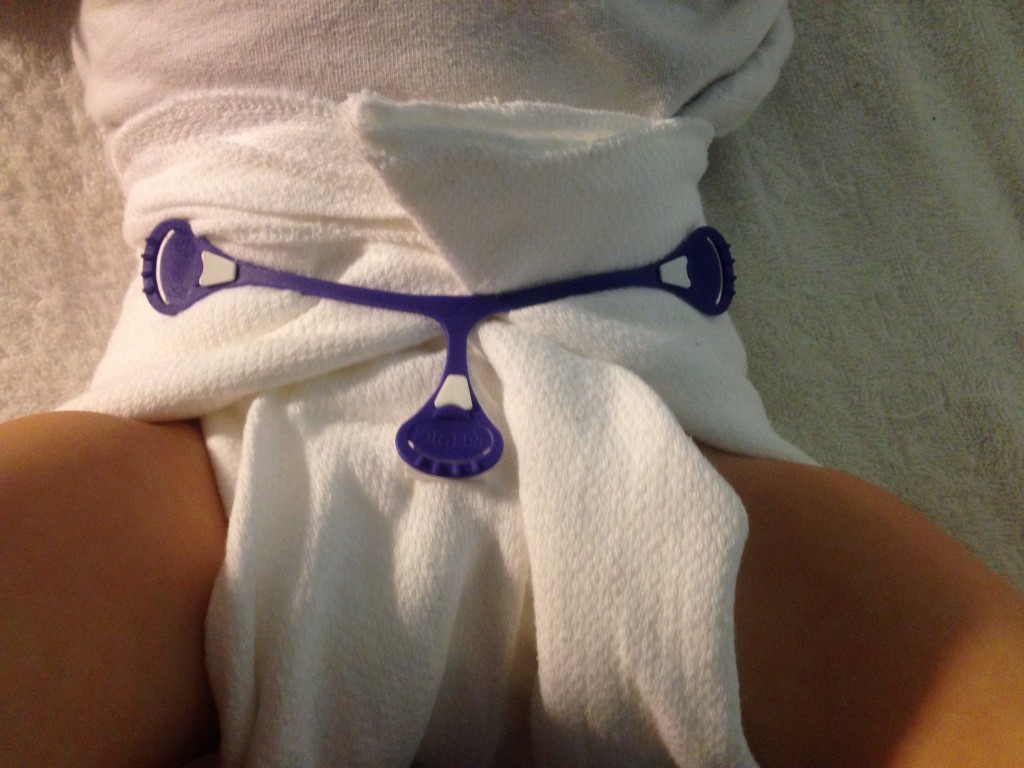
As for wrapping those diapers around a heinie? Here’s a peek:

Cloth covered heinie!

Cloth covered heinie!

Oh, and forget safety pins! We use Snappi’s to hold the diaper in place. They are AWESOME!

So…that’s a pretty long tutorial on something as mundane as cloth diapers. But this is one of the biggest money saving measures we’ve taken to date. 

Three years ago, I bought all our cloth diapering supplies. At the time, my cost breakdown was something like this:

  • Flat-fold diapers (4 dozen):    $88
  • Flip Diaper covers (6 each):   $96
  • Snappi’s (6 each):                    $36
  • Grand Total:                     $220

Using disposable diapers, the costs will vary widely. Coupons are abundant, and brands and prices give lots of options. Not to mention the number of diaper changes each baby goes through is probably different!

I think it’s safe to assume, though, that most parents will wind up using about 175 diapers in a month.  (That’s between 5 and 6 diapers a day.) It would not be out of line to say that a months worth of diapers could cost a family $40 a month at that rate!

So for one year:
disposables    = $480
cloth diapers = $220.

For THREE years:
disposables = $1,440
cloth diapers  = $220

Yeah. In most ways, disposables are easier. But when you crunch the numbers, cloth diapers are the most frugal way to go. 

Oh, and don’t feel like this is an all-or-nothing proposition! We keep some disposables on hand for certain situations; long trips to town, nights when we know he’s nursed a lot and will likely wet a lot, etc.

But just by using cloth 90-95% of the time, we save ourselves a TON of money.

Hope that helps!

__________

Do you cloth? What style of cloth diaper did you decide to use?