


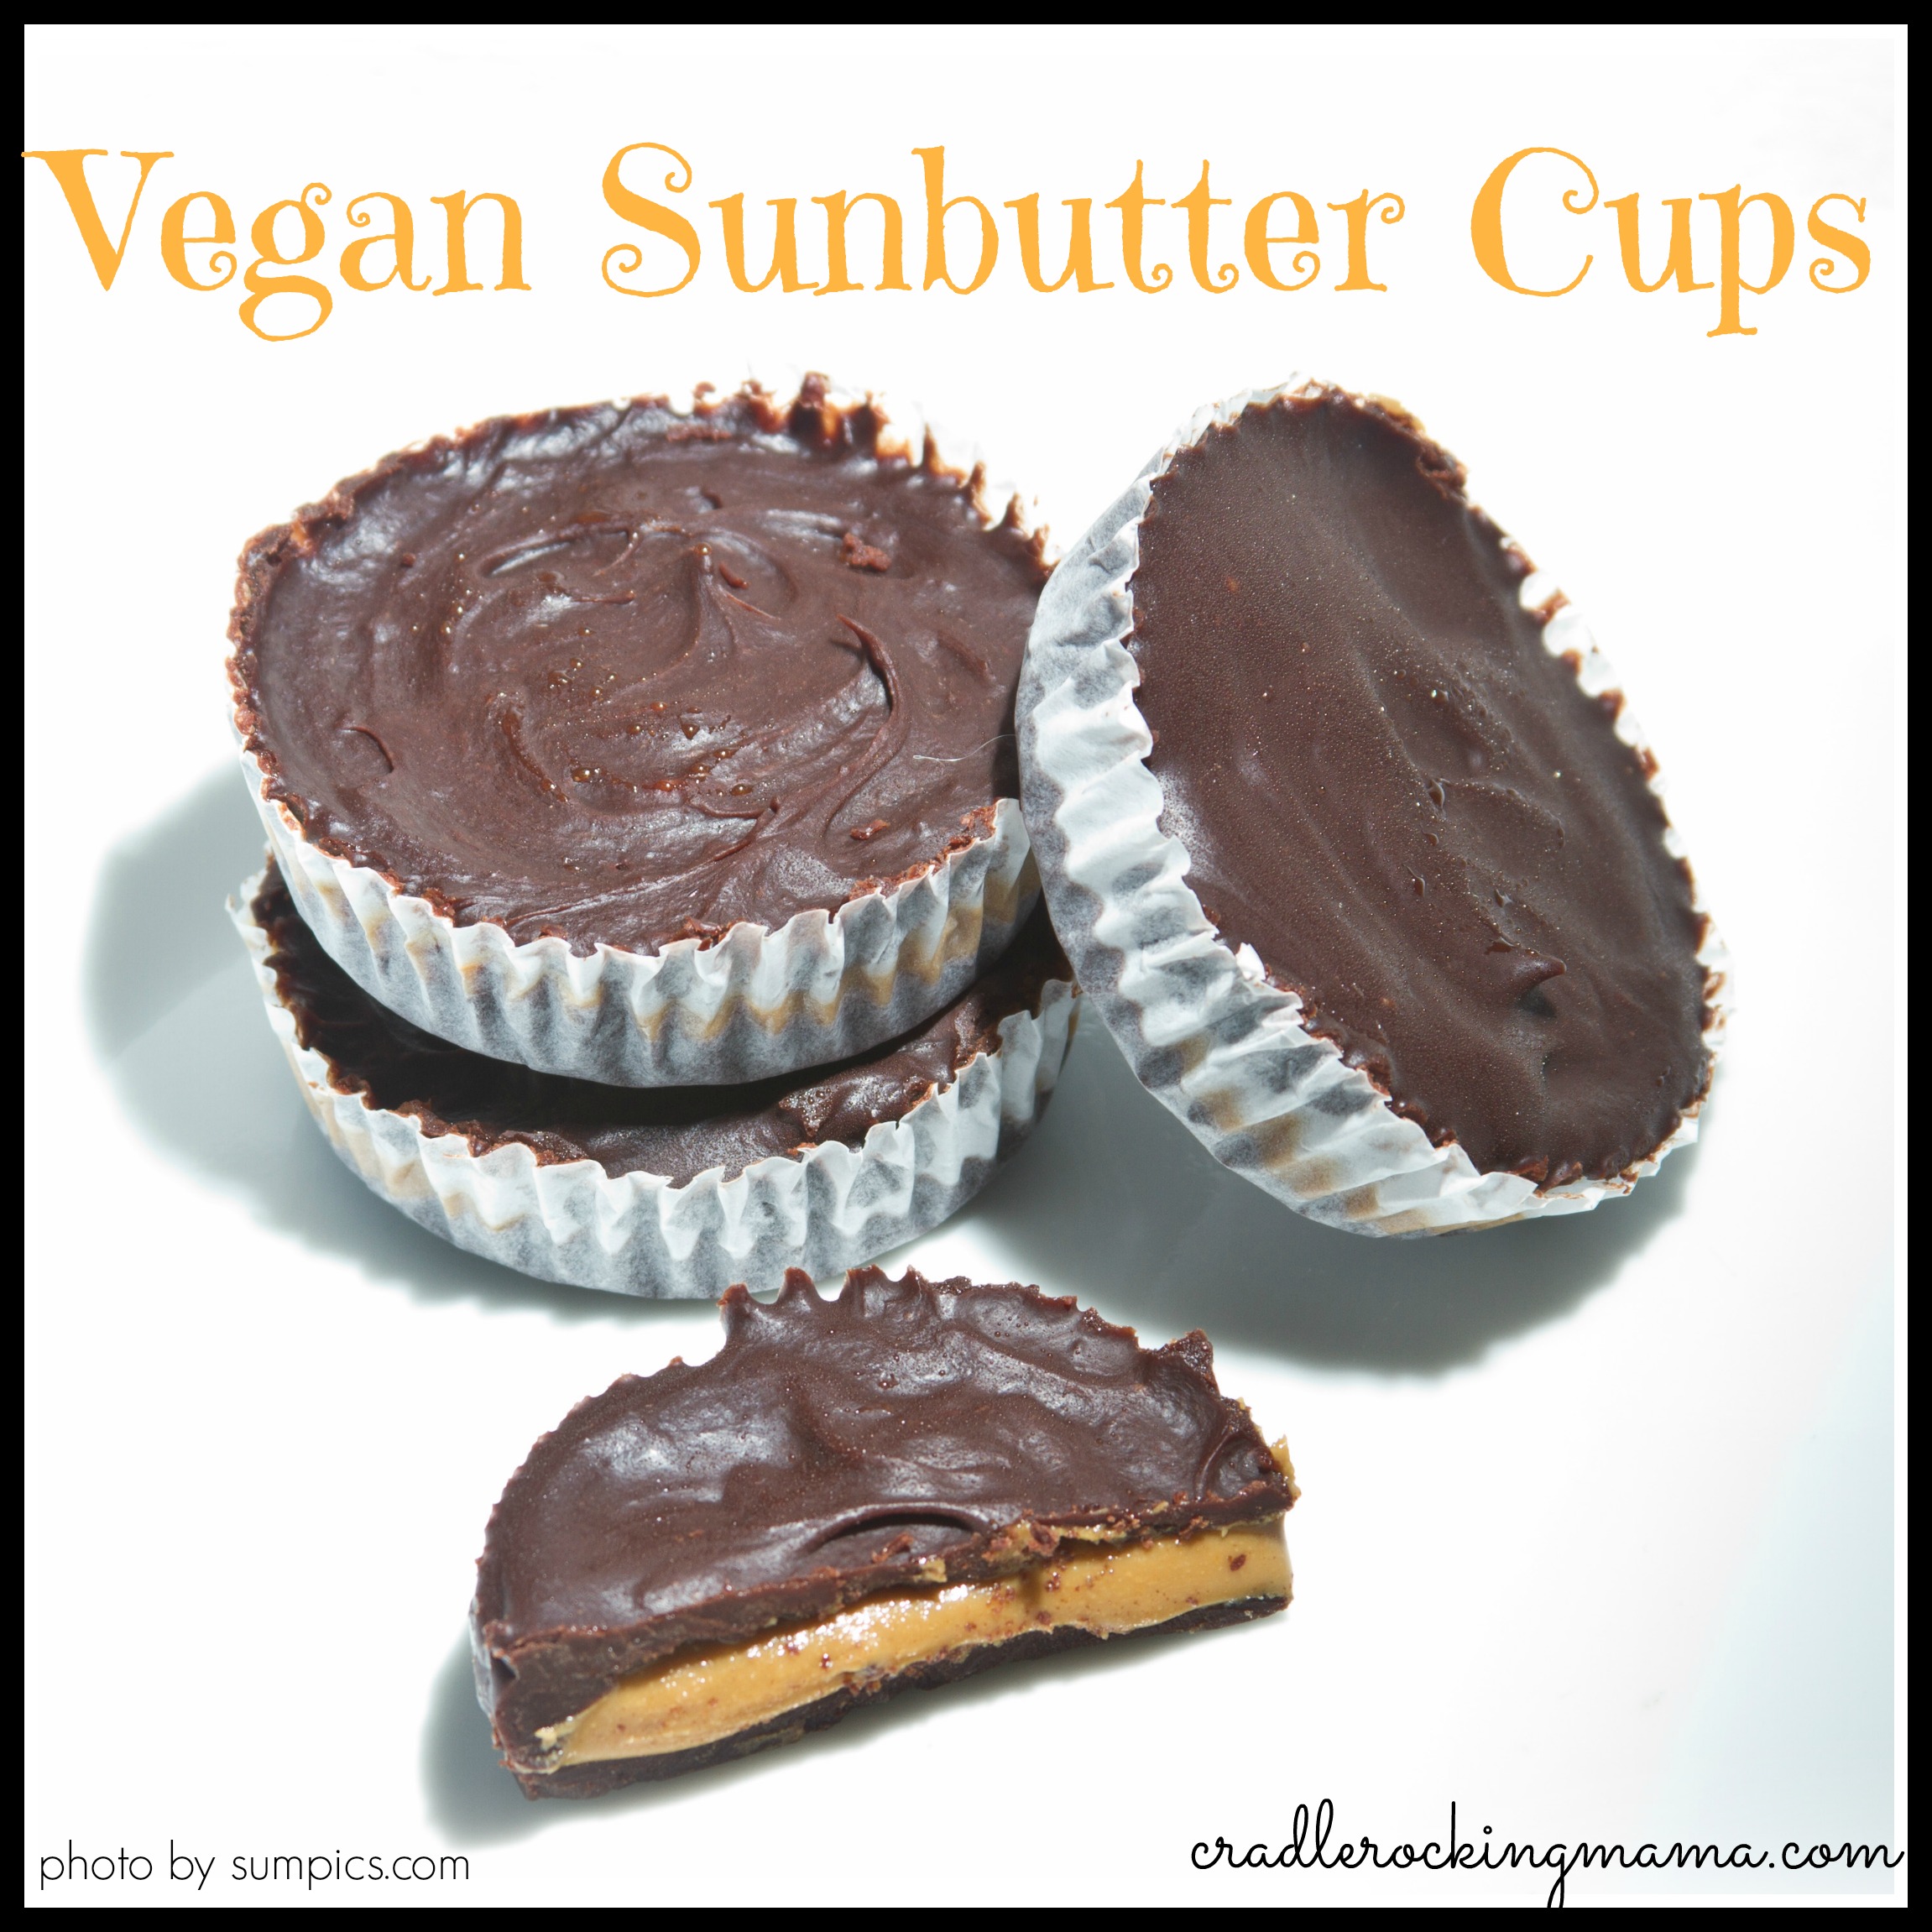
There are tons of “peanut butter cup” recipes online, but most of them are chock full of dairy and sugar.
Since neither of those is okay for our household, I decided to tweak and make Jed a safe butter cup to enjoy.
It was worth it! This is the first recipe I’ve made for Jed that garnered the response, “I LOVE these!”
He asks for his “black muffins” all the time, which just goes to prove that I can’t make these very often or the child will eat nothing but sunbutter cups until they’re all gone!
I will say that, having done these, there are a few things I want to try to make them prettier and easier. However, this recipe works just fine and is very simple as is, so I wanted to share it with you.
To start, you’ll need to make a double batch of my dairy-free/fructose-friendly chocolate.
Then line a muffin tin with cupcake liners and scoop some chocolate into each liner. I used my (clean) finger to smooth the chocolate out across the bottom and up the sides a little bit.
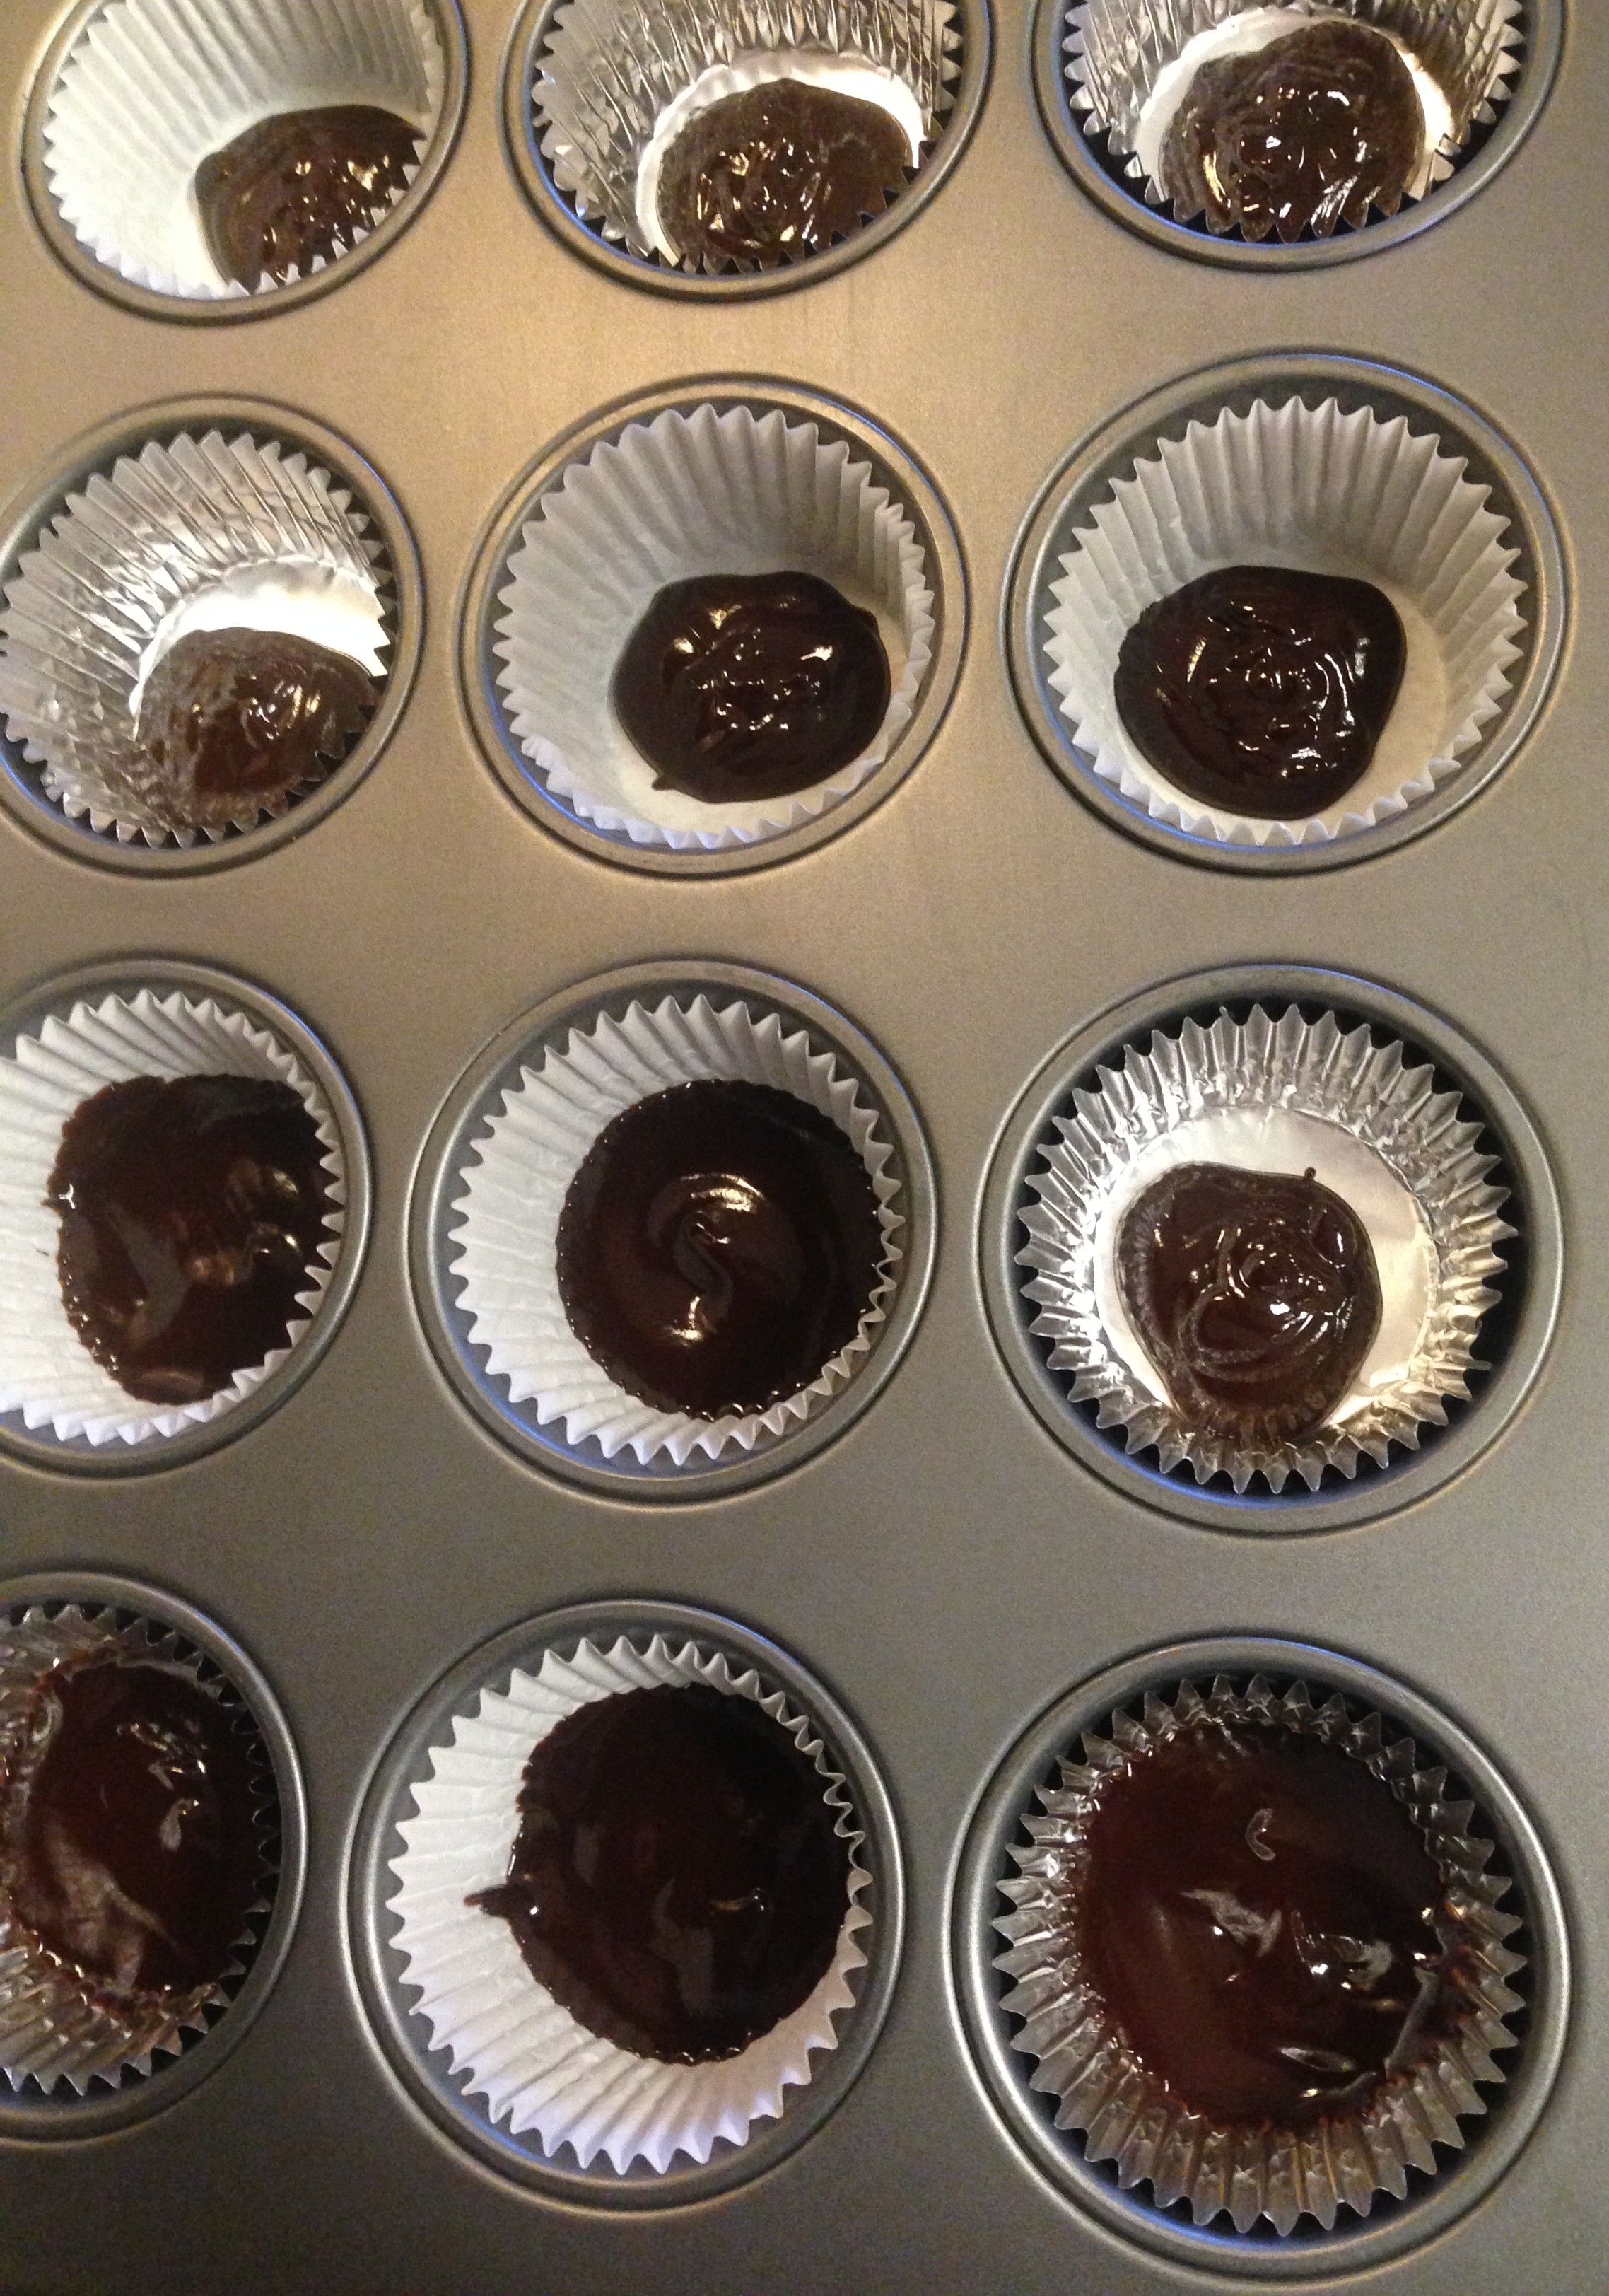
Lined with cupcake liners, you can see the 5 I’ve smoothed out and the rest waiting to be smoothed.
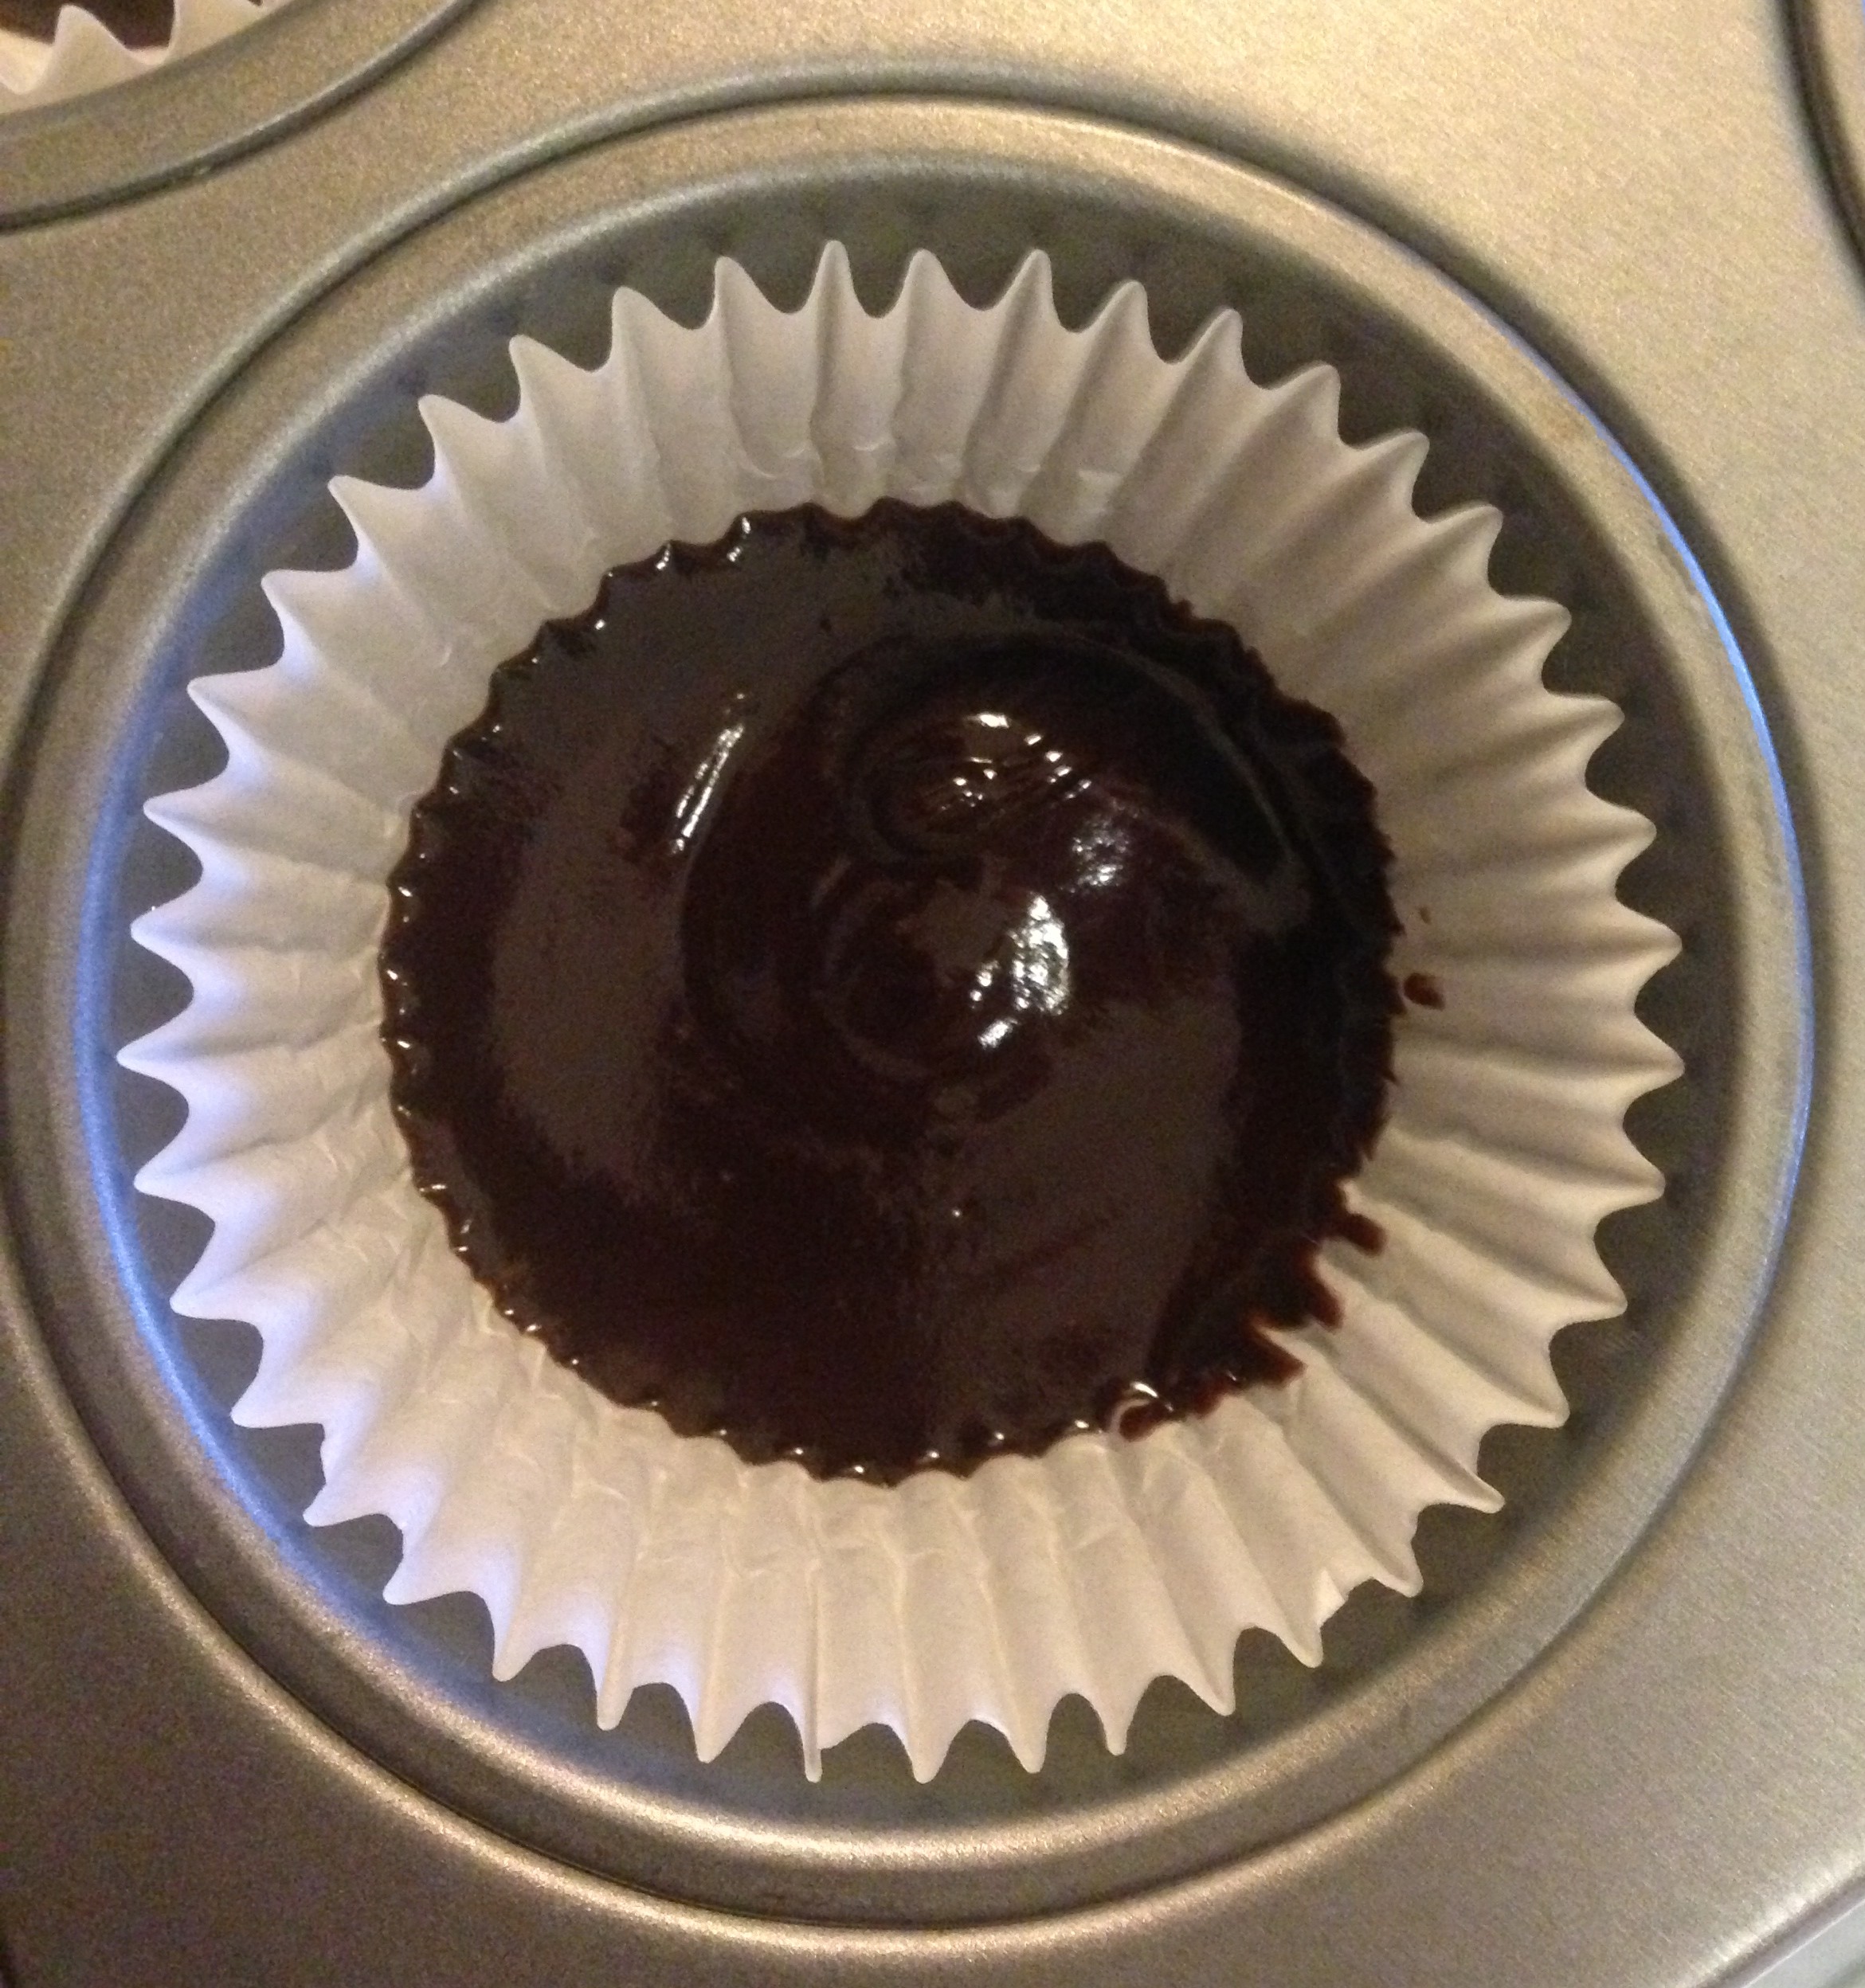
Smoothed on the bottom and up the sides a little bit. I might try smoothing it up the sides a little more next time I make these.
Set the whole pan in the freezer for about ten minutes, then bring it back to the counter.

Frozen chocolate bottoms!
Scoop out some sunbutter and put it on top of the chocolate; again I used my clean finger to smooth out the top of the sunbutter a bit.

Sunbutter scooped into the middle.
Put the whole pan back in the freezer.
Before you bring out the pan again, re-warm your chocolate over low heat until it is warm and runny.
Bring back the pan and scoop some more chocolate over the sunbutter. The amount may vary on this step; the goal is to completely cover the sunbutter and that may take slightly more or less than 1 T.

Chocolate sort of smoothed on the top, ready to go into the freezer.
Put the whole pan back in the freezer and after about ten minutes, you’ve got homemade, vegan, allergy free, fructose friendly sunbutter cups!
Now, some thoughts and notes about this:
Most recipes call for making a “filling” out of peanut or sun butter and confectioners sugar. This makes the inside of the cup sweeter and not as runny.
We’ve determined that Jed can tolerate some table sugar, but since I still prefer to avoid it whenever possible I decided to try it without any confectioners sugar.
It works, but it is very runny and messy.
I plan to try these again with two options: one is to freeze the sunbutter until hard before scooping it into the muffin liners, and another is to find something else I can mix with the sunbutter to make it not so runny.
Also, one big reason these did not turn out as “pretty” as I would have liked was that I underestimated how quickly the chocolate would set up on the frozen sunbutter!
I tend to work in “steps” in the kitchen; after getting out the frozen pan to pour the next layer of chocolate on too, the next step was, obviously, to put the chocolate on!
Rather than working one cup at a time, I scooped the chocolate on to every cup before attempting to smooth out the tops.
By the time I made it to the third cup on the “smoothing out” step, the chocolate was already firm and very difficult to smooth!
So on this step , make sure your chocolate is warm, and work one cup at a time to make these really pretty.
Of course, they’re delicious without being pretty! But being pretty is just nice, don’t you think? It takes them up a notch from “homemade” to “gourmet”, in my opinion.
These are best stored in the freezer or refrigerator. They’ll melt otherwise.
So there you have it! Homemade vegan, allergy-friendly, fructose-friendly Sunbutter Cups, suitable for bragging about to anyone.

- 1 cup cacao butter
- ½ c. cocoa powder
- ½ c. + 2 T. maple syrup
- pinch of sea salt
- 2 tsp. vanilla
- ¾ c. sunbutter
- Line a muffin pan with cupcake liners.
- Put your cacao butter in a double boiler on your stove and heat it slowly over medium heat until just melted. Immediately remove from heat.
- Add the remaining ingredients EXCEPT the sunbutter to the cacao butter and whisk until smooth and shiny.
- Pour 1 T. of chocolate into each liner. Smooth out with your finger, trying to smooth it up the sides a bit. Set in the freezer for about ten minutes.
- Remove from the freezer and scoop 1 T. of sunbutter into the center of each cupcake liner. Put back in the freezer for about ten minutes.
- Re-warm your remaining chocolate on the stove while you wait for the sunbutter to harden.
- Remove the pan from the freezer and scoop chocolate over the sunbutter, working one cup at a time and smoothing the tops as needed.
- Put the whole pan back in the freezer for about ten more minutes.
- Remove the pan from the freezer and pop out the cups. At this point you can trim the paper down to the top of the candy if you'd like a nicer presentation.
- Enjoy some delicious, and really fairly healthy for you homemade sunbutter cups!
Have you made these before? What did you use in your filling?
__________
This post shared with:


Thank Your Body Thursday, Healing With Food Friday, Let’s Get Real, Frugal Ways Sustainable Days, and Real Food Wednesday.
10 Responses to Vegan Sunbutter Cups