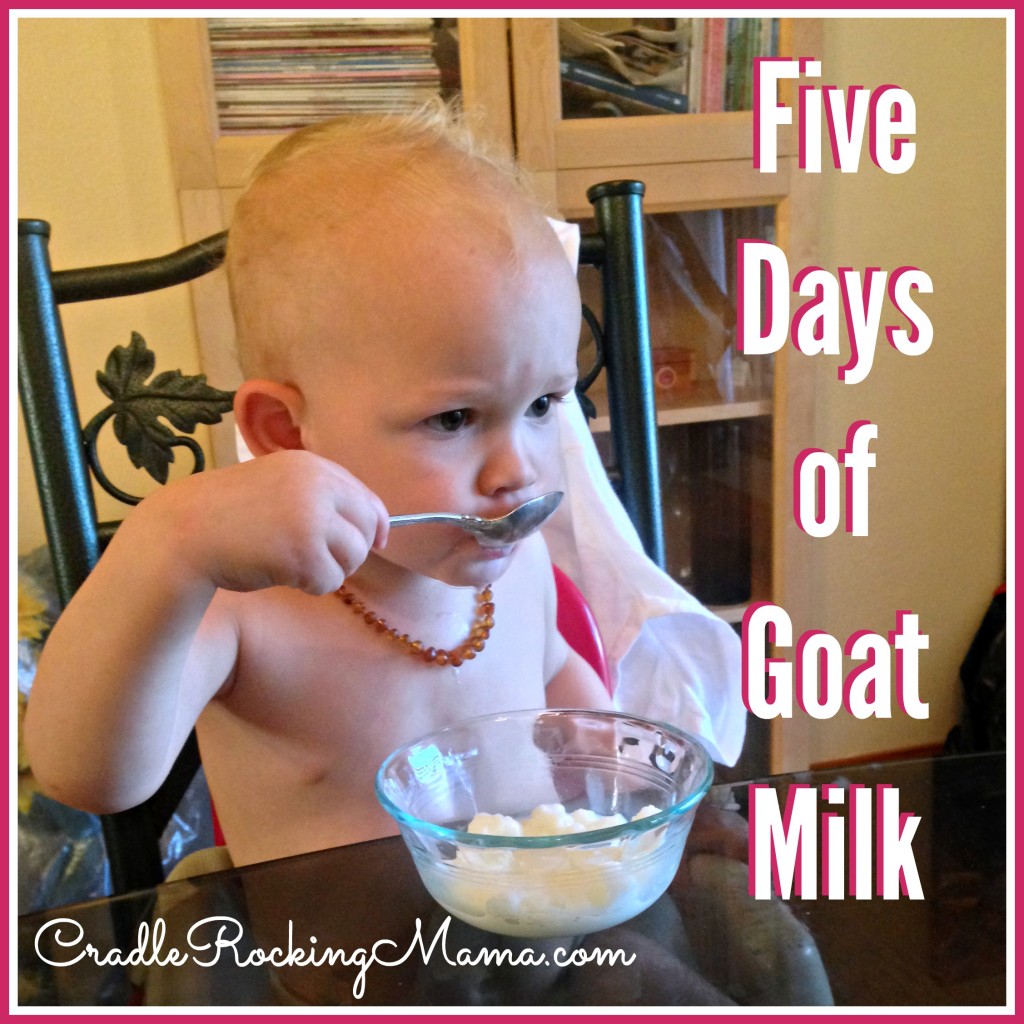
Five Days of Goat Milk

Five Days of Goat Milk CradleRockingMama.com

With five days of goat milk under our belts, I’m happy to report that we have good news, and we have great news!

For the good news, goat milk has so far proven to be very similar to eggs in terms of FPIES food trials for Zac. No symptoms whatsoever, an increase in development right away, and only a slight “particular-ness” about how he is served the new food to deal with.

Zac really is doing great! Two days after we started goat milk, he started babbling more and I’ve caught him trying to say new words. This is huge, especially considering that on Thursday we had him evaluated for Early Intervention Speech Therapy.

He’s tried to say “duck” and “water” that I know of, and is making more attempts at gestures and sounds than he was just a week ago.

I am thrilled!

His coordination has improved immensely, too. He’s throwing balls more now, and with more accuracy than he has ever shown before.

He’s sleeping more at night, too, which is always nice. Now we usually only have two middle of the night wake-ups instead of every 2-3 hours all night long.

Love me some sleep, y’all!

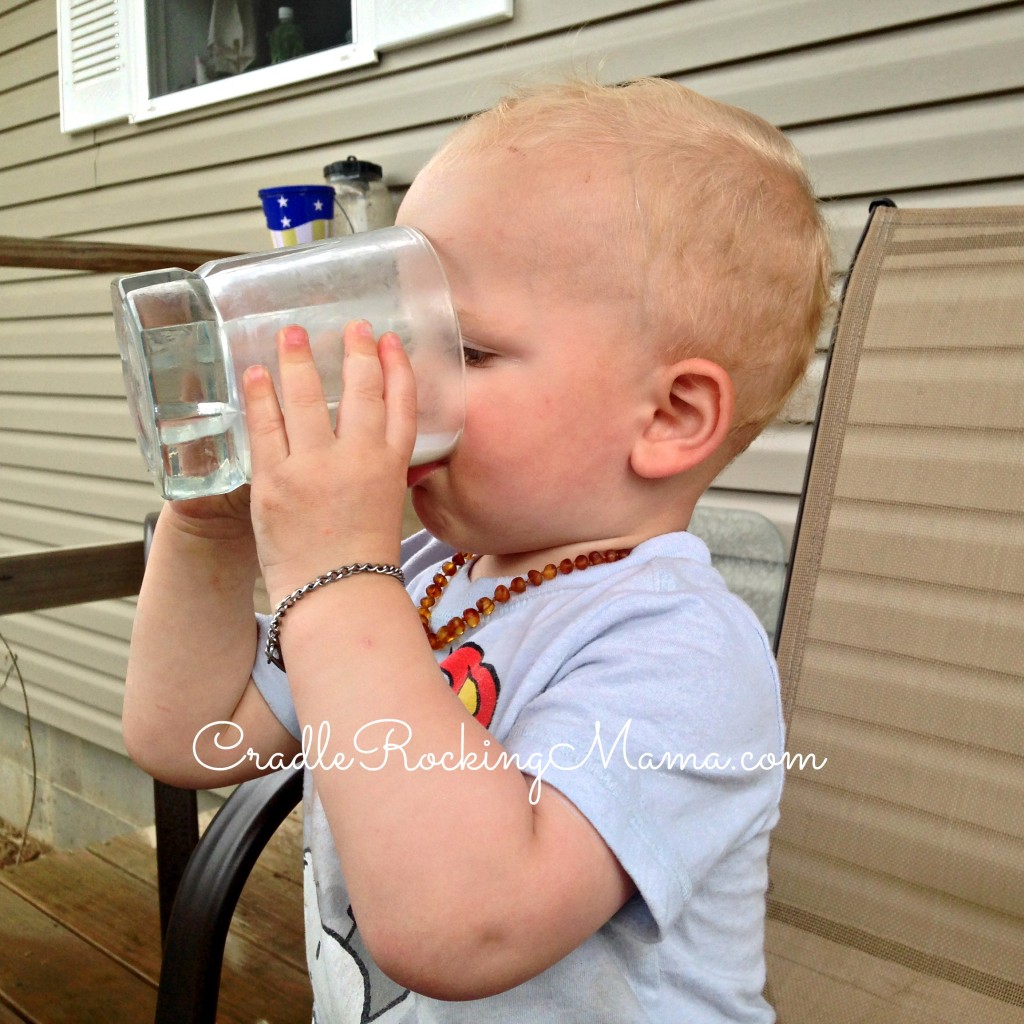
The only caveat is that he will only drink goat milk in a glass. He refuses it from our cups with lids and straws.

In fact, he’ll forcibly shove those cups full of goat milk across the table if we dare serve it to him that way!

The only problem with that is that he sucks  at drinking from a glass!

Oh, he can drink  from a glass perfectly fine; he just likes to shake the glass to see the liquid splash over the sides, tends to forget he’s holding one and simply lets go (dropping the glass and spilling all the liquid), or any other typically no-big-deal, age appropriate “learning to use a glass properly” things.

This is only a problem because as much trouble as procuring the goat milk is for us, I can’t afford to let him spill it all over the floor. Sure, it’s only $6 a gallon, but I have to drive almost two hours one way to buy it. The gas costs alone make the goat milk pretty pricey.

Not to mention we can only buy as much as she has available; if she’s sold all but two gallons that week, that’s all we can get. It’s not like we’re trying something you can just pick up from the grocery store, here!

Scarcity+costs=STOP SPILLING THE GOAT MILK, ZAC!

Zac drinking goat milk CradleRockingMama.com

Fortunately, I discovered that he ADORES goat milk if I turn it into ice cream!

I just pour 8 ounces into my ice cream maker and five minutes later sit Zac down with a nice bowl of frozen goat milk – and he goes nuts. He’ll scream at me when the bowl is empty, begging for more!

So, as long as we give him ice cream, or pour just a couple tablespoons in a glass at a time, he’ll consume his goat milk just fine. He’s been taking a nice 8 ounces per day after the first day, and yesterday took a whopping 12 ounces of goat milk!

Just a couple more days of this and we can pull it for our three day break and reintroduce it. Fingers and toes crossed and prayers like crazy that the reintroduction goes well.

Goat milk might be what saves our family from financial ruin.

For the great news, Jed appears to have NO problems with the goat milk, either!

From the beginning, his MSPI symptoms showed up very quickly. Give that child some dairy or direct soy (not oil) and within a few days his diapers were bloody.

We’ve been five days now with no bloody poop, no stomach cramps, no NOTHING.

Jed drinking goat milk CradleRockingMama.com

In fact, even Jed, who was already doing quite well developmentally, has shown some improvements since the start of the trial!

He’s using more vocabulary – big words, too! He’s telling more stories, attempting more conversations, listening a bit better, following instructions a tiny bit better, and showing much more creativity in his play.

This could be just a normal developmental growth moment, of course, but I find it interesting that it coincided directly with the beginning of his goat milk ingestions.

He also can’t seem to get enough goat milk! I’ll make him ice cream and he’ll eat huge bowls. He can easily drink three glasses of it per day. We had to actually start rationing it after he wiped out 1/4 gallon on the first day of the trial!

So goat milk is looking really good for us right now, and I’m happy to share that news with you. But I’m going to wrap it up now, because this weekend was exhausting! We had some awesome fun that was worth every minute but seriously wore us all out and set me behind on my housework and return to work preparations.

I hope I can share some more of our news and our fun weekend tomorrow.

In the meantime, how was your Easter weekend?

Frugal Friday – Open Your Windows

Open Your Windows CradleRockingMama.com

It’s beginning to look a lot like spring in some parts of the country, and will act like spring (eventually) for the rest of the Northern Hemisphere.

If you’re anything like us, the bitterly cold weather has given you some scary-high electric/heating bills the last few months, and I know we’d all love to see some lower bills in our mailbox.

As late as this spring seems to be coming, though, we’ll probably all end up in hot, summer weather sooner than we’d like…with the accompanying high air conditioning bills that come with it!

So here’s today’s frugal tip: every chance you get, turn off the climate control in your house and open the windows.

I love when the weather is temperate and I can open the house. Everything feels so fresh and clean when you’re breathing fresh air, and it inspires some serious cleaning and organizing for me. (I like that, so this is a plus for me.)

Cleaning aside, it’s wonderful to spend a few days – or even weeks – without turning on artificial climate control in the slightest. The electric bills for this time of the year are some of my favorite things ever!

Plus, with all that fresh air from the outside coming inside, I find myself much more likely to actually GO outside…which means fewer electronic devices turned on in the house. Engaging with nature brings about even more electric bill savings!

Oh, and have you ever taken a nap with the windows open? It’s delicious.

Open window naps remind me of resting in a hammock after a hard days hike.

Ah, the bliss of Spring!

So go open your windows, clean up your house, revel in the prettiness of the world – and enjoy those dirt cheap electric bills while you can!

Remember: Use it up, wear it out, make it do, or DO WITHOUT. Do without electric heat and air as much as you comfortably can, and your budget will thank you kindly.

Hope that helps!

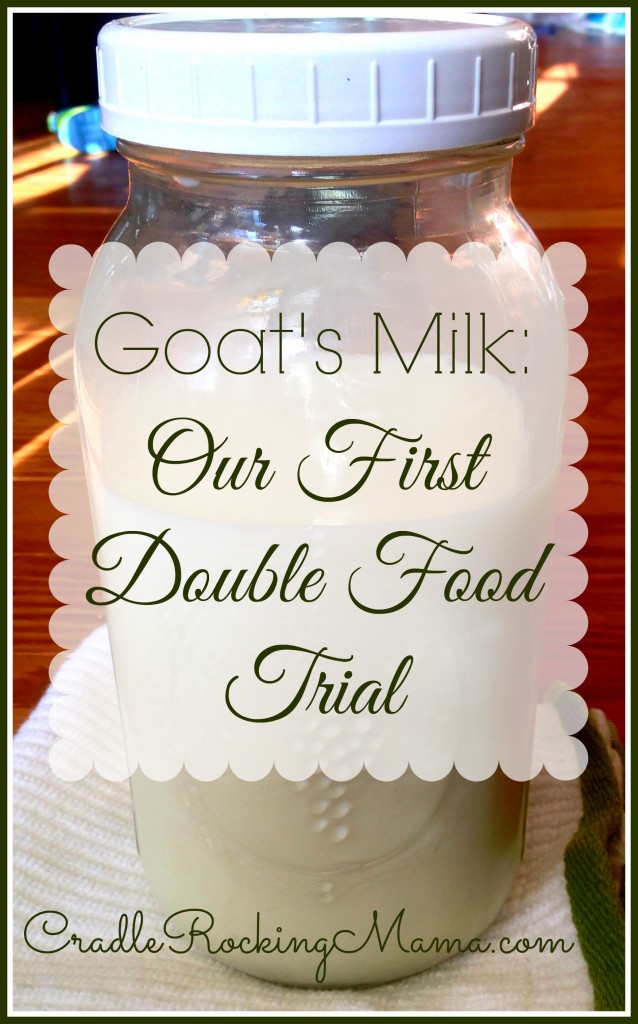
Goat’s Milk: Our First Double Food Trial

Goat's Milk Our First Double Food Trial CradleRockingMama.com

Well. We decided to trial BOTH boys on goat milk.

At the same time.

I can hear you all thinking it: Why would they do something so crazy?

Well, Jed has MSPI, and has been kept away from dairy products since he was 5 weeks old. However, he’s had infrequent accidental ingestions of dairy along the way. The most recent was almost a year ago, when he helped himself to a Snicker’s bar.

He did wind up having bloody poop from that. So, we reset the clock on waiting two years before his next milk trial, and went about our business.

Now enter Zac, our FPIES munchkin.

I’m heading back to work in just a couple of weeks (ack!) and we are worried we won’t have enough stored breastmilk to get him through the days that I will be gone. Ever since our trial run, I’ve been pumping as often as I can and have managed to add considerably to the stockpile, but it is still a concern.

Since we are waiting for the gardens to grow safe veggies to trial for Zac, we’re sort of scrambling to find things that will be corn-free to trial on him.

One day Darrel and I were brainstorming potential food trials and the idea popped up to perhaps trial dairy. 

Zac has never had dairy directly. I was dairy-free for all but two months of my pregnancy with him. Dairy is a frequent FPIES trigger food, but there are  FPIES kiddos who can handle it.

And dairy would solve the problem of not having enough pumped breastmilk for me to return to work comfortably. 

So I went online to find local raw milk farmers in our area. Thank God Arkansas state law changed last year to allow the sale of raw milk!

I called everyone I could find and asked what they feed their cows. Everyone stated they were “grass fed”…except, of course, for when they actually milk the cows. Then they ALL gave their cows grain.

Twelve pounds or more of grain per day, in most cases! Ugh!

The few who were willing to tell me specifics about the grain confirmed that corn and oats – two of Zac’s biggest triggers – were the first ingredients on the list.

Hmm.  That makes me uncomfortable. 

Then I found a goat farmer. She also grains her goats during milking, but she told me that she HATES giving her goats any grain. She said goats are not meant to eat grain, and she prefers to have them eat what is natural for a goat 99% of the time. So she gives them the smallest amount of grain possible just to get them into position to milk.

Her grain is also corny, but she showed me how much she gives her goats and it was truly about 1 cup per day.

That’s not a lot of grain. And it was the best option we could find.

So on Tuesday the kids, my Mom and I drove down to the ranch to visit the goat lady.

That’s a whole post all on its own, but the short version is: the kids loved it, and my Mom and I each bought a gallon of milk.

Once we had decided on goat milk instead of cow milk for Zac’s FPIES trial, Darrel and I decided to go ahead and trial Jed on it, too. It’s a long shot, but some MSPI kiddos can tolerate goat milk, while cow milk triggers them.

Wednesday morning I gave both boys goats milk. 

Zac got about two ounces, and Jed got about a cup.

Zac Drinking His First Goat Milk CradleRockingMama.com

Zac likes to play with his beverages. He’ll drink them, but once he’s had enough he likes to fill his mouth with the liquid and spit it out while grinning mischievously.

He drank an ounce of milk, then started playing with it. So I took the glass away. He seemed to like it, but that was enough for one day.

Jed Drinking His First Goat Milk CradleRockingMama.com

Jed, on the other hand, couldn’t get enough!

By the time breakfast was over, he had consumed 1/4 gallon of goat milk all by himself.

He kept asking for more goat milk all day long, too, but I cut him off at 1/4 of a gallon. That was enough for the first day.

I also handled things a little differently with Jed from the beginning. He’s older and verbal, so I sat down and explained to him about how we know cow milk upsets his tummy and makes him sick, but that we wanted to know if goat milk would be okay for his tummy, so would he mind drinking some and letting me know how he felt in his tummy today?

I feel like, at his age, he needs to start being a participant in his food trials.

He said yes, so we proceeded, and all day long I asked him how his tummy felt. Every time I asked, he would tell me “Mine tummy feels just fine.”

He pooped once on the potty (yay for a child who seems to finally be potty trained!) and it looked pretty good, but, frankly, I wasn’t going to dig through the toilet water to investigate too clearly. I saw no indication of blood, though.

Zac never pooped at all. He even took a nice, long, two and a half hour nap in the afternoon.

Both boys seemed just fine at bedtime. It was as if it was a normal, non-food-trialing day in our household!

I am praying so hard that both boys are safe with goat milk.

But at the very least, I would love it if ONE of my boys could handle it well.

If you don’t mind throwing some prayers our way, I’d appreciate it.

Was your MSPI kiddo able to tolerate goat milk? What about your FPIES kiddo?

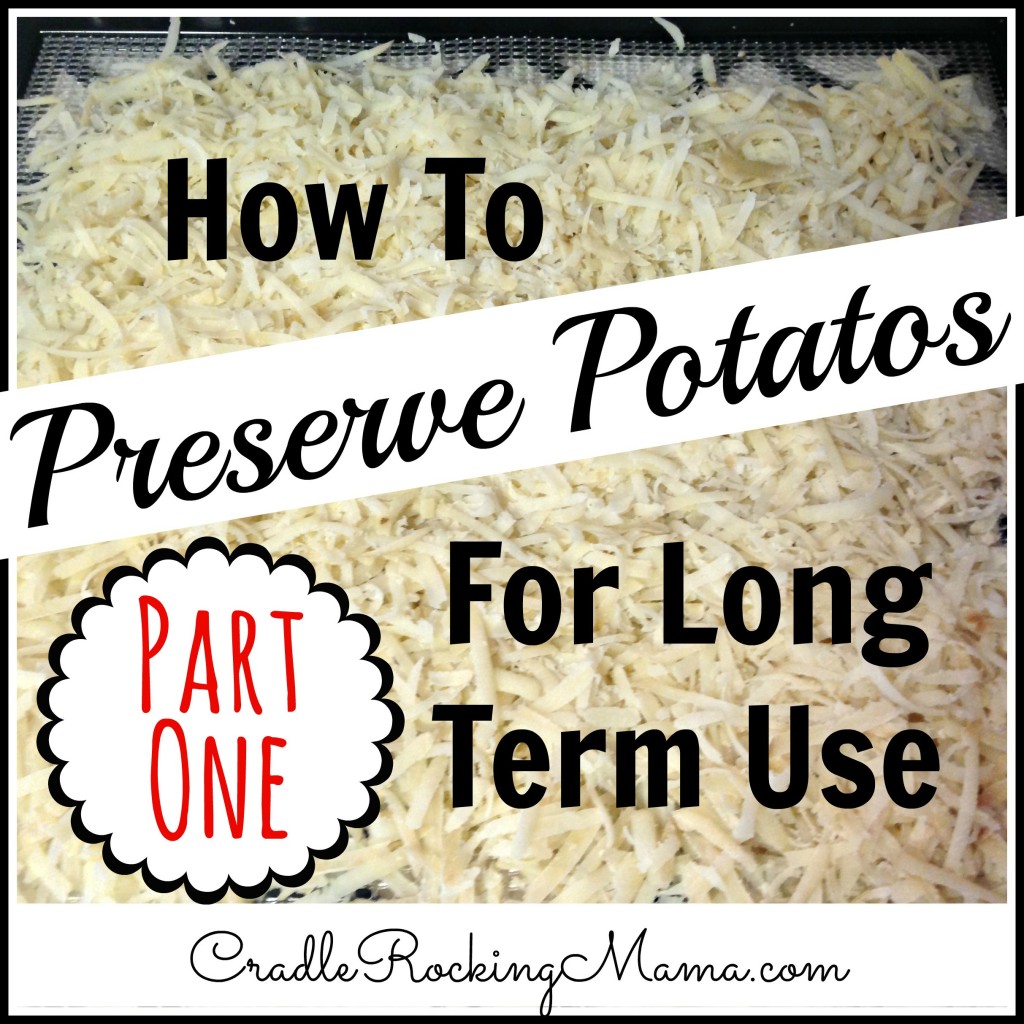
How to Preserve Potatos for Long Term Use (Part One)

How to Preserve Potatos for Long Term Use Part One CradleRockingMama

Last year my family ate over 600 pounds of potatos.

Yes, grocery shopping is interesting when you’re on a TED!

This year we hope to grow as many potatos as we can to save on our grocery bill, and when we do we will be faced with a unique challenge: how to keep a few hundred pounds of potatos without spoiling.

As it turns out, my local food co-op changed suppliers a few months ago. Ever since, it has been a challenge to get my safe potatos because their new supplier buys potatos from whomever has the best price, which often is NOT the producer that grows my potatos safely. Ugh!

Recently the helpful lady at the co-op called to let me know she had sucessfully tracked down three cases of my safe potatos and wanted to know how many I wanted.

I told her to save all three cases for me.

As hard as they are to get, now, I wasn’t about to let them get away!

Each case of potatos is 50 pounds. So right now I have over 150 pounds of potatos in my kitchen, waiting to be used.

It seemed as good a time as any to figure out how to preserve potatos for long term use.

Ideally, we’d all have a perfectly built root cellar with optimal air flow and temperature control. Potatos will keep for a very  long time in those conditions.

However, since the onset of electric refrigeration, root cellars are few and far between. I think it’s safe to say that most of us don’t have one.

So what do the rest of us modern dwellers do to keep our hard-earned potatos for year round use?

Two things: dehydrate or freeze.

I recently did both to experiment, and I’m sharing part of the process and results today.

There are many ways you could approach this, but the way I liked best was to take as many potatos as I could fit into a large baking dish and bake them. It’s important to cook potatos before freezing or dehydrating because it prevents them from changing colors and texture.

In this case I peeled the potatos. With the ones I will grow I will leave the peels on.

Just scrub the potatos, peel them if you feel so inclined, and put them in the dish. Cover the dish with a lid or some foil.

I baked them for about half an hour at 350 degrees F. You want the potatos cooked, but not overcooked.

Then I let them cool on the counter until almost room temperature, and put the whole baking dish in the fridge.

The next day, I experimented with what shape I wanted my potatos to be.

Some I grated for hash browns, and some I cut with the mandolin for French fries.

Then I took half of each type and froze it, and the other half I dehydrated.

Today I’m only sharing frozen and dehydrated hash browns and French fries; the other things I tried I’ll share in another post. (This was getting a bit long!)

FROZEN FRENCH FRIES

To freeze the potatos (whether fries or hash browns) I just laid them out on a parchment paper lined baking sheet and stuck in the freezer. The next morning they were solidly frozen and suitable for bagging.

Pre Baked Fries ready to Freeze CradleRockingMama

Ideally, I would have a food saver vacuum sealer, but since I don’t have one I made do with ziploc bags.

For the French fries, I actually think it would be easier to cut them BEFORE baking them. After baking, they’re very tender and don’t hold up as well to the rigors of a Mandolin.

I suppose if you cut your French fries by hand it would be better to bake them whole first, but I’m all about effort saving in the kitchen and the mandolin saves me a lot of effort!

When it was time to test out my frozen french fry efforts, I grabbed two potatos worth of fries and tossed them in my deep fryer.

I have just one word to describe those French fries: OHMIGOD!!!

Those were hands down the most delicious fries I’ve eaten in my whole life, and considering that I’ve eaten French fries pretty much every day for the last 20 months or so, that’s saying something!

They were soft and delicate on the inside with a perfectly crispy outside.

These were Gourmet French fries, y’all!

I didn’t take pictures of them because, well, I was hungry and I forgot. There wasn’t much to photograph, though: they looked like regular old french fries…they simply TASTED like manna from Heaven!

FROZEN HASH BROWNS

It was very easy to make the hash browns. Pre-baked potatos shred much easier than raw potatos! Though I would advise using a regular grater, rather than a food processor. They’re likely to get mushy with a food processor.

These also just went on a parchment lined baking sheet for freezing, and were stored in Ziploc bags.

Pre Baked Hash Browns ready to Freeze CradleRockingMama

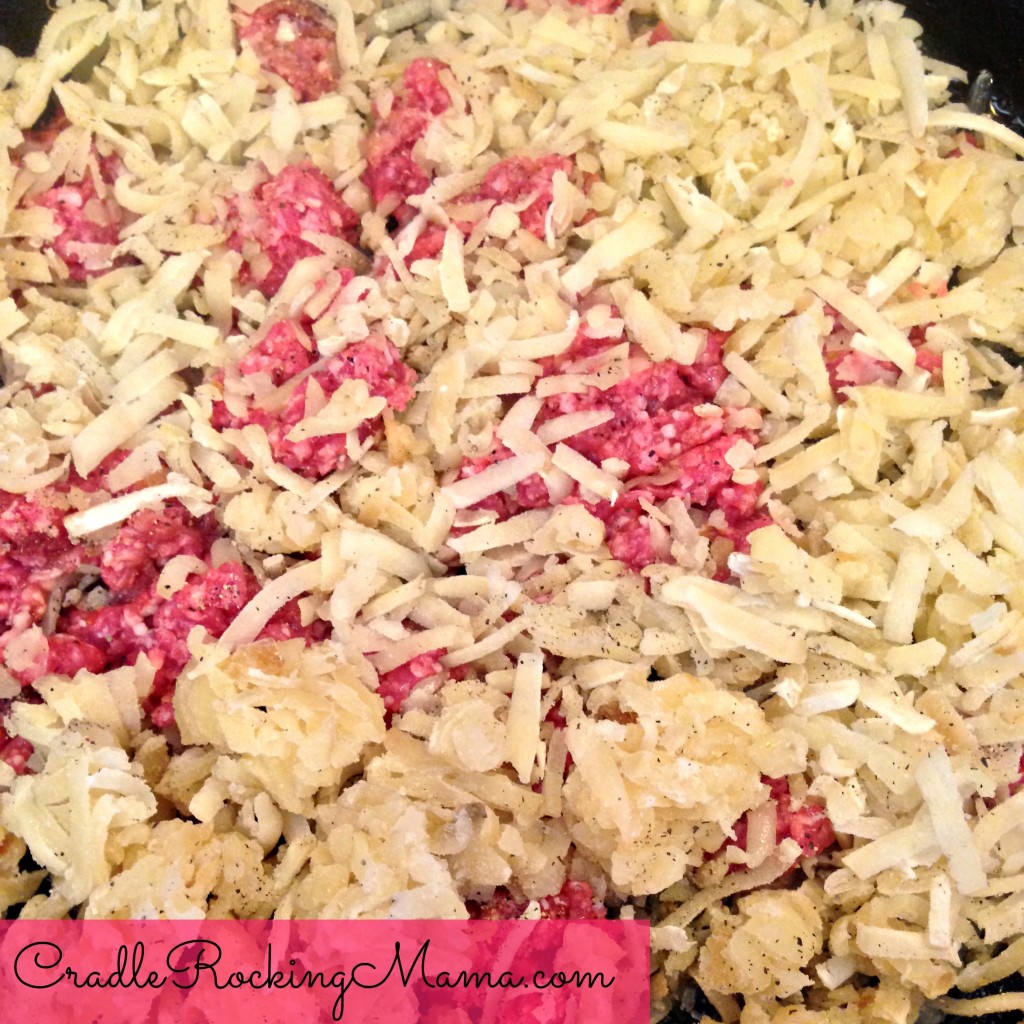
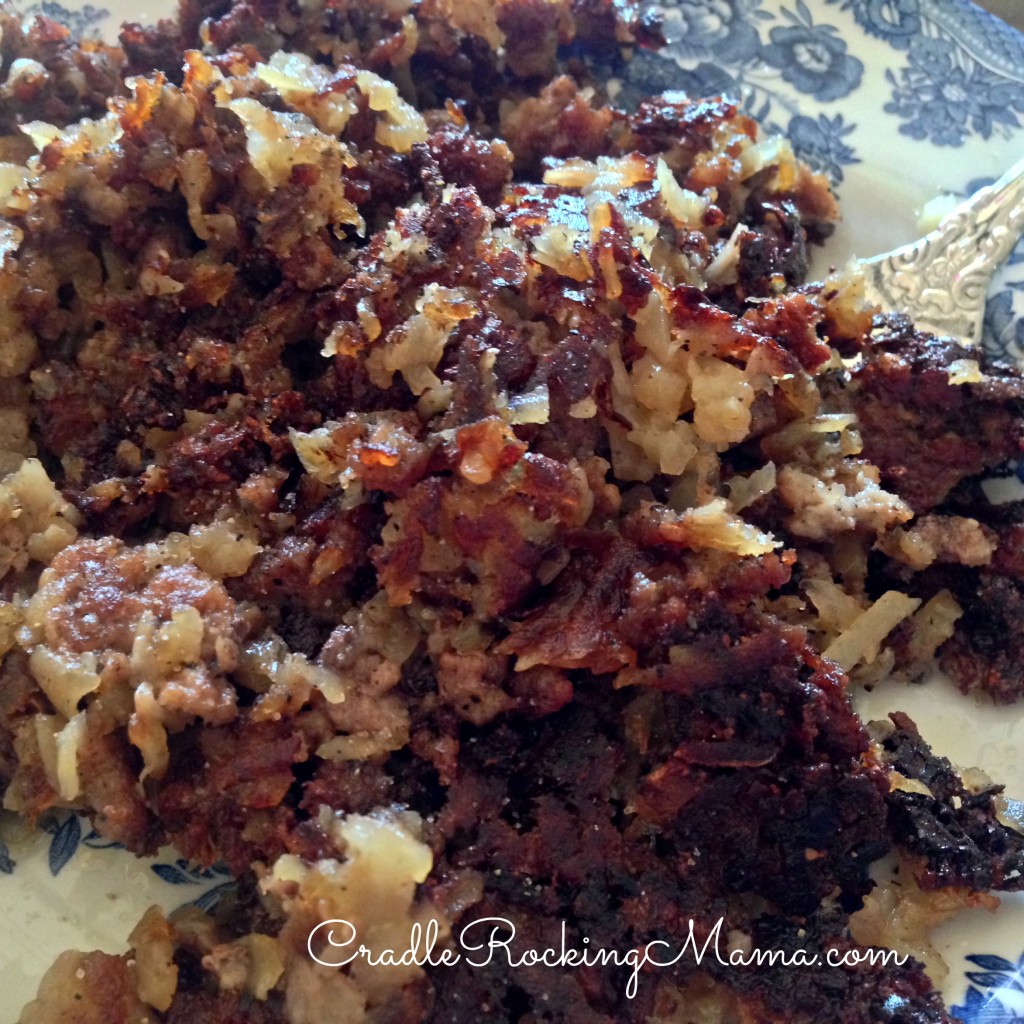
The frozen hash browns were very good, too. I used two potatos worth in our breakfast hamburger hash one morning for their test run.

Frozen Hash Browns Cooking CradleRockingMama

Since they are frozen and therefore release some moisture when heated, I shouldn’t have used as much oil in the pan as I did. They also cooked a little differently than regular freshly shredded potatos. I will have to work on finessing my technique with them, but it is something I will  work on because they went from freezer-to-plate in easily half the time my hamburger hash does!

Anything that makes breakfast edible in half the time is well worth some technique finessing, in my book!

The taste? Identical to my normal hamburger hash. Seriously, just as good.

Frozen Hash Browns Cooked as Hamburger Hash CradleRockingMama

DEHYDRATED FRENCH FRIES

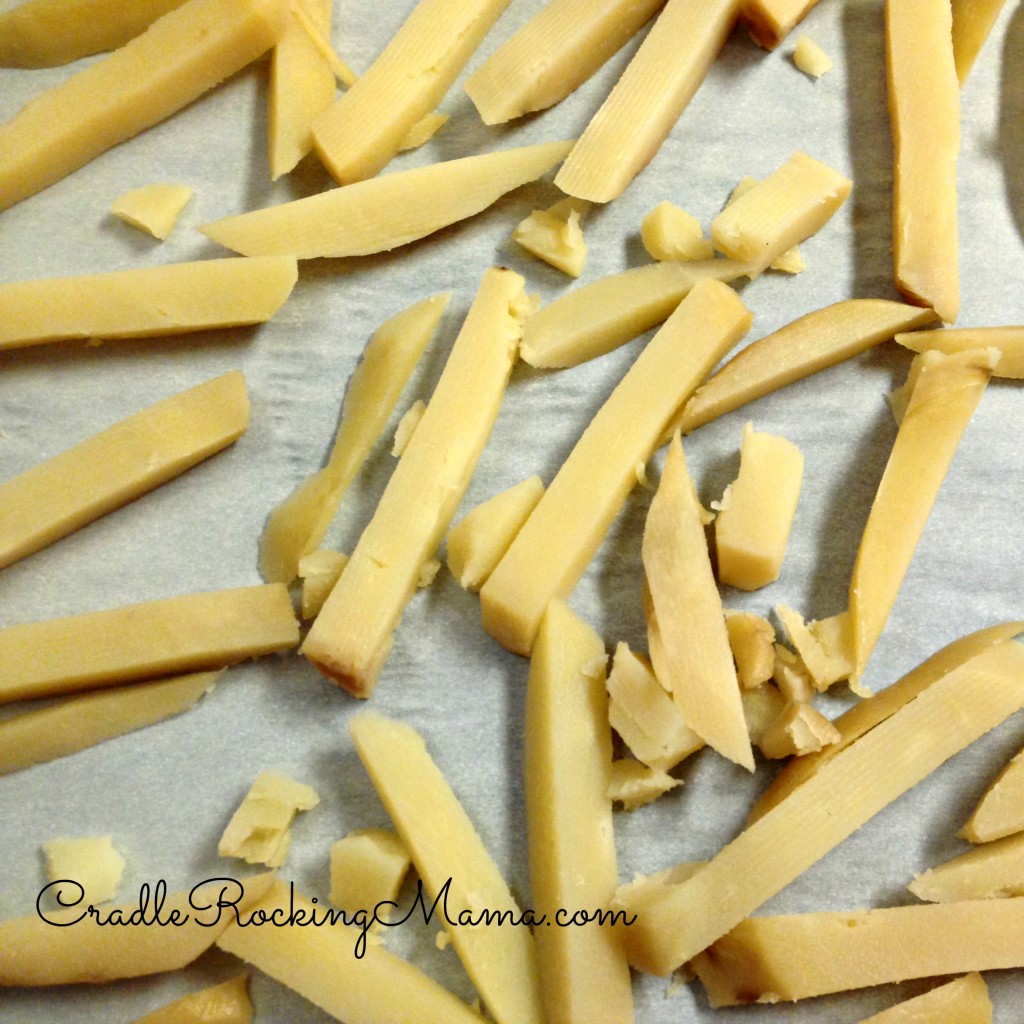
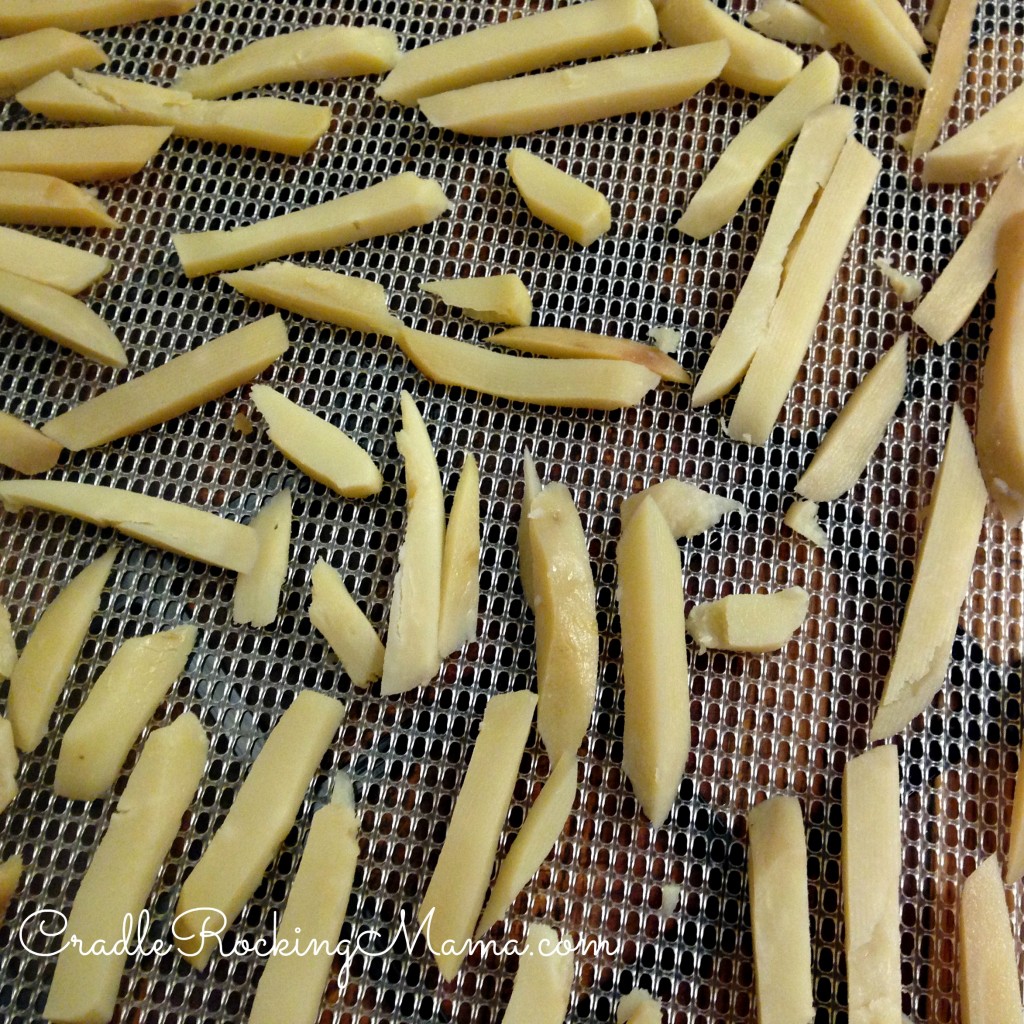
For the dehydrated French fries, I just laid the sliced fries directly on my dehydrator tray.

Pre Baked Fries ready to Dehydrate CradleRockingMama

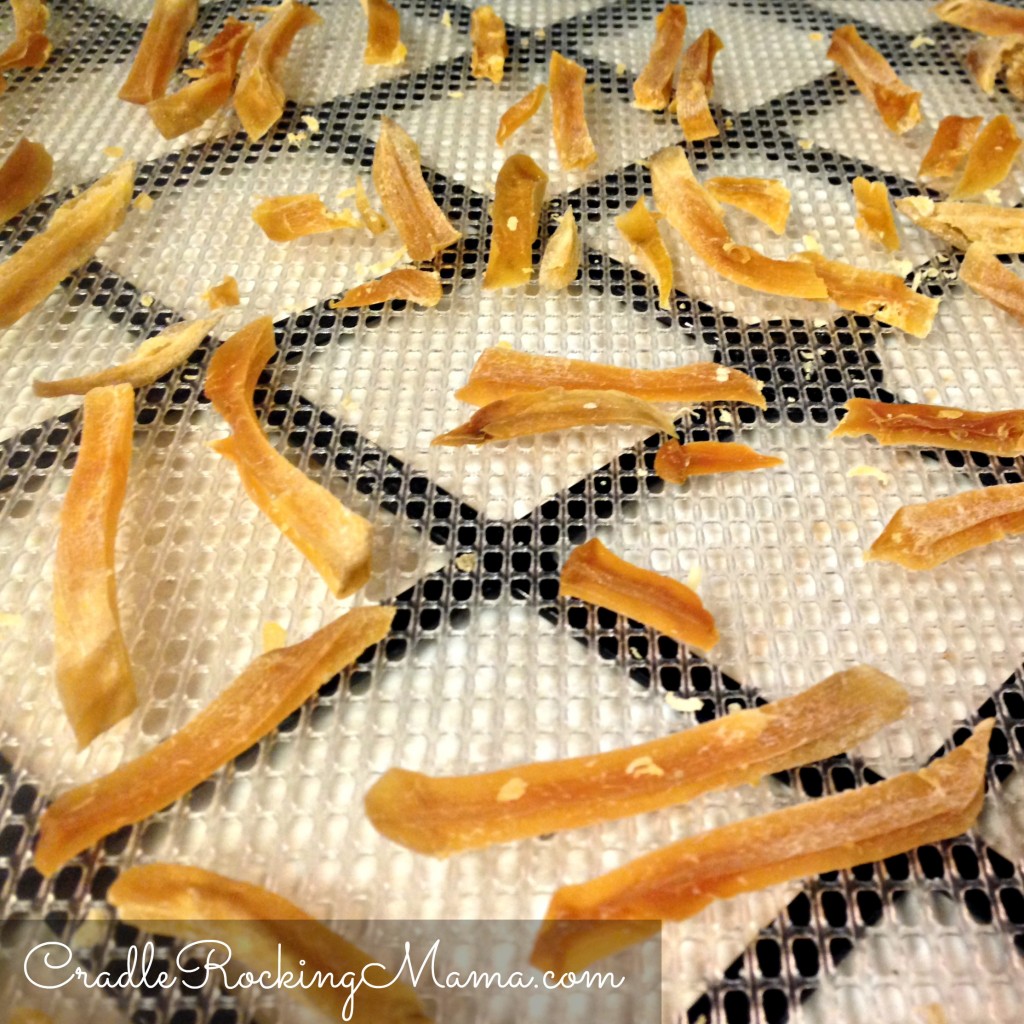
I set the dehydrator to 125 and turned it on. About ten hours later, I had perfectly dried potatos.

Dehydrated French Fries CradleRockingMama

The French fries didn’t reduce in size TOO much, but they were a lot lighter in weight.

To rehydrate and use, I boiled some water, covered the dehydrated French fries with it, and put a lid on the pan. After 45 minutes, I checked them.

They were “fuller” looking than in their dehydrated state, but didn’t look quite like regular, fresh or frozen French fries.

However, I was hungry. It was dinner time. Into the fryer they went.

They weren’t bad!

They weren’t really good, either.

They were simply passably decent French fries that sort of reminded me of the fries at Long John Silver’s: a tad chewy, yet crispy. It was a unique texture, actually. (And again, I was hungry and forgot to take photos of this part. Again, though, they just looked like skinny french fries.)

DEHYDRATED HASH BROWNS

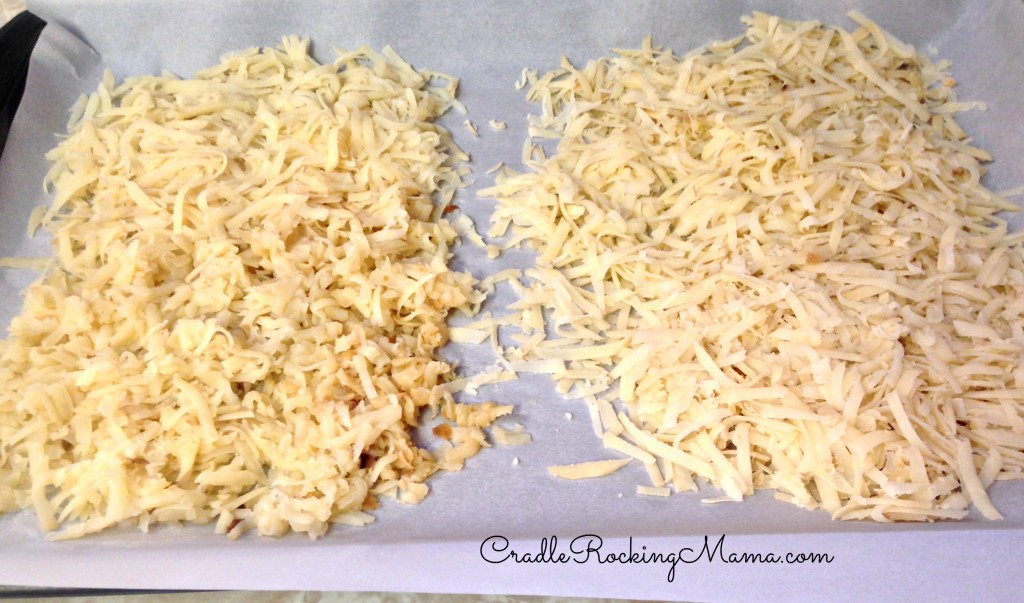
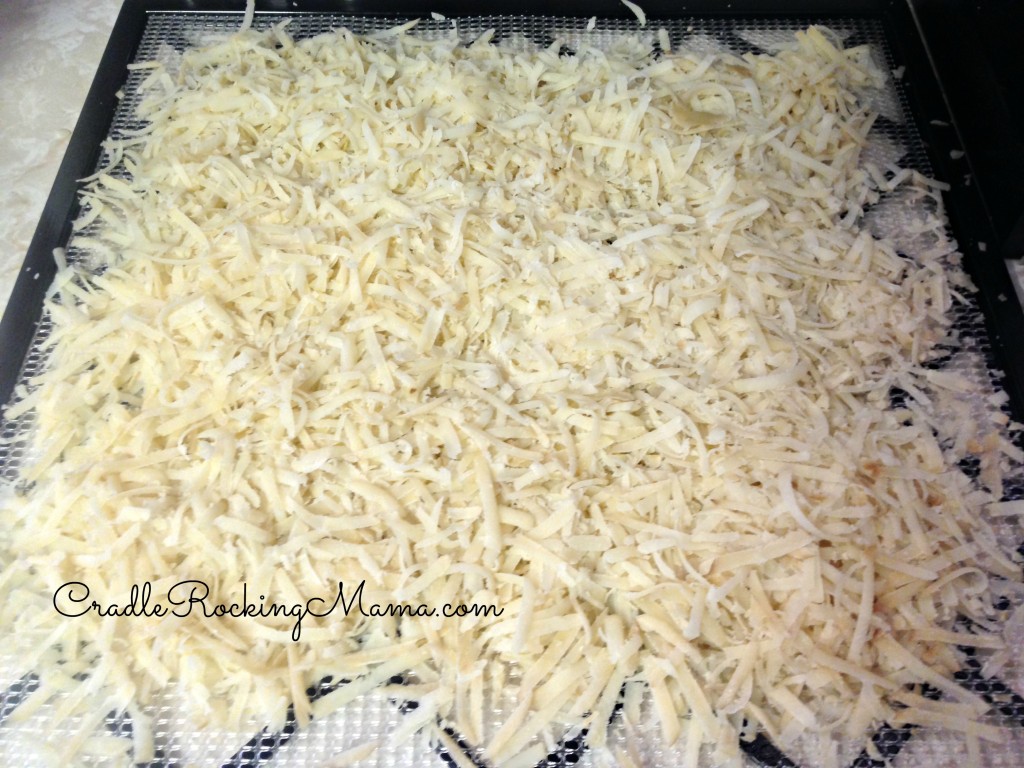
For the dehydrated hash browns, I shredded the potatos directly on to my dehydrator tray and turned it on to 125 degrees. Again, ten hours later, perfectly dried potatos.

Pre Baked Hash Browns ready to Dehydrate CradleRockingMama

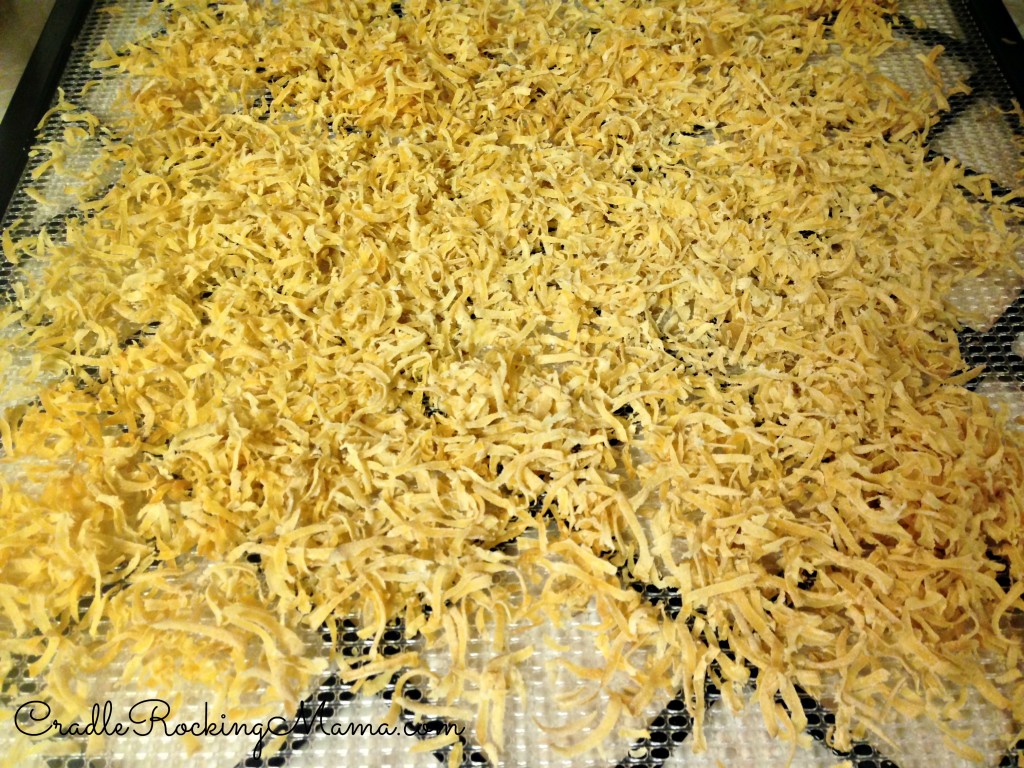
Four potatos shredded up to be just about four cups of shredded potato; once dehydrated, it was a mere 2.5 cups…and weighed almost nothing!

Dehydrated Hash Browns CradleRockingMama

I didn’t bother to test out rehydrating and cooking the shredded potatos this week, since that is exactly how I made my hamburger hash when I was at work last summer.

It works very well; the only caveat is to not rehydrate the potatos for too long, or they get mushy and basically become mashed potatos.

__________

So, after all this potato preserving experimentation, if have to say that freezing wins for best end product, but for those that don’t have a ton of freezer space or who prefer to preserve foods in ways that don’t rely on electricity, dehydration is a perfectly good option.

In fact, with the shredded potatos, either frozen or dehydrated yields pretty much an identical result.

Next week I’ll share some other potato preserving methods I tried. In the meantime, I just have to say: Seriously, y’all, pre-bake and freeze your French fries! It’s like a little slice of fried Heaven in your mouth.

What’s your favorite method of storing potatos long term?

We Can NEVER Eat Out Again

We Can Never Eat Out Again CradleRockingMama.com

Well, it’s official. There are no restaurants at which it is safe for my family to eat. We can never eat out again. (At least, not unless my kids suddenly outgrow at least half of their food allergies.)

Last Friday we took the kids to the park.

When everyone had been dragged kicking and screaming to the car (they really didn’t want to stop playing), we decided to splurge on Chick-Fil-A for dinner. It was late, and if we waited for me to cook something, bedtime would be completely shot.

From the day Jed received his MSPI diagnosis at 5 weeks old, eating out has been a challenge. Once he got his IgE egg diagnosis, it became more of a challenge.

As a regular American, though, I checked out every restaurant in our area to find which ones could safely feed us. After all, you have  to eat out, right?

Eventually I found 7 restaurants that had at least one item on their menu that Jed and I could eat, and we happily went about our business.

Then we discovered Jed’s Fructose Malabsorption, and the list of available safe eating out foods reduced to TWO restaurants, both of which only had two things on their menu my son could have. (It goes without saying that on my TED for Zac, I could eat at none of these restaurants.)

In the end, Burger King offered plain hamburger patties (no bread, no condiments) and french fries for Jed, and Chick-Fil-A had the kids grilled chicken nuggets with waffle fries.

Those two place were my inexpensive “sanity savers” for days when we had to run errands in town.

Plus, Chick-Fil-A had an awesome play area that I could, for a short while, let Zac play in.

Back to Friday, though.

The message boards reported that Chick-Fil-A recently changed their grilled chicken nuggets to contain soy. Of course, I didn’t remember that until I was ready to place my order, so I asked the lady if this was true.

For a bit of clarification: Jed has MSPI, which is Milk/Soy Protein Intolerance. Long ago, though, we realized that the soybean OIL commonly used in fast food didn’t seem to cause him any problems. So while we avoid soy as a general rule, the occasional fast food splurge was one place where I relaxed my “we hate soy” stance.

One of the things I liked best about Chick-Fil-A, though, was the lack of soy in their grilled chicken nuggets. So I did want to see if soy was now added to the nuggets, and see if there was any way we could get un-marinated nuggets grilled up for Jed – a solution several FPIES Mama’s had discovered was available at their local Chick-Fil-A.

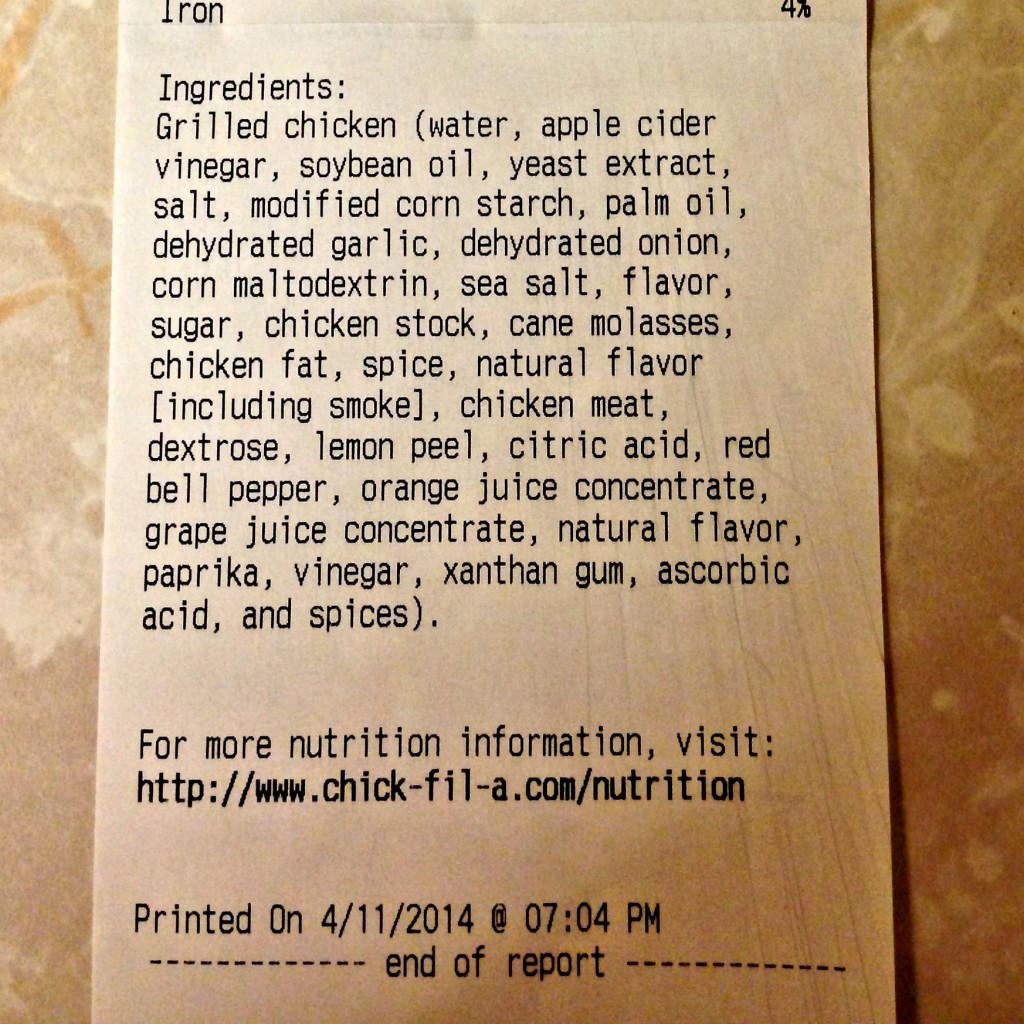
The lady at the drive thru window didn’t know about the menu changes, so she printed out the new ingredients in the nuggets and handed it to me. As I glanced over it, I saw that soybean oil was the THIRD ingredient in the list. So I quickly asked they had any nuggets that were not marinaded already that they could grill.

She didn’t know. She said she could ask in the kitchen, and turned away as if to ask someone. Ten whole seconds later (not even enough time for her to have asked the question), she turned around and told me “They don’t know.”

Right. The KITCHEN doesn’t know. Sure. And pigs fly.

At that point I realized that dehydrated garlic and onion were numbers 8 and 9 on the ingredients list.

SO not going to happen for Jed!

Also, I was in the drive thru window. Not exactly the best time and position to begin making specific queries about ingredients and any extra accommodations that could be made for food allergies. I’d already used up what reasonable wiggle room I had in my questioning.

So I asked one last thing: “Did you also change the recipe for the waffle fries, or are they still the same?” Obviously Jed could no longer have the nuggets, but at least I could get him some fries to hold him over until we got home!

She smiled and said, “Oh, no! Those are still the same!”

So I requested they change our order to a large order of waffle fries, paid them, and off we went.

I was very annoyed at the changes in the grilled nuggets, of course. When I first reviewed Chick-Fil-A’s menu years ago, their grilled nuggets were a refreshing change from what I usually saw on fast food menus: very limited numbers of ingredients, most of which were innocuous.

Now, their ingredient list is chock full of CRAP. Chicken meat is number 19 out of 31 ingredients in their grilled chicken nuggets! For Heaven’s sake!

Ingredients List CradleRockingMama.com

Seven ingredients are major FructMal issues for Jed, and they have “natural flavor” listed TWICE on the list…plus “flavor” listed all by itself.

I hate mystery ingredients.

Sigh…so, Chick-Fil-A is out.

The worst part is what happened the week before this incident. We realized Burger King is also out.

Thanks to our food journals, I’m able to go back and review whatever Jed and Zac ate prior to any reactions they have.

Two weeks ago, Jed had a day where he was absolutely a ROTTEN child to be around. Argumentative, pitching fits right and left, bursting into tears over the slightest thing, belligerent, angry; I’m telling you, it was a stressful, awful day for us.

It was a straight up “fructose” attack.

Reviewing his diet from the day before, I saw nothing that could have prompted a fructose attack. The only thing that had any potential was his lunch at Burger King.

I flipped back through the previous three months worth of food journals and noted that about 65-70% of the time we ate at Burger King, Jed had a fructose attack the next day.

After double checking that Burger King had not changed anything in their ingredients list, it became clear that he was being cross-contaminated with something from BK.

What? I don’t know.

In fact, I speculate that this is only happening at one particular BK, not at all of them; thus explaining why it didn’t happen every single time we ate at BK but only most of the time.

I could call the restaurant I suspect and ask a bunch of questions, but frankly, I’m tired and the energy to go through that just doesn’t seem worth it to me.

It’s easier to just accept the growing inevitability of the fact that for my family, we can never eat anything that I didn’t prepare myself, or have some part in preparing, at least.

It sucks, but there you are. Now, when we go to town to run errands, I pack food for myself, for Zac, and for Jed.

I’m getting a bit tired of planning for a moon landing just to go to Walmart, you know?

But this is our life now.

Turns out? You DON’T have to go out to eat.

Did you ever lose your one safe eating out place due to menu changes? What’s your best tip for taking food on errands?

Histamine Intolerance Too?

Histamine Intolerance, Too? CradleRockingMama.com

Last week I was inspired to try something new for Zac. On one of the message boards, someone had mentioned making meringue and piping it into shapes for a safe Easter “cookie” for their FPIES kiddo, and that sounded intriguing to me.

We don’t have sugar or vanilla as safe foods yet, but I thought a whipped egg white topping could make an interesting, fluffy topping to his quinoa & egg muffins.

So I whipped up some plain egg whites (that’s exhausting to do by hand!) and dumped them on top of the leftover muffins I’d already made for him that day. I tossed it in the oven for about ten minutes and popped them back out – they were gorgeous!

Zac LOVED it! He scarfed down the remaining three muffins and was licking the egg whites off his fingers. I was thrilled to have discovered something new to offer him!

Then I went to get him out of his high chair and saw that around his mouth, down on his chin, and up one side of one cheek was bright red!

Hmm. I’d heard of the “red around the mouth” rash thing during food trials before, but I’d never heard of it showing up from a safe food. So I posted about it on the FPIES boards. (Note: the red doesn’t show up very well in the photo for some reason. I promise you, it was everywhere I described.)

Immediately I started getting responses: “Looks and sounds like a histamine problem to me.”

When I reported back that in less than an hour the redness had faded completely away, most Mama’s responded with “Oh, yes, that definitely sounds like a histamine problem.”

Just. Great.

Now, I respect the hell out of the other Mama’s “in the trenches” of FPIES, FructMal, IgE allergies, and food allergies in general, and I believe them when they say they have experienced things. I believe them when they discuss what their children are going through. And I believe them when they offer sincere advice about my own kiddos.

But I don’t necessarily issue a diagnosis to one of my sons based on a single Facebook post!

I read and ask questions, and review my food journals to decide if the suggestion actually applies to us. If possible, I ask the doctor for a test to prove or disprove the theory – or do an elimination diet to prove or disprove the theory, if no test is available or offered.

You have to do your due diligence when dealing with unusual symptoms, folks!

So I hit the internet to read more about Histamine Intolerance (HI) and let me tell you, it’s JUST as confusing as Fructose Malabsorption, in terms of what information you can find online about it.

One website says citrus is high in histamines, another says citrus is low in histamines. These aren’t just your average “someone had an opinion and posted it online” websites saying this, either – these are medical-type websites completely contradicting each other!

ACK!

I’m still no expert in HI, and I still haven’t decided with absolute certainty that Zac has HI…but I admit I’m leaning in the direction of thinking he might.

The symptoms of HI are wide, varied, and insufferably vague. But I have noted in the food journals that after Zac eats pork, he consistently has a few of them: diarrhea, short and unhappy naps, and sudden “tantruming” that comes out of nowhere and is extreme in comparison to the tantrum stimulus. Now add to it the red flush on his face, and that’s four symptoms.

If we were to do a test for HI and his DAO markers were in the low range, having two symptoms would be enough for a diagnosis.

I’ve been writing the tantrums and sleep disruptions off as “just his age”, and “we had a change in routine” (even if the change in routine was two days before), and the diarrhea as a simple “pork must be a little rough for him to digest”. As he was having NO FPIES symptoms whatsoever with pork, and we are so desperate for foods, I was willing to accept a little “off-ness” in our quest.

But I had noticed it, even before the red face incident. Noticed it, and been concerned enough to pull pork for several days and make careful notes after reintroduction.

Then he had the red face from the egg whites, and, in reading more about HI, it seems that – at least anecdotally – pork and egg whites are “histamine releasing foods”. They liberate histamine that is floating naturally in your body and send it into overdrive, rather than creating histamine themselves.

But where is he getting all this histamine to be liberated?

Well, I suspect two places as of now. One is from the world at large – nature is fighting to turn to spring! That means lots of histamine loaded goodies floating in the air right now. (Don’t you take Benadryl – an ANTI-histamine in the spring when you sneeze a lot?)

The other place is from the pork itself. While pork IS low in histamine, all meats become incredibly high in histamines once they have been cooked, smoked, cured, aged, fermented, or cultured in some way.

I follow “safe” meat handling procedures, but while thawing a pork roast in the fridge overnight, grinding it into ground pork the next day, and making patties from the ground pork over the next three days is considered “safe” handling…it also is a fantastic way to exponentially increase the histamine load of the meat.

Since that is essentially what I do with ALL our meats, in some form or another, that’s where a lot of histamine is coming from.

So, what to do next?
Not a dang thing, y’all.

Zac has three foods. THREE. FOODS. that he can eat, thanks to FPIES. I have no choice but to give them to him. He needs the nutrition.

I’ll change the way I handle the meats we eat to see if that helps lighten the histamine load of our foods, and avoid using straight egg whites from here on out.

But I spent a few days last week feeling like I was going to go crazy trying to find foods to trial next for Zac that fit all the bills: corn free, fructose free, and histamine load decreasing.

Something has got to give. It’s time to triage our approach.

  1. Our first priority is FPIES and Corn-free. Those are clearly his biggest, most dangerous problems, as he won’t be able to eat a food he reacts to via FPIES.
  2. Second is FructMal. We saw clear physical effects with Jed during his time of undiagnosed FructMal; consider the word – malabsorption. When you don’t absorb some of your foods properly, it causes other things to not be digested and absorbed properly, and nutrition suffers. Zac hasn’t been tested for FM yet, but based on family history, it is highly likely he has it. We’ll be smart to hold off on fructose foods until we have a more complete diet for him and can trial those foods without danger of inadvertently causing any kind of malnutrition.
  3. THIRD is HI. From what I’ve read so far, Histamine will make him uncomfortable, make him behave badly, and be miserable to live with…but it doesn’t carry nearly the same danger as FPIES and FructMal. I simply can’t stress over HI at this point.

One day I can get Zac tested for both FM and HI (and probably the rest of the family, too, when you get down to it). Until then, though, we’ll avoid fructose where we can, I’ll practice better meat practices to reduce the histamine load from the pork, and we’ll keep moving forward on our FPIES path.

This may not be the right approach for every complex FPIES kiddo, but right now, it is the right approach for us. One day when Zac has 40 foods I can rotate through, we can be more strict about avoiding things that may cause problems and trial foods that might be tricky for his body.

Right now we don’t have that luxury. Right now we need to find enough foods to keep him alive.

Alive and red faced on occasion, maybe, but alive is the most important part.

Have you experienced HI with yourself or your kids? Where’d you find your best information on it? 

Frugal Friday – Water Bottle Seed Starters

Frugal Fridays Water Bottle Seed Starters CradleRockingMama.com

This weeks frugal tip is courtesy of my forced “green thumbing” thanks to FPIES.

I have  to garden this year, which means I need to get some seeds started NOW. Only, most seed starter kits use either plastic or “biodegradable” material that I’m not sure is safe for Zac.

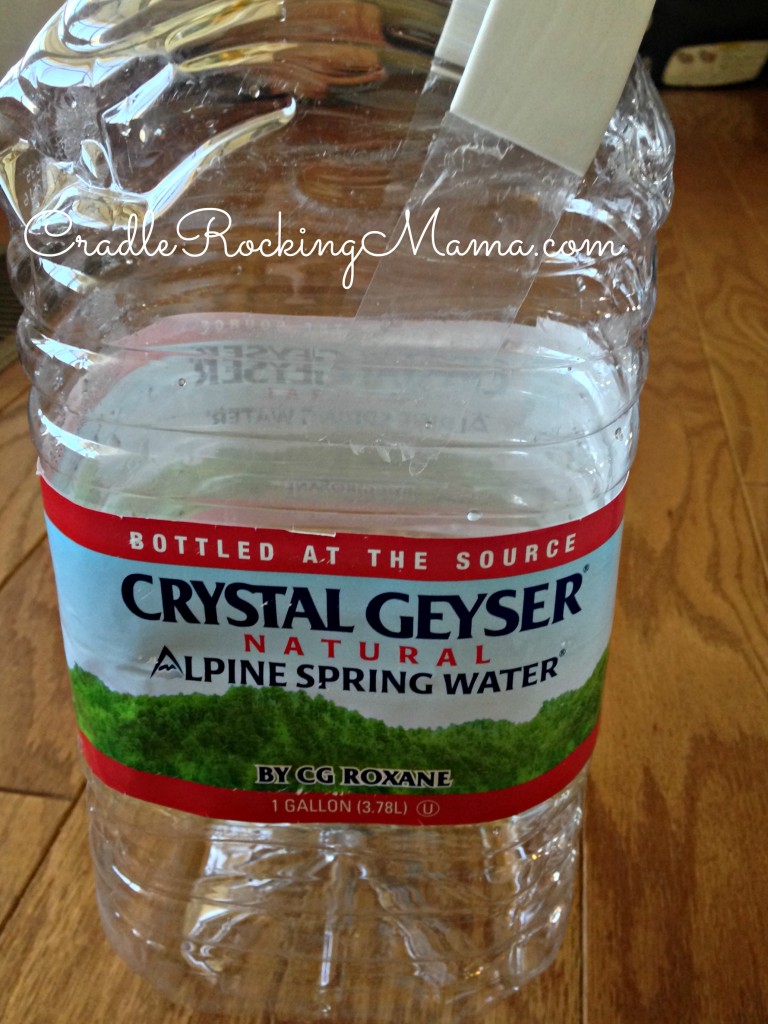
One day, as I went about my chores, I was mulling over who I would need to contact to find out which seed starters were safe for my son, and suddenly stopped short as I gathered up the many, many, MANY empty water bottles in our house for recycling.

Water, as I’ve explained, is tricky for Zac due to corn contamination. One of the reasons bottled water can be corntaminated is from the plastic used in the bottling. This is why we use the brand of water we use: it’s corn-free.

And here I am, holding twenty gazillion empty water bottles made of SAFE plastic for Zac.

Hel-lo!

I have about 400 million of these in my spare bathroom. Seriously. It's scary.

I have about 400 million of these in my spare bathroom. Seriously. It’s scary.

So I started storing these water bottles in our spare, never-ever-used-by-anyone, bathroom. They now literally fill the shower almost to the shower head! It’s insane! (Yes, the ones I don’t use will be recycled.)

Then it occurred to me…those seed starter thingies aren’t cheap. If you like to garden and need to start seeds, you could be $100 in the hole before you even start just with seed starters.

BUT, if you drink bottled water…well, this tip could help you quite a bit!

So here it is: easy, sort-of-free seed starters! (Free, if you consider you already bought them and were going to toss the bottle away, you know.)

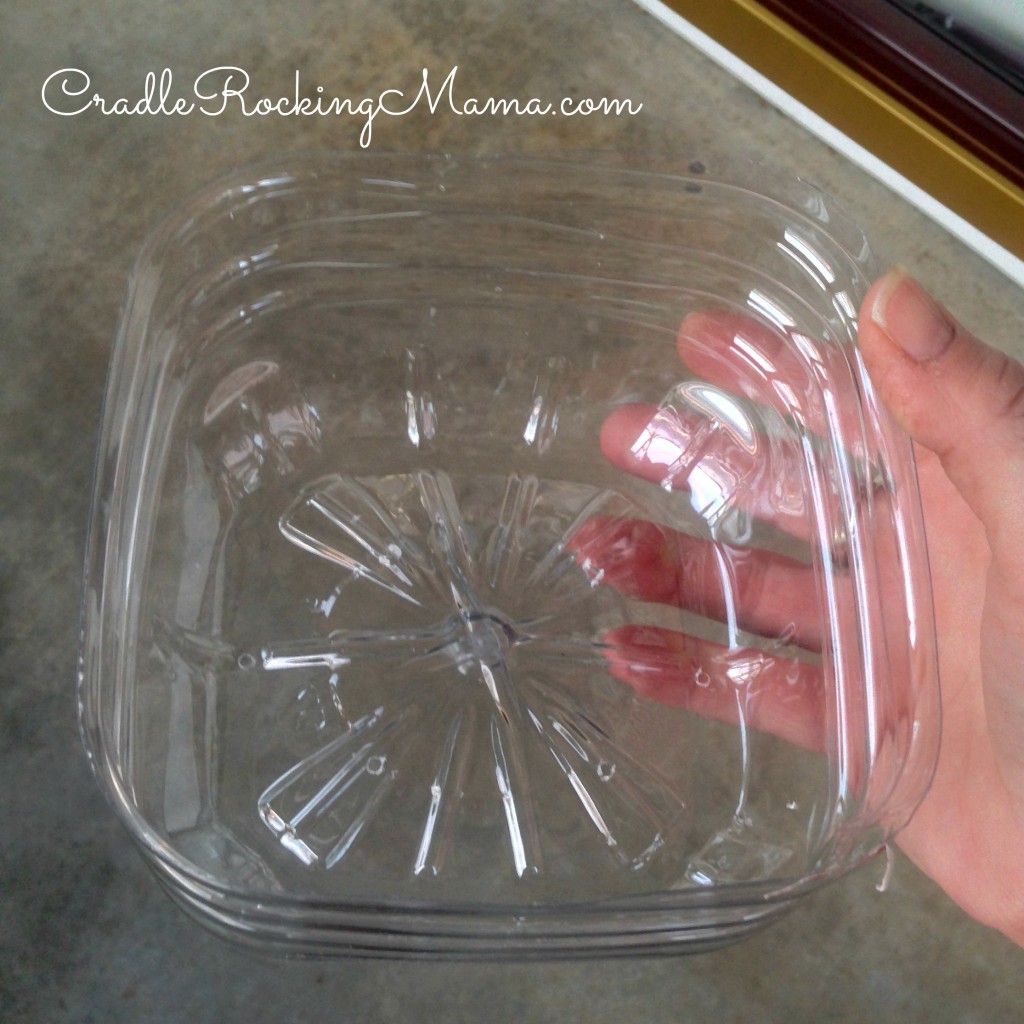
I took a utility knife and cut off the bottom of the bottle. I made mine fairly deep, just to be on the safe side. Probably about 4+ inches deep.

Please note that any sized water bottle will work for this. In fact, smaller bottles may even be easier and better to use. One bottle=one plant. But this is what I have, so I’m using the gallon sized bottles. I imagine I can start up to 4 seeds in each of them.

Cut off the bottom of the bottle CradleRockingMama.com

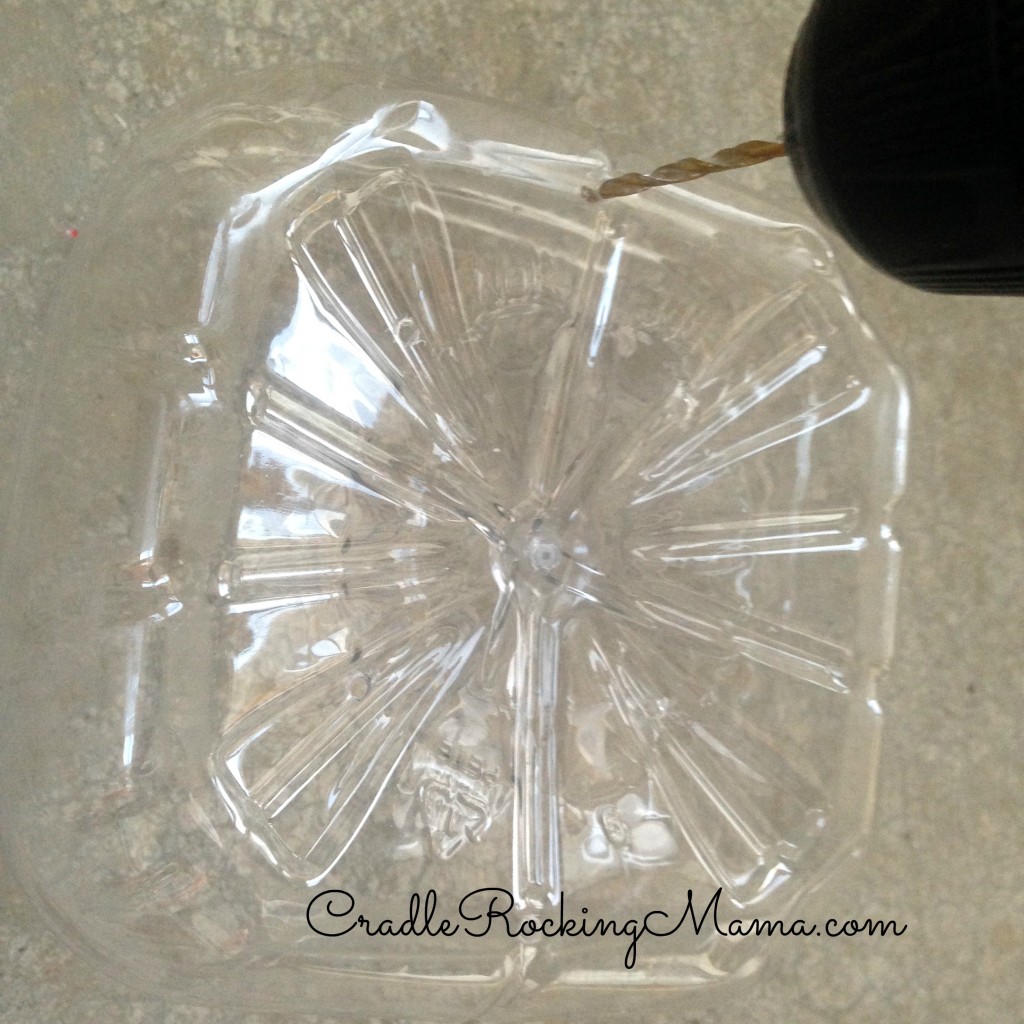
Then I used a drill to drill some drainage holes in the bottom. If you don’t have a drill, don’t worry! Take a nail, hold it over an open flame (a candle works great for this) and once it is hot it will slide right in to the bottle and make a nice little drainage hole for you. (Um, hold it with a pot holder or something, though, okay? Don’t burn yourself in the pursuit of gardening!)

Drilling drainage holes CradleRockingMama.com

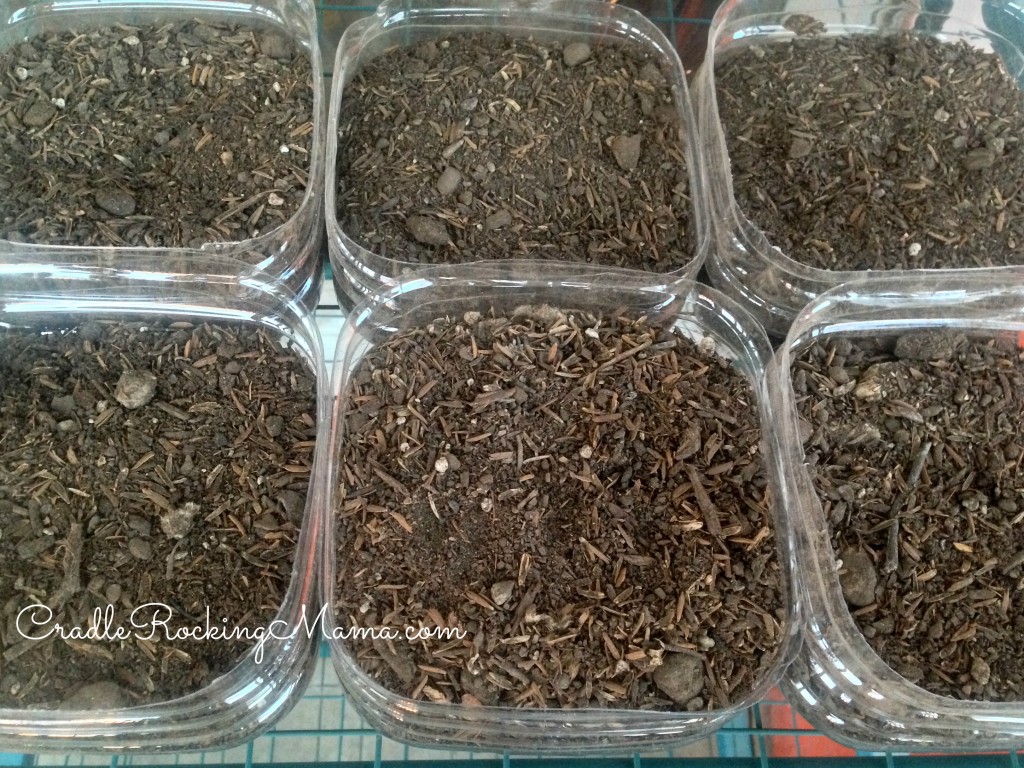
Then I simply filled them with dirt, and voila! Seed starters, ready to go!

Finished seed starters CradleRockingMama.com

Just plant the seeds, water them, and you are done. Gardening has commenced!

Simple. Free. And completely fitting with the Frugal Friday mantra: Use it up, wear it out, MAKE IT DO, or do without.

Hope this helps!

What’s your best cheap and easy seed starter solution? Well, aside from directly sowing into the ground! 

Brown Thumb Gardener: Potato Towers

Brown Thumb Gardener - Potato Towers CradleRockingMama.com

Well, I’ve been a bit distracted by all the frigid temperatures and snow on the ground, but lately, at least in Arkansas, it’s starting to resemble spring.

Which means I’m already late on starting my seeds.

Oops.

There’s no time like the present for getting a garden going, though, so this week I got to work.

To begin with, let me share with you my big experiment: potato towers.

I’d seen this on Pinterest, and a large number of friends shared this with me on Facebook, so I decided to give it a shot.

One big benefit, it seems, from growing potatos in towers is that you can line the bottom with chicken wire to prevent moles and other critters from digging up underneath your potatos and eating them while they grow.

Since we are overrun with such pesky little critters, I’m hopeful this will work.

Last Friday we bought the supplies for two towers. I followed the instructions from TipNut, and they have a lovely graphic that shows all the stuff you’ll need and the lengths to have it cut to, so head over there for the specifics.

I will say that next time, I’ll just cut all the boards the same length and make it a square. One place I deviated from the instructions is that I didn’t make my towers pretty and overlap the cut edges. If I’m not going to make them pretty, I may as well make them square – and therefore easier to assemble!

We also bought chicken wire to line the bottom of the towers.

This week I put the towers together.

It’s simple enough, but much harder to do when running herd on two munchkins that think going outdoors means going crazy!

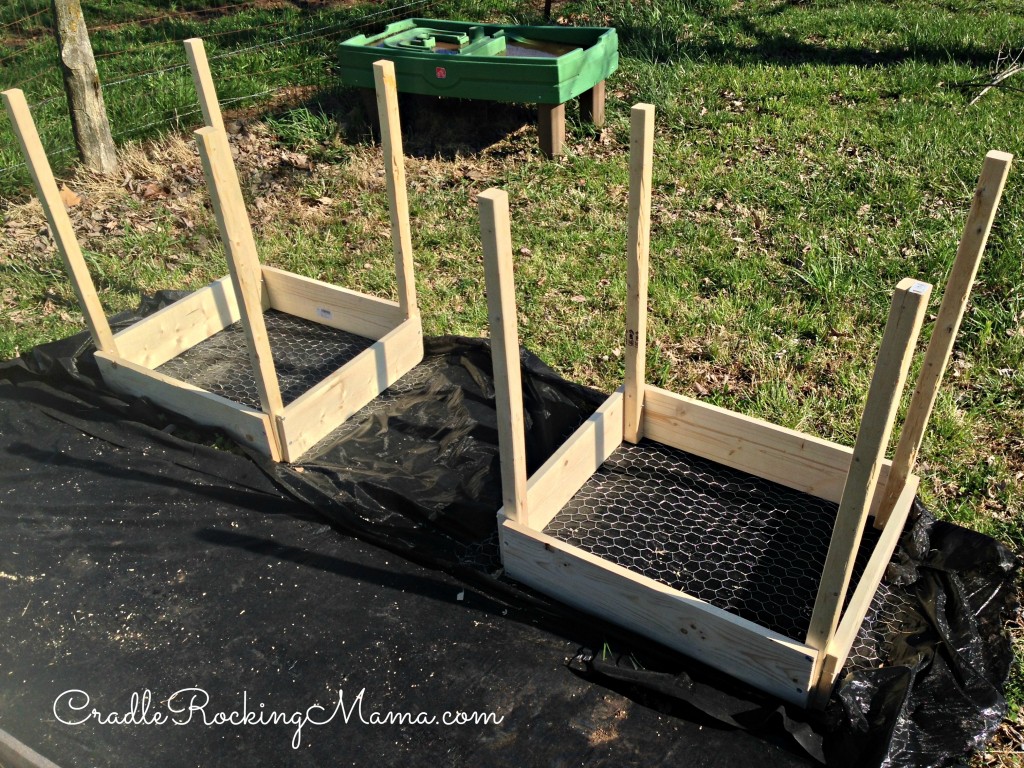
The first thing I did was to figure out where I wanted to put these lovely little potato towers. Once I knew that, I laid down black weed block stuff, then laid the chicken wire down on top of that.

It was windy, so I used the area as my workspace, too. It kept everything from flying around.

When it comes time to start assembling the towers, start by pre-drilling your holes. This is important! (Don’t ask how I know this, okay? It’s painful, and involves stripping out screws and using pliers to unscrew them.)

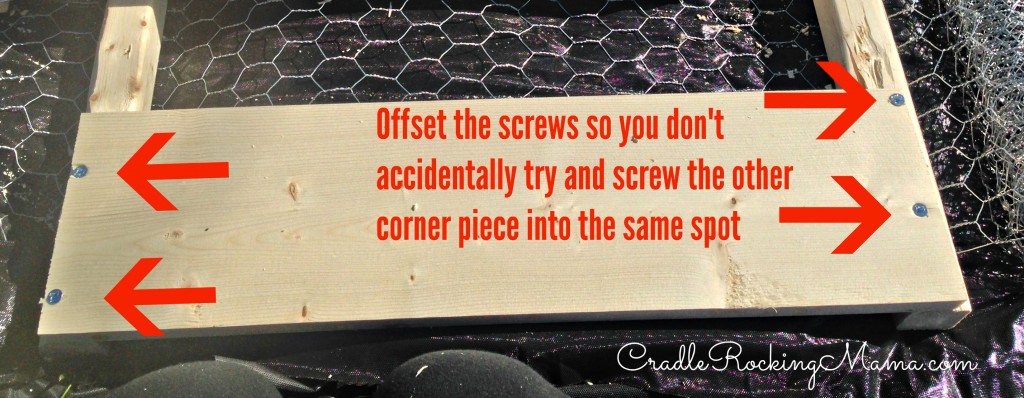
To avoid the screws bumping in to each other, I mentally divided up the ends of the boards and staggered the holes.

Offsetting the screws CradleRockingMama.com

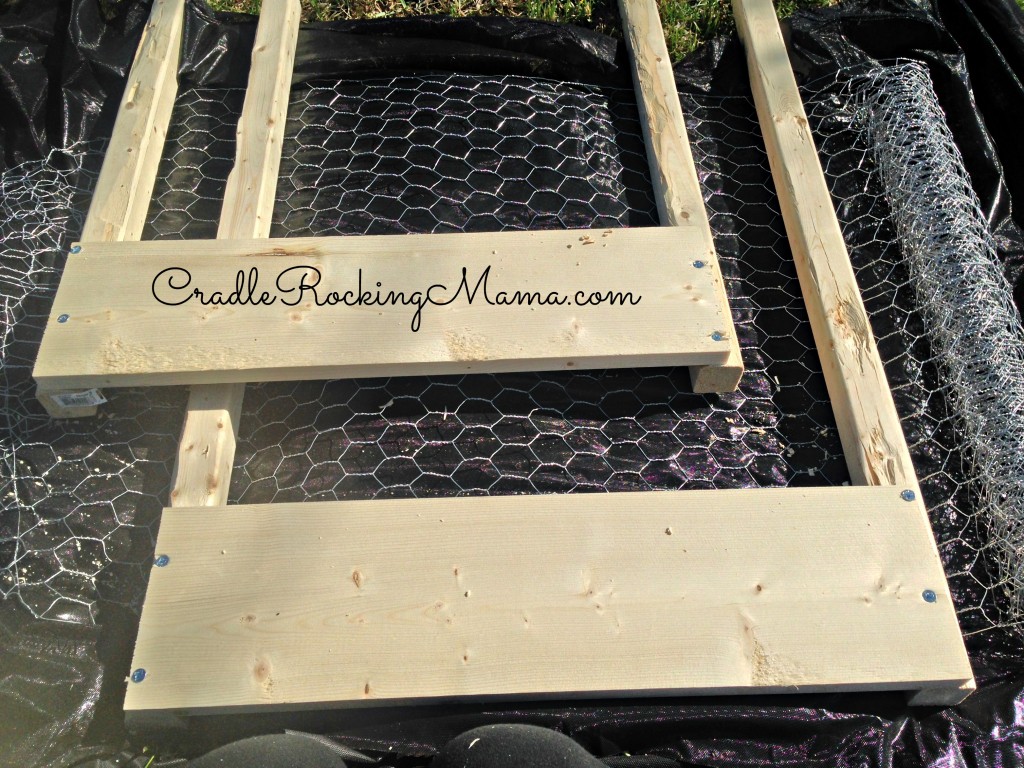
I basically assembled two ends by attaching one board to two 2 x 2’s first. Oh, and I used 1 x 6’s instead of 2 x 6’s. It was cheaper, and I’m confident it will work just as well.

Two ends of the potato towers ready to go CradleRockingMama.com

Then I took another board and attached it to the ends of the two pre-assembled ends. (Does that make sense? I hope so – I can’t figure out how to explain it better!)

The goal is to make a box, so after sides 1 and 3 were made, I attached side 2 to the end of side 1, then to the end of side 3. Does that help a little?

Side Picture CradleRockingMama.com

Then I flipped that over and attached side 4.

I don’t have photos of this part because I was doing this by myself, and I needed both hands. (And my voice, to yell at the kids to stop doing whatever potentially dangerous mischief they were doing at the moment.)

Projects involving power tools are SO MUCH FUN with toddlers around, doncha know?

At any rate, once all 4 sides were assembled, it’s a simple matter to just place the tower exactly where you want it. For us, that meant right on top of the chicken wire.

Then I built the second tower, which is very much a “second verse, same as the first” sort of deal.

Ta-da!

Basic potato tower built CradleRockingMama.com

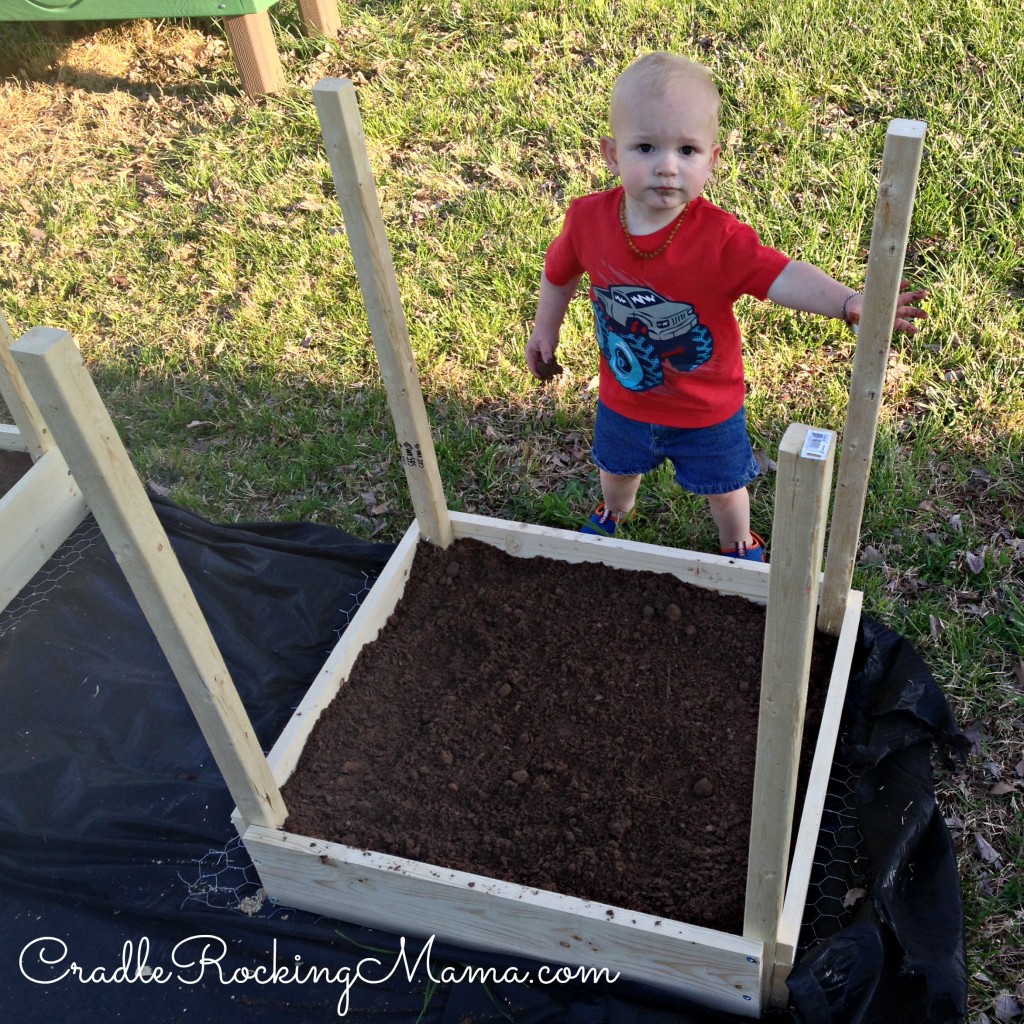
Then I filled the towers most of the way with dirt. With my adorable helper, of course!

Filling the potato tower with dirt CradleRockingMama.com

Here they both are, in all their “ready to feed my family” glory:

Potato Towers Ready to Plant CradleRockingMama.com

“But wait”, you might be thinking. “Isn’t she forgetting the SIDES of the towers?”

NOPE. The way these work is that now I plant my potatos and wait for them to grow. When they’ve grown about ten-twelve inches, I add another board and fill that section with dirt.

Actually, I’m planning to fill mine with straw. Some of the lack of success I’ve seen with these online was with folks who filled theirs with dirt; potatos don’t like to be compacted when growing, so I thought I’d take a tip from my amazing Nana and use straw the rest of the way in the towers.

So all that is left for me is to dump some compost in, till it together with the soil, and plant the spuds. I simply ran out of time yesterday to finish that part of the project.

I might only get 100-200 pounds of potatos out of this, and last year, I ate 600 pounds of potatos. So this won’t replace all the potatos we need to buy.

In our favor, my parents are planning on planting potatos the traditional way (in rows), so we should be able to get some potatos there. (Plus, it will be an interesting contest to see which method provides the biggest yields!)

Still, with any luck we’ll only have to buy half as many potatos as we bought last year.

And if it works, I’m building however many more of these are necessary to completely replace potato purchases for 2015!

(I plan to share with you how to save and store potatos for year long use at a later date.)

Have any of you ever grown potatos in towers? How did it work for you? Any tips you could share?

__________

Before I go, I had to share something with you all.

One of my longest, dearest readers, Ricky, sent me a gift she’d made.

My Very Own Green Thumbs CradleRockingMama.comMy very own Green Thumbs! 

They are so cute I absolutely laughed out loud when I opened the package. I may have scared the kids a little with my giddiness, but I didn’t care – I threw them on and danced around the kitchen.

These are a sign of things to come this year: I WILL change my “Brown Thumbs” into “Green Thumbs”! I’m so glad I’m not taking on that project alone!

Thanks a million, Ricky! I love them!

Oh, and Ricky has an Etsy shop, if you’re interested in an awesome handmade gift from Australia. You should check it out!


Homemade Taco Seasoning

Homemade Taco Seasoning CradleRockingMama.com

When Jed was a little baby and first got his MSPI and egg IgE diagnosis, I went through every item in my pantry reading labels.

Tons of food had to be disposed of, but there were things that were technically safe that we could keep.

However, as time went on, I found myself getting more and more skeeved out about the mystery ingredients, unhealthy preservatives, and miscellaneous “stuff” put in so many of those “allergy safe” foods.

Our Real Food journey had begun.

One of our favorite meals is tacos. Quick, easy, and delicious – how can you go wrong with tacos?

Well, have you ever looked at the ingredients on packages of taco seasoning? Go on. Read the label of the taco seasoning packet in your pantry.

It’s bad.

Not only is there more salt than anyone should consume in a day, but odds are you’ll see MSG, “natural flavorings” or “artificial flavorings” on the list.

All three of those are bad, bad, bad.

So I did what I always do, and went to the internet for replacement ideas!

Since Darrel and Jed are so “heat” sensitive to spices, it took some tweaking to get a wonderfully flavored, spicy – but not too spicy – perfect taco seasoning mix. But I managed to do it.

This is the taco seasoning we’ve used for the last three years. It’s better than any packet I’ve ever bought, and is an insanely simple switch to make in your kitchen.

Every step towards real foods is a step in the right direction, right?

Try this. I know you’ll like it! (And feel free to add some more hot spices if you prefer to have spicy tacos!)

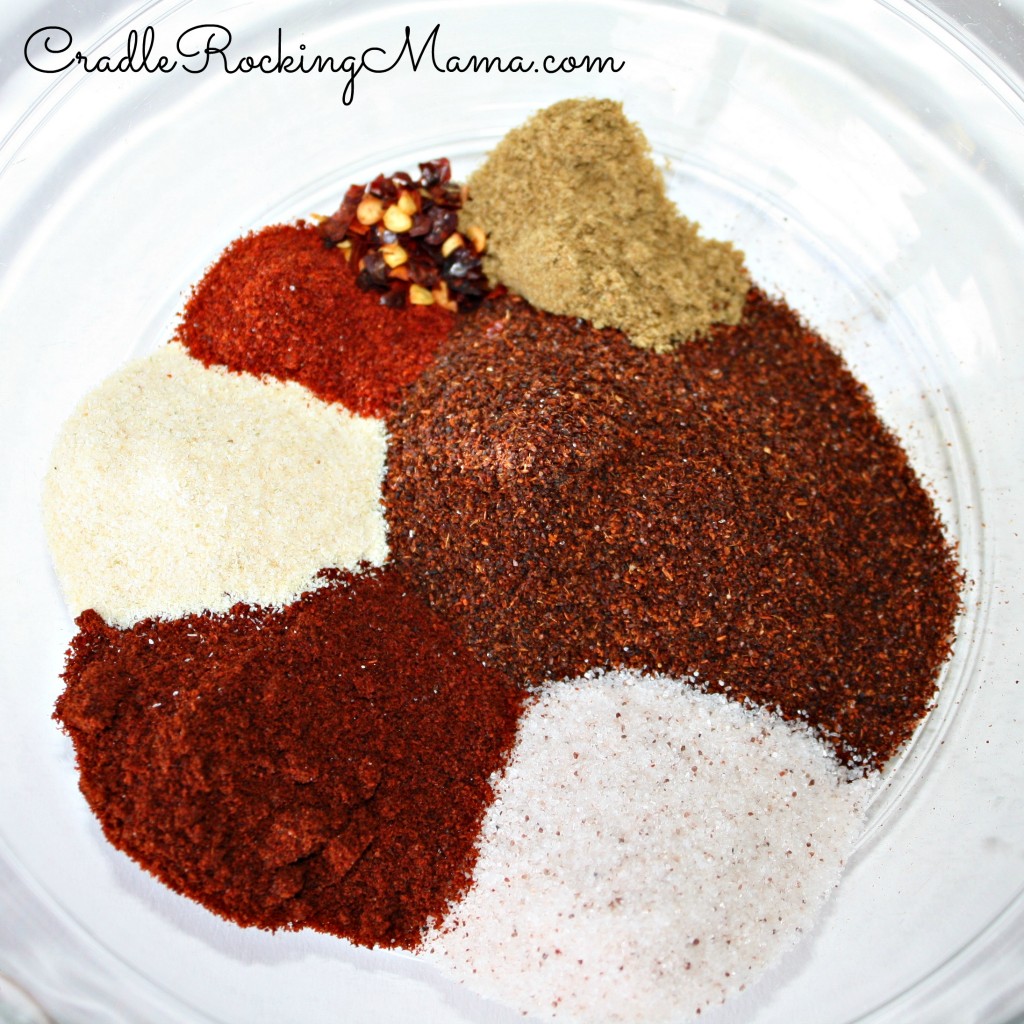
All you do is dump your spices in a bowl and mix.

Taco Seasoning Spices Ready to mix CradleRockingMama.com

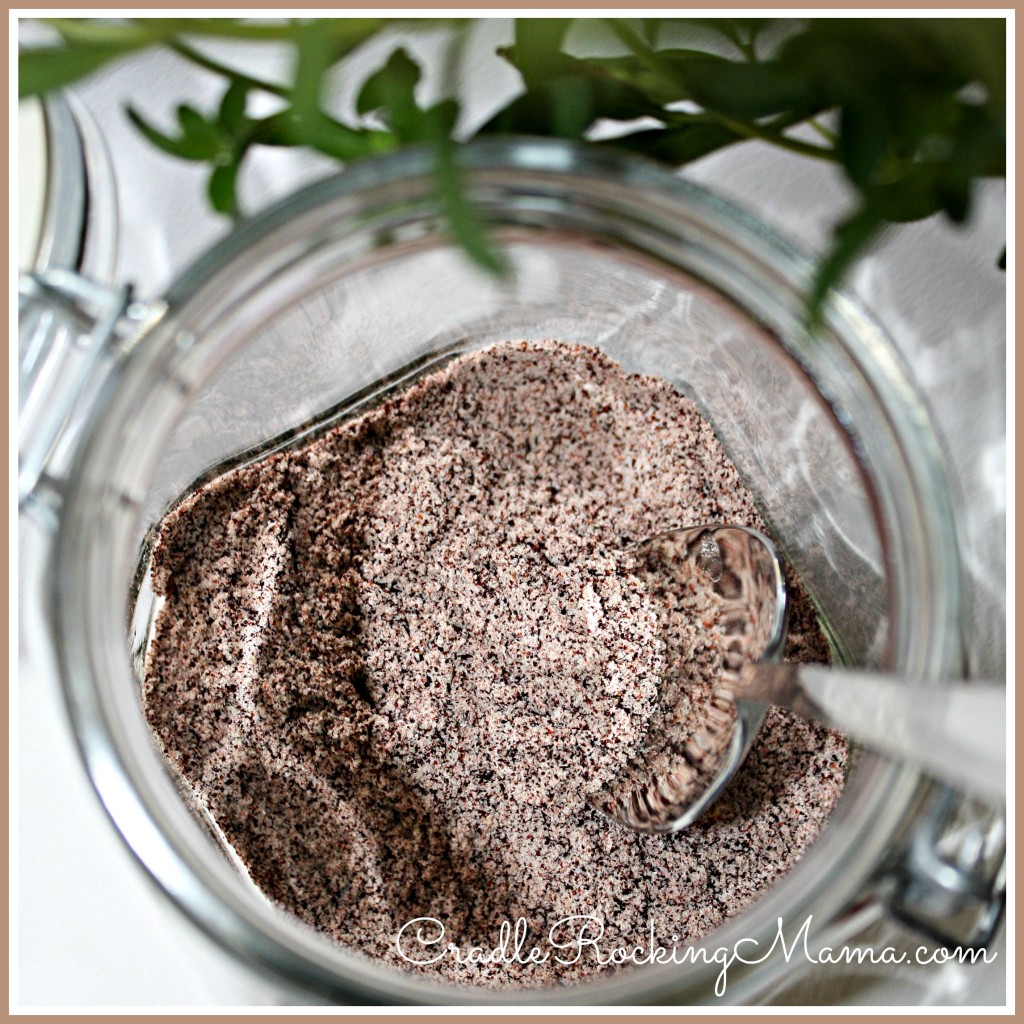
Store in an airtight jar In your pantry.

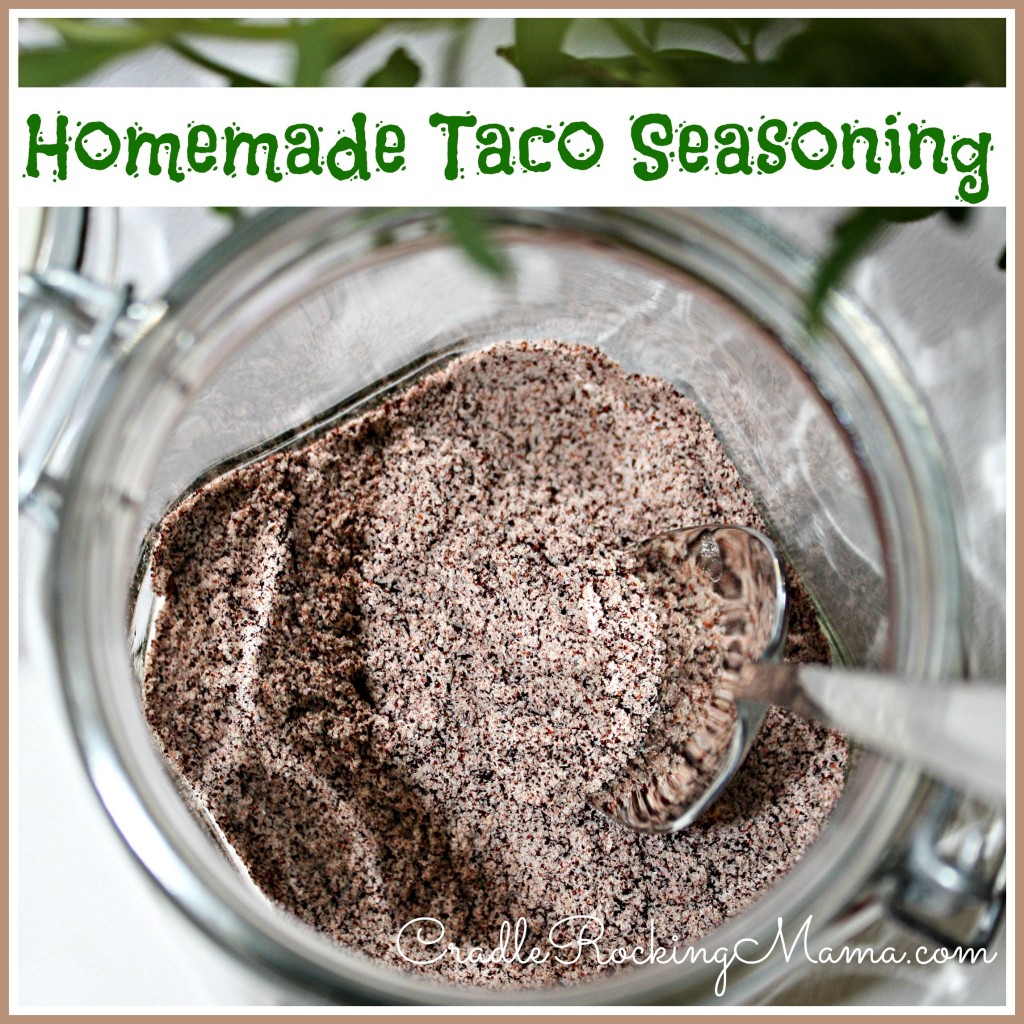
Jar of Taco seasoning CradleRockingMama.com

That’s it!

I actually will usually make triple batches of this at a time, just so I always have it on hand. Typically I use between 2 and 3 T. of this mix per pound of meat, depending on the moisture level of my meat that day and how spicy I want it to be.

It works great on almost anything you can season: ground beef, shredded chicken, shredded turkey, even in a veggie mix!

I’ve made this fructose friendly by omitting the garlic and onion powders, and it still tastes wonderful. Some FructMal folks will still have problems with some of the spices, but if you mostly are concerned with garlic and onion, this might work for you.

So have a happy, healthier taco night at your house!

Homemade Taco Seasoning
 
Prep time
Total time
 
Enjoy a "Real Food" replacement for your pantry: a taco seasoning mix that tastes wonderful, and can be made fructose friendly! This will make 8 T. of mix, or approximately 2½ packets worth of seasoning mix. We usually make triple batches! Use 2-3 T. per pound of meat, and enjoy!
Author:
Recipe type: fructose friendly, seasoning mix
Serves: 8 T.
Ingredients
  • 2 T. arrowroot starch
  • 2 T. chili powder
  • 1 T. sea salt
  • 1 T. paprika
  • ½ tsp. cayenne pepper
  • ¼ tsp. crushed red pepper flakes
  • ½ tsp. cumin
  • 1½ tsp. onion powder (optional)
  • ½ tsp. garlic powder (optional)
Instructions
  1. Measure out all your spices and pour in a bowl.
  2. Mix well and store in an airtight container. (I often shake the jar once the mix is poured in.)
  3. Enjoy a healthier taco!


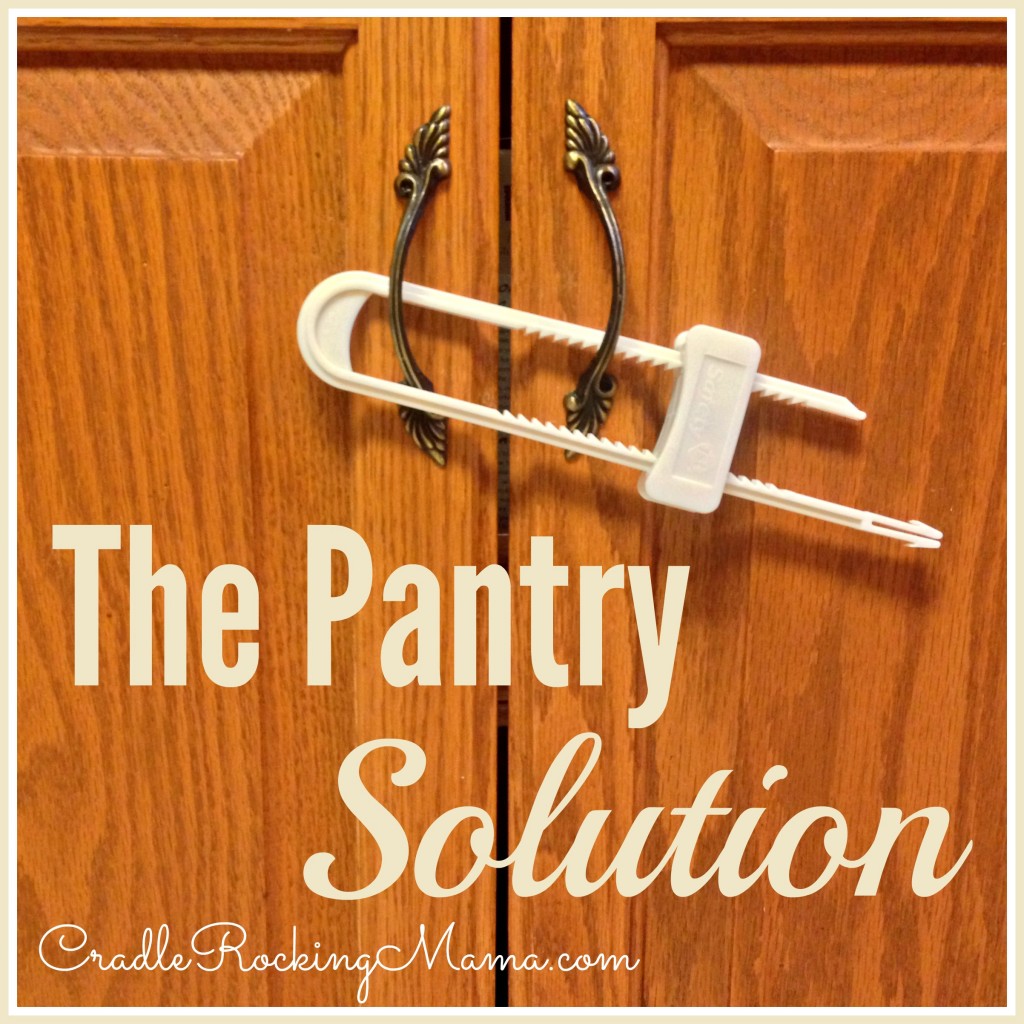
The Pantry Solution

The Pantry Solution CradleRockingMama.com

Before I start today’s post, I want to thank everyone who offered suggestions for our breast milk shortage issue yesterday. You’ve given us plenty of food for thought and some great potential solutions. Y’all are awesome!

So…we’ve got a problem in our house: ACCESSIBLE FOOD.

While normal moms of a nearly 4-year-old are busy trying to come up with “self-serve” food options for their kids (an awesome idea for independence and helping make Mama’s life easier), we are a Food Allergy Family and are stressing out about how easy  it is for our kids to access the food in our cabinets.

Jed is naturally self-sufficient enough to help himself, which I love…but not quite old enough to be neat enough with his foods to let him have free rein in the kitchen. Not only that, but despite repeated reminders that Zac can’t have his foods, he still has a tendency to want to share.

Add to that the fact that Zac can now get out of bed on his own, and has been taught by The Master of Mischief (his big brother Jed) to NOT wake Mommy up if she is still asleep so they can go get into mischief without interference.

I’ve been quite anxious, as you can imagine!

The problem with our house is that we have no actual pantry. We simply have lots of cabinets.

The ones I had been storing food in were the upper cabinets, none of which can be easily locked because of the way the doors hang.

We have one very large cabinet section that could be converted to a pantry…but how to convert it was giving me fits. Every option either would look completely out-of-place (and make the one room I spend the most time in the ugliest in our house) or cost a pretty penny to do in an attractive way.

I was just about to go for the “ugly” option, when THIS happened:

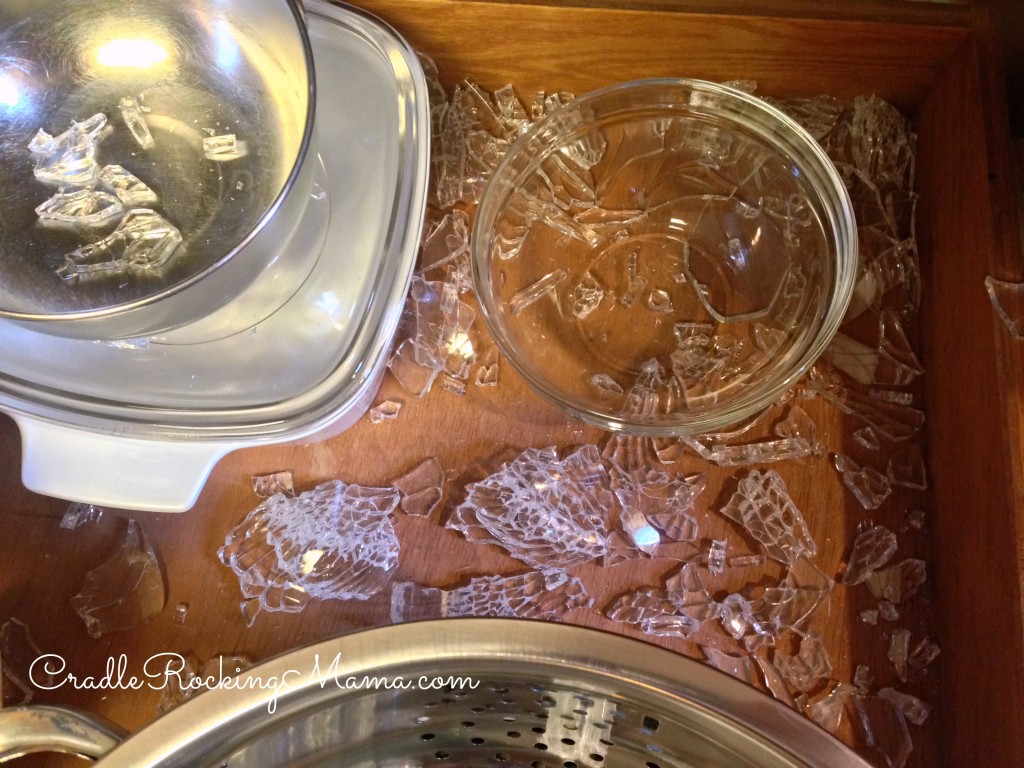
Broken Glass CradleRockingMama.com

That would be one of our lower, below the counter cabinets, where I stored mixing bowls and baking dishes.

I reached in one day last week, put my hands on a glass bowl, and it shattered at the touch. Weird and crazy, right?

Obviously, I had to empty all the dishes out of the cabinet and clean it thoroughly to remove all the glass.

Once emptied, I saw these cabinets as if for the first time. I had an epiphany: I could store the food in these lower cabinets! They’re huge, and they can be locked!

There was only one small problem with this idea, but it was easily solved.

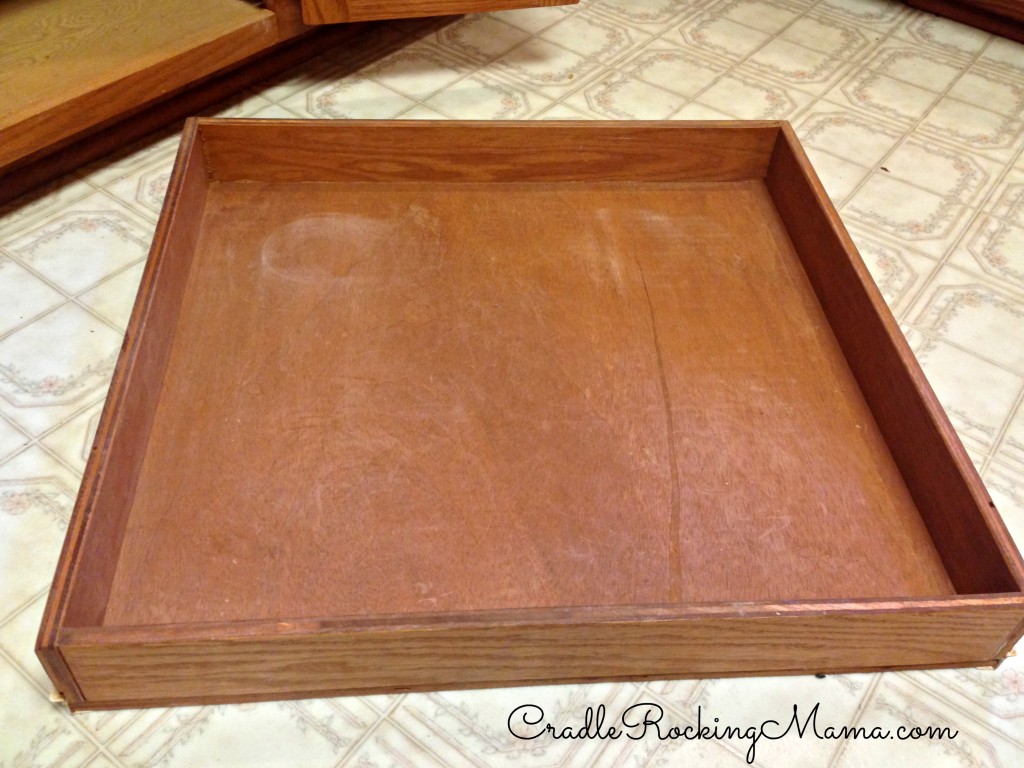
These cabinets have pull out drawers that aren’t very deep. My food would wind up falling off the back when I pull the drawers out to access the food in the back.

No problem!

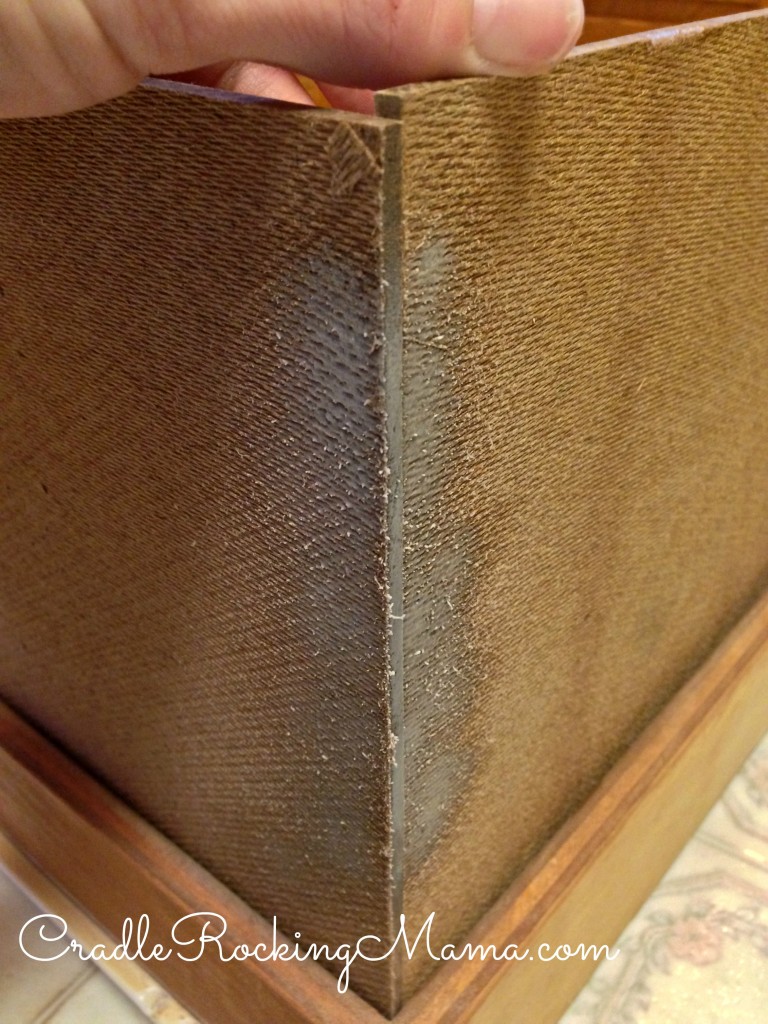
Last Friday we bought some hardboard (think dry erase board without the writing surface) and had the lovely gentleman at Home Depot cut it to my measurements.

Sunday I got to work.

First I pulled the drawers completely out.

Basic Drawer CradleRockingMama.com

Then I made sure my new sides would fit with a test fit. When they fit perfectly, I got out a hammer and some small finishing nails, but that didn’t go very well.

Darrel was keeping the boys entertained while I worked (and out of my way), and without someone holding the sides together it was almost impossible to get the nails to cooperate.

So I went with Plan B: spray adhesive and some tape.

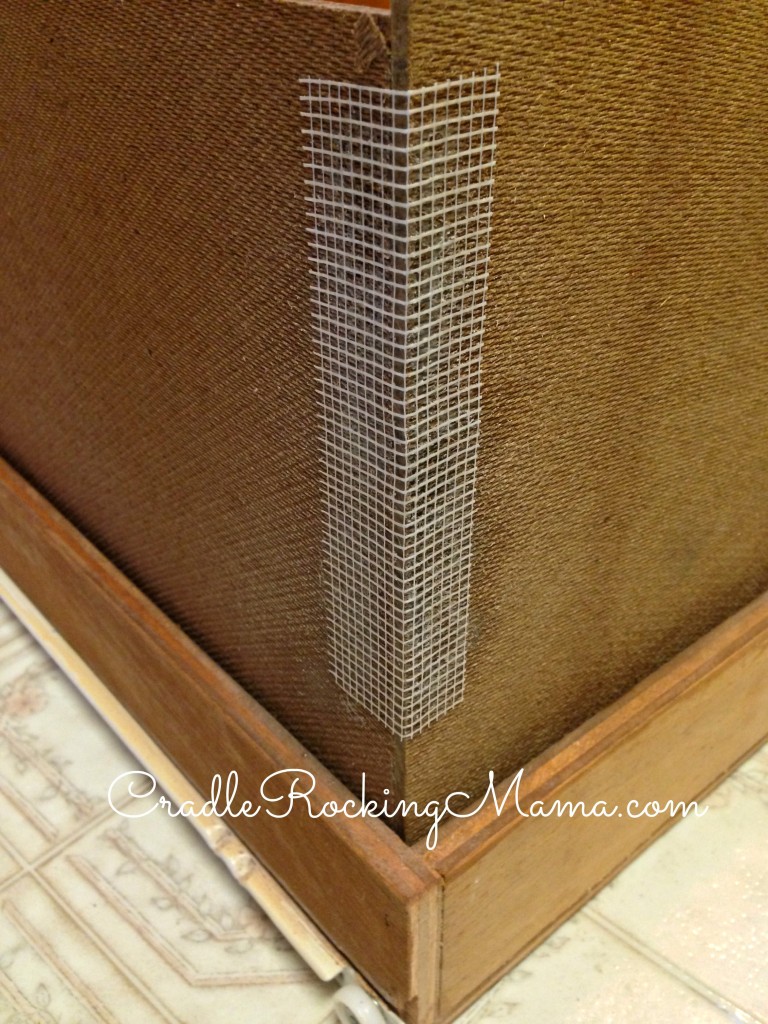
I was inspired by partially assembled furniture I’ve bought in the past that had a grid-like tape holding lightweight pieces like this together. Since I had some drywall joint tape sitting in my tool cabinet, it seemed like a good idea. I KNEW duct tape, painters tape, and masking tape wouldn’t work.

It worked like a charm!

First I sprayed the backside of the boards…

Sprayed the glue CradleRockingMama.com

Then I applied the tape as tightly as I could.

Applied the tape CradleRockingMama.com

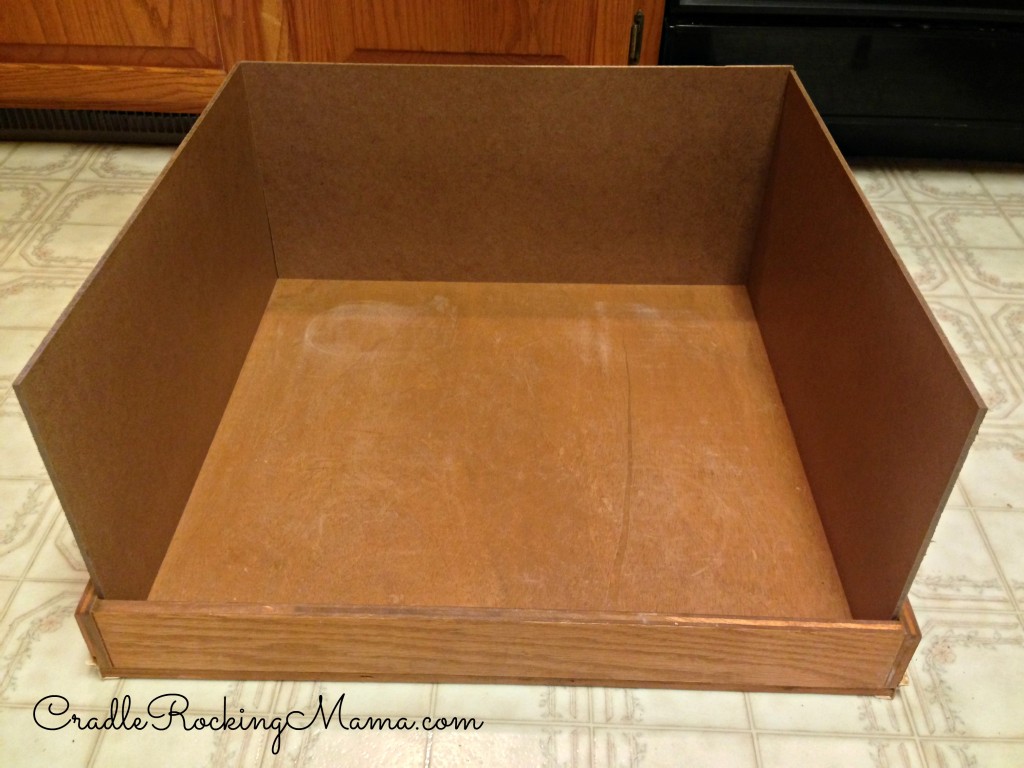
Repeated it on the other side, and voila! New, taller sides for the drawers!

Finished Drawer CradleRockingMama.com

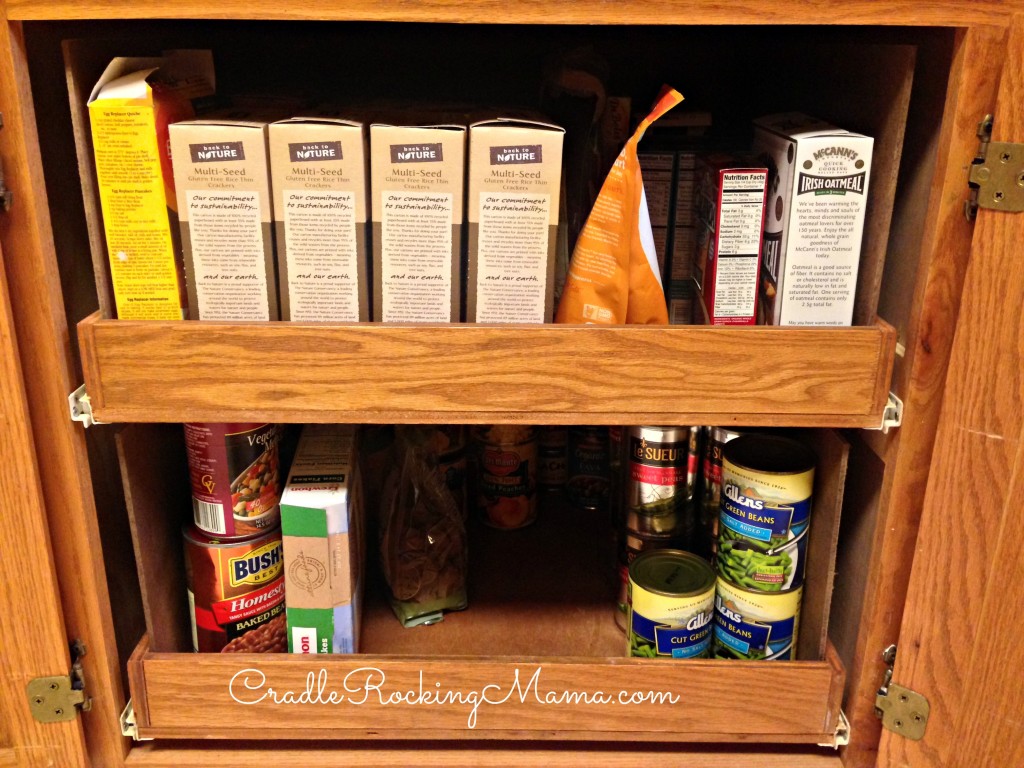
Then I just slid the drawers back on their rails and my new pantry was ready to load up with food.

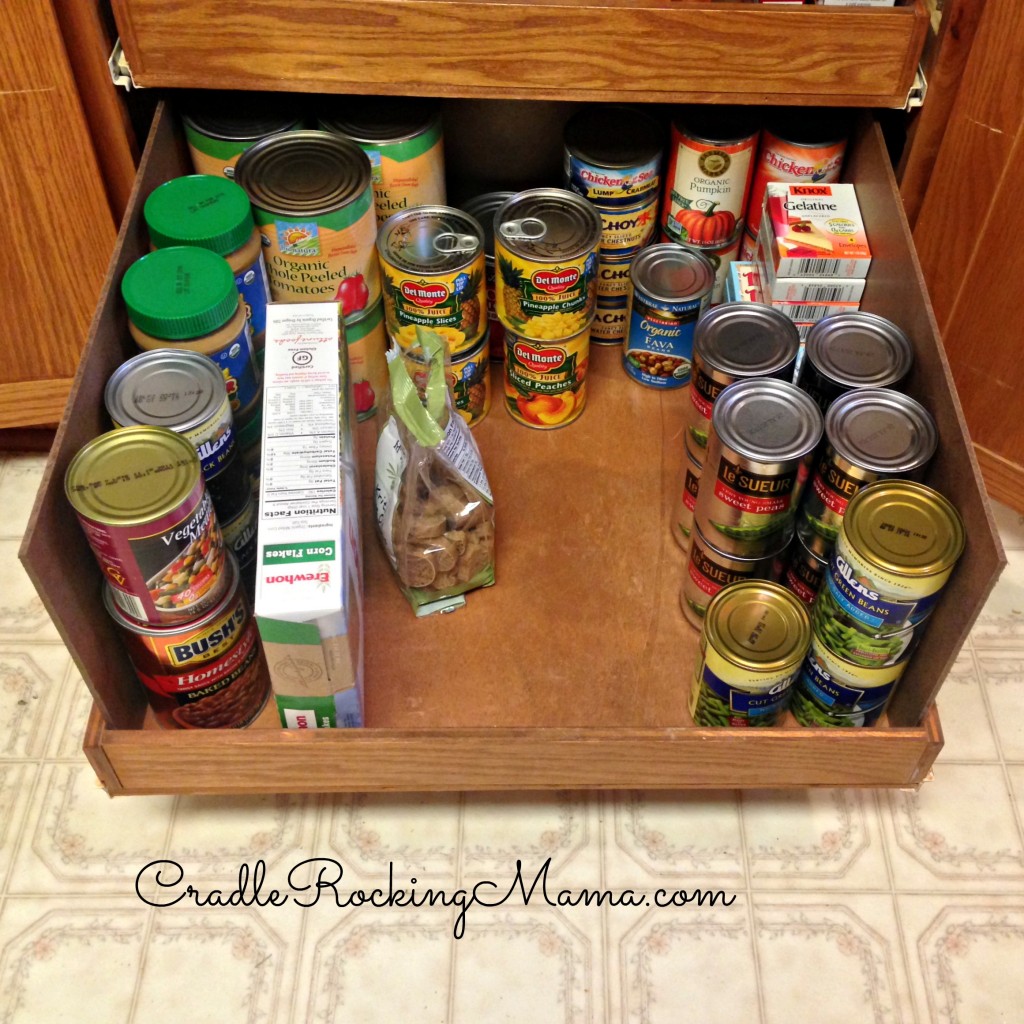
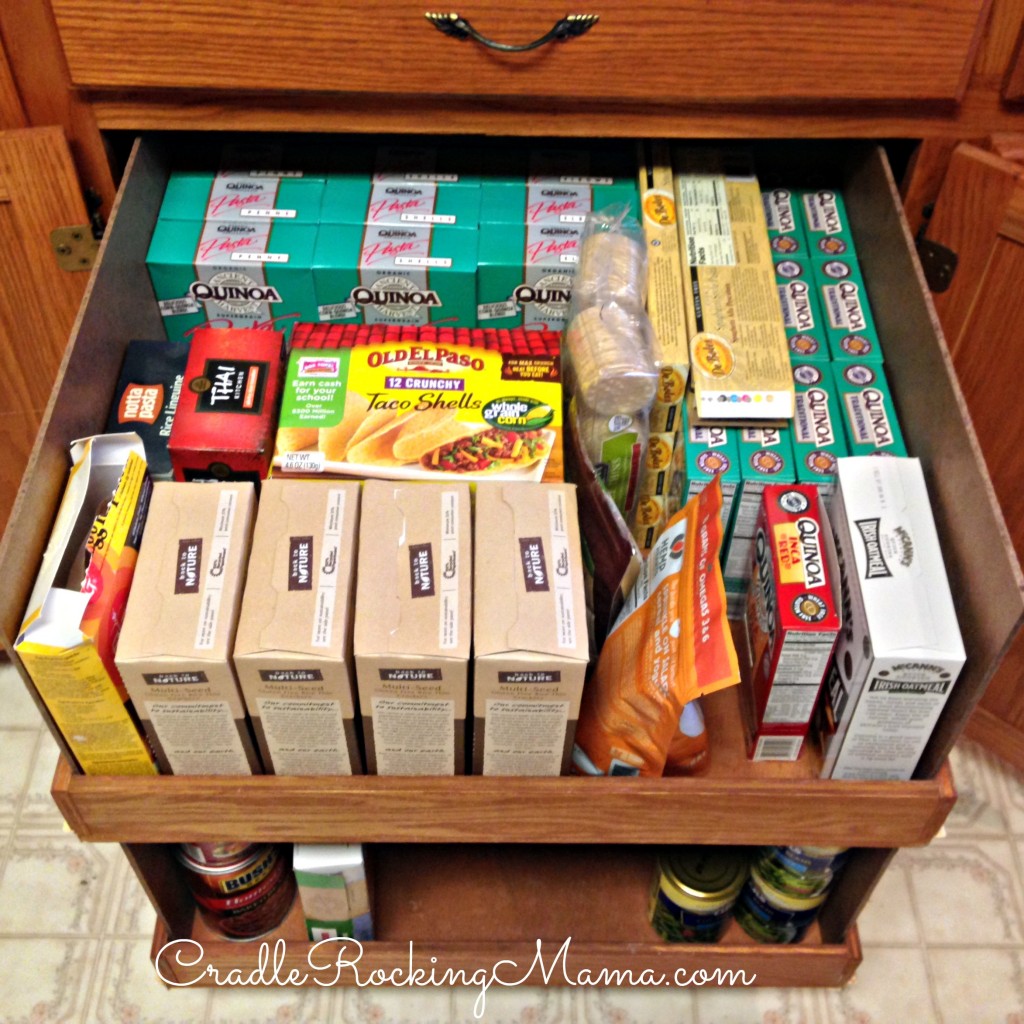
Look how much one cabinet holds! And I have another one just like it! Yay, me!

One Drawer Filled CradleRockingMama.com

Second Drawer Filled CradleRockingMama.com

Nice and neat CradleRockingMama.com

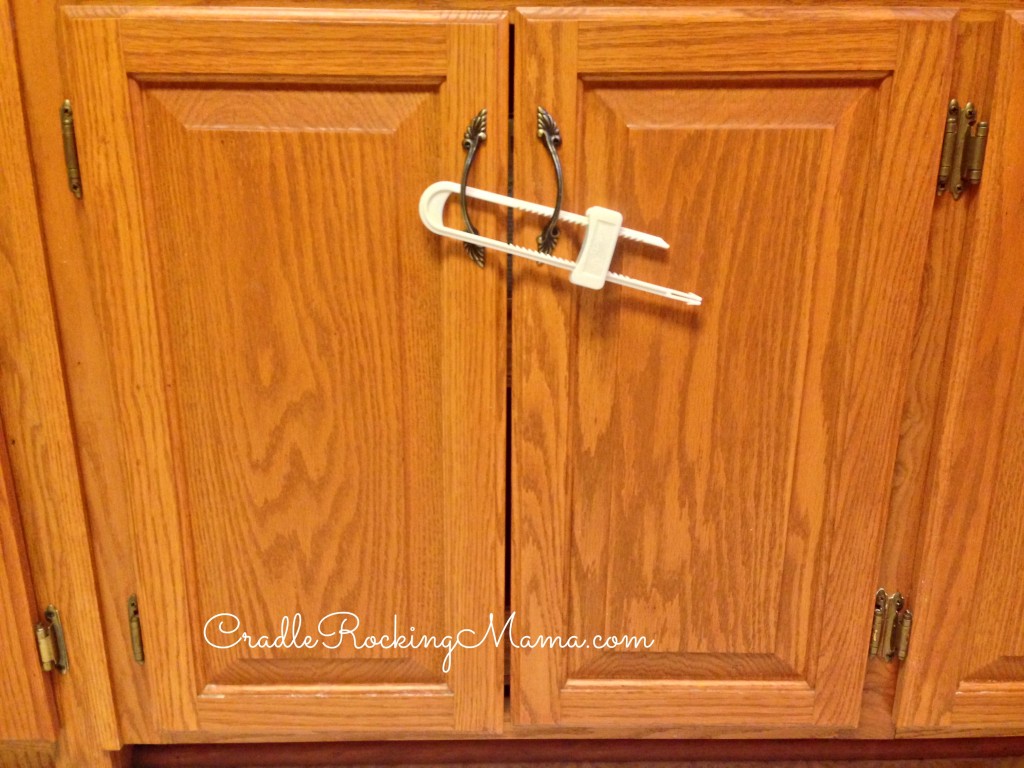
And once they’re closed, these lovely child locks work perfectly to keep the doors shut and safe from mischievous little boys.

And a locked pantry CradleRockingMama.com

Of course, my kids are experts at breaking child locks. If these prove to be no match for my ingenious kiddos, we can always resort to our other option: padlocks.

(No, I’m not kidding. We have a padlock on the cabinet under the sink where soaps and cleaners are stored.)

I had to share this pantry issue today because I’ve heard of many Food Allergy Mama’s commenting on having a similar problem.

Hopefully this may inspire a solution for someone: look around your kitchen and see where you can move things to find a safe, inexpensive way to reorganize for safe food storage.

So far, it’s working great! No need for us to spend tons of money to solve this problem.

Thank goodness!

Jed isn’t too happy with it, since he can’t get to his snack foods without Mama’s help any more, and Darrel keeps going to the old location to grab foods, but they’ll both adjust in time. As for me, I’m sleeping a lot better knowing my kids won’t be able to snag unsafe foods from the pantry without my knowledge.

What creative food safety solutions have you come up with? I’d love to hear any other ideas out there!