It was gettin’ crazy in my freezer, y’all.
In the 18 months I’ve been on the TED, I’ve eaten 4 cows worth of beef. That’s a lot of beef!
It’s also a lot of beef BONES.
Because I’m frugal, and because I can’t have any pre-made, store-bought broths, I’ve saved all the bones from all of those steaks and roasts these last 18 months. And while I’ve made broth frequently throughout that time, I had fallen behind.
WAY behind.
So behind, I’d started running out of room in my freezer for, you know, food, because I was storing so many bones. It was ridiculous!
Worst of all, I knew that once I made all the broth I needed to make from those lovely bones, I’d have a TON of broth to freeze…so making the broth wasn’t actually going to help out on the freezer storage solution very much.
Unless…
Surely there had to be a way to dehydrate the beef broth for future use, right?
Well, not according to anything I could find on the internet! The closest I could find was a recipe for making your own bouillon cubes that used a scary amount of salt and was incredibly comprehensive. Plus, you still had to store it in the freezer.
One day, I will be returning to work. When that day comes, I’d like to be able to take my broth with me…without it leaking all over my suitcase!
So I experimented, and I found the answer.
Read on and learn how you, too, can dehydrate beef broth!
Start out by making your broth. Most people add veggies and some vinegar to the bones to make their broth; I can’t really do that and it always comes out just fine (though probably not as nutritious). I prefer the “low and slow” approach to making broth. It’s not unusual for my broth to simmer for as long as a day or two!
Then strain all the solids out of your broth and put it in the fridge so any fats will rise to the top and solidify.
Scoop out as much of the fat as you can and set it aside to be cleaned.
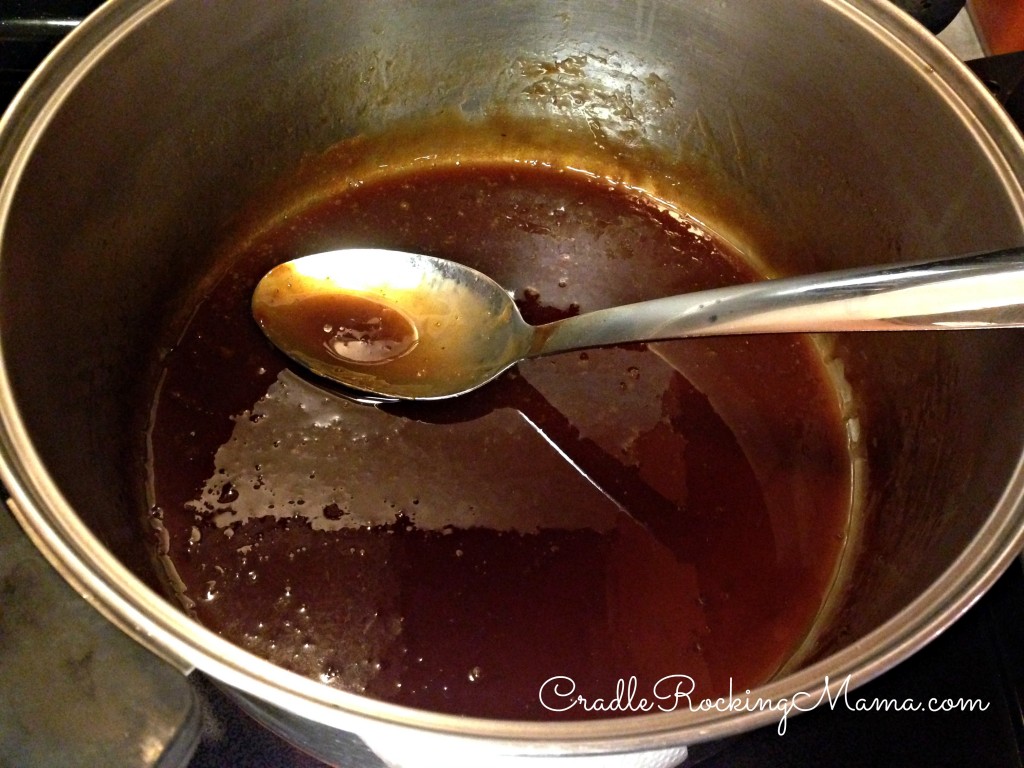
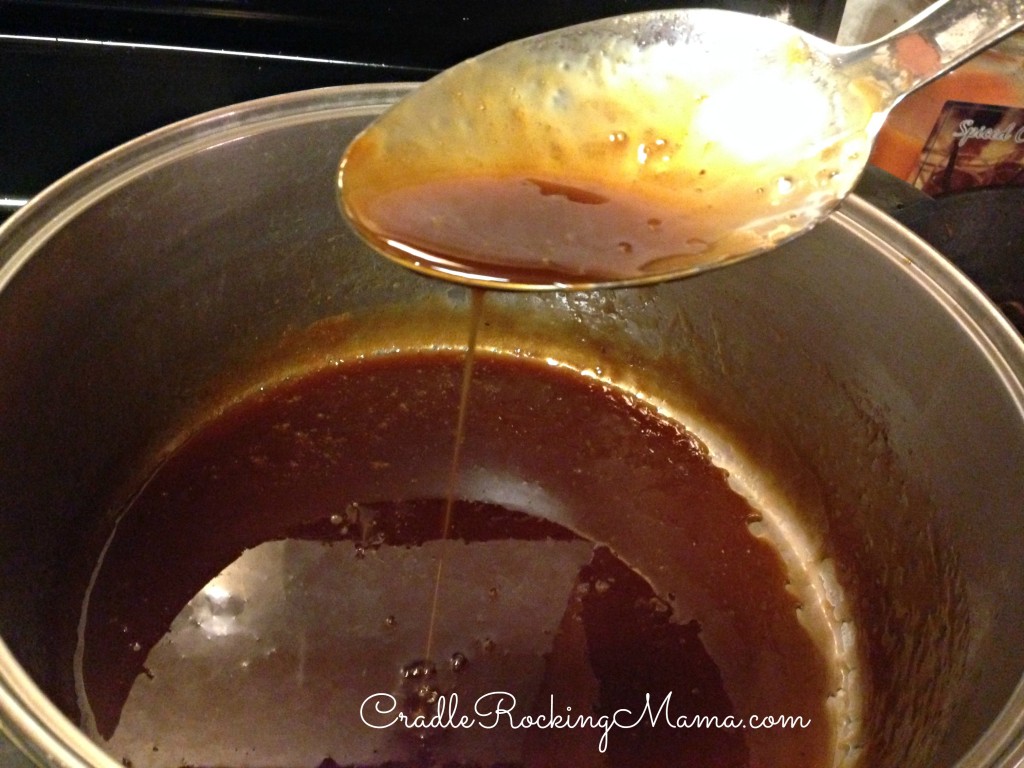
Now take that broth back to the stove and begin reducing it down. Turn the heat up until the broth is simmering, with the lid off, and let it cook until it is thickened and reduced to almost nothing.
In my experience, the broth will simmer for what feels like ages, doing nothing particularly interesting, and when I leave it alone for an hour I come back to find I’ve almost ruined it by letting it go too long. So, keep an eye on it.
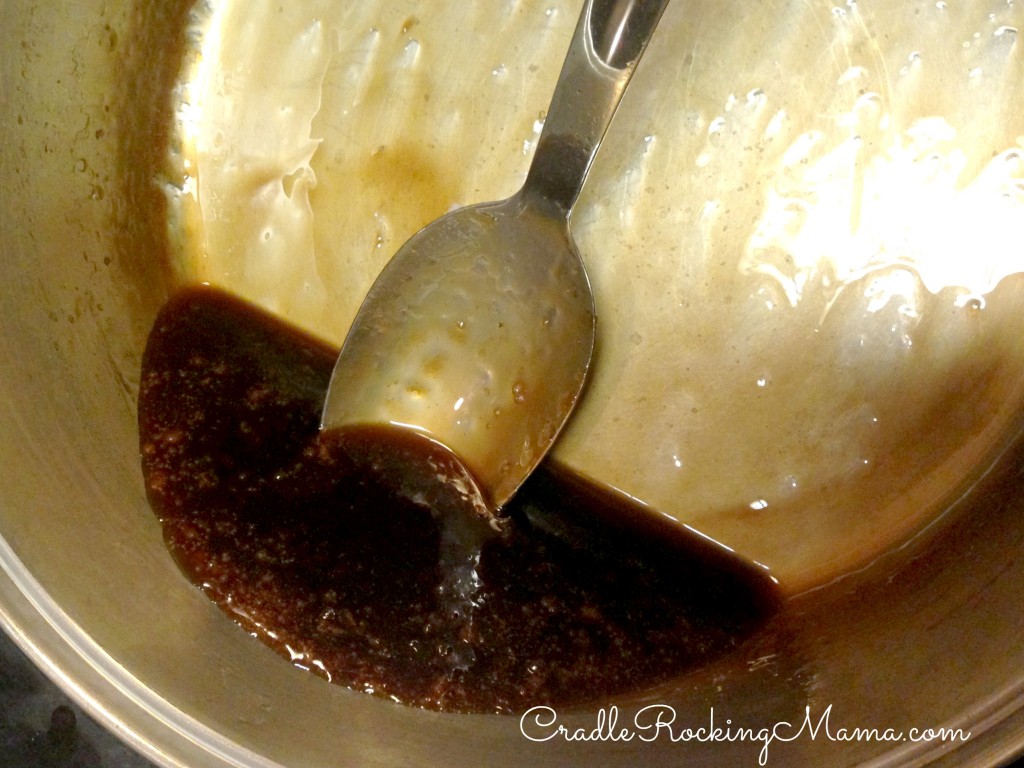
What you’re going for is a thicker, gravy-like consistency. It should still be runny, not like a thick syrup.
Once you’ve reached the consistency you want, head over to your dehydrator. I’m sure you could use an oven for this, but since I haven’t done it that way I can’t give much guidance on dehydrating that way.
Drizzle the reduced broth on the non-stick sheets that come with your dehydrator. If yours doesn’t come with non-stick sheets, try using Saran Wrap wrapped around the trays. I’ve heard that works well.

Drizzled onto the trays. Use more trays with thinner drizzling if possible. I was being lazy and wanted to use just one sheet for this. It took longer.
Try to drizzle the broth as thinly as you can. Some of my sections got thicker than others, and they took far longer to dehydrate.
Then set your dehydrator up for the highest temperature it will go (mine is 155 degrees for meats; this is why I think this will do well in an oven) and turn it on.
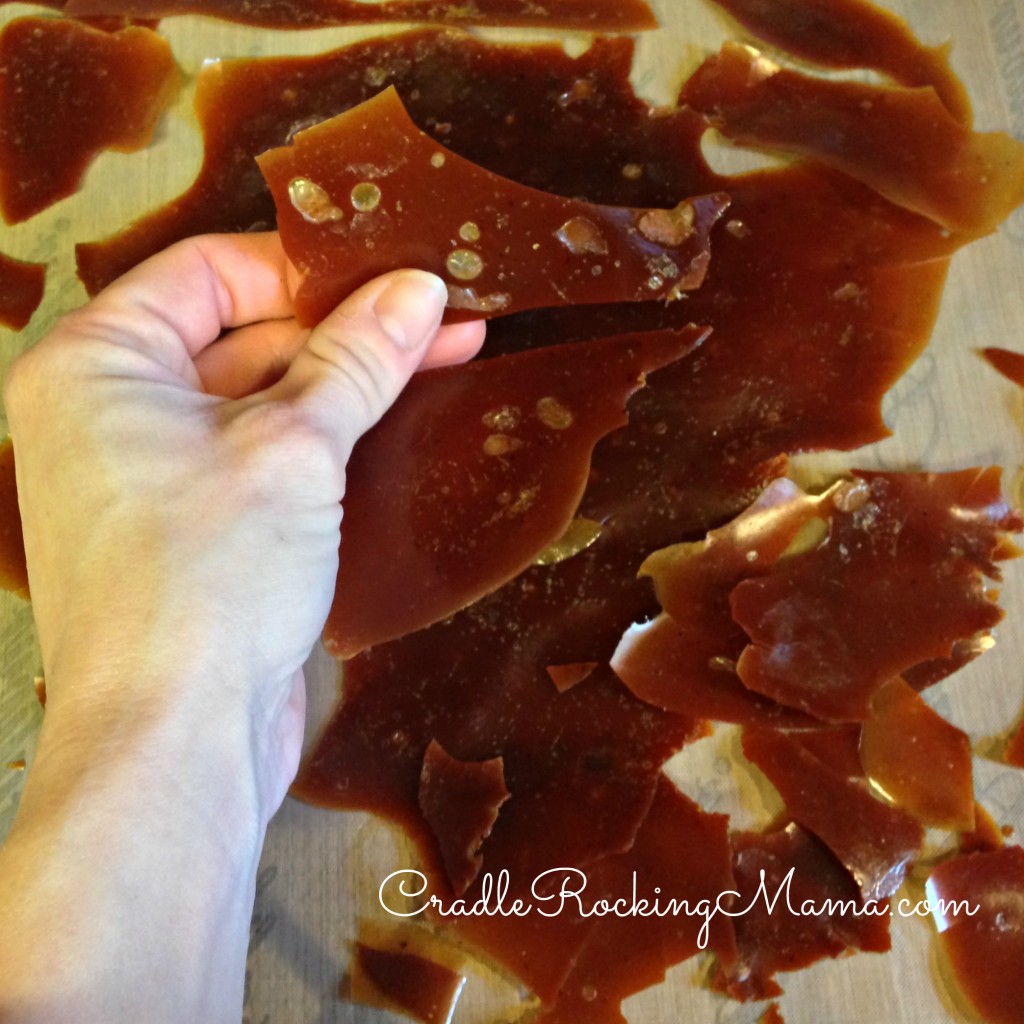
After about 8 hours, I started checking mine. In the end, it took about 16 hours for me to think this had dried enough. Then I let it go an extra 2 hours, just to be sure. You really want this to be completely dried.
When it is dried, it will easily snap into little pieces!
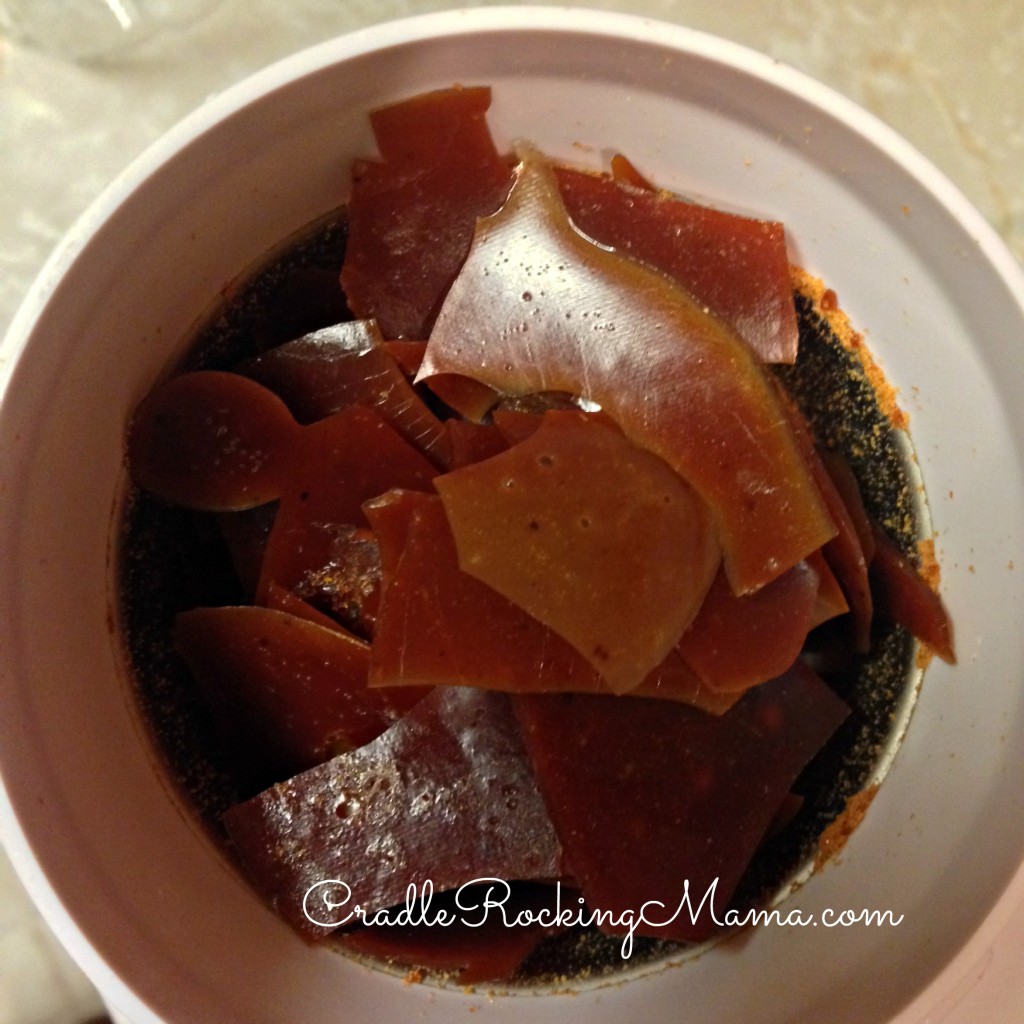
You can stop right here, if you’d like, but I wanted to be able to measure it out accurately and make it easier to store and transport. So I got out a clean coffee grinder and used it to grind the dried broth into powder.
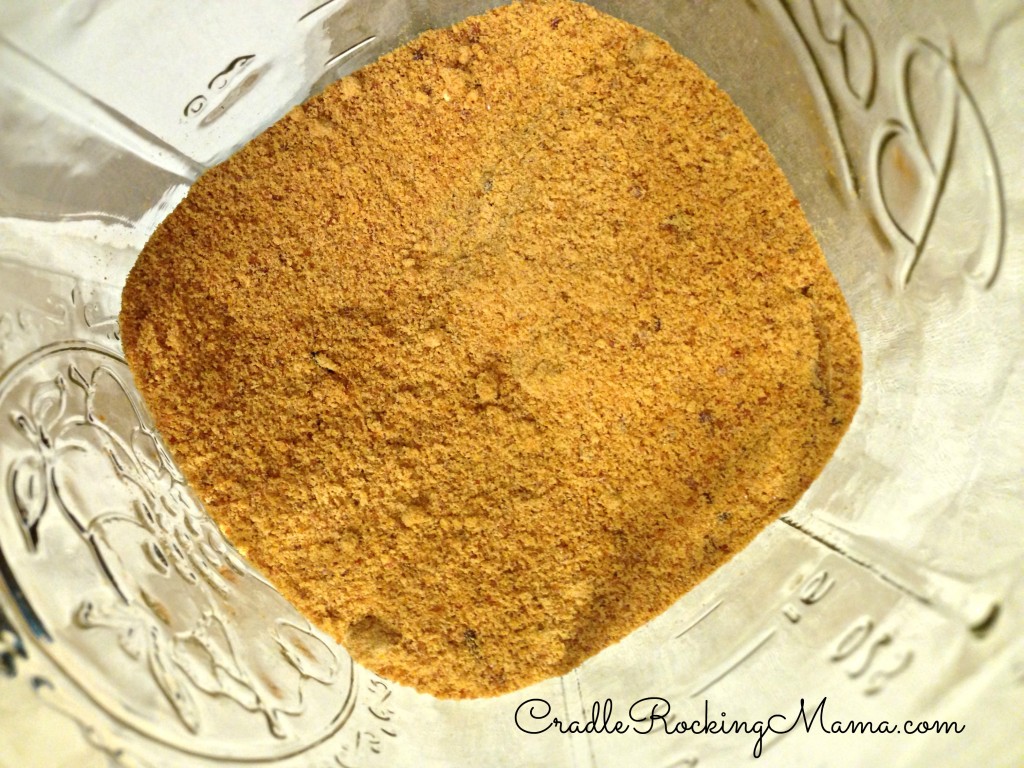
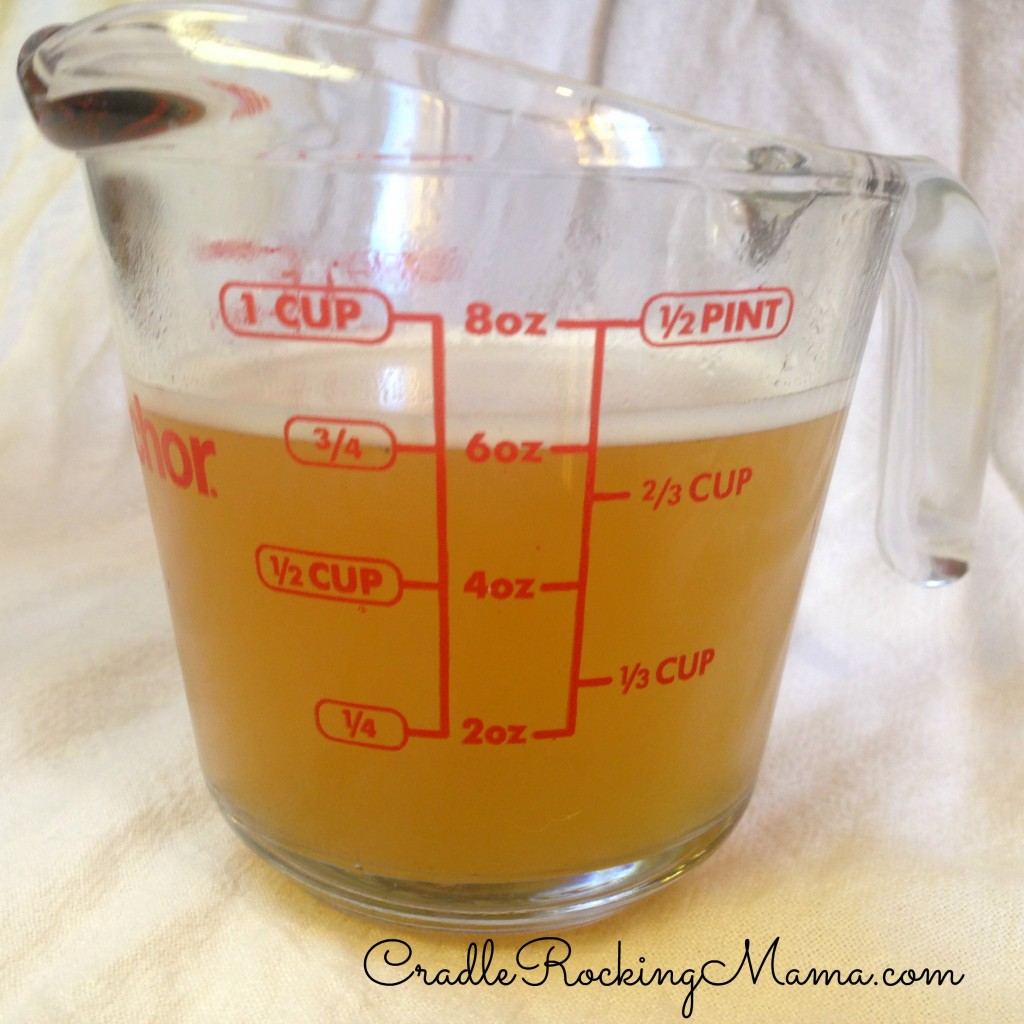
In the end, 6.5 quarts of liquid broth became 2/3 c. of powdered broth.
Much smaller amounts to store and deal with!
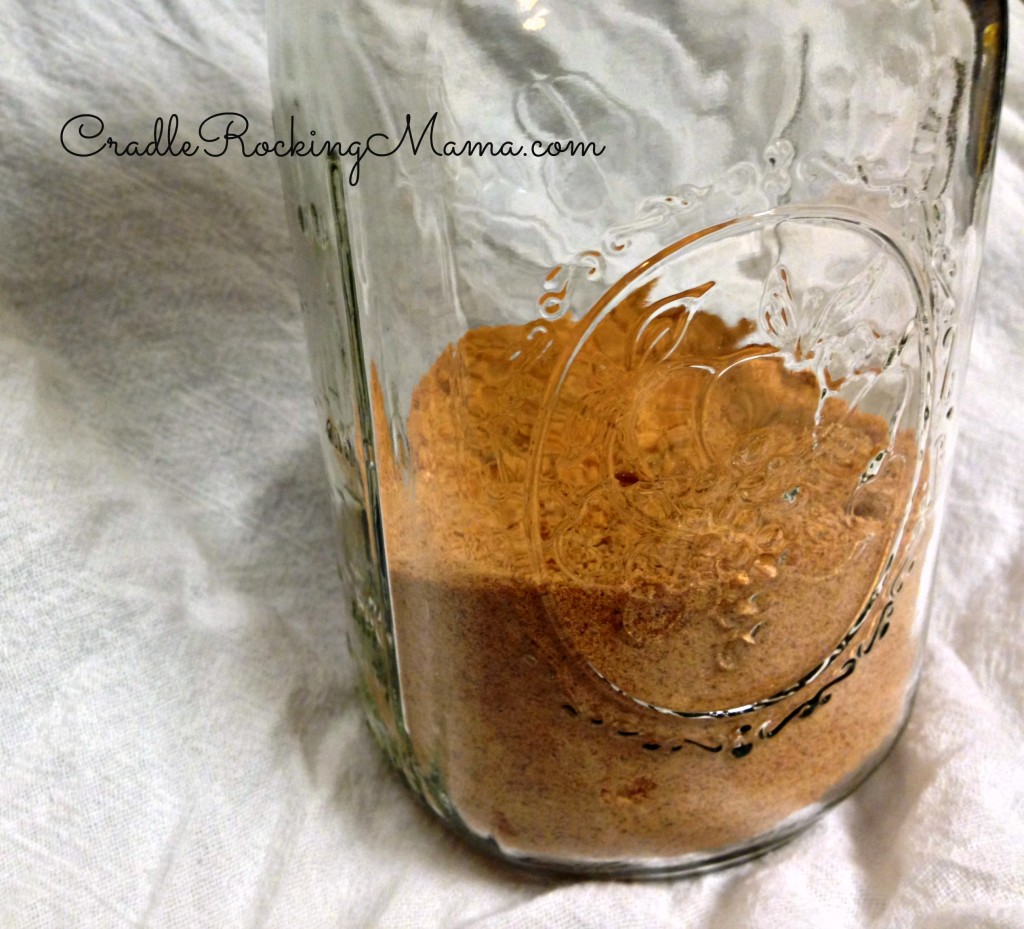
This was over 13 quarts of liquid broth. It doesn’t even halfway fill a quart canning jar when dried and ground.
Now, as for long term storage, I’ll admit that I’m not sure how this will best be kept. Traditional wisdom says, for things like this, that using moisture-removing packets and removing all the air (like with a food saver) would sufficiently protect this for safe, long term storage.
Personally, I’m making up quantities of broth to clean out my freezer of bones, and once it has been powdered I’m storing it in canning jars in my freezer and refrigerator.
I’m not aiming to build a surplus of broth to last through the end of the world as we know it; just a way to clear out some freezer space and make my broth easier to store and use!
I don’t think it will hang around my house long enough to worry about safe long-term storage methods. However, if you know anything about storing this long-term, please share in the comments!
When it comes time to use this broth, it’s incredibly simple. Figure out how many cups of broth you need. For each cup of needed broth, add 1 1/4 tsp. of powdered broth to 1 c. of water. Heat it up and stir well, and voila! Perfectly good broth, ready to use!
So there you have it: how to dehydrate broth. I can think of a ton of ways to use this!
Of course there are a zillion ways to use this around your home, but this would be useful for backpackers, travelers, or for taking to work to spruce up your lunch and give it extra flavor. After all, all you need is hot water and BAM! Instant homemade broth, full of nutrition and taste!
I used beef broth as the example here, but any sort of broth would work just as well. So boil up your chicken bones, or make your veggie broth and have fun dehydrating!
I’m also going to take this opportunity to give a big shout out to my Excalibur dehydrator. I LOVE this thing! If you are serious about dehydrating, I strongly urge you to get one. It can handle anything I’ve thrown at it, and is well worth the cost. If you seriously dehydrate foods, you will easily save the cost of this dehydrator in a few short months.
*I am an affiliate seller for Excalibur. I loved them long before I ever had a blog, and recommended them before I ever made a penny off those recommendations. So I’m coming from a place of honest applause, here. If you buy an Excalibur and do so through one of the links on my blog, I will receive a small compensation for the referral…and I’d really appreciate it if you would keep me in mind if you decide to enrich your life with an Excalibur! Thank you!
__________
HOW TO DEHYDRATE BROTH
- Make your broth. Refrigerate it, and scrape the solidified fat off the top once it has hardened.
- Take the broth back to the stove; pour it in a large soup pot.
- Simmer until it has reduced almost completely. Look for runny, but thicker and more like a gravy than a watery consistency.
- Drizzle the broth on non-stick sheets for your dehydrator.
- Set to the highest temperature and dehydrate until completely dry. It will easily snap into pieces once dry, and will not feel sticky or tacky at all.
- Break it into pieces, and drop in a clean coffee grinder. Grind until powdery.
- To reconstitute, take 1 cup of hot water and mix with 1 1/4 tsp. of powdered broth.
Store in an airtight container; for extreme long term storage, use moisture removing packets and vacuum seal your broth. For general long term storage, keeping it airtight and in the freezer or refrigerator will probably work fine.
__________
Have you ever dehydrated broth before? Do you have any tricks or tips about this method?




Got a question for you since you have already walked this path and if I don’t have to reinvent the wheel if I don’t need to… Are Bob’s Red Mill products a good source of corn free flours? I am wanting to do an elimination diet with my son; he has always dealt either being constipated or diarrhea and the dr just said that he has chronic constipation and put him on Miralax. Ignoring the information in his record that he is lactose intolerant… Frustration! So after reading what you are going thru I know what I am dealing with is not anywhere near as bad but enough is enough. I am local to you (fay-town) so shopping tips would be welcomed. Thank you for sharing with us, you guys are inspiring.
Hi, Lyndia!
Well, I don’t know much about Bob’s Red Mill and corn contamination, but I try to avoid them because I know they aren’t very good about avoiding cross-contamination with other products. Specifically soy and tree nuts, which they state on the package is a possible cross-contamination issue. I’ve heard of people reacting to other triggers via Bob’s Red Mill products, so I’m not inclined to trust them very much.
So far I haven’t actually researched much into safe corn-free sources of grains and flours, yet, because we aren’t there yet on our journey with Zac. He has quinoa, which is working great for him as a grain-like product, so we’re focused on other things at the moment. I’d be happy to ask on the corn boards for you, or, if you’d like, I can send you the link for the corn-free message boards so you can ask directly and get all sorts of extra help there. 🙂
As for local shopping, I LOVE me some Ozark Natural Foods! They have been amazing at helping us the last year and a half…always willing to try and custom order anything I want to try in smaller quantities, willing to take back anything we try that doesn’t work – even if opened and partially used – for a full refund, and more than happy to call and ask questions from manufacturers for us. You can also get 10% off anything you buy in a case from them, so that’s worth asking about.
Harps has been developing a pretty decent natural foods section, particularly the store on Crossover, but it still doesn’t have nearly the variety of Ozark Natural.
I try to go to the Farmer’s Markets in the summertime, but it’s a real challenge to be up and going that early in the morning with two kiddos that require breakfast be fully cooked from scratch. :-/ The one on the square in Fayetteville is nice, though. Everyone I talked to there was pretty helpful.
Thanks for reading and I’m so sorry about your son. I got the psyllium husks at Ozark Natural, too. Have you tried that for your sons constipation? What sort of elimination diet are you wanting to try?
I shop at ONF a lot! I agree about the staff. They have special ordered for me in the past. Last spring I worked for Mason Creek Farms when Fayetteville decided to try having two markets on Saturday. It didn’t work out but I got to know a lot of the vendors. Farmers markets are wonderful.
What I couldn’t get the doc to listen to was that he has more diarrhea problems than constipation and that he is known lactose intolerant. For everything I have read online and off he is presenting more as IBS. Ran across a lot of info researching for a friend with Crohn’s. But I will keep the psyllium husks in mind. Especially since they will work to hold things together for baking.
I’m considering Total Elimination Diet. Turkey, lamb, potatoes, sweet potatoes, yellow squash, green squash, millet, rice, rice milk (homemade), pears, pear juice, quinoa (my addition), quinoa milk (again homemade), salt and pepper. You’re supposed to be on it for two weeks to empty the bucket but I wonder if that is long enough after reading what your family goes through and if he is going to have problems cheating on it because he has access to other food at school. It does add foods back faster than sounds right. A new food every 4 days. He is 17 and has had problems off and on for years it just seems like they have gotten a lot worse lately.
Ok, so stay away from Bob’s Red Mill. How about the bulk product at ONF?
I’m glad your DH started posting these on Facebook. I have enjoyed reading them. And seeing that I’m not the only one out there with digestive issues in the household is a plus. Any boards that you can suggest would be great. I know he is lactose intolerant for sure (both sides of the family contributed). Raw milk is easier on his system but he will go overboard with it and be right back at square one.
So out to the kitchen today to make some rice milk and quinoa milk to see if he will drink either one since he does really like milk be it cow or goat. I just saw a recipe for sweetener made with sweet potatoes. I will have to make some of that as well.
Thank you for all the inspiration!
Lyndia, lordy, lady! What a mess!
I have another friend whose teenage son was recently diagnosed with a similar condition, and she’s had fits getting him to stick to his diet. He wants to be “normal”…but it puts him in pain! Kids! Ugh!
Hopefully your son will understand that the elimination diet is a temporary thing; it might help if you explain to him that now is the time to do it, while he’s living at home and can get a handle on it, so that when he goes off to college he can probably eat somewhat normally but will know what foods are absolute triggers for his tummy problems and can just avoid certain things, rather than being a mess all the time. Logic isn’t always teenagers strong suits, but, you might have a strong enough young man to handle the pressures of this health need!
Two weeks will probably be enough. It takes 2-4 weeks to see improvement when dealing with an elimination diet. Two weeks will give you a good idea of whether you’re on the right track or not. As for adding foods back in, if you think he has some kind of malabsorption issue, 4 days is about right. For Jed, we see reactions within 4 hours of ingestion, and they last almost exactly 36 hours on the dot. So 4 days is enough time to try a food several times to see if it will cause a reaction, and get over any symptoms that come up so you can try a new food. Malabsorption isn’t the same as a food protein reaction.
That’s good, though – more likely your son will be willing to stick with it if you can fly through foods so quickly!
That elimination diet sounds DELICIOUS! There are TONS of healthy, yummy foods you can make with those ingredients!
The psyllium husks might help with diarrhea, too. You might read a little more about it, but it seems like I read something that said they would help with both constipation and diarrhea…the exact mechanism for how it works on both escapes me at the moment. It might be in one of the links I shared, though. Worth checking in to.
Bulk product is tricky. If you want to just get a little from the bulk bins, I’d advise against it. Cross-contamination runs HIGH in the bulk section. But if there is something you want and use a lot of, you can ask them to grab you a bag from the back that hasn’t been opened yet. Then it might be safe. Careful, though, because sometimes they just get large bags of Bob’s Red Mill and put that out for use. I’ve heard decent things about Arrowhead Mills, but since I haven’t called them directly, yet, I can’t say one way or the other whether they’re safe for all cross-contamination issues.
How did your son like the quinoa milk or rice milk? Have you considered using pear juice to give them a little sweetness?
As for boards…if you suspect Fructose Malabsorption, there’s a board for Parents of FructMal kids on Facebook that is very active. I can’t think of any others to suggest; we don’t have a problem, strictly speaking with lactose…it’s the milk proteins that get us. As you start getting a list of what foods set him off and what foods work, you might be able to figure out what his malabsorption issues are a little more clearly and can see if there are boards that fit.
I’m going to try and email you the FructMal diet we follow for Jed. It might give you a good starting point for foods to trial on your son.
Thanks and good luck to you both!
WOW! I wasn’t aware you could dehydrate broth. I’m really glad you discovered this as it will open up a lot of opportunities for you when you start flying again.
I bought an Excaliber from the company yeas ago when Carrie recommended it and I’ve been very happy with it. I haven’t used it or experimented near as much as her but what I’ve done has turned out great. Retired on the farm now it will see a lot more use next Spring.
DP
Thanks, Daddy! 🙂 I’m excited about the opportunities for when I go back to work, too.
Bone broth is an awesome food. Dehydrated, it is so much more versatile. I sprinkle a dash on many foods to boost nutrition. Anything where I would add salt, garlic, or onions. Add when roasting or pan frying with an extra bit of water or fat. I also use broth to make a sauce. Just reduce broth until it is thick and smooth, but not quite ready to dehydrate. Drizzle over meat, veggies, whatever. I keep some highly concentrated (reduced) broth in the freezer, frozen in an ice cube tray. Then it is easy to add a cube to whatever I am cooking.
It gives you gelatin and nutrients in a tiny package.
I hope this isn’t more info than you want.
Hi Amy!
Wow, sounds like you already knew how to dehydrate broth. Awesome! Am I just Google-impaired, or is it almost impossible to find information on doing this online? LOL
Yes, adding it sprinkled on food for a nutritional boost was one idea I had for using this. Love the idea of using the reduced broth as a sauce – I actually do that with my pot roast juice and it is heavenly!
There’s no way to ever give me too much information. I’m an information junkie. 🙂
I like the idea of freezing the concentrated broth in cubes in the freezer, too. Clever way to keep it around for home use, then I can dehydrate what I need for work. Thanks!
Can anyone else see the gingerbread man in the coffee grinder picture?!! It made me laugh a lot!
I didn’t until you pointed it out! LOL
Carrie, This is a great blog on how to make broth dehydrated, but what I would like to know is how to make the broth in the first place? How long do you cook the bones and how do you get it to the broth stage?
Hi Teresa!
Sorry I missed this. OK, making broth is pretty simple. Brown the bones if they aren’t already (I’ll throw them in the oven for an hour or so) and then put in a pot and cover with water.
If you can, you could add things like onion, garlic, and herbs to add flavor to the broth, but it’s completely not necessary to do so.
You can make a broth in just a few hours, which, if you have histamine issues, is probably the way to go. If you want a really good bone broth, though, you can cook it for longer. I’ve forgotten broth on the stove (at a simmer) for 24 hours before and it’s been delicious!
Then just strain the liquid into jars, refrigerate, and once the fat has hardened on top you can scoop that off and underneath is pure broth!
Save the fat; it’s great for cooking with, and if you clean it several times (I have a tutorial on that, too) you can use it for personal care products like lotion, too.
Does that help? 🙂
Thanks for the tutorial on dehydrating bone broth. It was great for my two month trip. Just a thermos and dehydrated veggies and I had a nutritious lunch that healed my gut. I even use it for short trips. And it saves freezer space.
So glad this helped you!
I was looking for information about your tutorial for cleaning fat
Here it is! How to Clean Your Oil. Enjoy!
Pingback: Bone Broth Benefits and Uses | Wellness Mama
Hello! Could you tell us how your powdered brooth tasted/ how long you stored it? Also did you try adding the powder to salads/ other foods as a seasoning? So curious if I could do this to consume broth when I’m not in the mood for soup 😀 or hot liquids
The broth tasted just fine when rehydrated! I never ate it plain or as a powder, though, so I can’t attest to that. For longevity purposes, I stored it in a canning jar in the fridge, where it lasted for over a year! If you don’t want to refrigerate I recommend the standard rules of food storage: oxygen absorbers, mylar bags, and a food saver!
Adding this to salads or other foods sounds like a brilliant idea! One lady said she didn’t powder hers, she just handed her kids a piece of broken, dried broth and they ate it like candy. Whatever works!!
Hi Carrie, it was not easy to find an article about dehydrating bone broth and almost gave up till your site, so thank you. My question I create the bone broth in a slow cooker, could I not also reduce the broth in slow cooker till it reaches the syrupy gravy vs stove top? Many thanks
I had the same problem! Glad this could help you. 🙂 I don’t see any reason why you couldn’t reduce the broth in a slow cooker. I just have no idea how long it might take. Good luck and let me know how it works!
Hi, loved the article, but I don’t have a dehydrator. I’m just wondering what you think about using the same evaporation method to make a broth concentrate and then canning it (I do a lot of canning). Maybe reduce volume by 3/4.
I’ve never done it, but I’ve heard you can can broth. I’m sure there are instructions in a good, reputable canning guide somewhere! It honestly sounds like a great idea; if you use small enough jars, you could easily store them in the fridge once they’re opened and be able to use it up before it spoils.
If you decide you’d like to try it, you can actually dehydrate in a regular oven. I know I’ve seen instruction on how to do so online; basically you use the lowest heat setting (like 170 degrees), put the food on a tray, and then prop the door open with a wooden spoon. The only downside is that it still takes a good length of time, during which you cannot use your oven for anything.
There are also solar dehydrators that are pretty easy to make yourself.
For your immediate purposes, though, canning should work great! Let me know how it goes!
Hello! I really want to do this. I have tried with my own broth and store bought broth, and reducing in a crockpot and on the stove. I get it to the dehydrator, and I can leave the thing on for over 24 hours, and it sticks to my trays and is always gummy! I literally have to scrape it off with a knife. It never hardens up, and even after waiting for a bit, the pieces end up sticking together and almost useless at that point! I would like to know what I can do different or what I am doing wrong! Thanks so much for any help you can give me.
Hmm…well, do you have he temperature set on the highest setting? I think mine goes up to 155 degrees F. The humidity in your area can make a difference, too. It should take a while to dry (24 hours isn’t too short), but a very humid day or area could make it take much longer.
Also, make sure you’re reducing it as much as possible. There’s a short period of time between when it’s still too liquidy and when it dries out and burns where it’s perfect for dehydrating.
I really don’t know, but these are the top things I can think of to troubleshoot. I really hope it works out for you soon!
Sorry! I did not see your response. Think my oven might do a better job?
Your oven might be a good choice. Especially if your dehydrator doesn’t go as high as 155.
Ok! I will give it a go. Thanks for your help.
Let me know how it works! I’m interested to see if it was a temperature issue. 😉 Make sure to use a spoon to crack the door or else it will just cook it instead of drying it.
PS: My dehydrator is a Nesco that only goes up to 145. Could it be that my heat is not high enough? My oven is gas and can go down to 170 degrees.
Pingback: Avantages et utilisations du bouillon d'os | bonne-sante-au-naturel.com
Pingback: Knochenbrühe Vorteile und Verwendungen | demannergesund
Pingback: Organic Bone Broth Recipes: 26 Creative Ways to Cook with the Gelatin Rich Elixir
Pingback: Organic Bone Broth Recipes: 26 Creative Ways to Cook with the Gelatin Rich Elixir – Keto Diet Cheats
Pingback: Organic Bone Broth Recipes: 26 Easy Ways to Cook with the Gelatin Rich Elixir – Keto Diet Cheats
Pingback: Organic Bone Broth Recipes: 26 Easy Ways to Cook with the Gelatin Rich Elixir | A&C Accounting And Tax Services - Top Quality Accounting, Bookkeeping, Payroll And Tax Services- Oakland, CA