


Well, I’ve been a bit distracted by all the frigid temperatures and snow on the ground, but lately, at least in Arkansas, it’s starting to resemble spring.
Which means I’m already late on starting my seeds.
Oops.
There’s no time like the present for getting a garden going, though, so this week I got to work.
To begin with, let me share with you my big experiment: potato towers.
I’d seen this on Pinterest, and a large number of friends shared this with me on Facebook, so I decided to give it a shot.
One big benefit, it seems, from growing potatos in towers is that you can line the bottom with chicken wire to prevent moles and other critters from digging up underneath your potatos and eating them while they grow.
Since we are overrun with such pesky little critters, I’m hopeful this will work.
Last Friday we bought the supplies for two towers. I followed the instructions from TipNut, and they have a lovely graphic that shows all the stuff you’ll need and the lengths to have it cut to, so head over there for the specifics.
I will say that next time, I’ll just cut all the boards the same length and make it a square. One place I deviated from the instructions is that I didn’t make my towers pretty and overlap the cut edges. If I’m not going to make them pretty, I may as well make them square – and therefore easier to assemble!
We also bought chicken wire to line the bottom of the towers.
This week I put the towers together.
It’s simple enough, but much harder to do when running herd on two munchkins that think going outdoors means going crazy!
The first thing I did was to figure out where I wanted to put these lovely little potato towers. Once I knew that, I laid down black weed block stuff, then laid the chicken wire down on top of that.
It was windy, so I used the area as my workspace, too. It kept everything from flying around.
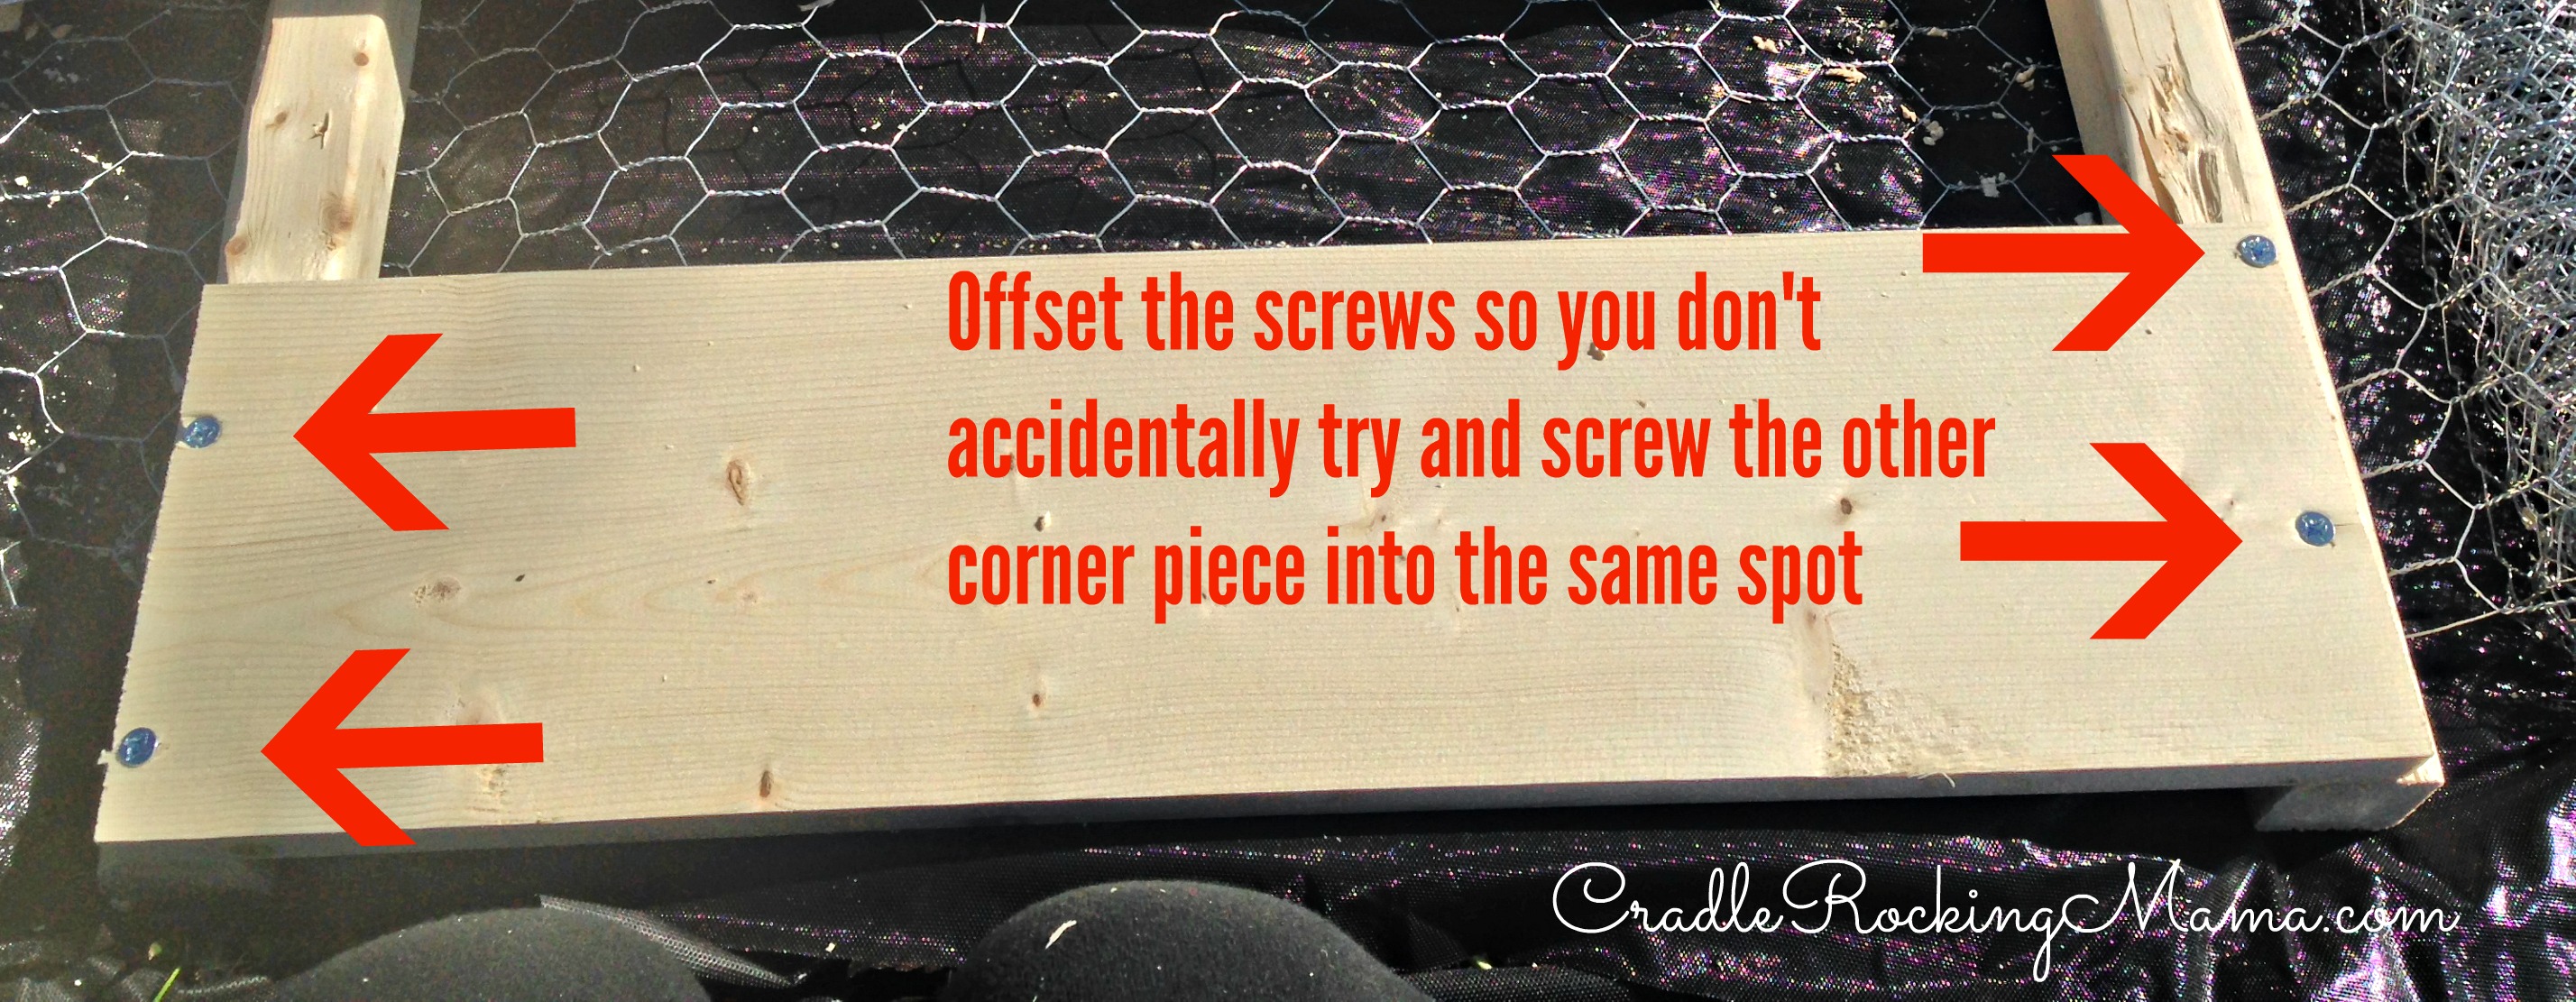
When it comes time to start assembling the towers, start by pre-drilling your holes. This is important! (Don’t ask how I know this, okay? It’s painful, and involves stripping out screws and using pliers to unscrew them.)
To avoid the screws bumping in to each other, I mentally divided up the ends of the boards and staggered the holes.
I basically assembled two ends by attaching one board to two 2 x 2’s first. Oh, and I used 1 x 6’s instead of 2 x 6’s. It was cheaper, and I’m confident it will work just as well.

Then I took another board and attached it to the ends of the two pre-assembled ends. (Does that make sense? I hope so – I can’t figure out how to explain it better!)
The goal is to make a box, so after sides 1 and 3 were made, I attached side 2 to the end of side 1, then to the end of side 3. Does that help a little?

Then I flipped that over and attached side 4.
I don’t have photos of this part because I was doing this by myself, and I needed both hands. (And my voice, to yell at the kids to stop doing whatever potentially dangerous mischief they were doing at the moment.)
Projects involving power tools are SO MUCH FUN with toddlers around, doncha know?
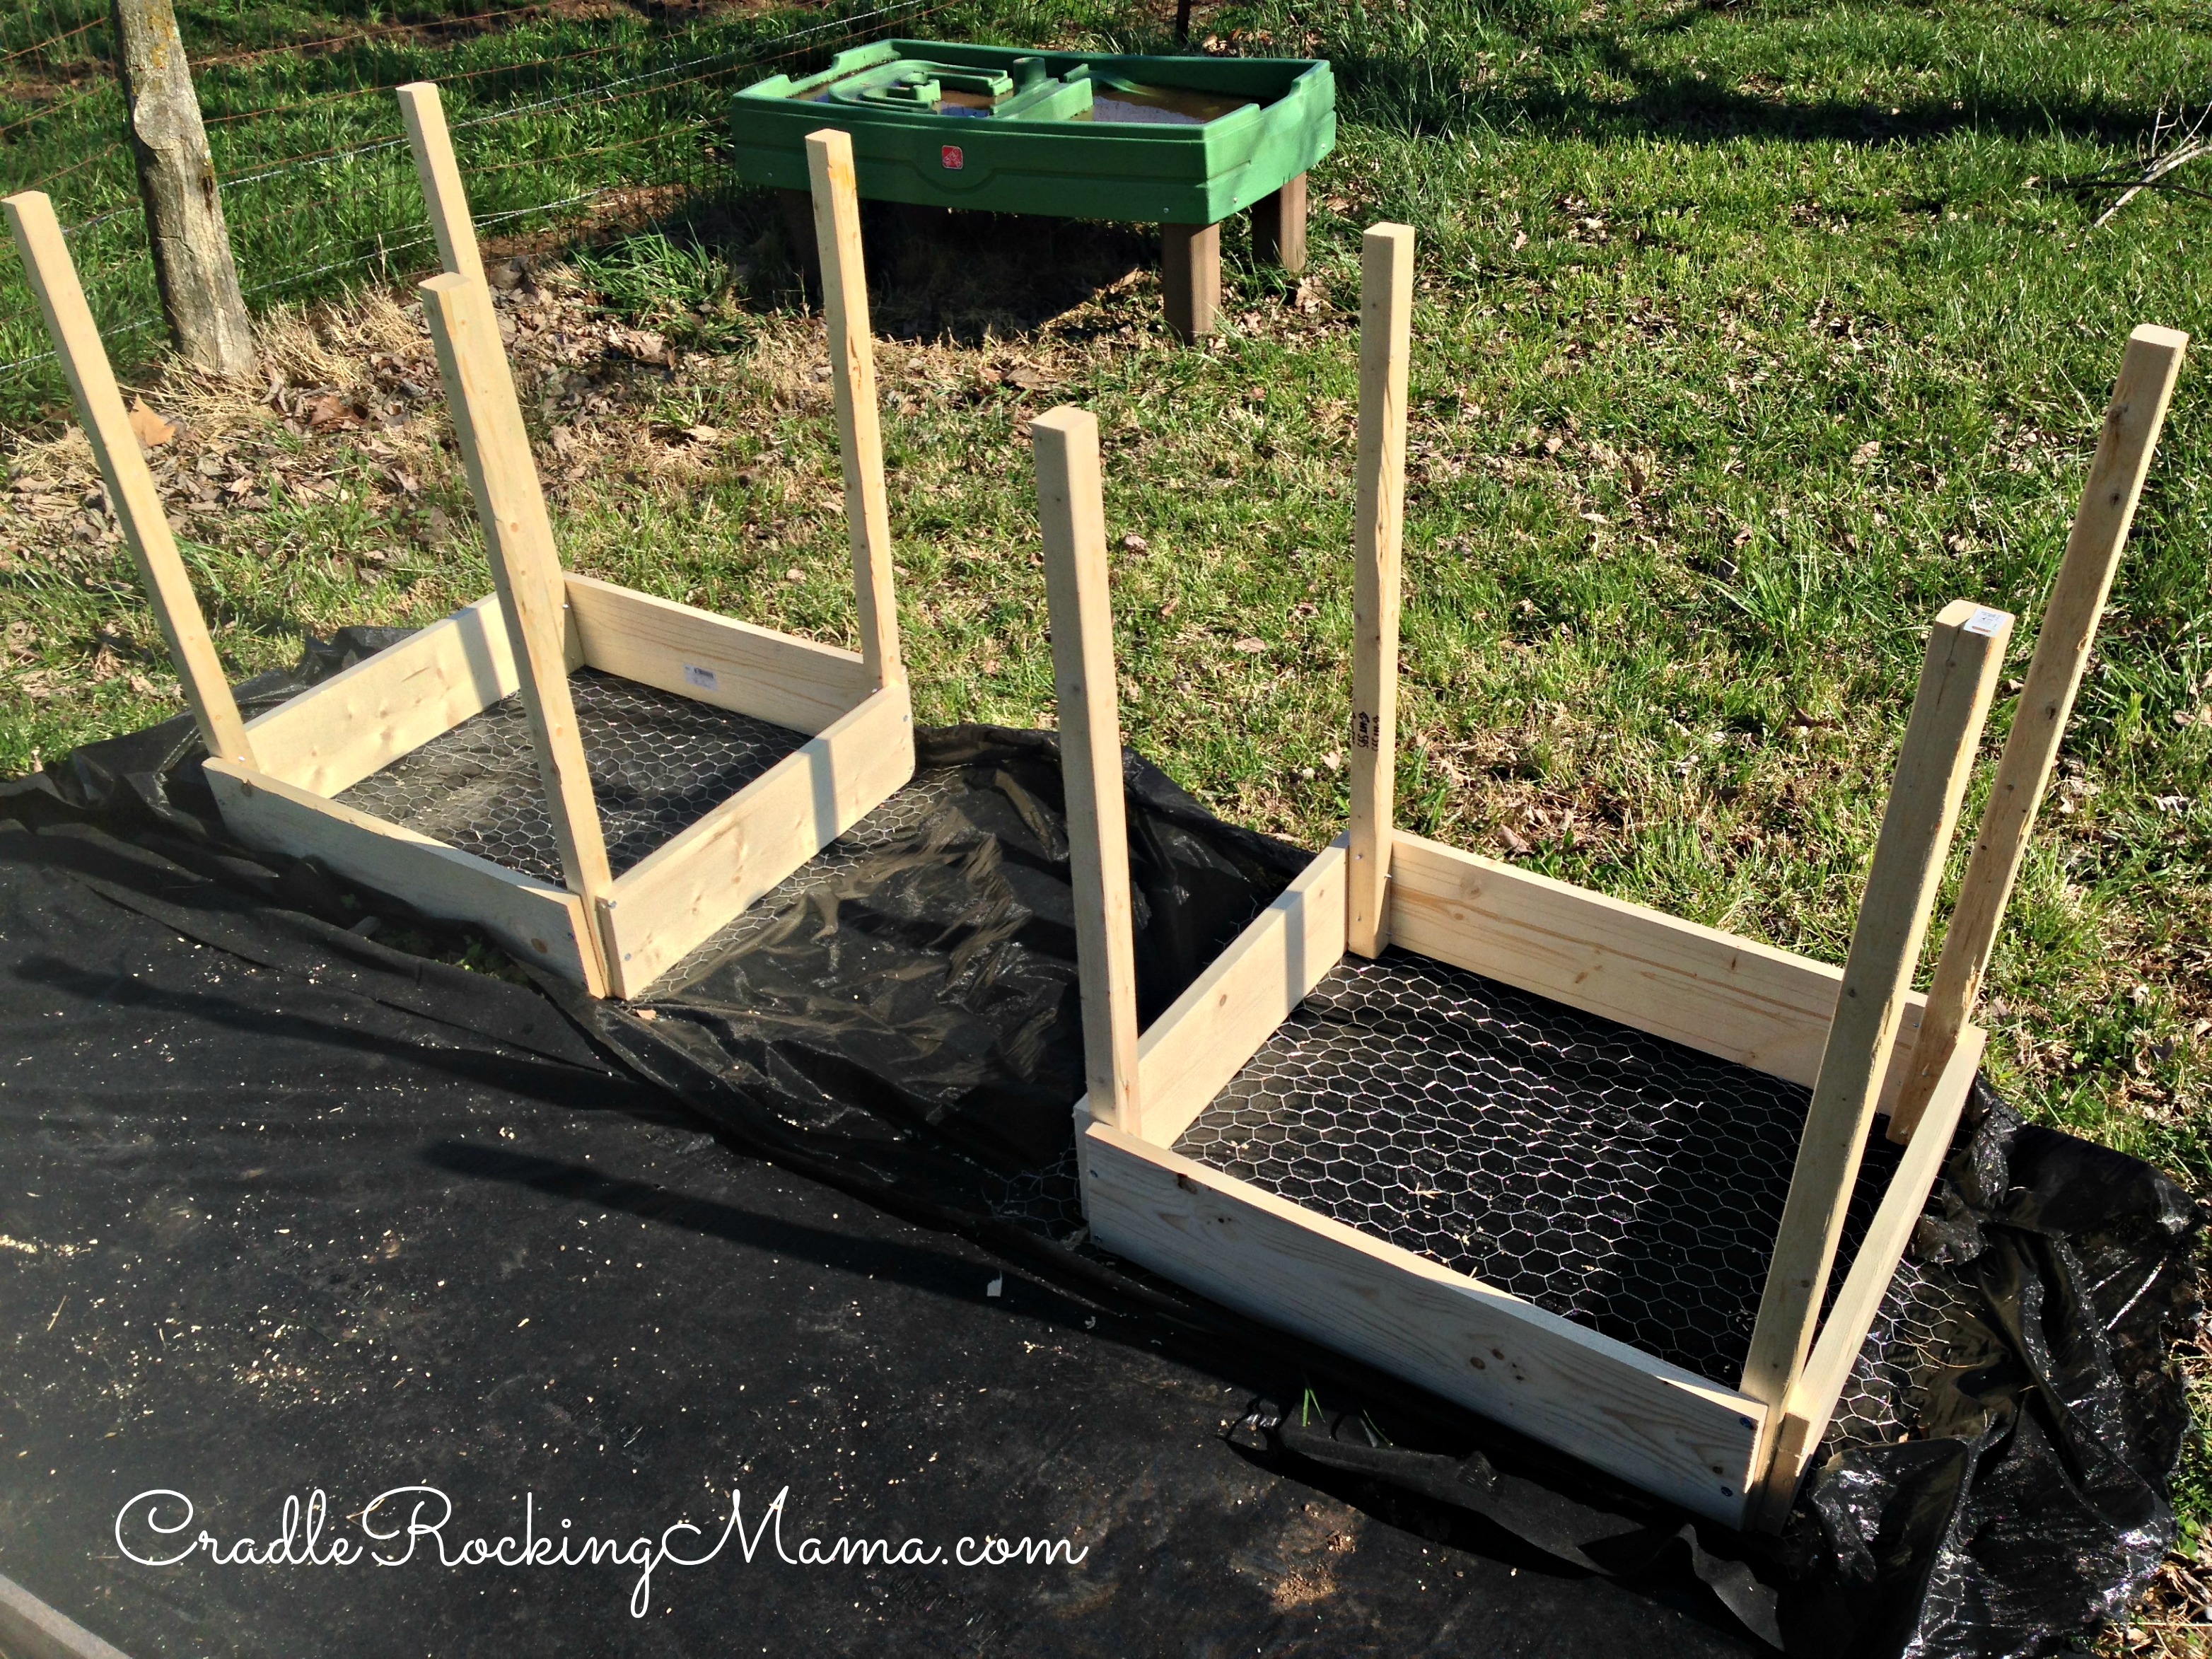
At any rate, once all 4 sides were assembled, it’s a simple matter to just place the tower exactly where you want it. For us, that meant right on top of the chicken wire.
Then I built the second tower, which is very much a “second verse, same as the first” sort of deal.
Ta-da!
Then I filled the towers most of the way with dirt. With my adorable helper, of course!

Here they both are, in all their “ready to feed my family” glory:
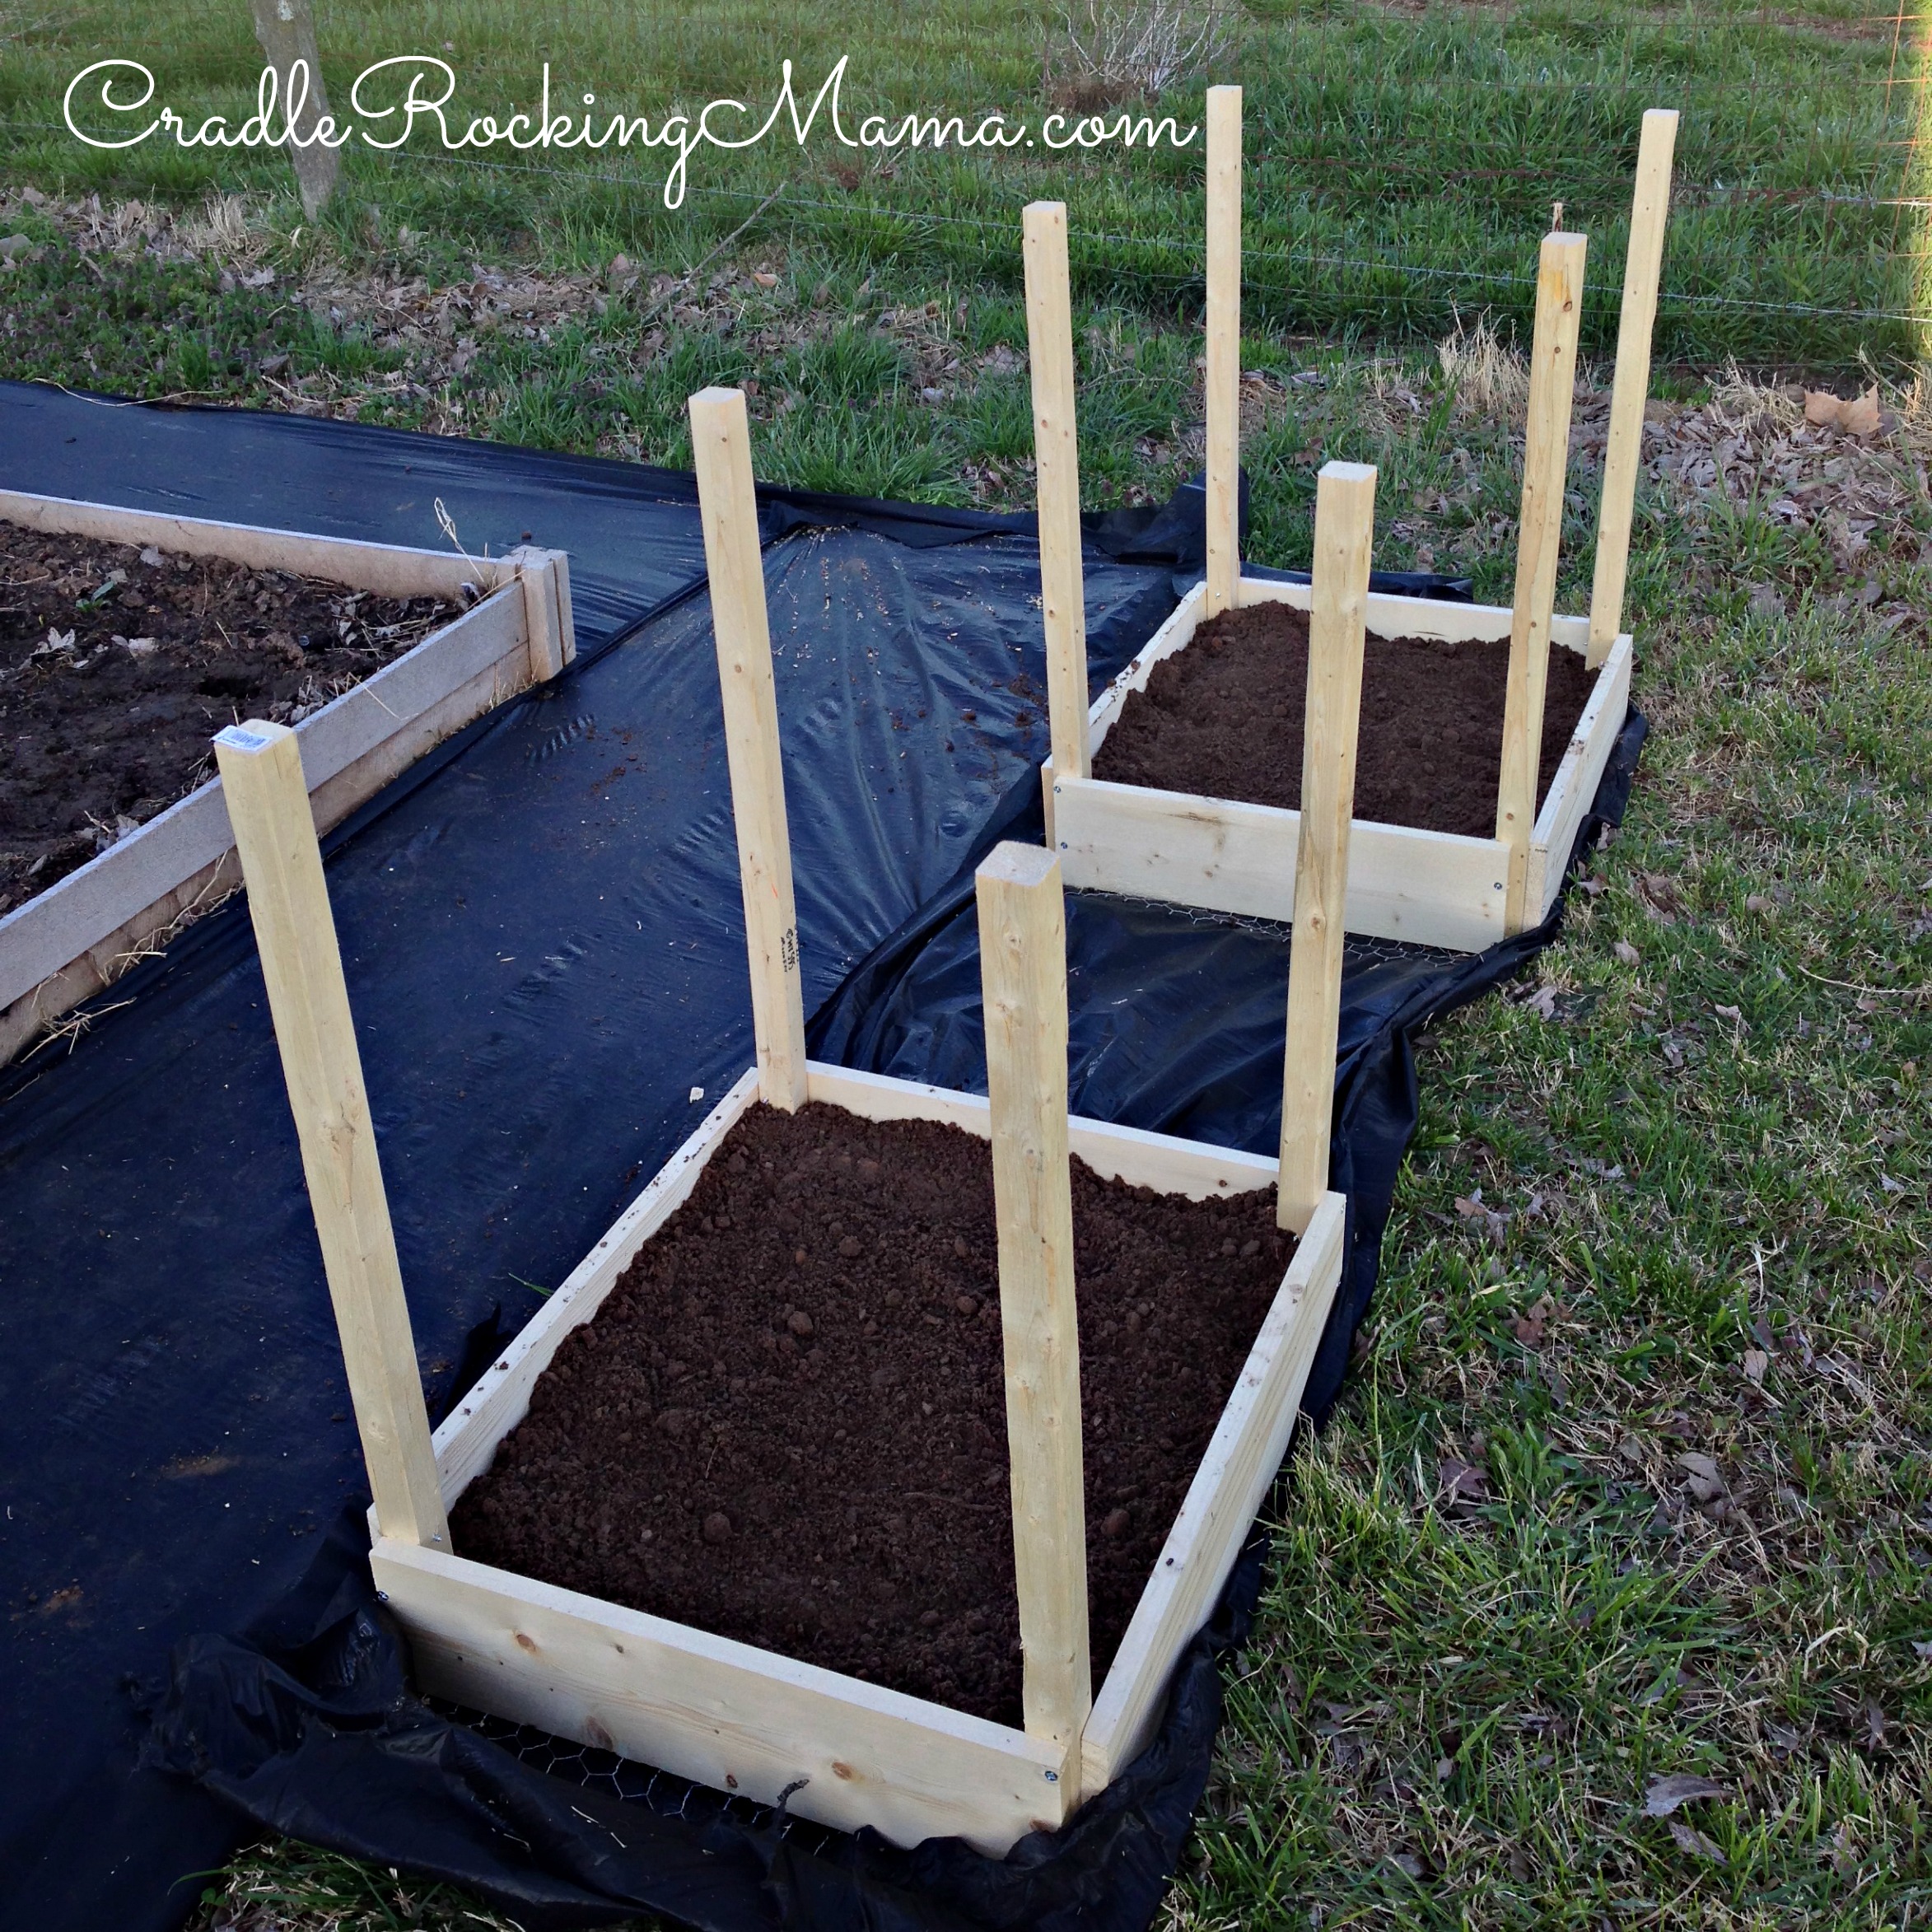
“But wait”, you might be thinking. “Isn’t she forgetting the SIDES of the towers?”
NOPE. The way these work is that now I plant my potatos and wait for them to grow. When they’ve grown about ten-twelve inches, I add another board and fill that section with dirt.
Actually, I’m planning to fill mine with straw. Some of the lack of success I’ve seen with these online was with folks who filled theirs with dirt; potatos don’t like to be compacted when growing, so I thought I’d take a tip from my amazing Nana and use straw the rest of the way in the towers.
So all that is left for me is to dump some compost in, till it together with the soil, and plant the spuds. I simply ran out of time yesterday to finish that part of the project.
I might only get 100-200 pounds of potatos out of this, and last year, I ate 600 pounds of potatos. So this won’t replace all the potatos we need to buy.
In our favor, my parents are planning on planting potatos the traditional way (in rows), so we should be able to get some potatos there. (Plus, it will be an interesting contest to see which method provides the biggest yields!)
Still, with any luck we’ll only have to buy half as many potatos as we bought last year.
And if it works, I’m building however many more of these are necessary to completely replace potato purchases for 2015!
(I plan to share with you how to save and store potatos for year long use at a later date.)
Have any of you ever grown potatos in towers? How did it work for you? Any tips you could share?
__________
Before I go, I had to share something with you all.
One of my longest, dearest readers, Ricky, sent me a gift she’d made.
 My very own Green Thumbs!

They are so cute I absolutely laughed out loud when I opened the package. I may have scared the kids a little with my giddiness, but I didn’t care – I threw them on and danced around the kitchen.
These are a sign of things to come this year: I WILL change my “Brown Thumbs” into “Green Thumbs”! I’m so glad I’m not taking on that project alone!
Thanks a million, Ricky! I love them!
Oh, and Ricky has an Etsy shop, if you’re interested in an awesome handmade gift from Australia. You should check it out!


The potato towers look great! Andy got our potatoes planted last week (traditional rows). Looking forward to hearing what you’ve found out about storing them all year. We’ve yet to be able to figure out a successful method to keep them from sprouting after they’ve been in storage about 3-4 months.
LOVE those green thumbs!! 🙂
Whew! If you just got your potatos in last week, I’m not TOO far behind! Yay!! 😉
My dearest yearning is for a custom designed root cellar. Barring that, I’ve got some tips and tricks that ought to work for long term storage. 🙂 Stay tuned!
Aren’t they cute? So precious!
Yaaaaay so glad you like them 🙂
Pingback: Brown Thumb Gardener – A Sheepish Admission - Cradle Rocking Mama